Introduction
This manual provides detailed instructions for setting up, operating, and maintaining your BSIMB W215D 21.5 Inch FHD WiFi Digital Picture Frame. Please read this manual thoroughly before using the product to ensure proper function and longevity.
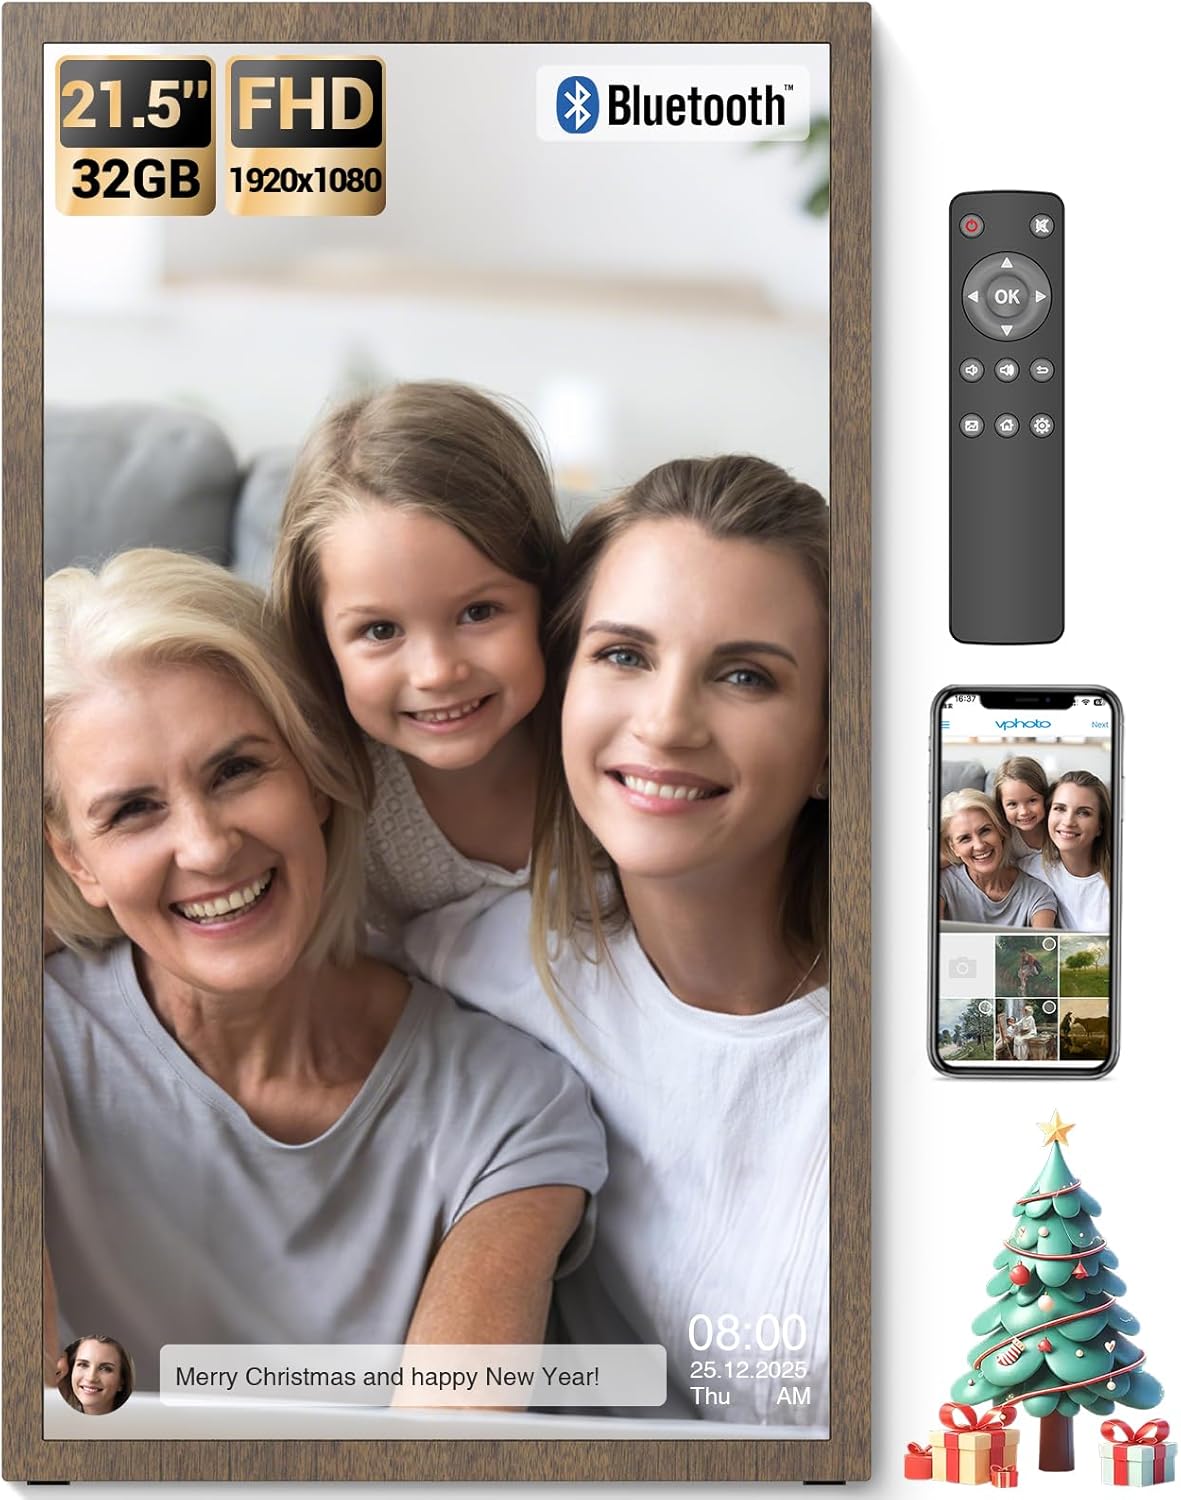
Image: The BSIMB 21.5-inch digital picture frame showcasing a family photo, accompanied by its remote control and a smartphone displaying the companion app interface.
Package Contents
Please check the box for the following items:
- BSIMB W215D Digital Picture Frame
- Remote Control (AAA+ batteries not included)
- Wall Adapter with US Plug
- User Manual
- Quick Start Guide
- Screws & Wall Anchors
- Stand
- USB Flash Drive (32GB)

Image: An illustration detailing the contents of the product package, including the digital frame, remote control, power adapter, user manuals, stand, wall mounting accessories, and a USB flash drive.
Product Overview
Familiarize yourself with the components of your digital picture frame.

Image: An exploded view diagram of the digital picture frame, highlighting key features such as the non-touch anti-glare FHD display, power button, USB ports, Micro SD slot, DC power input, VESA mounting holes, and speakers.
Key Features:
- 21.5 Inch FHD Matte Screen: 1920x1080 resolution IPS display with a 16:9 aspect ratio for clear image presentation.
- 32GB Internal Storage: Capable of holding over 80,000 pictures.
- Expandable Storage: Supports Micro SD Card (TF Card) and USB drives.
- WiFi Connectivity: For sharing photos and videos via the VPhoto app and email.
- Remote Control: For convenient operation.
- Smart Light Sensor: Automatically adjusts brightness based on ambient light.
- Sleep Mode: Schedule on/off times for energy saving.
- Wall-Mountable Design: Allows for flexible placement (swivel wall mount not included).
Setup Guide
1. Initial Power On
- Connect the power adapter to the DC IN port on the back of the frame and plug it into a power outlet.
- Press the Power Button on the back of the frame to turn it on.
- Follow the on-screen prompts to select your language and time zone.
2. Connecting to Wi-Fi
- From the main menu, navigate to Settings.
- Select Wi-Fi and choose your network from the list.
- Enter your Wi-Fi password and confirm. The frame will connect to the internet.
3. VPhoto App Installation and Pairing
- Download the VPhoto app from the App Store (iOS) or Google Play Store (Android) on your smartphone.
- Open the VPhoto app and create an account.
- On your digital frame, navigate to the Bind Device section to find your unique Frame ID or QR code.
- In the VPhoto app, select "Add Device" and enter the Frame ID or scan the QR code to pair your smartphone with the frame.
- Once paired, you can start sharing photos and videos directly from your phone to the frame.

Image: A visual guide illustrating the three main steps for initial setup: downloading the VPhoto app, connecting the frame via its unique ID, and uploading media.
4. Mounting Options
The frame can be placed on a flat surface using the included stand or mounted on a wall using the provided screws and wall anchors. The frame supports auto-rotation for both landscape and portrait orientations.

Image: The digital frame positioned on a stand, illustrating its ability to automatically adjust image orientation when rotated between landscape and portrait views.
Operating Instructions
1. Remote Control Usage
The included remote control allows for easy navigation and setting adjustments. Insert two AAA+ batteries (not included) into the remote before use.
- Navigation Buttons: Use the arrow keys to move through menus and select options.
- OK Button: Confirms selections.
- Back Button: Returns to the previous screen.
- Menu Button: Accesses main settings and options.
- Volume Buttons: Adjusts audio output.
2. Uploading Photos and Videos
You can upload media to your frame using several methods:
- VPhoto App: After pairing, use the VPhoto app on your smartphone to send photos and videos directly to the frame. You can also invite friends and family to share.
- Email: The frame has a unique email address. Send photos and short videos (up to 15 seconds) to this address, and they will appear on your frame.
- USB Drive / Micro SD Card: Insert a USB drive or Micro SD card into the respective ports on the frame. Navigate to the Files or Storage section to browse and import media.

Image: A visual representation of the frame's storage capabilities, with multiple images and video thumbnails surrounding the frame, emphasizing its capacity for a large number of media files.
3. Slideshow Settings
Customize your photo display experience:
- Navigate to Settings > Slideshow.
- Adjust parameters such as display interval, transition effects, and playback order.
- Enable or disable photo captions, weather, and clock display.
4. Smart Light Sensor
The frame features a smart light sensor that automatically adjusts screen brightness according to the ambient light in the room. This feature can be enabled or disabled in the Settings menu.

Image: A visual representation of the frame's smart light sensor, illustrating how the screen brightness dynamically adapts to changes in room lighting conditions.
5. Sleep Mode
To conserve energy, you can schedule the frame to automatically turn off and on at specific times. Access this feature in Settings > Sleep Mode.
6. Bluetooth Audio
Connect Bluetooth speakers or headphones to enjoy audio with your videos or music files. Navigate to Settings > Bluetooth to pair devices.

Image: The digital frame displaying an image, with a smartphone showing a Bluetooth connection to the frame, indicating the ability to play music or audio through connected Bluetooth devices.
Maintenance
1. Cleaning the Frame
- Ensure the frame is powered off and unplugged before cleaning.
- Use a soft, dry, lint-free cloth to gently wipe the screen and frame.
- For stubborn marks, lightly dampen the cloth with water or a screen-safe cleaning solution. Avoid harsh chemicals or abrasive materials.
2. Software Updates
Periodically check for software updates in Settings > About > Check for Updates to ensure your frame has the latest features and performance improvements. A stable internet connection is required for updates.
Troubleshooting
| Problem | Possible Cause / Solution |
|---|---|
| Frame does not power on. |
|
| Cannot connect to Wi-Fi. |
|
| VPhoto app cannot connect to the frame. |
|
| Images are not displaying correctly or are blurry. |
|
| Remote control is not working. |
|
Specifications
| Feature | Detail |
|---|---|
| Model Number | W215D |
| Screen Size | 21.5 Inches |
| Resolution | 1920x1080 (FHD) |
| Aspect Ratio | 16:9 |
| Display Type | IPS Matte Display (Non-Touch) |
| Internal Storage | 32GB |
| External Storage | Micro SD Card (TF Card), USB Drive |
| Connectivity | WiFi, Bluetooth |
| Control Method | Remote Control, VPhoto App |
| Product Dimensions | 19.91 x 11.7 x 0.99 inches |
| Item Weight | 8.98 pounds |
Warranty and Support
Warranty Information
Your BSIMB Digital Picture Frame comes with a:
- 30-day money-back guarantee
- 1-year worry-free warranty
Please retain your proof of purchase for warranty claims.
Customer Support
If you encounter any issues or have questions not covered in this manual, please contact our customer service team. We are committed to ensuring your satisfaction with our products.
For support, visit the official BSIMB website or refer to the contact information provided in your Quick Start Guide.


