
ANCTOR HK-BFF-04
ANCTOR Full Size Floating Bed Frame with Bookcase Headboard and Charging Station
Model: HK-BFF-04
Brand: ANCTOR
Introduction
This manual provides detailed instructions for the assembly, operation, and maintenance of your ANCTOR Full Size Floating Bed Frame, Model HK-BFF-04. Please read all instructions carefully before beginning assembly and retain this manual for future reference.
Important Safety Information
- Exercise caution around the inner legs of the bed frame to avoid kicking injuries.
- Assemble the bed frame strictly according to the provided instructions to ensure stability and prevent accidents.
- Do not exceed the maximum weight recommendation of 850 pounds for the bed frame.
- Ensure all connections are secure before use. Periodically check and tighten all screws and bolts.

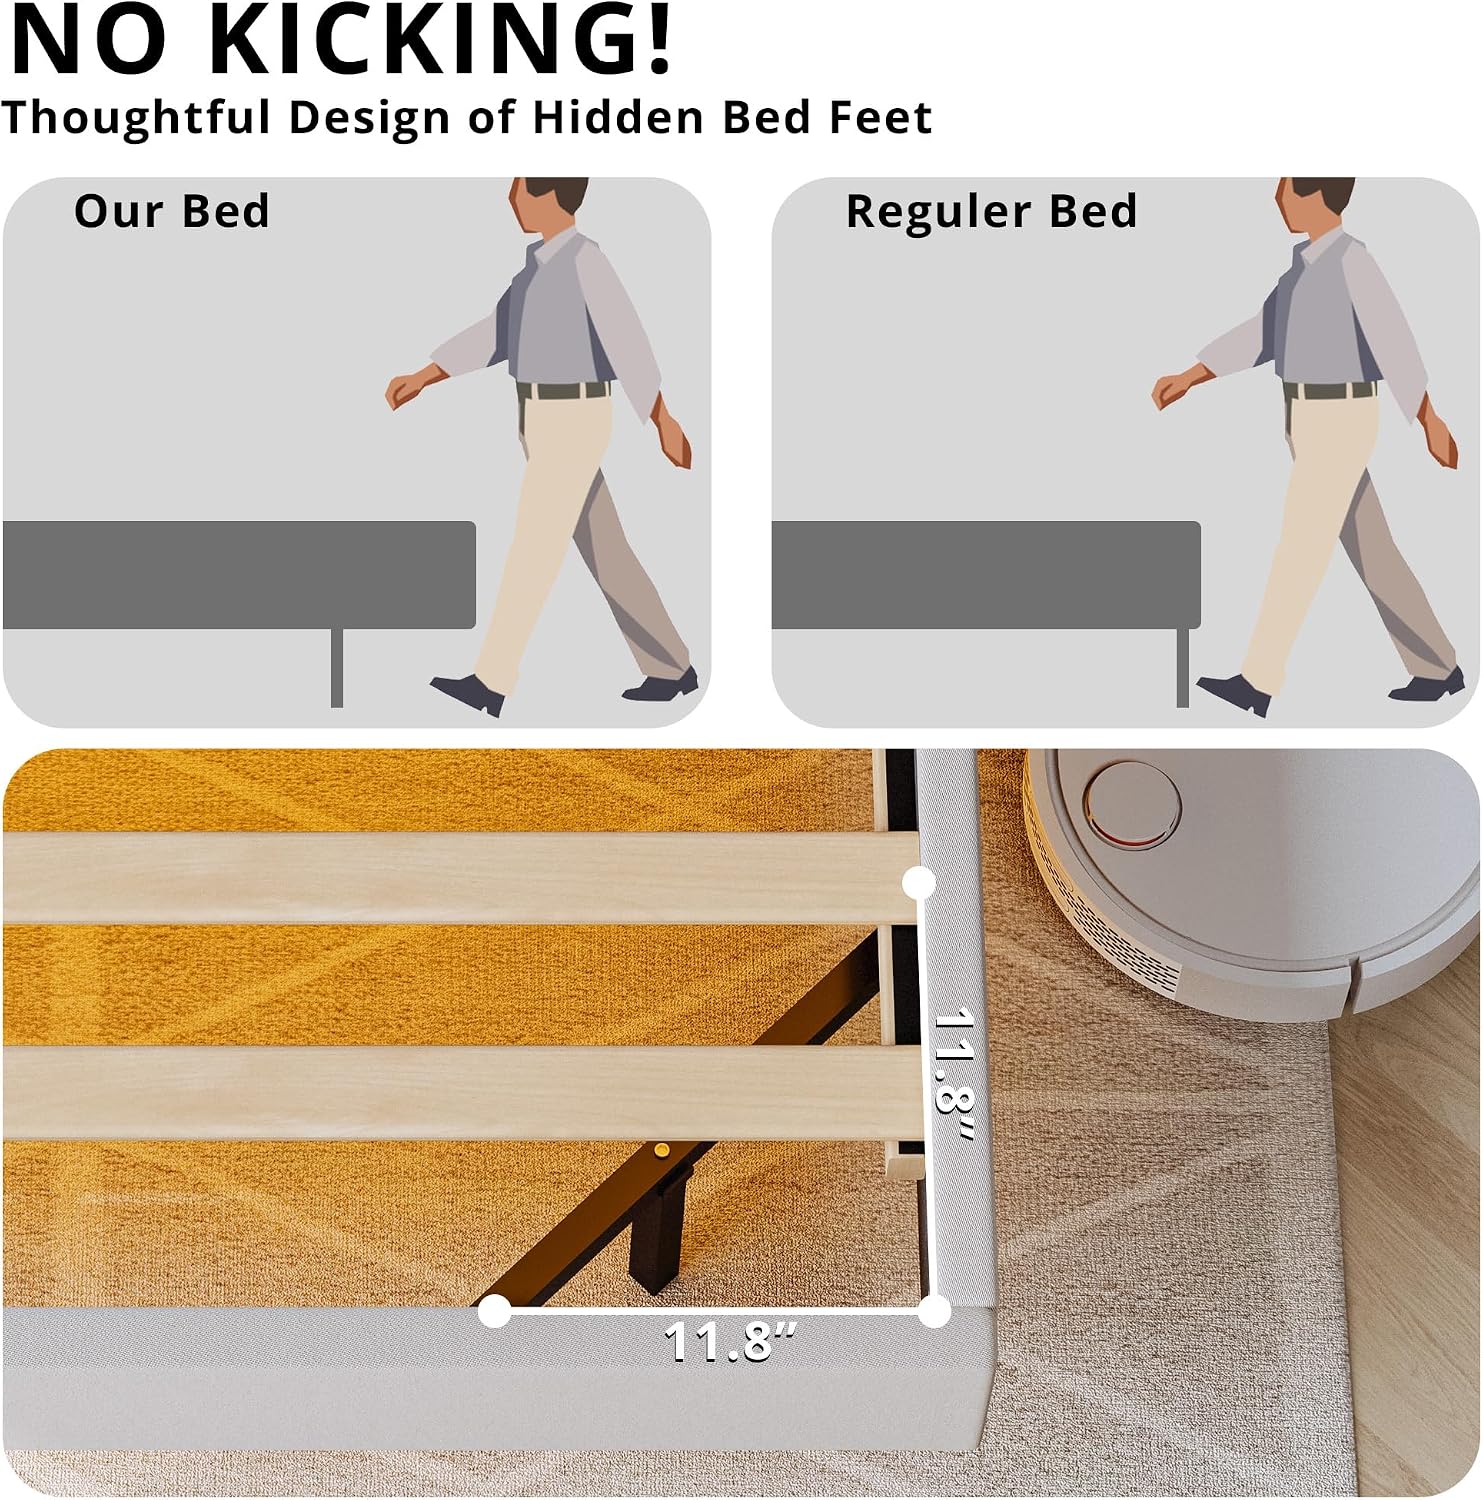
Package Contents
Your ANCTOR bed frame package includes all necessary components for assembly. All parts are clearly labeled and numbered to facilitate the installation process. Please verify that all parts are present before beginning assembly.
- Bed Frame Components (Side Rails, Footboard, Headboard)
- Solid Wood Slats
- Metal Support Legs
- Bookcase Headboard with Integrated Charging Station
- RGB LED Light Strip and Remote Control
- Assembly Hardware (screws, bolts, Allen wrench)
- Installation Manual (this document)
Assembly Instructions
Assembly of the ANCTOR bed frame is designed to be straightforward, with all parts numbered. It is recommended that two adults perform the assembly, which typically takes several hours.
Before You Begin:
- Clear a spacious area for assembly.
- Unpack all components and lay them out, checking against the parts list.
- Ensure all tools (including the provided Allen wrench) are at hand. A power drill may be useful for tightening screws, but use with care to avoid overtightening.
Step-by-Step Assembly:
- Assemble the Headboard: Attach the bookcase sections to the main headboard frame. Connect the charging station wiring as instructed.
- Attach Side Rails: Connect the side rails to the headboard and footboard using the provided hardware. Ensure all connections are firm.
- Install Center Support: Place and secure the central metal support beam and its legs.
- Position Wood Slats: Lay the solid wood slats across the frame. The slats are designed with foam padding to reduce noise. Secure them in place as indicated in the detailed diagram.
- Install LED Lighting: Adhere the RGB LED light strip to the designated area under the bed frame. Connect it to the power source.


Operating Instructions
Bookcase Headboard with Charging Station:
The integrated bookcase headboard features two standard power outlets and two USB ports for convenient charging of electronic devices. Simply plug your devices into the available ports. Ensure the bed frame is connected to a wall outlet for the charging station to function.
RGB LED Lighting:
The bed frame is equipped with RGB LED lights to enhance your room's ambiance. Control the lights using the provided remote control. The remote allows you to change colors, adjust brightness, and select various lighting modes. Please note that there is no integrated timer function for the LED lights; they will remain on until manually turned off via the remote.

Care and Maintenance
- Cleaning Fabric Components: For upholstered parts, follow care instructions for "Hand Wash Only/Dry Clean Only" as appropriate for spot cleaning or professional care. Avoid harsh chemicals.
- Cleaning Wood/Metal Components: Wipe down wood and metal surfaces with a soft, damp cloth. Avoid abrasive cleaners.
- Hardware Check: Periodically inspect all screws and bolts to ensure they remain tight. Re-tighten as necessary to maintain the bed frame's stability and prevent squeaking.
- LED Lights: If LED lights malfunction, check the power connection and remote control battery.
Troubleshooting Guide
| Problem | Possible Cause | Solution |
|---|---|---|
| Bed frame feels unstable or wobbly. | Loose hardware connections. | Check and tighten all screws and bolts, especially those connecting the side rails to the headboard and footboard. |
| Headboard feels loose. | Headboard attachment screws are not fully tightened. | Re-tighten the screws securing the headboard to the bed frame. Using an electric drill with appropriate torque settings can ensure a firmer connection. |
| Charging station is not working. | Bed frame not plugged into a wall outlet; loose connection; power outage. | Ensure the bed frame's power cord is securely plugged into a functional wall outlet. Check all internal connections for the charging station. Test the outlet with another device. |
| LED lights are not turning on or responding to remote. | Remote control battery depleted; loose LED strip connection; power issue. | Replace the remote control battery. Check that the LED strip is securely connected to its power source and the bed frame is plugged in. |
| Difficulty finding pre-drilled holes during assembly. | Fabric covering pre-drilled holes. | Carefully locate the pre-drilled holes by feeling through the fabric. If necessary, gently cut a small opening in the fabric to expose the hole, ensuring not to damage the underlying material. |
Product Specifications
- Model: HK-BFF-04
- Size: Full
- Product Dimensions (L x W x H): 81.5" x 57.1" x 43.3"
- Color: Beige
- Material: Solid Wood Slats, Metal Support, Upholstered Fabric
- Special Features: Bookcase Headboard, Integrated Charging Station (2 standard outlets, 2 USB ports), RGB LED Lighting, No Box Spring Needed
- Recommended Mattress Thickness: 8" - 12"
- Ground to Item Distance: 6.7 Inches
- Item Weight: 46.4 pounds
- Assembly Required: Yes


Warranty and Customer Support
ANCTOR is committed to providing high-quality products. For any questions regarding your bed frame, assembly assistance, or to report missing/damaged parts, please contact ANCTOR customer service. We offer 24-hour customer support to assist you.
Please refer to your purchase documentation or the ANCTOR official website for specific warranty details and contact information.
Contact Information:
- Website: ANCTOR Official Store
- Email: [Refer to product packaging or official website]
- Phone: [Refer to product packaging or official website]
Related documentsHK-BFF-04

Ask a question about this manual
Ask about setup, troubleshooting, compatibility, parts, safety, or missing instructions. Manuals+ will review the question and use this page’s manual context to help answer it.