1. Introduction
The SEQURE ES666 Electric Screwdriver Set is an innovative and versatile tool designed for precision tasks. Featuring Auto, Sensing, and Fixed operating modes, along with adjustable torque and a comprehensive set of magnetic bits, it is ideal for repairing and assembling electronics, RC models, drones, and more. This manual provides detailed instructions for safe and efficient use of your ES666 screwdriver.
2. What's Included
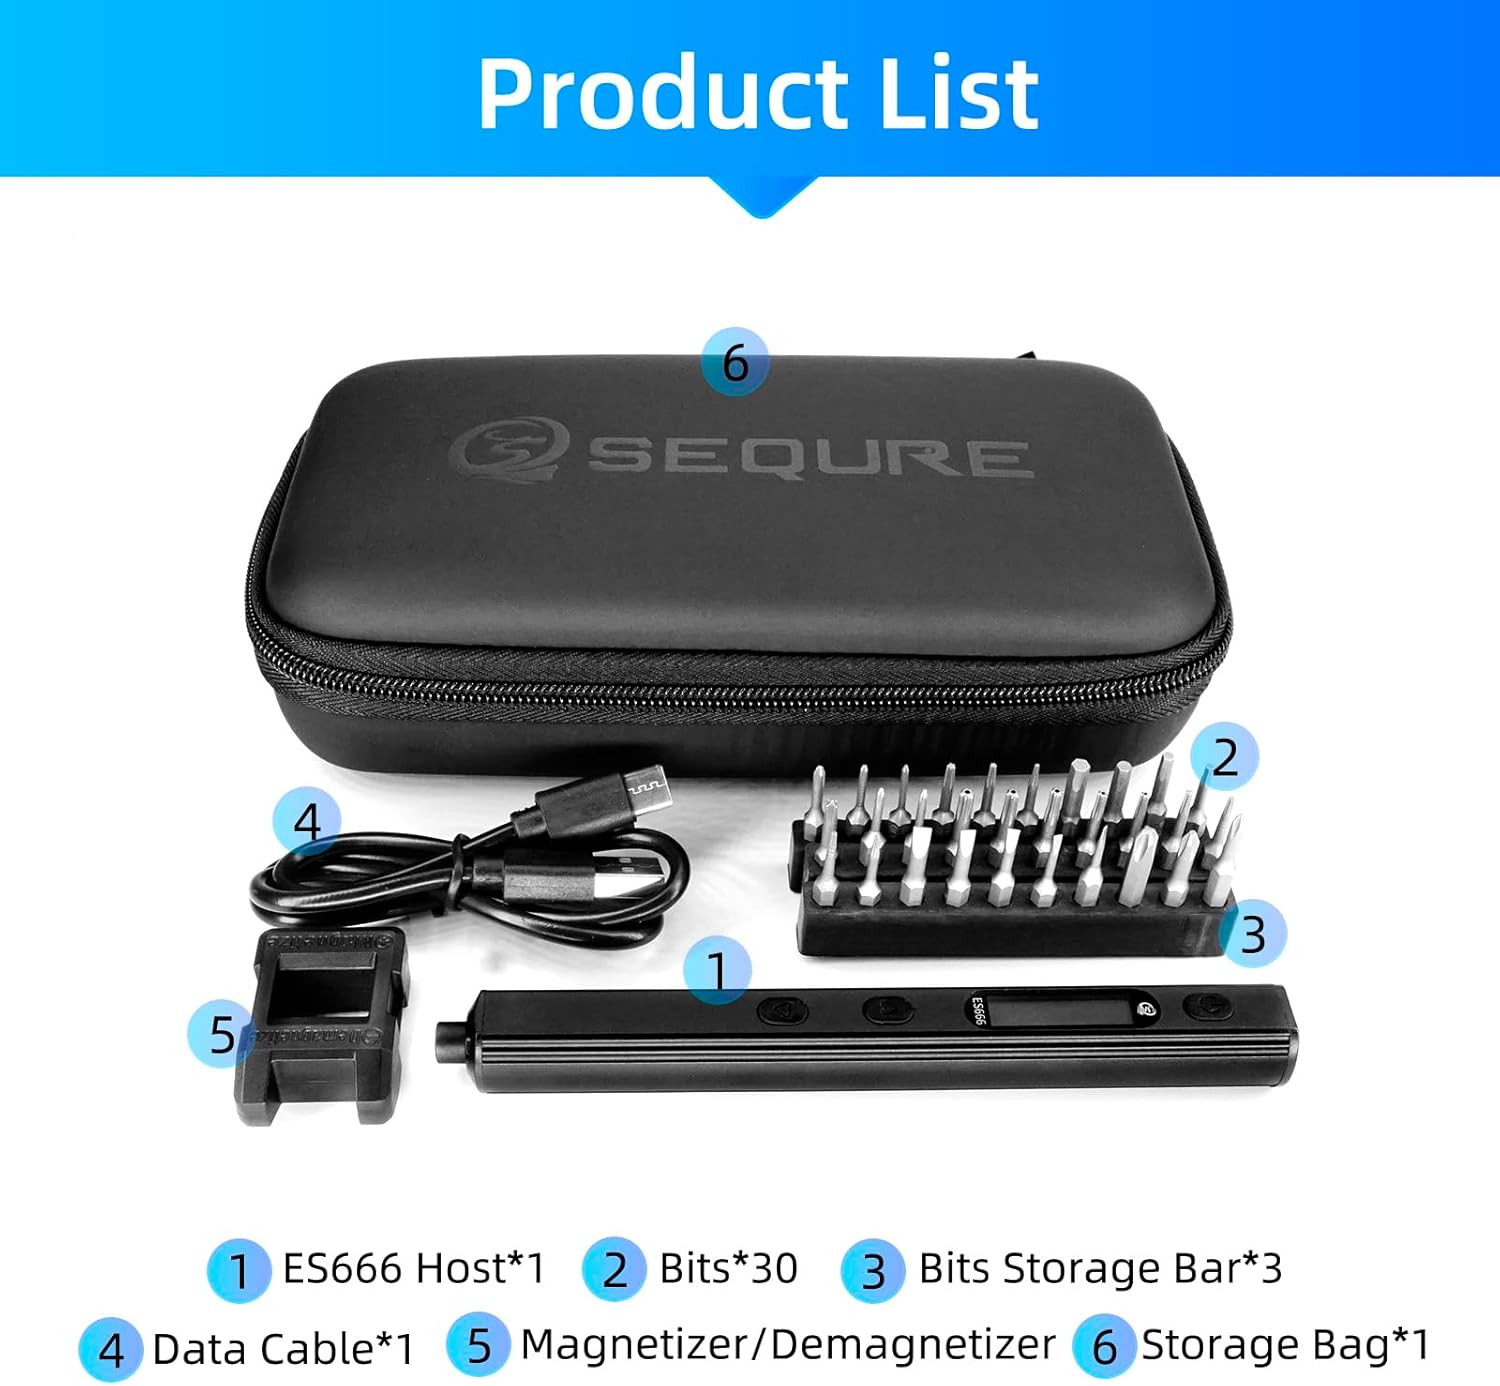
Carefully unpack your SEQURE ES666 Electric Screwdriver Set and ensure all items are present:
- 1 x ES666 Pocket Screwdriver Host
- 30 x S2 Magnetic Screwdriver Bits
- 1 x Magnetized & Demagnetized Toolbox
- 1 x Data Cable (Type-C)
- 1 x Storage Bag
- 3 x Storage Bars for Bits
3. Product Overview
Familiarize yourself with the components and controls of your ES666 screwdriver:

- On/Off Button / Menu Key: Powers the device on/off and navigates menu settings.
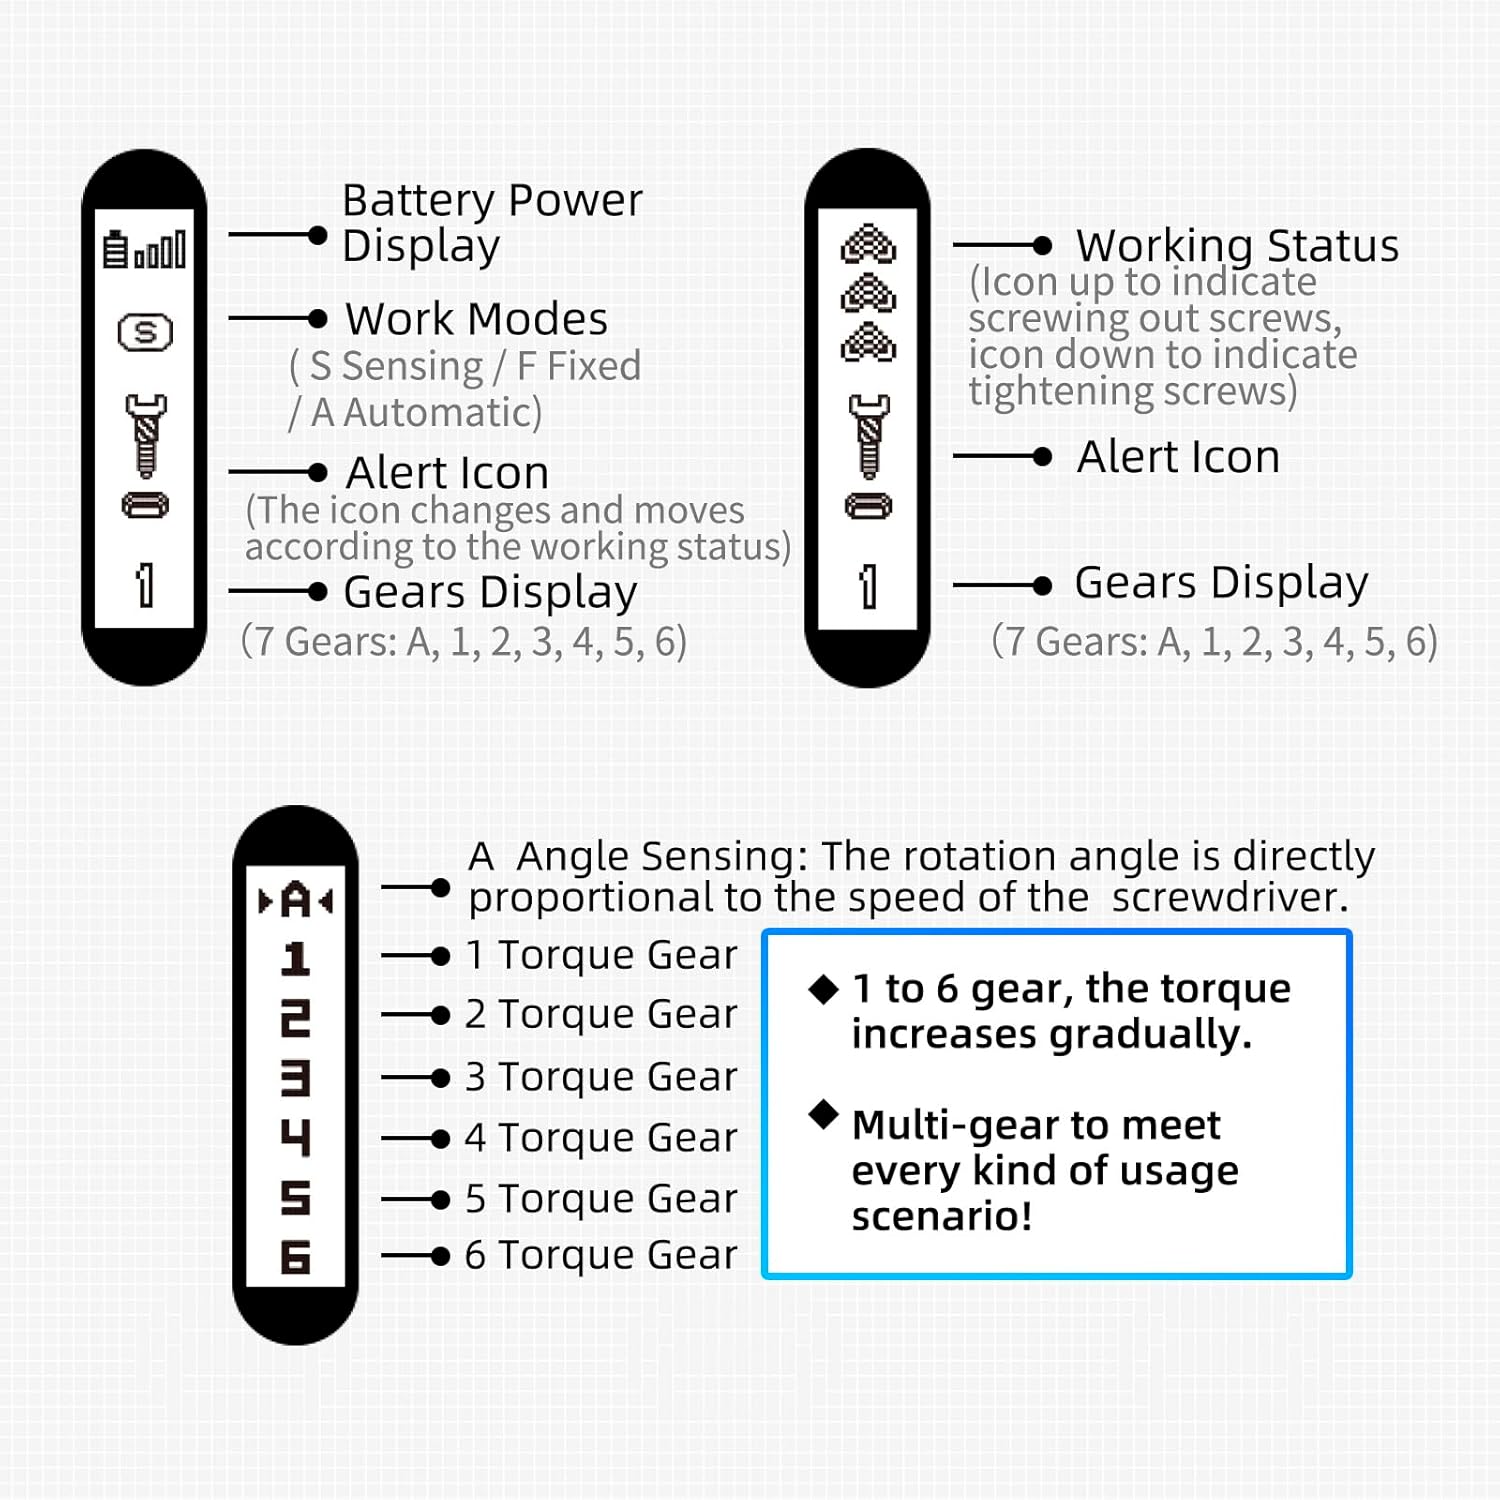
- OLED Display: Shows battery power, work modes, alert icons, and gear display.
- Type-C Charging Port: For charging the device and firmware upgrades.
- Triangle Up Button: Used for navigation and selection.
- Triangle Down Button: Used for navigation and selection.
- Metal Body: Durable aluminum construction with anti-slip strips for strong grip.
- Shadow-less LED Lights: Four integrated LED lights illuminate the work area.
- 4MM Bits Installation Port: Standard port for inserting screwdriver bits.
4. Key Features
4.1. Innovative Operating Modes
The ES666 offers three distinct operating modes to suit various tasks:
- Auto Mode: Automatically tightens or screws out without continuous button pressing. Press the button for 0.5s and release your hand.
- Sensing Mode: Requires only a small turn of the wrist to freely tighten or loosen screws.
- Fixed Mode: Requires continuous pressing of the corresponding buttons for operation.

4.2. Powerful Performance
Despite its mini size, the ES666 delivers robust performance:
- 7 Torque Gears: Adjustable torque settings for various applications.
- 250 RPM Rotating Speed: Efficient and quick operation.
- Electric Torque: Up to 0.2 N.m.
- Manual Torque: Up to 2.2 N.m.
- 600mAh Rechargeable Lithium-ion Battery: Provides up to 4 hours of continuous work.

4.3. Shadowless LED Lights
Equipped with four shadowless LED lights, the ES666 ensures clear visibility in dark or confined spaces, making precision work easier.

4.4. Magnetic S2 Steel Bits
The set includes 30 high-quality S2 steel magnetic bits, designed to attract and hold screws, saving time and effort during assembly and disassembly.

4.5. Durable and Portable Design
The ES666 features a high-quality aluminum alloy shell, making it solid and durable. Its compact size (5.5" length, 2oz weight) and anti-slip strips ensure a strong grip and easy portability, ideal for field repairs.

4.6. Firmware Upgrade Support
The Type-C charging port also supports firmware upgrades, allowing your screwdriver to stay up-to-date with the latest features and improvements.

5. Setup and Charging
5.1. Initial Charging
Before first use, fully charge the ES666 screwdriver. Connect the provided Type-C data cable to the screwdriver's charging port and a compatible USB power source (e.g., computer, wall adapter). The OLED display will indicate charging status.

5.2. Installing Screwdriver Bits
Select the appropriate S2 magnetic bit for your task. Insert the bit firmly into the 4MM bits installation port at the tip of the screwdriver. The magnetic design will hold the bit securely in place.
6. Operating Instructions
6.1. Power On/Off
Press and hold the On/Off button (top button) for a few seconds to power the screwdriver on or off. The OLED display will light up upon activation.
6.2. Menu Navigation and Settings
To enter the menu setting interface, quickly press the On/Off button 3 times. Use the Triangle Up and Triangle Down buttons to navigate through menu options such as Light (LED mode), Action (torque sensitivity), Language, and About (firmware version). Press the On/Off button again to select an option or confirm a setting.

6.3. Mode Selection and Operation
The ES666 supports Auto, Sensing, and Fixed modes. You can switch between these modes via the menu or by specific button presses as demonstrated in the video below.
Video Demonstration: Operating Modes and Features
Video 6.1: Comprehensive Overview of ES666 Features and Modes
6.4. Torque Gear Selection
Single press the On/Off button to cycle through the 7 torque gears (A, 1, 2, 3, 4, 5, 6). 'A' represents Angle Sensing mode, where rotation angle is proportional to speed. Gears 1 to 6 increase torque gradually, allowing for multi-gear adjustment to meet various usage scenarios.
7. Maintenance
- Keep the screwdriver and bits clean and dry.
- Store in the provided storage bag to prevent damage.
- Avoid exposing the device to extreme temperatures or humidity.
- Regularly check bits for wear and replace as needed.
8. Troubleshooting
| Problem | Possible Cause | Solution |
|---|---|---|
| Screwdriver not turning on | Low battery; Device off | Charge the screwdriver; Press and hold power button to turn on |
| Bit slipping or not gripping screw | Incorrect bit size; Worn bit; Screw head stripped | Use correct bit size; Replace worn bit; Use a screw extractor for stripped screws |
| Screwdriver stops unexpectedly | Overload protection; Low battery | Reduce pressure; Charge the screwdriver |
| Display not working | Device off; Software issue | Turn on device; Try resetting (refer to advanced troubleshooting or contact support) |
9. Specifications
| Feature | Detail |
|---|---|
| Brand | SEQURE |
| Model | ES666 |
| Material | Aluminum |
| Speed | 250 RPM |
| Power Source | Battery Powered |
| Product Dimensions | 0.63"L x 0.59"W x 5.5"H |
| Voltage | 5 Volts |
| Electric Torque | Up to 0.2 N.m |
| Manual Torque | Up to 2.2 N.m |
| Maximum Chuck Size | 6 Millimeters |
| Battery Capacity | 600mAh Lithium Polymer |
| Working Time | Up to 4 hours (continuous) |
| Included Components | ES666 Screwdriver Host, 30 S2 Magnetic Bits, Magnetized & Demagnetized Tool, Data Cable, Storage Bag |
10. Warranty and Support
The SEQURE ES666 Electric Screwdriver Set comes with a 90-day warranty. For warranty claims, technical support, or further assistance, please contact the manufacturer or your point of purchase. Keep your purchase receipt as proof of warranty.