
bonsaii B0CSJ3K6T3
Contents
Bonsaii 110-Sheet Autofeed Micro-Cut Paper Shredder Instruction Manual
Model: B0CSJ3K6T3
1. Introduction
This manual provides essential instructions for the safe and efficient operation, maintenance, and troubleshooting of your Bonsaii 110-Sheet Autofeed Micro-Cut Paper Shredder. Please read this manual thoroughly before initial use and retain it for future reference.
2. Important Safety Instructions
- Read all instructions before operating the shredder.
- Keep children and pets away from the shredder.
- Keep loose clothing, jewelry, hair, and hands away from the paper entry.
- Do not spray or keep any aerosol products in or around the shredder.
- Do not shred metallic credit cards or other hard materials.
- Unplug the shredder when not in use or before cleaning.
- Do not operate the shredder with a damaged power cord or plug.
- Ensure the shredder is placed on a stable, level surface.
3. Package Contents
Verify that all items are present in the package:
- Bonsaii Paper Shredder (Model C233-B) x 1
- Instruction Manual x 1
4. Product Overview
Familiarize yourself with the components of your shredder.

Figure 4.1: Front view of the Bonsaii 110-Sheet Autofeed Micro-Cut Paper Shredder, showing the autofeed tray, control panel, and waste bin window.

Figure 4.2: Close-up of the shredder's control panel, highlighting the Reverse (REV), Auto (ON/OFF), and Forward (FWD) buttons. The internal shredding mechanism features upgraded metal parts for durability.
5. Setup
- Unpack the Shredder: Carefully remove all packaging materials.
- Position the Shredder: Place the shredder on a flat, stable surface. Ensure the universal casters are locked if you do not intend to move it frequently.
- Connect Power: Plug the power cord into a standard electrical outlet. Ensure the power switch on the back of the unit is in the "On" position.
- Open Auto-feed Support: Lift the auto-feed supporting plate and the auto-feed fixed rod.

Figure 5.1: Illustration showing the shredder plugged into a power outlet with the main power switch in the "On" position. Proper placement ensures no gaps between the shredder and the wall.
6. Operating Instructions
6.1. Auto-Feed Shredding
The auto-feed feature allows for shredding up to 110 sheets of paper automatically.
- Ensure the shredder is plugged in and the main power switch is on.
- Open the auto-feed supporting plate and fixed rod.
- Stack up to 110 sheets of paper neatly in the auto-feed opening. Ensure papers are flat and in order.
- The shredder will automatically begin shredding. The auto button light will be blue during operation.
- The shredder can operate continuously for 30 minutes in auto-feed mode, followed by a 60-minute cool-down period.

Figure 6.1: The shredder configured for auto-feed, demonstrating the capacity for 110 sheets of paper. This mode is designed for paper only and can run for 30 minutes continuously.

Figure 6.2: Visual guide for auto-feed operation, showing correct paper placement and indicators for overload and overheat conditions.
6.2. Manual Feed Shredding
For smaller quantities or different materials, use the manual feed slot.
- Ensure the shredder is plugged in and the main power switch is on.
- Insert up to 12 sheets of paper, or one credit card, or a few staples into the manual feed slot.
- The shredder will automatically detect and shred the inserted items.
- The shredder can operate continuously for 10 minutes in manual feed mode, followed by a 60-minute cool-down period.

Figure 6.3: The shredder configured for manual feed, illustrating the insertion of a credit card. This mode handles up to 12 sheets of paper, credit cards, and staples, with a 10-minute continuous run time.
6.3. Security Level
This shredder provides P-4 high security, micro-cutting documents into tiny pieces measuring 5/32" x 15/32" (4 x 12 mm).

Figure 6.4: A visual representation of micro-cut shredded paper, demonstrating the small particle size (4x12mm) for P-4 security, compared to a dime for scale.
7. Maintenance
7.1. Emptying the Waste Bin
The shredder features a 6-gallon pull-out bin. Monitor the transparent window to determine when the bin needs emptying. The auto button light will flash blue when the basket is full.
- Unplug the shredder from the power outlet.
- Pull out the waste bin.
- Dispose of the shredded material.
- Slide the waste bin back into place until it is securely closed.
- Plug the shredder back in.

Figure 7.1: The shredder with its 6-gallon pull-out waste bin, indicating the large capacity for shredded paper.
7.2. Oiling the Shredder Blades
Regular oiling helps maintain shredder performance and extends its lifespan. Refer to your shredder oil instructions for frequency. Do not use mineral oil.
- Apply shredder oil across the paper entry slot.
- Run the shredder in reverse for a few seconds to distribute the oil.
8. Troubleshooting
This section addresses common issues you may encounter with your shredder.
8.1. Paper Jam
If paper jams occur, the auto button light may flash red and blue.
- Press the REV (Reverse) button to attempt to clear the jam. Gently pull out the jammed papers.
- Separate the jammed paper and re-feed tidy paper into the auto-feed.
- For wrinkled paper, re-feed it through the manual-feed slot.

Figure 8.1: Visual instructions for clearing auto-feed paper jams, including steps for serious jams requiring access to the connecting plate lock.
8.2. Overload
If too many papers are fed, the shredder may stop, and the auto button light will flash red and blue.
- Remove the excess papers.
- Separate the jammed paper (if any) and re-feed tidy paper into the auto-feed.
- Re-feed wrinkled paper into the manual-feed slot.
8.3. Overheat
Continuous operation beyond the recommended duty cycle (30 minutes for auto-feed, 10 minutes for manual feed) will cause the shredder to overheat. The auto button light will turn red.
- The shredder will stop automatically.
- Allow the shredder to cool down for approximately 60 minutes before resuming operation.
8.4. Basket Full
When the waste bin is full, the auto button light will flash blue.
- Empty the paper scraps from the waste bin as described in Section 7.1.

Figure 8.2: Comprehensive troubleshooting guide for common issues such as paper out of order, overload, overheat, and a full waste basket, with corresponding indicator lights.
9. Specifications
| Feature | Detail |
|---|---|
| Model | B0CSJ3K6T3 (C233-B) |
| Cut Type | Micro Cut |
| Security Level | P-4 |
| Shred Size | 5/32" x 15/32" (4 x 12 mm) |
| Auto-Feed Capacity | 110 sheets (paper only) |
| Manual Feed Capacity | 12 sheets (paper, credit cards, staples) |
| Auto-Feed Run Time | 30 minutes on / 60 minutes off |
| Manual Feed Run Time | 10 minutes on / 60 minutes off |
| Shredding Speed | 71 inches per minute |
| Waste Bin Capacity | 6 Gallons (23 Liters) |
| Product Dimensions | 10.35 x 14.45 x 19.96 inches |
| Item Weight | 19.69 pounds |
| Color | Black |
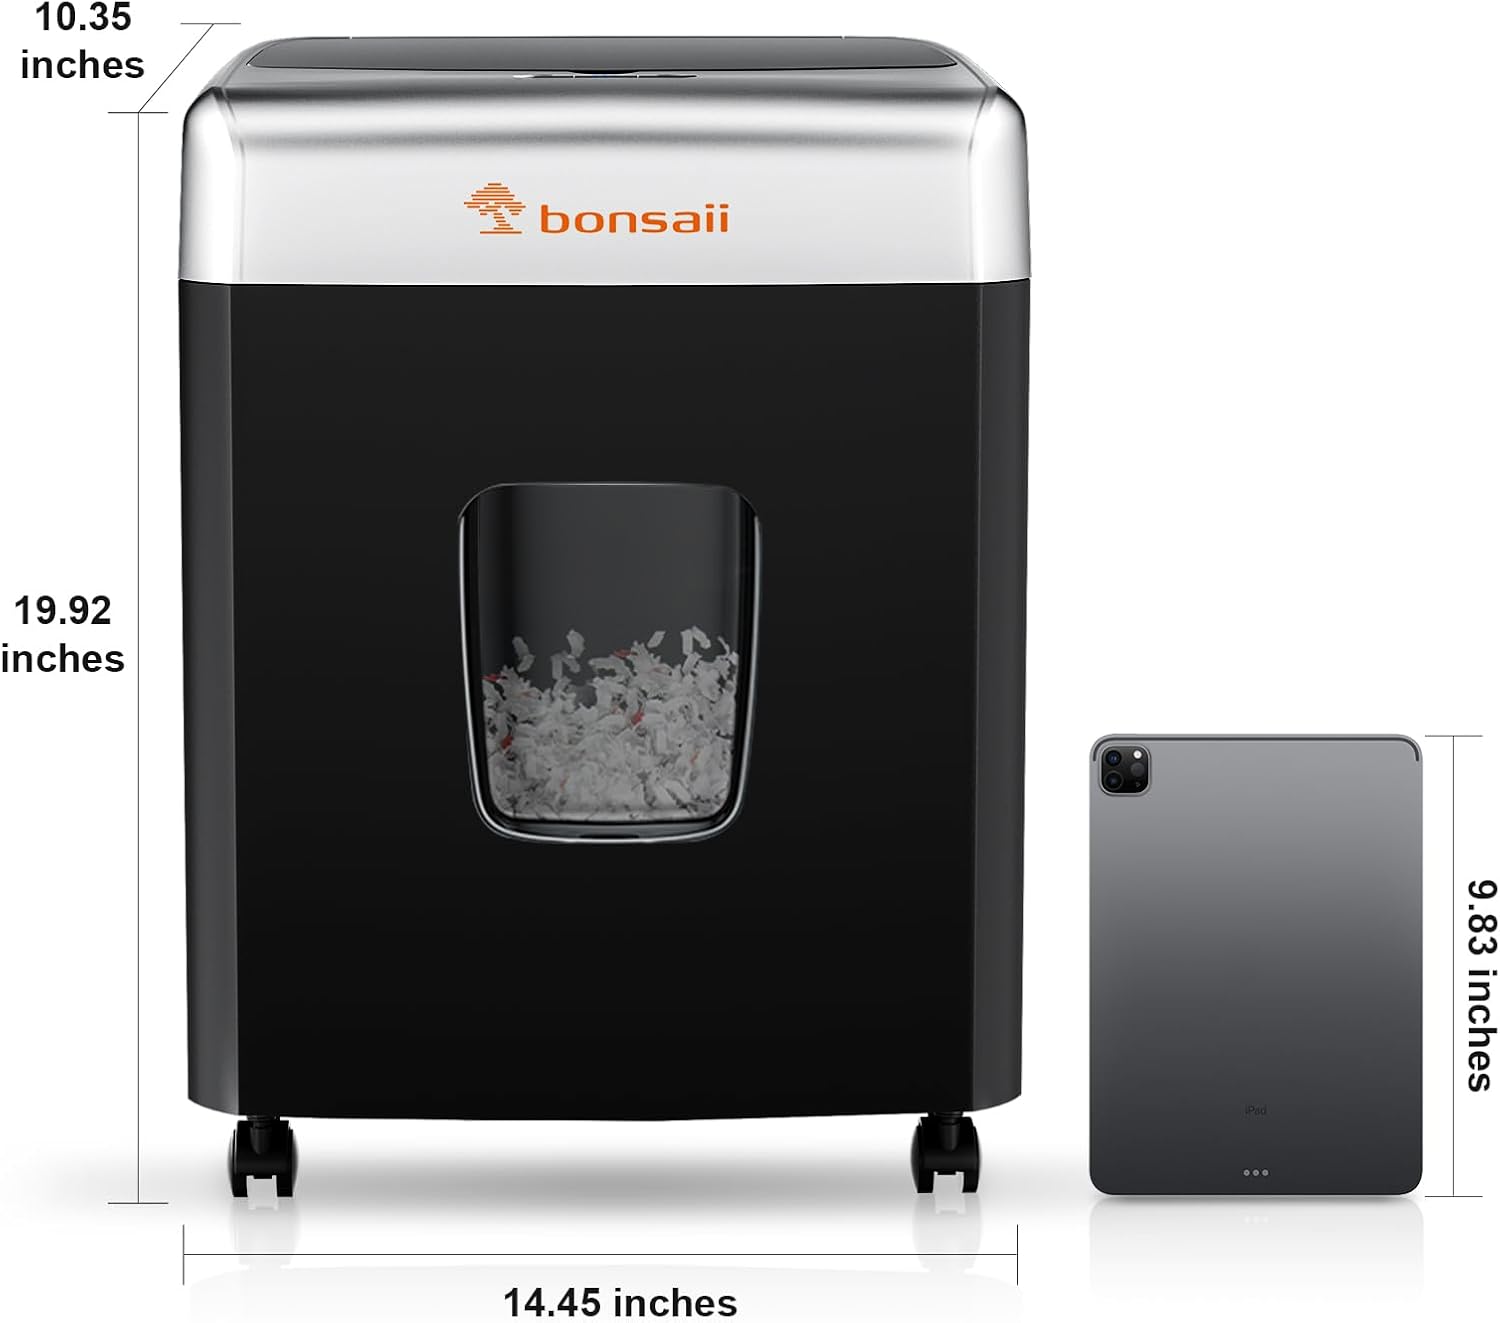
Figure 9.1: Diagram illustrating the physical dimensions of the Bonsaii shredder: 10.35 inches (width), 14.45 inches (depth), and 19.92 inches (height).
10. Warranty and Support
Bonsaii is committed to providing professional customer service. If you have any questions or require assistance during the use of your shredder, please contact us through Amazon. Our customer service team is available to help you within 24 hours.
For warranty information, please refer to the specific warranty card included with your product or contact customer support.
Ask a question about this manual
Ask about setup, troubleshooting, compatibility, parts, safety, or missing instructions. Manuals+ will review the question and use this page’s manual context to help answer it.