
Briloner 3800016
Briloner Ceiling Fan with Light
User Manual
Model: 3800016
Introduction
Thank you for choosing the Briloner Ceiling Fan with Light. This multifunctional device combines efficient LED lighting with a powerful fan to provide comfort and illumination in your living spaces. Designed for ease of use and modern aesthetics, this manual will guide you through the installation, operation, and maintenance of your new ceiling fan.

Image: The Briloner Ceiling Fan with Light, showing its circular design, integrated fan, and accompanying remote control.
Safety Instructions
Please read all safety instructions carefully before installation and use. Failure to follow these instructions may result in electric shock, fire, or serious personal injury.
- Ensure the power supply is disconnected before installation or maintenance.
- Installation must be performed by a qualified electrician in accordance with local wiring regulations.
- Mount the fan securely to a ceiling joist or a structure capable of supporting the fan's weight.
- Do not insert fingers or any objects into the fan blades while the fan is operating.
- Keep children away from the fan during operation.
- This product is designed for indoor use only (IP20 certified). Do not expose to water or high humidity.
- Use only the remote control provided with the unit.
Setup
Components Included
- Briloner Ceiling Fan with Light unit
- Remote Control
- Mounting Hardware
- Instruction Manual
Installation Guide
- Prepare for Installation: Turn off power at the main circuit breaker. Ensure the mounting surface is clean and clear.
- Attach Mounting Bracket: Secure the mounting bracket to the ceiling junction box using the provided screws. Ensure it is firmly attached to a structural support.
- Wire the Fan: Connect the electrical wires from the ceiling to the fan's wiring according to the wiring diagram in the detailed installation instructions (refer to the included manual for specific diagrams). Ensure all connections are secure and insulated.
- Mount the Fan Unit: Carefully lift the fan unit and attach it to the mounting bracket. Secure it in place with the designated screws.
- Install Remote Control Batteries: Open the battery compartment on the remote control and insert the required batteries (batteries required: Yes, as per specifications).
- Restore Power: Once installation is complete and all connections are secure, restore power at the main circuit breaker.
Note: For detailed wiring diagrams and specific installation steps, please refer to the comprehensive instruction manual included in the product packaging.
Operating Instructions
The Briloner Ceiling Fan with Light is operated using the included remote control. Familiarize yourself with the buttons and their functions.
Light Control
- Power On/Off: Press the Light On/Off button to turn the light on or off.
- Color Temperature Adjustment (CCT): Use the CCT buttons (often indicated by sun/snowflake icons or 'K' values) to cycle through color temperatures from 3000K (warm white) to 6500K (cool white).
- Dimming: Press and hold the Dimmer buttons (often indicated by +/- or brightness icons) to adjust the light intensity.
- Night Light Function: Activate the night light mode (3000K) by pressing the dedicated Night Light button.
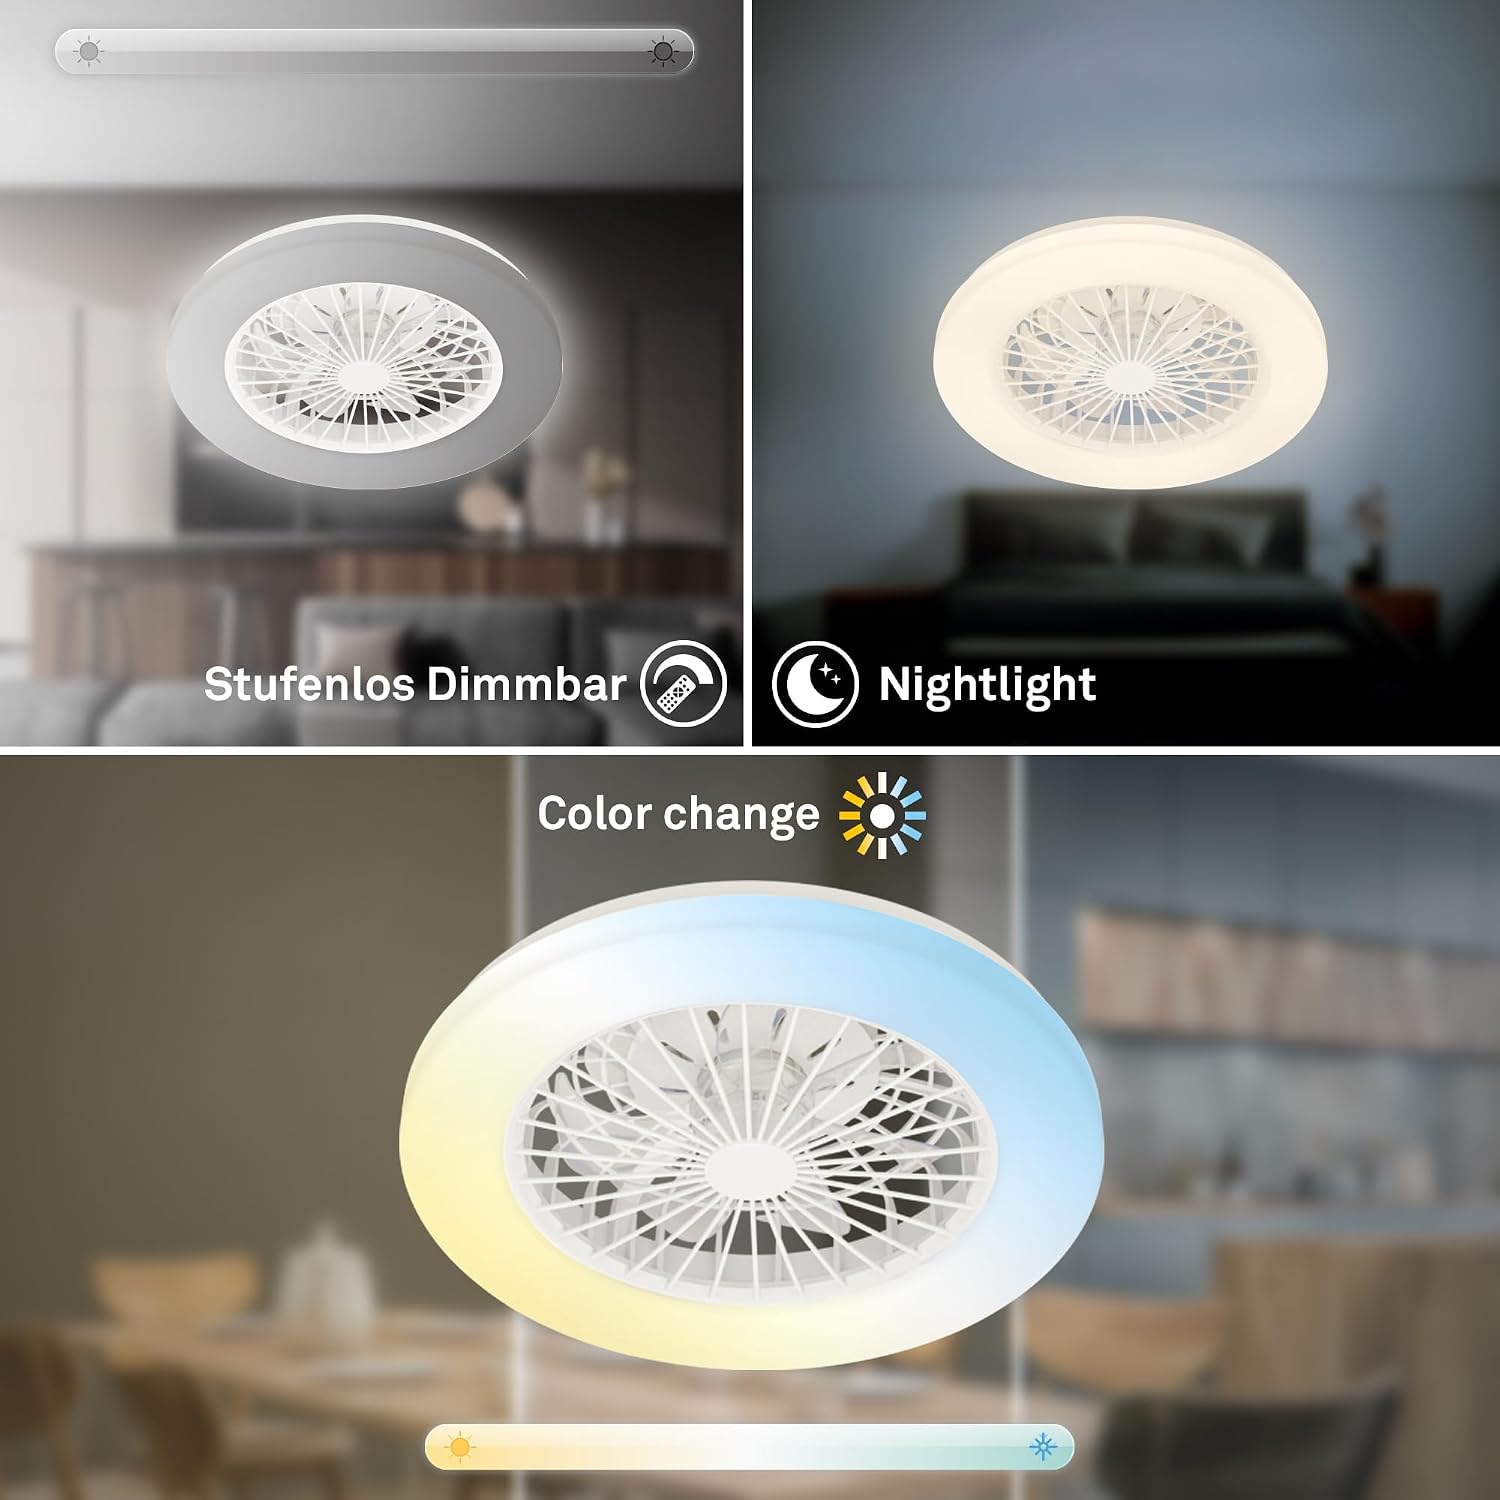
Image: Visual representation of the light's capabilities, including stepless dimming, night light mode, and color temperature adjustment.
Fan Control
- Power On/Off: Press the Fan On/Off button to start or stop the fan.
- Speed Adjustment: Select from 5 different fan speed levels using the dedicated speed buttons (often numbered 1-5 or with fan icons).
- Direction of Rotation: Adjust the fan's rotation direction (forward for cooling in summer, reverse for circulating warm air in winter) using the Direction Change button.
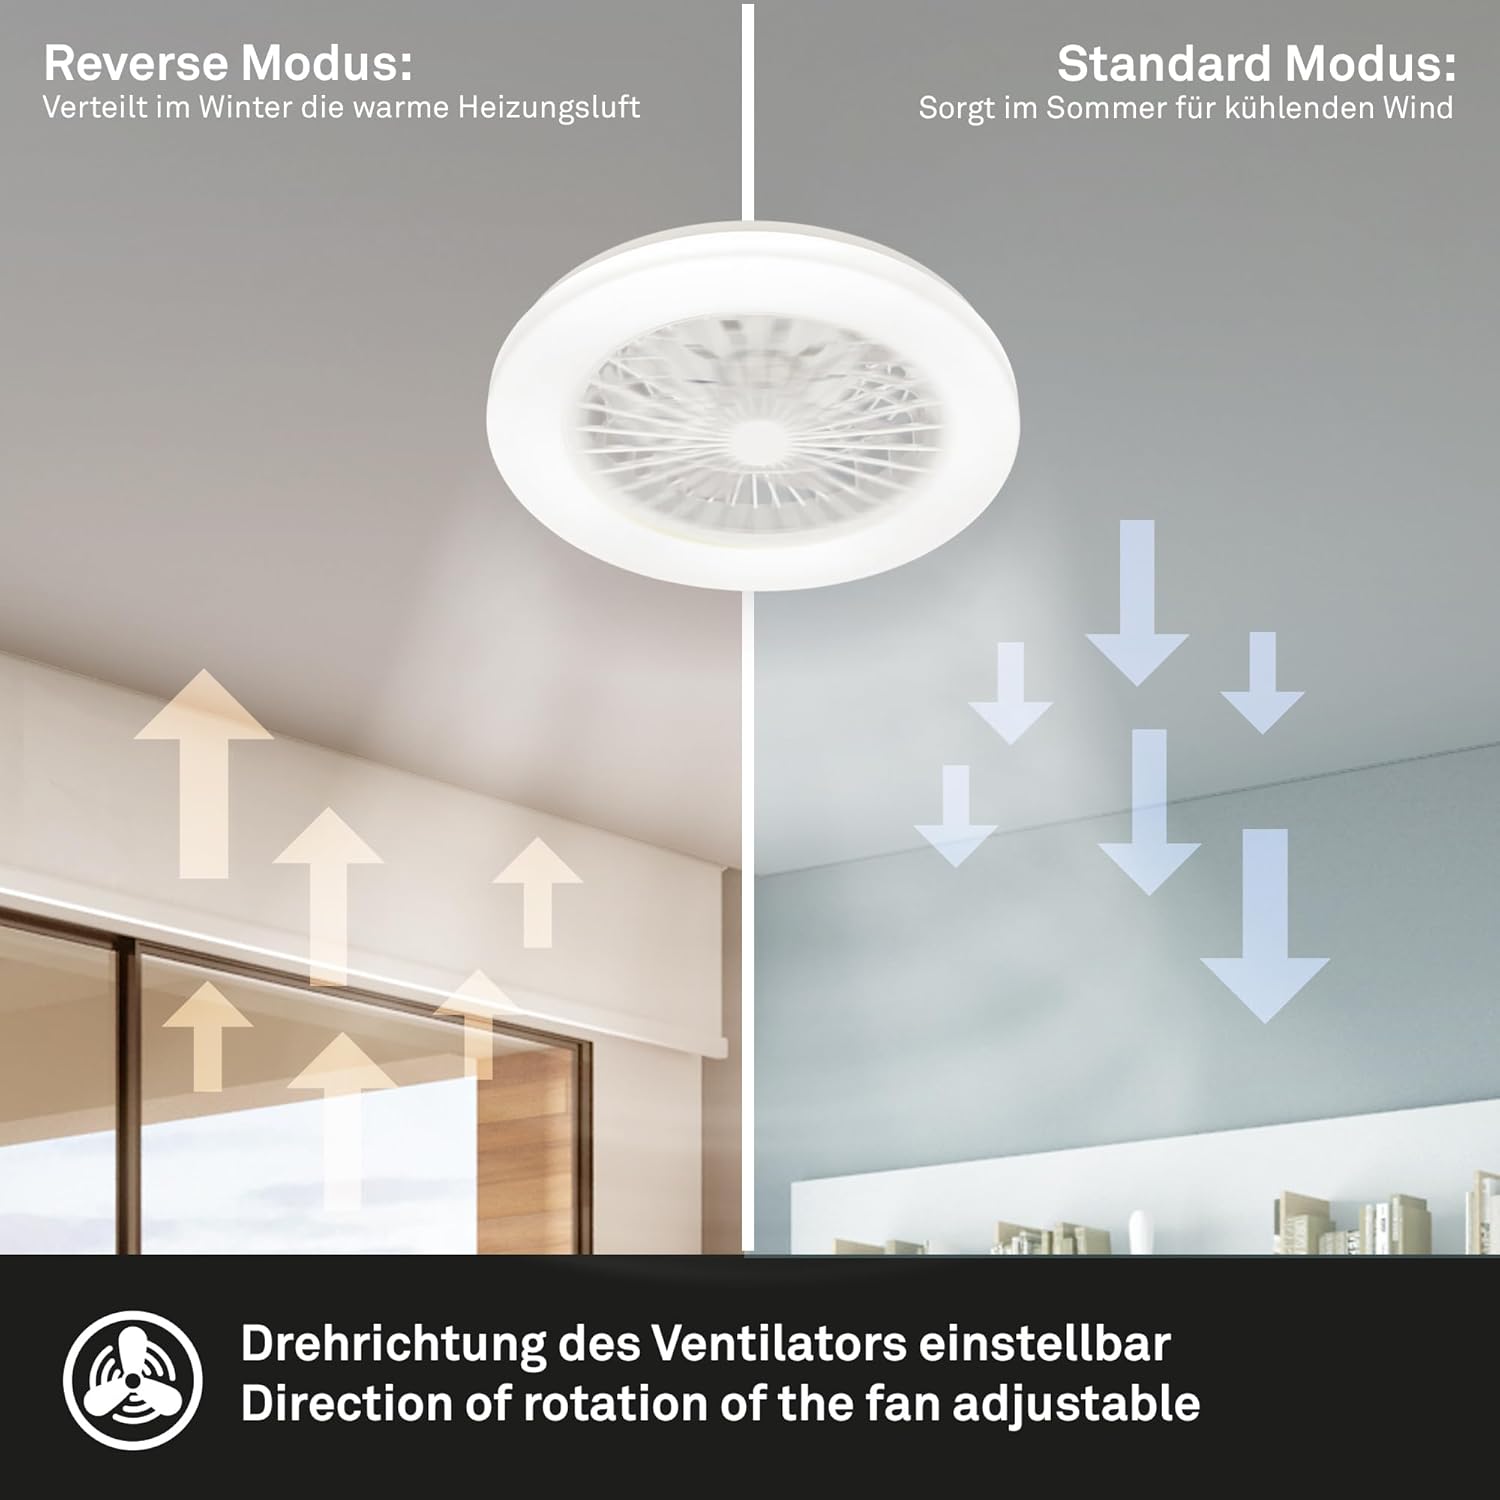
Image: Illustration showing the fan's ability to change rotation direction for summer cooling (downward airflow) and winter heat distribution (upward airflow).

Image: A visual bar indicating the 5 adjustable fan speed levels.
Timer Functions
- Light Timer: Press the Light Timer button to set the light to turn off automatically after 30 minutes.
- Fan Timer: Press the Fan Timer button to set the fan to turn off automatically after 1 hour.

Image: Two panels showing the fan with light on, one indicating a 30-minute timer for the light, and the other indicating a 60-minute timer for the fan with airflow visible.
Maintenance
Regular maintenance ensures the longevity and optimal performance of your Briloner Ceiling Fan with Light.
- Cleaning: Before cleaning, ensure the power is turned off at the circuit breaker. Use a soft, damp cloth to wipe down the exterior of the fan and light. Do not use abrasive cleaners or solvents.
- Dust Removal: Periodically clean dust from the fan blades and light cover to maintain airflow and light output.
- Inspection: Regularly check all mounting screws and connections to ensure they are secure.
Troubleshooting
If you encounter issues with your Briloner Ceiling Fan with Light, refer to the following common problems and solutions:
| Problem | Possible Cause | Solution |
|---|---|---|
| Fan or Light does not turn on. | No power supply; Remote control batteries are dead; Loose wiring connection. | Check circuit breaker and wall switch. Replace remote control batteries. Verify wiring connections (consult a qualified electrician if unsure). |
| Fan turns off after 5 minutes, or light turns on by itself. | Possible interference or internal malfunction. | Try resetting the unit by turning off power at the circuit breaker for a few minutes, then turning it back on. If the issue persists, contact customer support. |
| Fan produces low airflow. | Incorrect fan speed setting; Fan direction set for winter mode; Obstruction. | Increase fan speed using the remote. Change fan direction to standard (summer) mode. Ensure no objects are blocking airflow. |
| Fan is noisy. | Loose mounting screws; Unbalanced blades (not applicable for this enclosed design); Internal component issue. | Ensure all mounting screws are tightened. If noise persists, especially at higher speeds, contact customer support. |
| Remote control is unresponsive or hard to read. | Dead batteries; Obstruction between remote and fan; Remote display issue. | Replace batteries. Ensure clear line of sight. If display is faulty, contact customer support for a replacement remote. |
| Debris visible inside the sealed unit. | Manufacturing residue or packaging material. | This is typically a cosmetic issue and does not affect functionality. If it impacts performance or is a significant concern, contact customer support. |
Specifications
| Feature | Detail |
|---|---|
| Model Number | 3800016 |
| Dimensions (DxH) | 48.5 x 48.5 x 14.5 cm |
| Product Weight | 1.65 kg |
| Power Consumption | 49 Watts |
| Material | Plastic, Metal |
| Color | White |
| Light Type | LED |
| Color Temperature (CCT) | 3000K - 6500K (Adjustable) |
| Dimming | Yes, via remote control |
| Night Light Function | Yes (3000K) |
| Fan Speeds | 5 levels |
| Fan Direction | Adjustable (Summer/Winter mode) |
| Light Timer | 30 minutes |
| Fan Timer | 1 hour |
| IP Rating | IP20 (Indoor use only) |
| Batteries Required | Yes (for remote control) |
| Assembly Required | No (refers to the main unit, but installation is required) |

Image: Technical drawing illustrating the dimensions of the Briloner Ceiling Fan: 485mm diameter and 145mm height.
Warranty and Support
Briloner products are manufactured to high quality standards. For information regarding warranty coverage, please refer to the warranty card included with your product or visit the official Briloner website.
For technical support, troubleshooting assistance beyond this manual, or to inquire about replacement parts, please contact Briloner customer service. Contact details can typically be found on the product packaging, the official Briloner website, or through your point of purchase.
Please retain your proof of purchase for warranty claims.
Related documents3800016


Ask a question about this manual
Ask about setup, troubleshooting, compatibility, parts, safety, or missing instructions. Manuals+ will review the question and use this page’s manual context to help answer it.