1. Introduction
Thank you for choosing the TIDRADIO TD-H3 GMRS Radio. This multi-band handheld transceiver offers advanced features including 8-band frequency support, Type-C and wireless programming, and a 1.44-inch LCD color screen. Designed for reliable communication, this manual provides essential information for safe and effective operation.
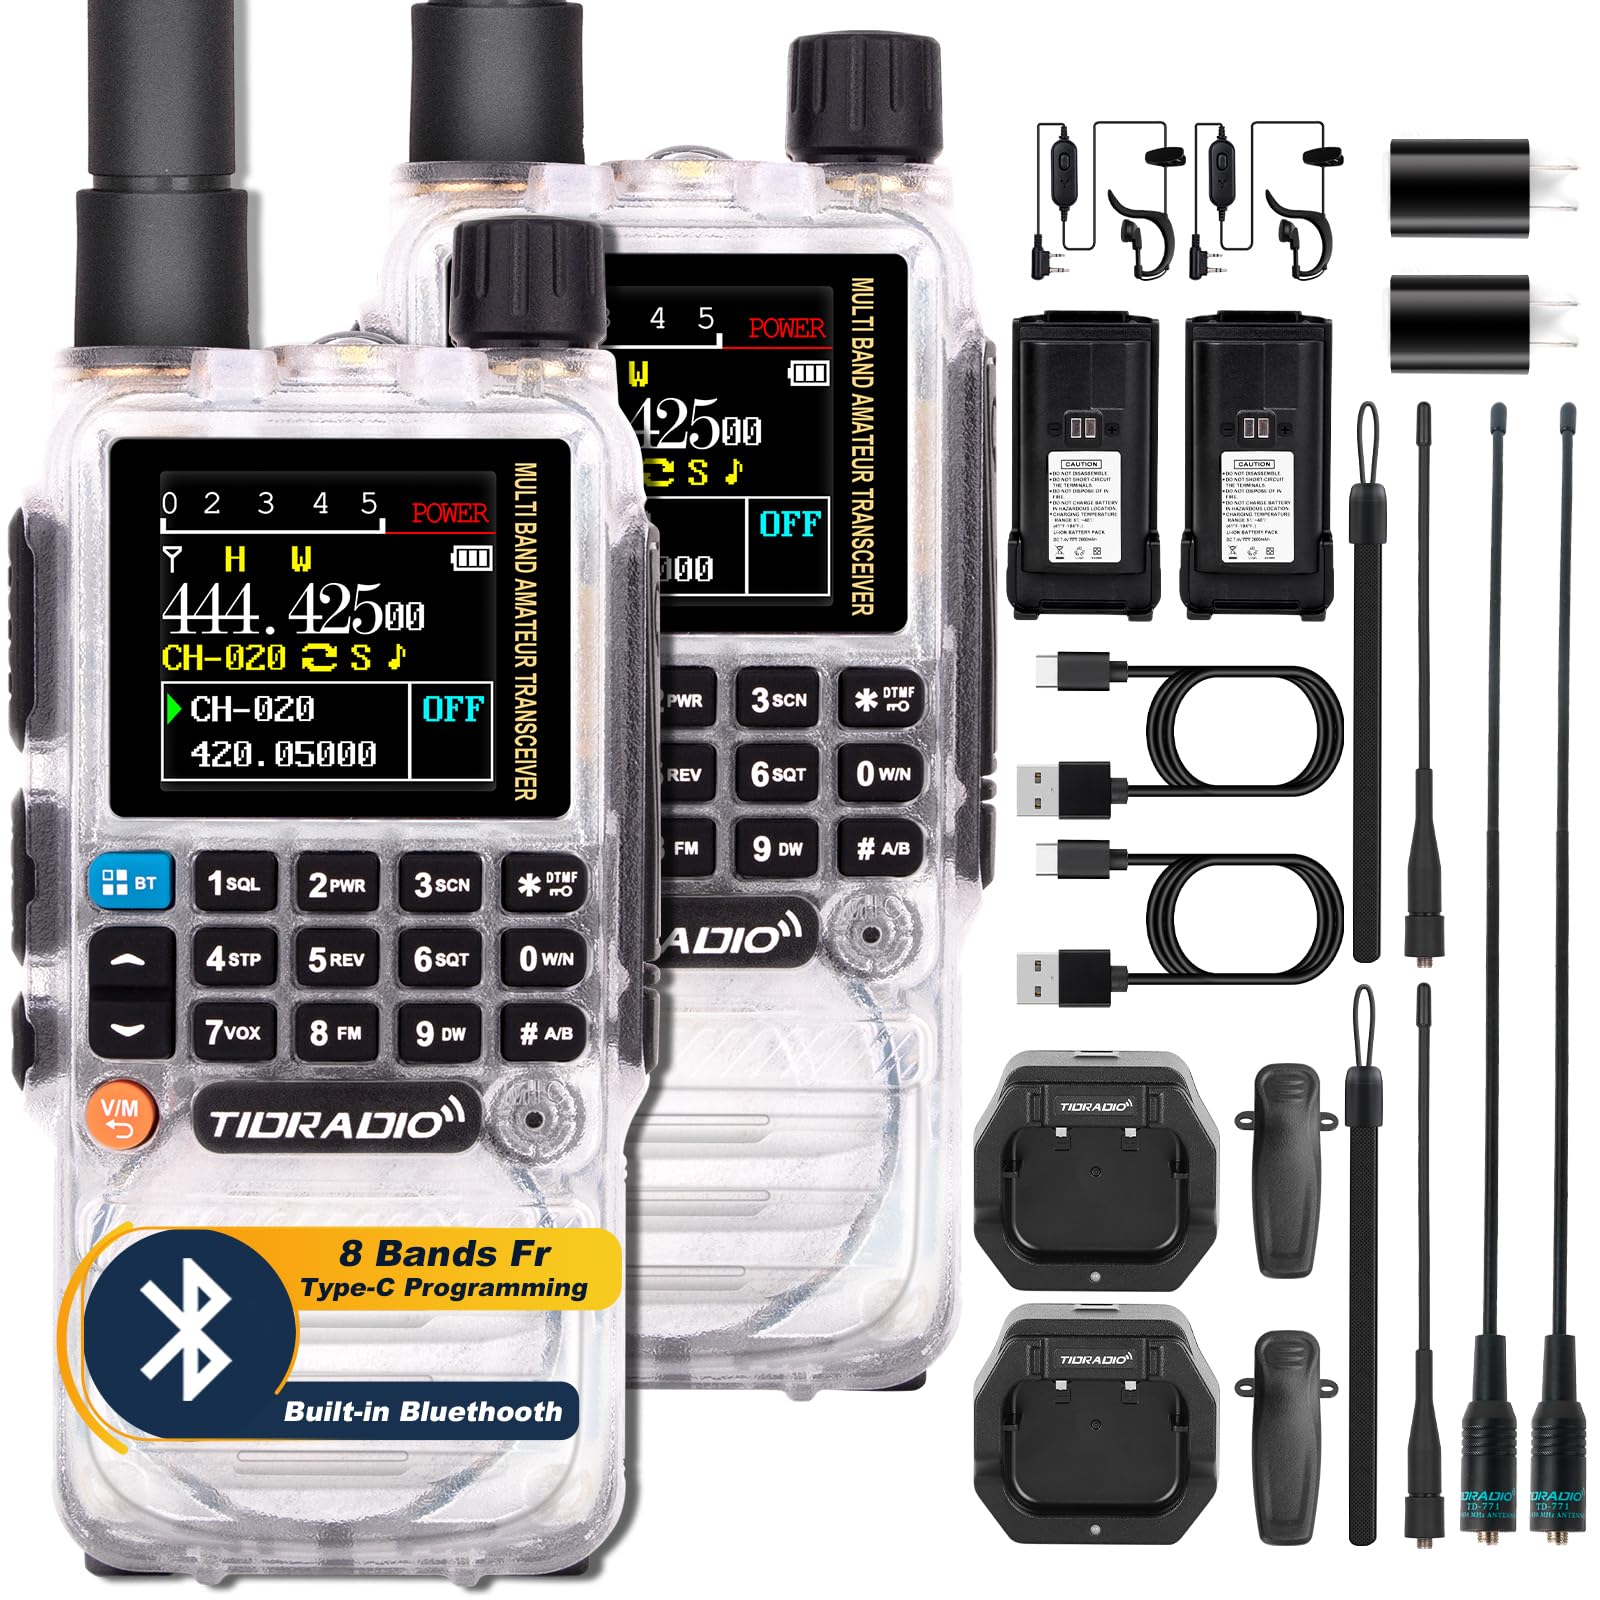
Image: The TIDRADIO TD-H3 GMRS Radio, showcasing its compact design and color display.
2. Package Contents
Ensure all items are present in your package:
- TD-H3 Handheld GMRS Radio (2 units for 2-pack)
- 6.1-inch GMRS Antenna
- 15.12-inch 771 AM Antenna (120/300MHz)
- 2500mAh Type-C Battery
- Earpiece with Mic
- USB Charger with cable
- Back Clip
- User Manual
- Lanyard
- Desktop Charger

Image: A visual representation of the complete kit for the TIDRADIO TD-H3 GMRS Radio, including two radios, multiple antennas, batteries, chargers, and accessories.
3. Setup
3.1 Battery Installation and Charging
The TD-H3 radio comes with a 2500mAh Type-C battery. To install, align the battery with the radio body and slide it upwards until it clicks into place. To remove, press the release button below the battery pack.
Charge the battery using the provided USB Type-C cable or desktop charger. A full charge via the Type-C port takes approximately 3 hours, providing up to 48 hours of standby time. The desktop charger may take 5-7 hours for a full charge.

Image: Various charging methods for the 2500mAh battery, including desktop, car, laptop, and power bank charging via Type-C.
3.2 Antenna Attachment
Screw the desired antenna (GMRS or AM/Air Band) clockwise onto the antenna connector at the top of the radio until it is secure. Ensure a snug fit for optimal performance.

Image: The flexible 771 Air Band antenna, highlighting its 2.15dBi gain for extended range.
4. Operating the Radio
4.1 Basic Controls and Display
The TD-H3 features a 1.44-inch LCD color screen for clear display of frequencies, channels, and settings. The radio supports dual display and dual watch functionality.

Image: An overview of the TD-H3's key features, including 8-band frequency, NOAA receiver, DTMF, wireless programming, and 1.44-inch colorful screen.
4.2 Multi-Band Transmitting & Receiving
The TD-H3 supports 8 frequency bands for both transmitting and receiving, including:
- FM: 50-76MHz, 76-108MHz (Receive only)
- AM (Aviation Band): 108-136MHz (Receive only)
- VHF: 136-174MHz, 174-350MHz, 350-400MHz (Transmit/Receive)
- UHF: 400-470MHz, 470-600MHz (Transmit/Receive)
To switch between VFO (Frequency) mode and Channel (Memory) mode, press the V/M button. Use the keypad to enter frequencies directly in VFO mode.
Video: TD-H3 Ham/GMRS Radio, Multi-Band Mini Walkie Talkie. This video provides an overview of the radio's multi-band functionality.
4.3 Air Band Operation
The TD-H3 can receive on the AM Aviation Band (108-136MHz). To enable Air Band reception:
- Press the MENU button.
- Navigate to option 48 (AM_BAND).
- Use the arrow keys to set it to ON.
- Press MENU again to confirm.
You can then enter air band frequencies directly or use the scanning function to find active transmissions.
Video: TIDRADIO H3, How to Use AIRBAND. This video guides users through the process of activating and utilizing the Air Band feature.
4.4 NOAA Weather Receiver
The TD-H3 includes a NOAA Weather Receiver function to keep you informed about weather alerts. Consult the manual for specific channel access or programming details for NOAA frequencies in your area.
4.5 Dual PTT and Flashlight
The radio features dual PTT buttons for independent control of two frequency bands. An enhanced flashlight is integrated for convenience in low-light conditions.
5. Programming
5.1 Multi-Mode Programming
The TD-H3 offers versatile programming options:
- USB Type-C Cable Programming: Connect the radio to a PC using a standard Type-C cable (side port) and use compatible software like CHIRP or CPS.
- Bluetooth Programming: Program the radio wirelessly via the Odmaster app on your smartphone or the Odmaster website on your PC. Ensure Bluetooth is enabled on your device.
- Traditional 2-Pin Interface: The radio also retains a traditional 2-pin programming interface for compatibility with existing accessories.

Image: Illustration of the TIDRADIO TD-H3's multi-mode programming options, including USB-C, Bluetooth via Odmaster app/web, and traditional 2-pin interface.
Video: Review Video of TD-H3 and How to Program on Phone. This video guides users through the process of programming the radio wirelessly via a smartphone app.
5.2 Fast Copy One Channel (Frequency Match)
The TD-H3 allows for quick frequency matching:
- Hold down the "1" button on the keypad.
- The radio will identify the frequency when another radio is transmitting nearby.
- You can then save this frequency directly to a new channel. (Refer to Menu 47 On/Off for settings).

Image: The Fast Copy One Channel feature of the TD-H3, illustrating how to quickly identify and save frequencies from other transmitting radios.
Video: How to Use One Key Frequency Match on TD-H3 Radio. This video provides a step-by-step guide on using the fast frequency copy feature.
5.3 Wireless Radio Replication
If you have multiple TD-H3 radios, you can wirelessly replicate settings from one radio to another, streamlining setup for multiple devices.
6. Maintenance
6.1 Battery Care
- Always use fresh or fully charged batteries for optimal performance.
- Do not store the radio in direct sunlight or hot areas, as high temperatures can shorten battery life.
- If the battery appears to be running out, the outer frame of the battery icon will flash to indicate that the radio is unable to transmit at that time.
6.2 General Care
- Do not attempt to open the radio for any reason; unauthorized opening will void the warranty.
- Keep the radio dry. Rainwater or damp conditions can corrode electronic circuits.
- If the radio diffuses a peculiar smell or smoke, shut off its power immediately and take off the battery.
7. Troubleshooting
7.1 DTMF Lock and Stun Code
The TD-H3 features DTMF Lock and Stun codes for privacy protection:
- Kill Code: If a Kill Code is set via Odmaster, any radio with DTMF function on the same frequency can send the code to lock your H3 radio. A locked H3 cannot be used until unlocked.
- Stun Code: Setting a Stun Code limits your H3 radio to receive-only mode, preventing transmission.
- The code should be at least 5 digits. To unlock, add a '#' to the end of the code (e.g., Kill Code: 12345, Unlock Code: 12345#).
Video: How to the Unlock the "Kill All Locked" or "Stun" of H3? This video provides instructions for managing the radio's security features.
8. Specifications
| Feature | Specification |
|---|---|
| Item Weight | 2.07 pounds |
| Package Dimensions | 9.92 x 8.54 x 2.6 inches |
| Model Number | TD-H3 GMRS Radio |
| Batteries | 2 Lithium Polymer batteries required (included) |
| Number of Channels | 199 |
| Special Feature | Type C & Wireless Programming, 8 bands frequency |
| Frequency Range | GMRS (TX), AM: 108-136MHz (RX), FM: 50-76MHz, 76-108MHz (RX), VHF: 136-174MHz, 174-350MHz, 350-400MHz (TX/RX), UHF: 400-470MHz, 470-600MHz (TX/RX) |
| Talking Range Maximum | 5 Kilometers (5-10km in optimal conditions) |
| Water Resistance Level | Not Water Resistant |
| Compatible Devices | Two-way radios & Smartphone |
9. Warranty & Support
TIDRADIO offers a 180-day quality guarantee for this product. If you are not satisfied, a replacement will be offered. For any questions or suggestions, please contact TIDRADIO customer support. Lifetime after-sales support is provided.
For more information and product updates, please visit the official TIDRADIO website: www.tidradio.com.