
1. Introduction
The LEPREM Automatic Sliding Gate Opener Control Board is designed to manage the operation of sliding gate motors. It features advanced functionalities such as soft start/stop, adjustable operating parameters, and remote control compatibility, ensuring smooth and secure gate automation. This specific package includes one control board and two remote controls.
2. Safety Information
- Installation should be performed by qualified personnel to ensure electrical safety and proper functionality.
- Always disconnect power before performing any installation, maintenance, or troubleshooting.
- Ensure all wiring connections are secure and insulated to prevent short circuits.
- Keep children and pets away from the gate area during operation.
- This board is designed exclusively for sliding gate motors with AC voltage. Do not use it with other motor types.
3. Package Contents
Upon opening your package, please verify that all components are present:
- 1 x LEPREM Automatic Sliding Gate Opener Control Board
- 2 x Remote Controls (Note: Remote controls are not pre-programmed and do not include batteries.)
4. Product Overview
The control board integrates various components for comprehensive gate management. Below is an image of the control board and its associated remote controls.
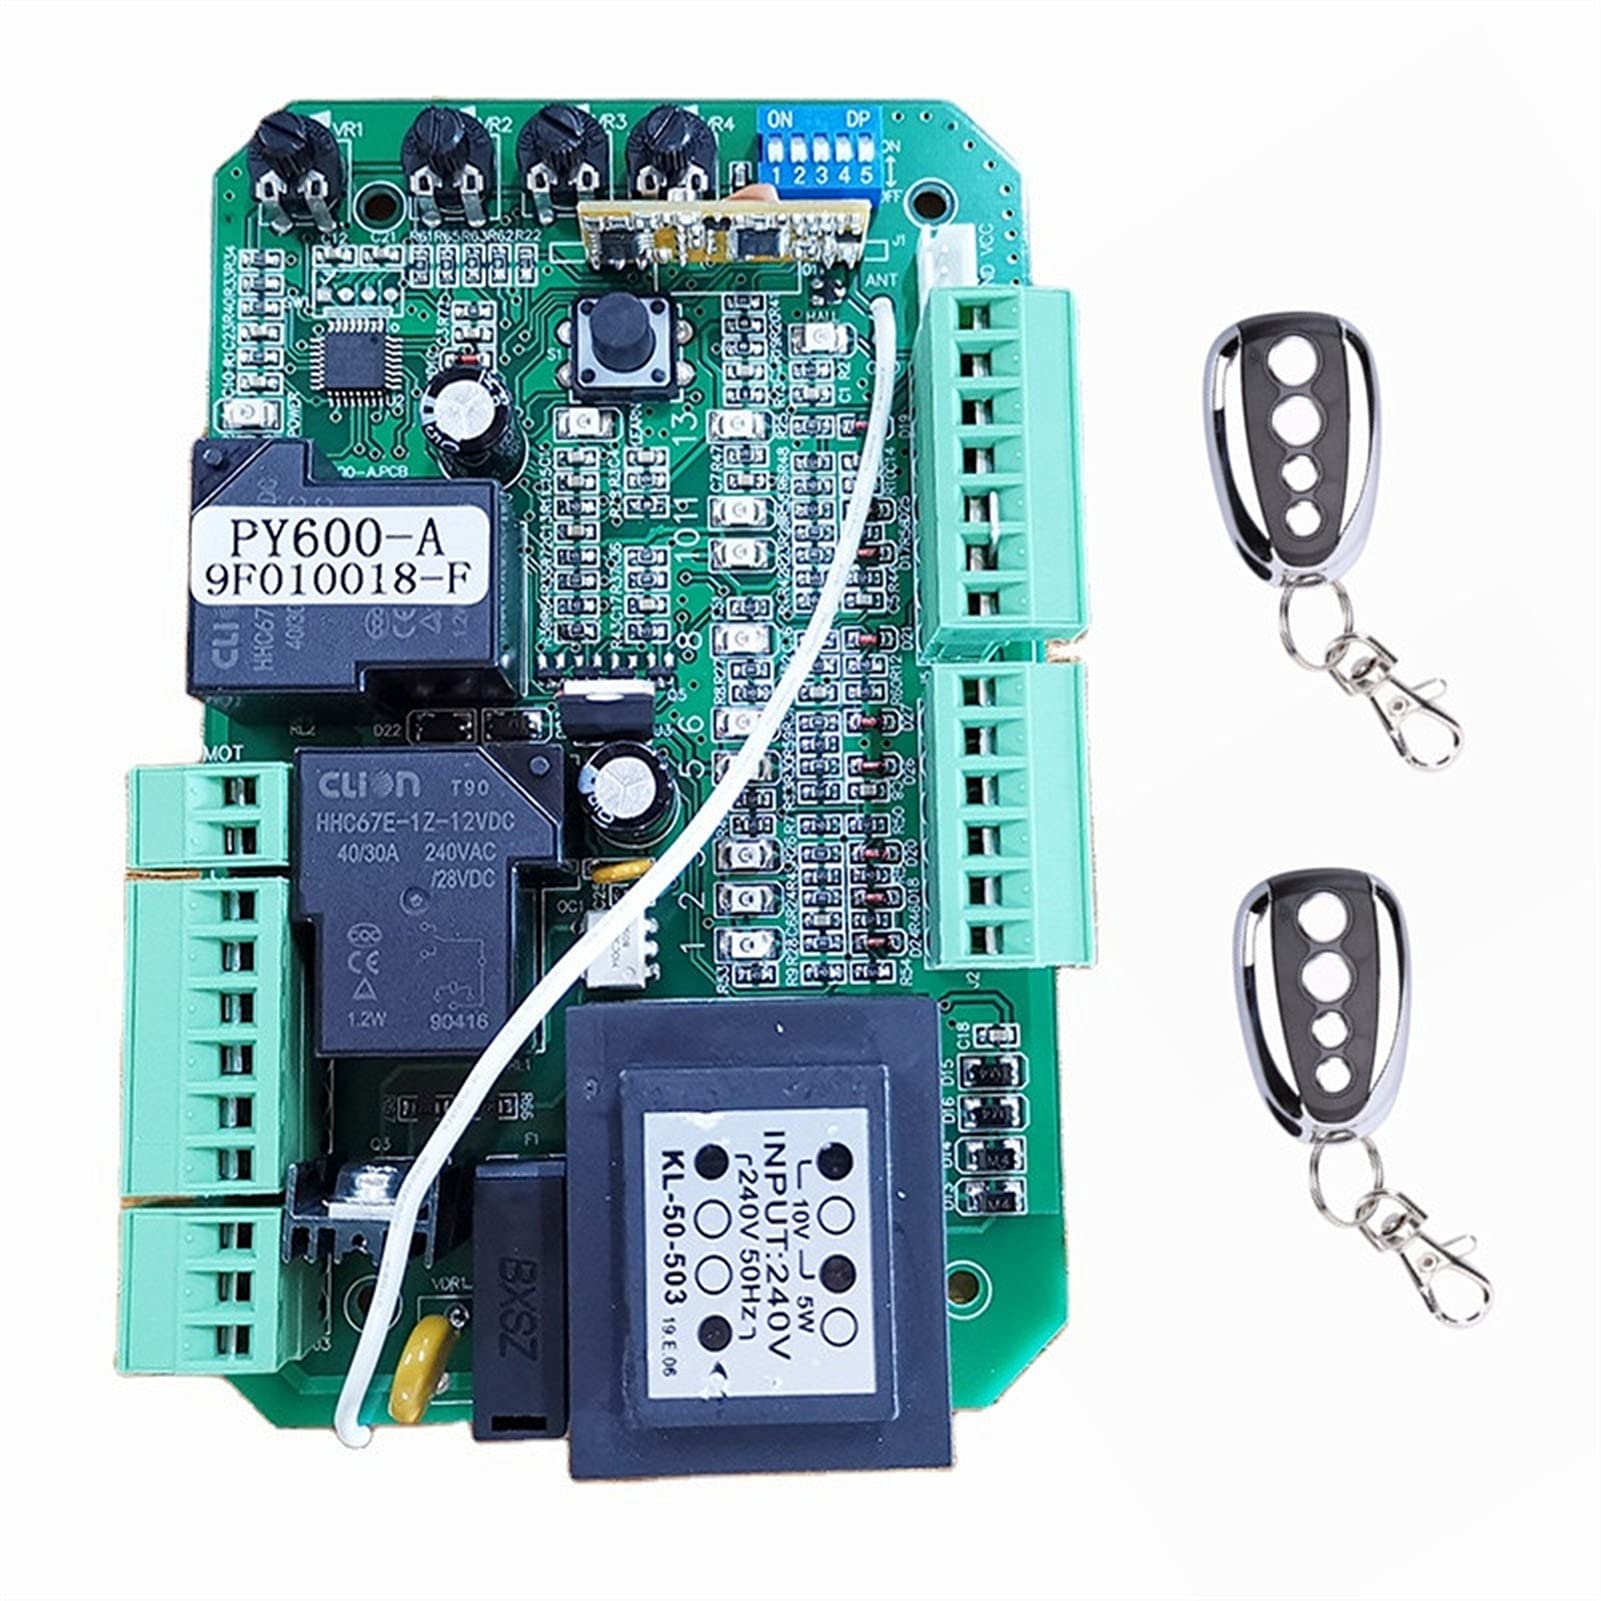
Image 4.1: LEPREM Control Board with two remote controls. The board is green with various electronic components and terminal blocks. Two black remote controls with silver buttons are shown next to it.
Key Features:
- Soft Start and Soft Stop: Adjustable width for smooth gate movement.
- Adjustable Working Time: Customize the gate's operational duration.
- Adjustable Motor Output Torque: Fine-tune the motor's power.
- Automatic Closing Function: Set a delay for the gate to close automatically.
- Multiple Interfaces: Supports keyboard/single button, photo safety beam, infrared sensor, and alarm light.
- LED Indicators: Provide visual feedback on the board's working status.
- Remote Control Capacity: Can learn up to 25 remote controls.
- Remote Compatibility: Requires 433MHz, HCS301, SN1646 rolling code remote controls. Only compatible with LEPREM remotes.

Image 4.2: Close-up of the control board, highlighting the transformer labeled 'INPUT: 240V 50Hz' and other electronic components like relays and capacitors.
5. Setup and Installation
This section outlines the general steps for installing and wiring the control board. Refer to the labeled diagram for specific connection points.

Image 5.1: Detailed diagram of the control board with labels for power, motor, caution light, limit switches, loop detector, infrared sensor, pedestrian switch, extra button switch, and adjustable potentiometers (VR1-VR4) and DIP switches.
Wiring Connections:
- Power Input (J3): Connect the main AC power supply (240V, 50Hz) to the L (Live), N (Neutral), and PE (Protective Earth) terminals.
- Motor Connections (J4): Connect your sliding gate motor's wires to the MOT1 and MOT2 terminals. Ensure correct polarity as per your motor's manual.
- Caution Light (J4): Connect a caution light to the LAMP terminals if desired.
- Limit Switches (J2, terminals 10-13): Connect your gate's open limit and close limit switches to the designated terminals. These define the gate's fully open and closed positions.
- Safety Sensors (J2, terminals 8-9): Connect infrared safety sensors or a loop detector to the respective terminals (GND/COM, Infrared sensor, Loop detector). These prevent the gate from closing on an obstruction.
- Control Inputs (J2, terminals 1-7): Connect external control devices such as a pedestrian switch, single/three-button switch, or keyboard to these terminals.
- Antenna (ANT): Connect the provided antenna wire for optimal remote control range.
After all connections are made, double-check them for security and correctness before applying power.
6. Operating Instructions
Remote Control Programming:
The remote controls included are not pre-programmed. Follow these steps to program them:
- Locate the 'LEARN' button on the control board (refer to Image 5.1).
- Press and hold the 'LEARN' button for approximately 2 seconds. The LED indicator on the board should illuminate.
- While the LED is lit, press the desired button on your remote control that you wish to program.
- The LED on the board will flash or turn off, indicating successful programming.
- Repeat the process for any additional remote controls or buttons you wish to program.
The control board can store up to 25 remote controls. To clear all programmed remotes, press and hold the 'LEARN' button for approximately 8 seconds until the LED indicator turns off.
Adjusting Settings:
The control board features several adjustable parameters using potentiometers (VR1-VR4) and DIP switches (ON/DP 1-5) as shown in Image 5.1.
- Soft Start/Stop Width: Adjust potentiometers VR1 and VR2 to fine-tune the duration and intensity of the soft start and soft stop functions.
- Working Time: Adjust VR3 to set the maximum running time of the motor.
- Motor Output Torque: Adjust VR4 to control the motor's output power.
- Automatic Closing Time: The automatic closing function can be enabled or disabled, and its delay time adjusted, typically via DIP switches or a dedicated potentiometer (refer to specific board markings if available).
- DIP Switches: The DIP switches (ON/DP 1-5) control various operational modes and features. Consult the specific markings on your board for their exact functions (e.g., auto-close enable/disable, motor direction, etc.).
7. Maintenance
Regular maintenance ensures the longevity and reliable operation of your gate system:
- Periodically check all wiring connections for tightness and signs of wear.
- Keep the control board clean and free from dust, moisture, and insects.
- Inspect safety sensors (infrared beams, loop detectors) for proper alignment and cleanliness.
- Ensure the gate's mechanical components (tracks, wheels, motor) are in good working order.
- Replace remote control batteries as needed.
8. Troubleshooting
If you encounter issues with your gate opener, refer to the following common problems and solutions:
| Problem | Possible Cause | Solution |
|---|---|---|
| Gate does not open or close | No power to the board; Remote control battery low/dead; Safety sensors obstructed/misaligned; Limit switches faulty. | Check power supply; Replace remote battery; Clear sensor path, realign sensors; Inspect and test limit switches. |
| Remote control not working | Remote not programmed; Incorrect remote type; Low/dead battery. | Reprogram the remote control (Section 6); Ensure remote is 433MHz HCS301/SN1646 rolling code; Replace battery. |
| Gate stops unexpectedly | Safety sensors triggered; Obstruction in gate path; Motor overheating. | Check for obstructions, clear sensor path; Allow motor to cool down if applicable. |
| Gate opens/closes partially | Limit switches incorrectly set; Motor torque too low. | Adjust limit switch positions; Increase motor output torque (VR4). |
9. Specifications
| Feature | Specification |
|---|---|
| Manufacturer | LEPREM |
| Model Number | 92367110 |
| Product Dimensions | 3 x 2 x 1 cm |
| Weight | 2 Kilograms |
| Material | Metal |
| Input Voltage | 240V AC, 50Hz |
| Motor Voltage Compatibility | AC Sliding Gate Motors only |
| Remote Control Frequency | 433MHz |
| Remote Control Chip Type | HCS301, SN1646, Rolling Code |
| Max Remote Controls | 25 pieces |
| Key Features | Soft start/stop, adjustable working time, adjustable motor torque, automatic closing, keyboard/single button interface, photo safety beam interface, LED indicators. |
10. Warranty and Support
For warranty information and technical assistance, please contact your retailer or the manufacturer directly. Ensure you have your product model number (92367110) and purchase details available when seeking support.