Introduction
This manual provides detailed instructions for the installation, operation, and maintenance of your ARES WING Desk Monitor Mount (Model GDT1003LWH). Please read this manual thoroughly before installation and use to ensure proper function and safety. This monitor mount is designed to support a single monitor, compatible with screens ranging from 17 to 49 inches and weighing between 4.4 to 44 lbs.
Safety Information
- Ensure all components are present and undamaged before assembly. Do not use if any parts are missing or defective.
- Verify that your monitor's weight and size are within the specified limits (4.4-44 lbs, 17-49 inches). Exceeding these limits can result in instability and damage.
- Confirm your monitor has compatible VESA mounting holes (75x75mm or 100x100mm). If not, a separate VESA adapter is required.
- Ensure your desk thickness is compatible with the chosen mounting method (C-clamp: 0.39-3.34 inches; Grommet: 0.39-1.8 inches).
- Adjust the gas spring tension according to your monitor's weight before attaching the monitor to prevent sudden drops or difficulty in adjustment.
- Keep children and pets away during installation.
- Do not overtighten screws, as this may cause damage.
- For any issues or concerns, contact ARES WING customer support.
Package Contents
Please check the package to ensure all the following components are included:
- Monitor Arm Assembly
- Desk Clamp (C-clamp)
- Grommet Mount Base
- VESA Plate
- Hardware Kit (screws, washers, spacers)
- Allen Wrenches
- User Manual (this document)
Setup and Installation
1. Check Monitor Compatibility
Before proceeding, ensure your monitor meets the following criteria:
- VESA Pattern: 75x75mm or 100x100mm.
- Screen Size: 17" to 49".
- Weight Capacity: 4.4 lbs to 44 lbs.

Figure 1: Monitor and Desktop Compatibility Check
For monitors without VESA holes, a separate VESA adapter is required. Some Samsung G9 monitors may come with a VESA adapter; please check your monitor's documentation.

Figure 2: VESA Hole Check and Adapter Preparation
2. Choose Mounting Method
The ARES WING monitor mount supports two installation methods: C-clamp and Grommet mount.
- C-Clamp: Suitable for desk thickness between 0.39 inches (10mm) and 3.34 inches (85mm).
- Grommet Mount: Suitable for desk thickness between 0.39 inches (10mm) and 1.8 inches (45mm). Requires an existing hole in your desk.
3. Install the Desk Mount
Follow the instructions provided with your mount to securely attach the base to your desk using either the C-clamp or grommet method. Ensure the mount is stable before proceeding.
4. Adjust Gas Spring Tension
It is crucial to adjust the gas spring tension to match your monitor's weight before attaching the monitor. This prevents the arm from springing up or sagging.
- Use the provided Allen wrench to adjust the tension screw on the arm.
- Turn counter-clockwise for heavier monitors (to increase tension).
- Turn clockwise for lighter monitors (to decrease tension).
- Adjust until the arm can hold its position freely when moved without a monitor attached.

Figure 3: Gas Spring Tension Adjustment
5. Attach Monitor to VESA Plate
Secure the VESA plate to the back of your monitor using the appropriate screws and spacers from the hardware kit. Ensure the screws are tightened securely but do not overtighten.
6. Mount Monitor to Arm
Carefully slide the VESA plate with the attached monitor onto the monitor arm's VESA head. Ensure it clicks into place or is secured with any locking mechanism provided.
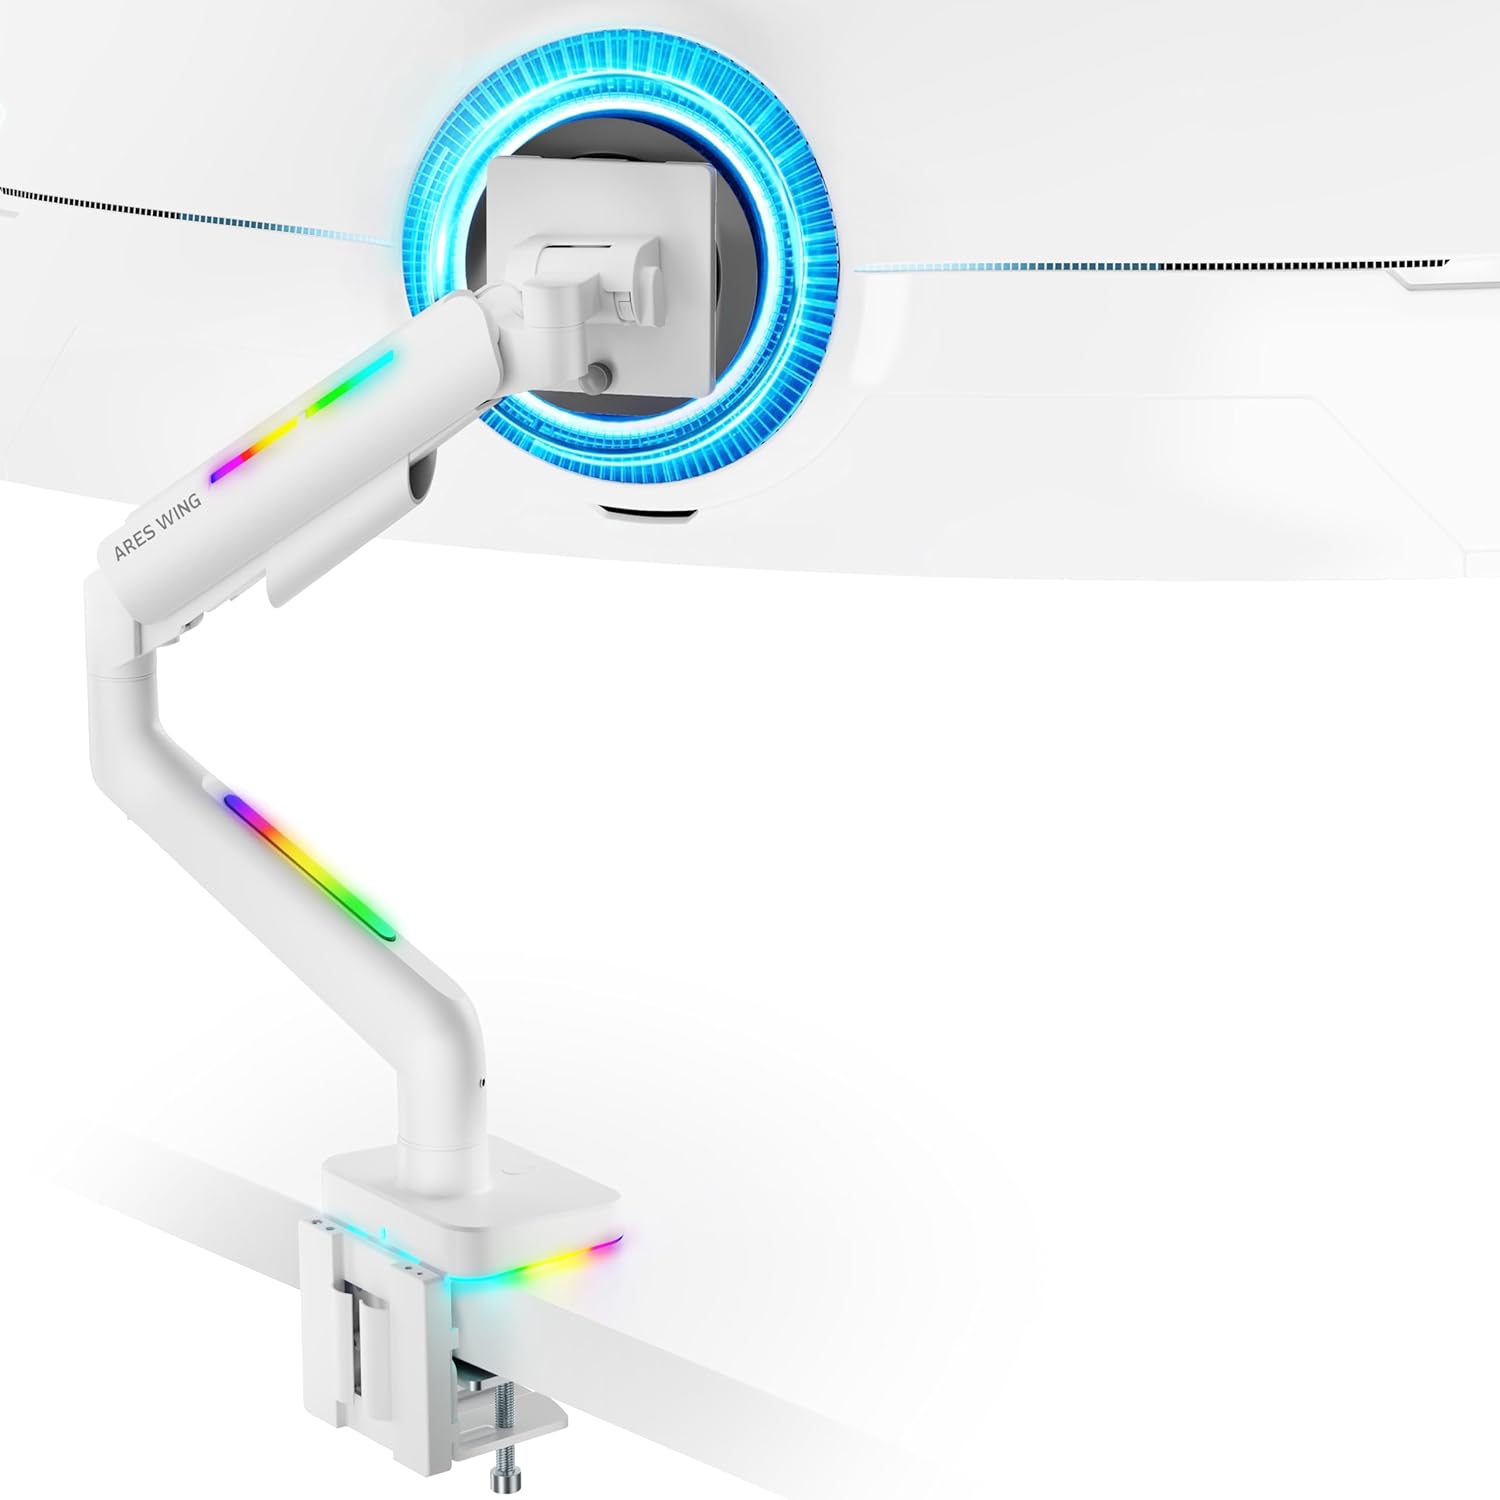
Figure 4: Monitor Mounted on ARES WING Arm
Operating Instructions
1. Adjusting Monitor Position
The ARES WING monitor arm offers full motion capabilities for optimal ergonomic positioning:
- Height Adjustment: The arm allows vertical movement to raise or lower your monitor to the desired eye level. The height can be adjusted from 8.5 inches to 19.7 inches.
- Tilt: Tilt your monitor +50° upwards or -20° downwards to reduce glare and find the perfect viewing angle.
- Swivel: Swivel the monitor ±90° left or right to share your screen or adjust for different tasks.
- Rotation: Rotate the monitor 360° to switch between landscape and portrait orientations.

Figure 5: Full Motion Adjustment Capabilities
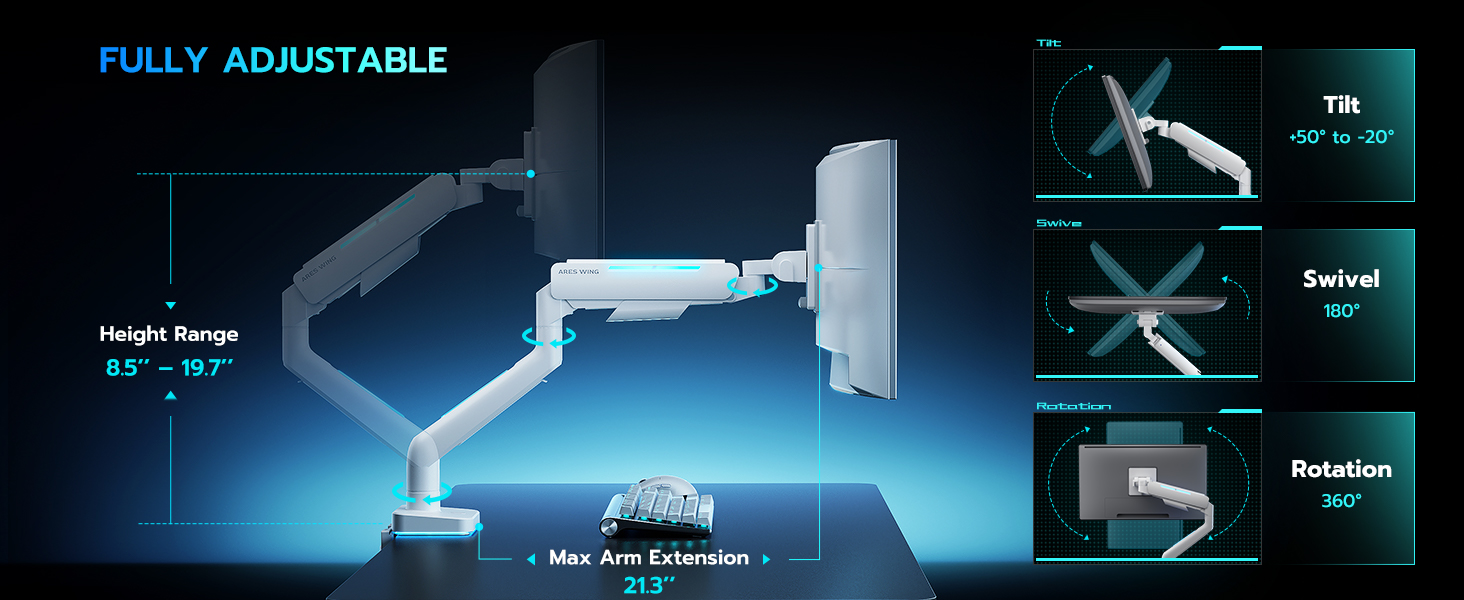
Figure 6: Tilting Ultrawide Monitors
2. RGB Lighting Control
The monitor arm features integrated RGB lighting with 20 dynamic lighting effects. To control the lighting:
- Connect the USB cable from the monitor arm to a USB port on your computer or a USB power adapter.
- Locate the light control button on the base of the monitor arm.
- Press and hold the button for approximately 2-3 seconds to turn the RGB lighting ON or OFF.
- Press briefly to cycle through the 20 different lighting modes (Color Cycle, Chasing, Static, Wave, etc.).
- The lighting will remember the last mode used when turned back on.

Figure 7: RGB Lighting Control
3. Cable Management
Utilize the integrated cable management channels on the arm to route your monitor and power cables. This helps maintain a clean and organized workspace.
Maintenance
- Cleaning: Wipe the monitor arm with a soft, damp cloth. Avoid abrasive cleaners or solvents that could damage the finish.
- Periodic Checks: Periodically check all screws and connections to ensure they remain tight and secure. Re-tighten if necessary.
- Gas Spring: The internal gas spring is designed for long-term durability (fatigue tested 20,000+ times). No specific maintenance is required for the gas spring itself, but ensure its tension is correctly set for your monitor's weight.
Troubleshooting
| Problem | Possible Cause | Solution |
|---|---|---|
| Monitor arm sags or won't stay up. | Gas spring tension is too low for monitor weight. | Increase gas spring tension by turning the adjustment screw counter-clockwise. Refer to "Adjust Gas Spring Tension" section. |
| Monitor arm is too stiff or won't move down. | Gas spring tension is too high for monitor weight. | Decrease gas spring tension by turning the adjustment screw clockwise. Refer to "Adjust Gas Spring Tension" section. |
| RGB lighting does not turn on. | USB cable not connected or button not pressed correctly. | Ensure USB cable is securely connected. Press and hold the light control button for 2-3 seconds to activate. |
| Monitor wobbles or is unstable. | Mount not securely fastened to desk or VESA plate not tight. | Check desk clamp/grommet mount for tightness. Ensure VESA plate screws are securely fastened to the monitor and the plate is properly seated on the arm. |
| Monitor cannot tilt smoothly. | Tilt mechanism screw is too tight. | Loosen the tilt adjustment screw slightly until smooth tilting is achieved. Refer to Figure 6. |
Specifications
| Model Number | GDT1003LWH |
| Material | Aluminum, Iron |
| VESA Compatibility | 75x75mm, 100x100mm |
| Screen Size Compatibility | 17 - 49 inches (flat and curved monitors) |
| Weight Capacity | 4.4 - 44 lbs (2 - 20 kg) |
| Height Adjustment Range | 8.5 - 19.7 inches |
| Tilt Angle | +50° / -20° |
| Swivel Angle | ±90° |
| Rotation | 360° |
| Desktop Thickness (C-Clamp) | 0.39 - 3.34 inches (10 - 85 mm) |
| Desktop Thickness (Grommet) | 0.39 - 1.8 inches (10 - 45 mm) |
| RGB Lighting | 20 dynamic lighting effects |
Warranty and Support
ARES WING provides a 3-year Manufacturer Warranty for this product. For any questions, technical assistance, or warranty claims, please contact ARES WING customer support through the retailer where you purchased the product or visit the official ARES WING website for contact information.
For more information and support, you may visit the ARES WING Store on Amazon.


