
DANOPLUS LS163
DANOPLUS Tint Meter User Manual
Model: LS163
1. Introduction
The DANOPLUS Portable Window Tint Meter is a versatile and accurate device designed for measuring the Visible Light (VL), Ultraviolet (UV), and Infrared (IR) transmittance and rejection of various materials. Its automatic rotating screen and multiple display interfaces make it an essential tool for professionals and enthusiasts alike. This manual provides detailed instructions for the proper setup, operation, and maintenance of your tint meter.

Figure 1: DANOPLUS Portable Window Tint Meter.
2. Setup
2.1 Battery Installation
The tint meter requires 4 AAA batteries for operation. These are included with your purchase. To install the batteries:
- Locate the battery compartment on the back of the device.
- Open the battery cover.
- Insert 4 AAA batteries, ensuring correct polarity (+/-).
- Close the battery cover securely.
2.2 Initial Calibration
The DANOPLUS Tint Meter features automatic calibration upon power-on. No manual calibration is required for initial use. Ensure the measurement slot is empty when powering on the device for accurate self-calibration.
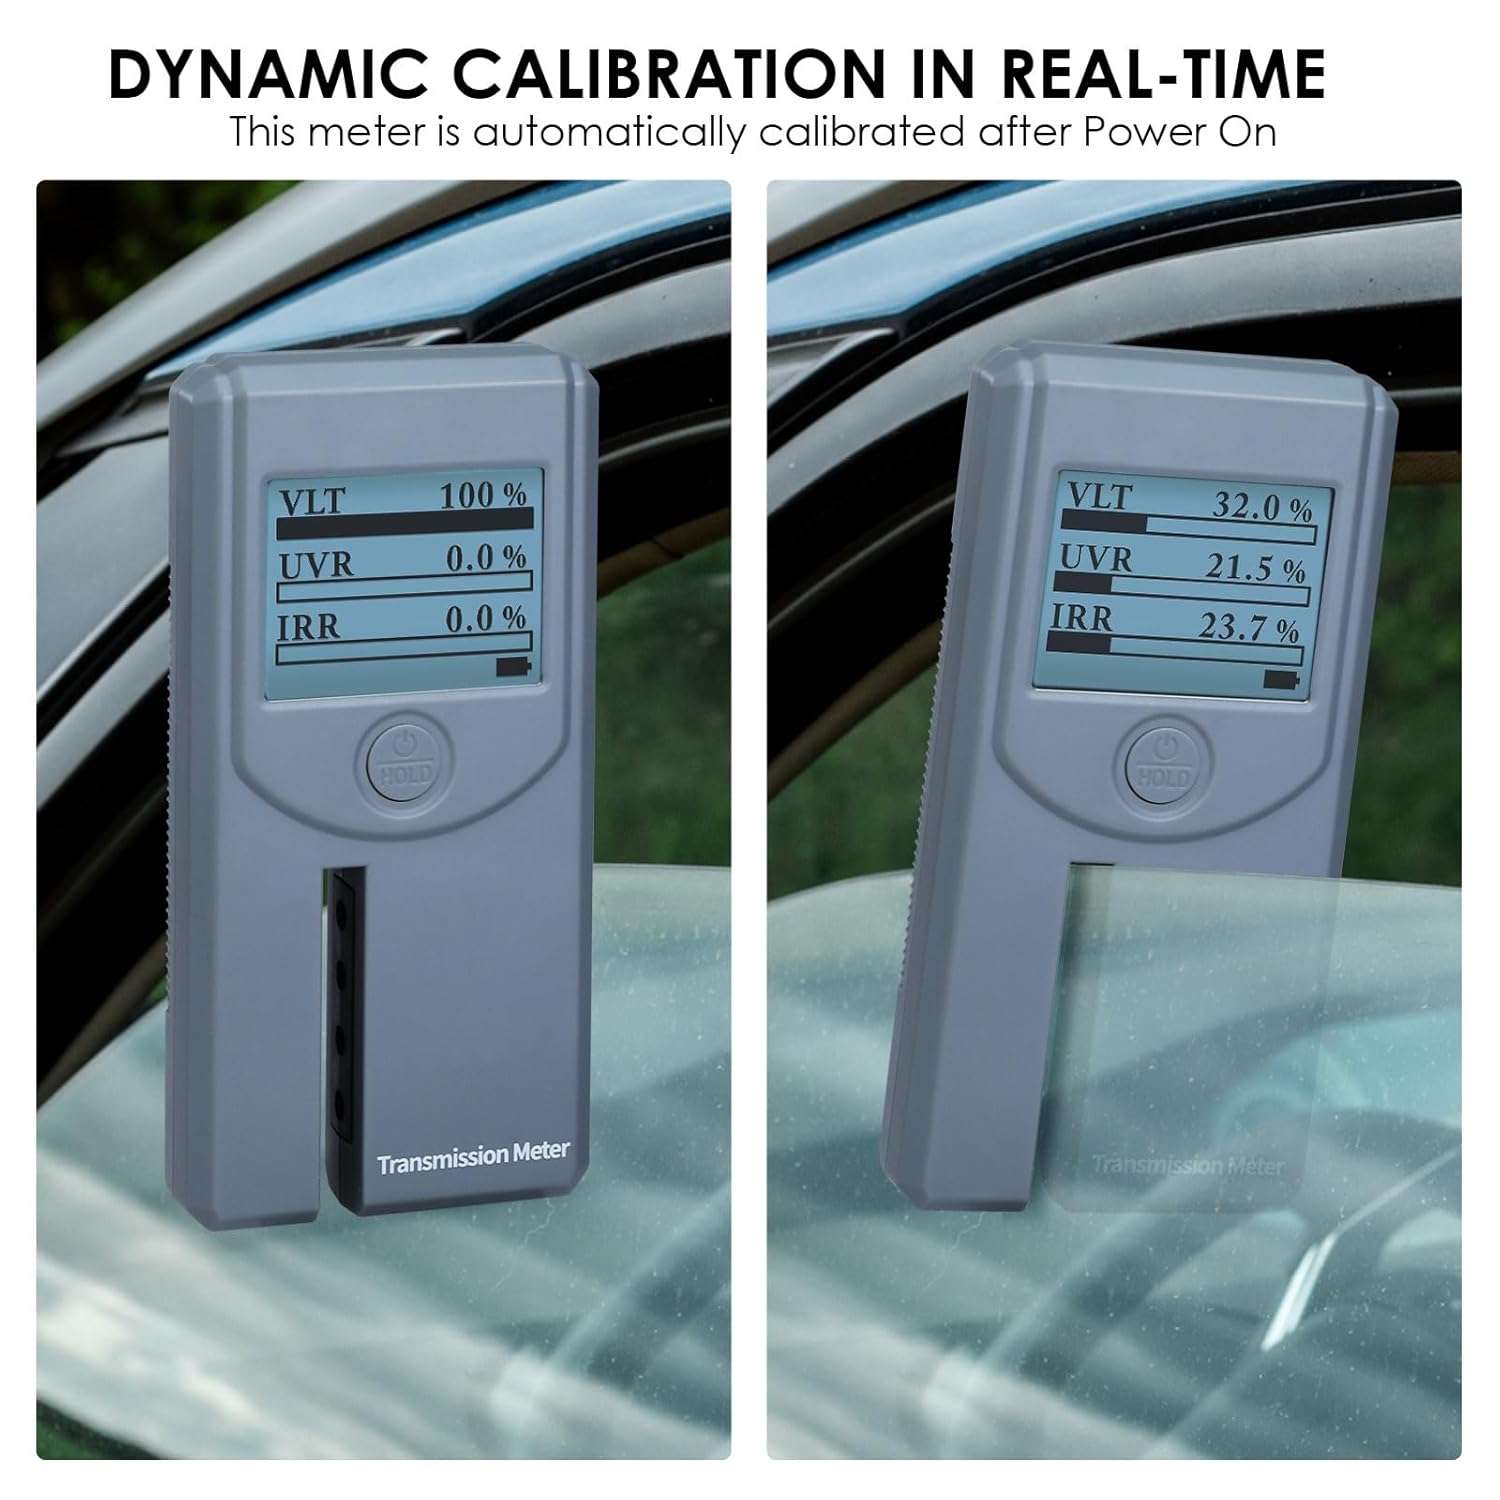
Figure 2: Dynamic calibration in real-time. The meter automatically calibrates after power on, showing 100% readings for an empty slot.
3. Operating Instructions
3.1 Power On/Off
Press the "HOLD" button (power button) to turn the device on. Press and hold the "HOLD" button to turn it off.
3.2 Measurement Process
To measure the transmittance and rejection of a material:
- Ensure the device is powered on and has completed its automatic calibration (displaying 100% for all values when empty).
- Carefully insert the window film, glass, or other material into the measurement slot. The slot is 6mm (0.24 inches) wide.
- The device will instantly display the VLT (Visible Light Transmittance), UVR (UV Rejection), and IRR (IR Rejection) values.

Figure 3: Measuring film glass with the tint meter. The test slot is 6mm wide.
3.3 Automatic Rotating Screen
The display screen automatically rotates to ensure readings are always in an upright position, regardless of the device's orientation during measurement. This enhances convenience and readability.

Figure 4: The screen automatically rotates for easy reading.
3.4 Display Interfaces
The meter offers three selectable display modes. Press the "HOLD" button briefly to cycle through them:
- UVR/IRR/VLT: Displays Ultraviolet Rejection, Infrared Rejection, and Visible Light Transmittance. This is the default mode.
- UVT/IRT/VLT: Displays Ultraviolet Transmittance, Infrared Transmittance, and Visible Light Transmittance.
- VLT: Displays only Visible Light Transmittance.

Figure 5: Three selectable display interfaces.
3.5 Data Hold Function
Press and hold the "HOLD" button during measurement to freeze the current readings on the screen. Press it again to release the hold and resume live measurement.
4. Features Overview
- Automatically Rotating Screen: Ensures convenient reading from any angle.
- High Accuracy: Measures Visible Light Wavelength from 380 to 760nm, IR Peak Wavelength: 940nm, UV Peak Wavelength: 365nm with +/-2% accuracy and 0.1% resolution.
- Multiple Display Interfaces: Choose between UVR/IRR/VLT, UVT/IRT/VLT, and VLT only modes.
- Automatic Calibration: Self-calibrates upon power-on for immediate and accurate measurements.
- Backlight Design: LCD screen features a backlight for clear visibility in various lighting conditions.
- Low Power Alarm: Indicates when batteries are running low, prompting replacement.
- Data Hold Function: Allows users to freeze the displayed measurement for easier recording.

Figure 6: Key features including backlight, low power indicator, and hold function.

Figure 7: The meter's backlight feature and low power indicator.
5. Specifications
| Parameter | Value |
|---|---|
| Display | 128 x 128 Dot matrix LCD |
| UV Peak Wavelength | 365nm |
| IR Peak Wavelength | 940nm |
| Visible Light Wavelength | 380-760nm (conforms to CIE photopic vision function standard) |
| Accuracy | ±2% (Colorless and transparent material) |
| Resolution | 0.1% |
| Power Supply | 4 x AAA alkaline battery (included) |
| Product Dimensions | 5.7 x 2.9 x 0.9 inches (14.6 x 7.3 x 2.4 cm) |
| Weight | 8.96 ounces (approx. 254 grams) |

Figure 8: Product dimensions.
6. Maintenance
To ensure the longevity and accurate performance of your DANOPLUS Tint Meter, follow these maintenance guidelines:
- Cleaning: Use a soft, dry cloth to clean the device. Do not use abrasive cleaners or solvents, as they may damage the screen or casing.
- Storage: Store the meter in a cool, dry place, away from direct sunlight and extreme temperatures. When not in use for extended periods, it is recommended to remove the batteries to prevent leakage.
- Handling: Handle the device with care. Avoid dropping it or subjecting it to strong impacts, which could affect its internal components and calibration.
- Measurement Slot: Keep the measurement slot free of dust, debris, or any foreign objects that could interfere with accurate readings.
7. Troubleshooting
If you encounter issues with your DANOPLUS Tint Meter, please refer to the following common troubleshooting steps:
- Device does not power on:
- Check if the batteries are installed correctly with the correct polarity.
- Replace the batteries with new ones if they are depleted.
- Inaccurate readings:
- Ensure the measurement slot is clean and free of obstructions.
- Verify that the device self-calibrates to 100% when the slot is empty. If not, power cycle the device.
- Ensure the material being measured is flat and fully inserted into the slot.
- Screen not rotating:
- Ensure the device is powered on.
- If the issue persists, try restarting the device.
- Low Power Alarm constantly on:
- Replace all 4 AAA batteries with fresh ones.
If the problem persists after attempting these steps, please contact DANOPLUS customer support for further assistance.
8. What's in the Box
Upon opening your DANOPLUS Tint Meter package, you should find the following items:
- Tint Meter x 1pcs
- AAA battery x 4pcs
- Carrying bag x 1pcs
- Manual x 1pcs (This document)
9. Warranty and Support
For information regarding product warranty, returns, or technical support, please refer to the official DANOPLUS website or contact their customer service directly. Keep your purchase receipt as proof of purchase for any warranty claims.
DANOPLUS Customer Support: Refer to the contact information provided on the product packaging or the official DANOPLUS website.
10. Product Video
Video: An overview of the DANOPLUS Portable Tint Meter, demonstrating its features and applications, including its automatic screen rotation and various display modes. This video provides a visual guide to the product's functionality.
Ask a question about this manual
Ask about setup, troubleshooting, compatibility, parts, safety, or missing instructions. Manuals+ will review the question and use this page’s manual context to help answer it.