
MOES WM-105-M-MS
Contents
MOES WiFi Smart Relay Dimmable 1 Gang User Manual
Model: WM-105-M-MS
1. Introduction
This manual provides detailed instructions for the installation, setup, and operation of the MOES WiFi Smart Relay Dimmable 1 Gang module (Model WM-105-M-MS). This device allows you to convert traditional lighting into smart, dimmable lighting controllable via Wi-Fi, voice commands, or the MOES/Tuya Smart Life application.

Image 1.1: MOES WiFi Smart Relay Dimmable 1 Gang module and its retail packaging.
The MOES Smart Dimmer Module is designed to integrate seamlessly with your existing electrical system, offering enhanced control over your lighting. It supports 2.4GHz Wi-Fi connectivity and is compatible with popular voice assistants like Google Assistant and Amazon Alexa.
2. Safety Information
WARNING: Electrical installation should only be performed by a qualified electrician or a person with a thorough understanding of electrical systems. Always turn off power at the circuit breaker before installation to prevent electric shock.
- Ensure the power supply is disconnected before any installation or maintenance.
- Do not exceed the maximum load rating of 10 Amps or 150 Watts for this device.
- This device requires a neutral wire for proper operation.
- Operate within the specified voltage range of 90V-250V AC 50/60Hz.
- Avoid installing in environments with high humidity or extreme temperatures (above 40°C).
- A metal junction box may impact Wi-Fi signals. Consider placement in a room with good Wi-Fi coverage.
3. Product Overview
3.1 Features
- Universal Smart Switch Solution: Converts traditional switches into smart, dimmable controls.
- Dimmable Control: Adjust brightness from 1% to 100% without an additional dimmer switch.
- Wireless Control: Remote access, voice control, and timer functions via MOES or Tuya APP.
- Compact Design: Small size (1.57 x 1.57 x 0.71 inches) for easy integration into standard switch boxes.
- Voice Assistant Compatibility: Works with Google Assistant and Amazon Alexa.
- Multi-Control Association: Allows control of the same light from multiple physical switches.
- Timer Function: Supports countdown, schedule, circulate, random, and inching modes.
3.2 Package Contents
- MOES WiFi Smart Relay Dimmable 1 Gang Module (WM-105-M-MS)
- Screws
- Nuts
- Installation Manual
3.3 Specifications
| Specification | Value |
|---|---|
| Model Number | WM-105-M-MS |
| Brand | MOES |
| Operation Mode | Automatic |
| Current Rating | 10 Amps |
| Wattage | 75 Watts (Max Power: 150W stated on product image, please refer to product label for exact rating) |
| Voltage | 90V-250V AC 50/60Hz |
| Control Method | App, Remote, Voice |
| Connectivity | 2.4GHz Wi-Fi |
| Dimensions | 40mm x 40mm x 18mm (1.57 x 1.57 x 0.71 inches) |
| Upper Temperature Rating | 40 Degrees Celsius |
| Contact Material | Tungsten |
| Mounting Type | Wall Mount (fits in switch box or DIN rail) |
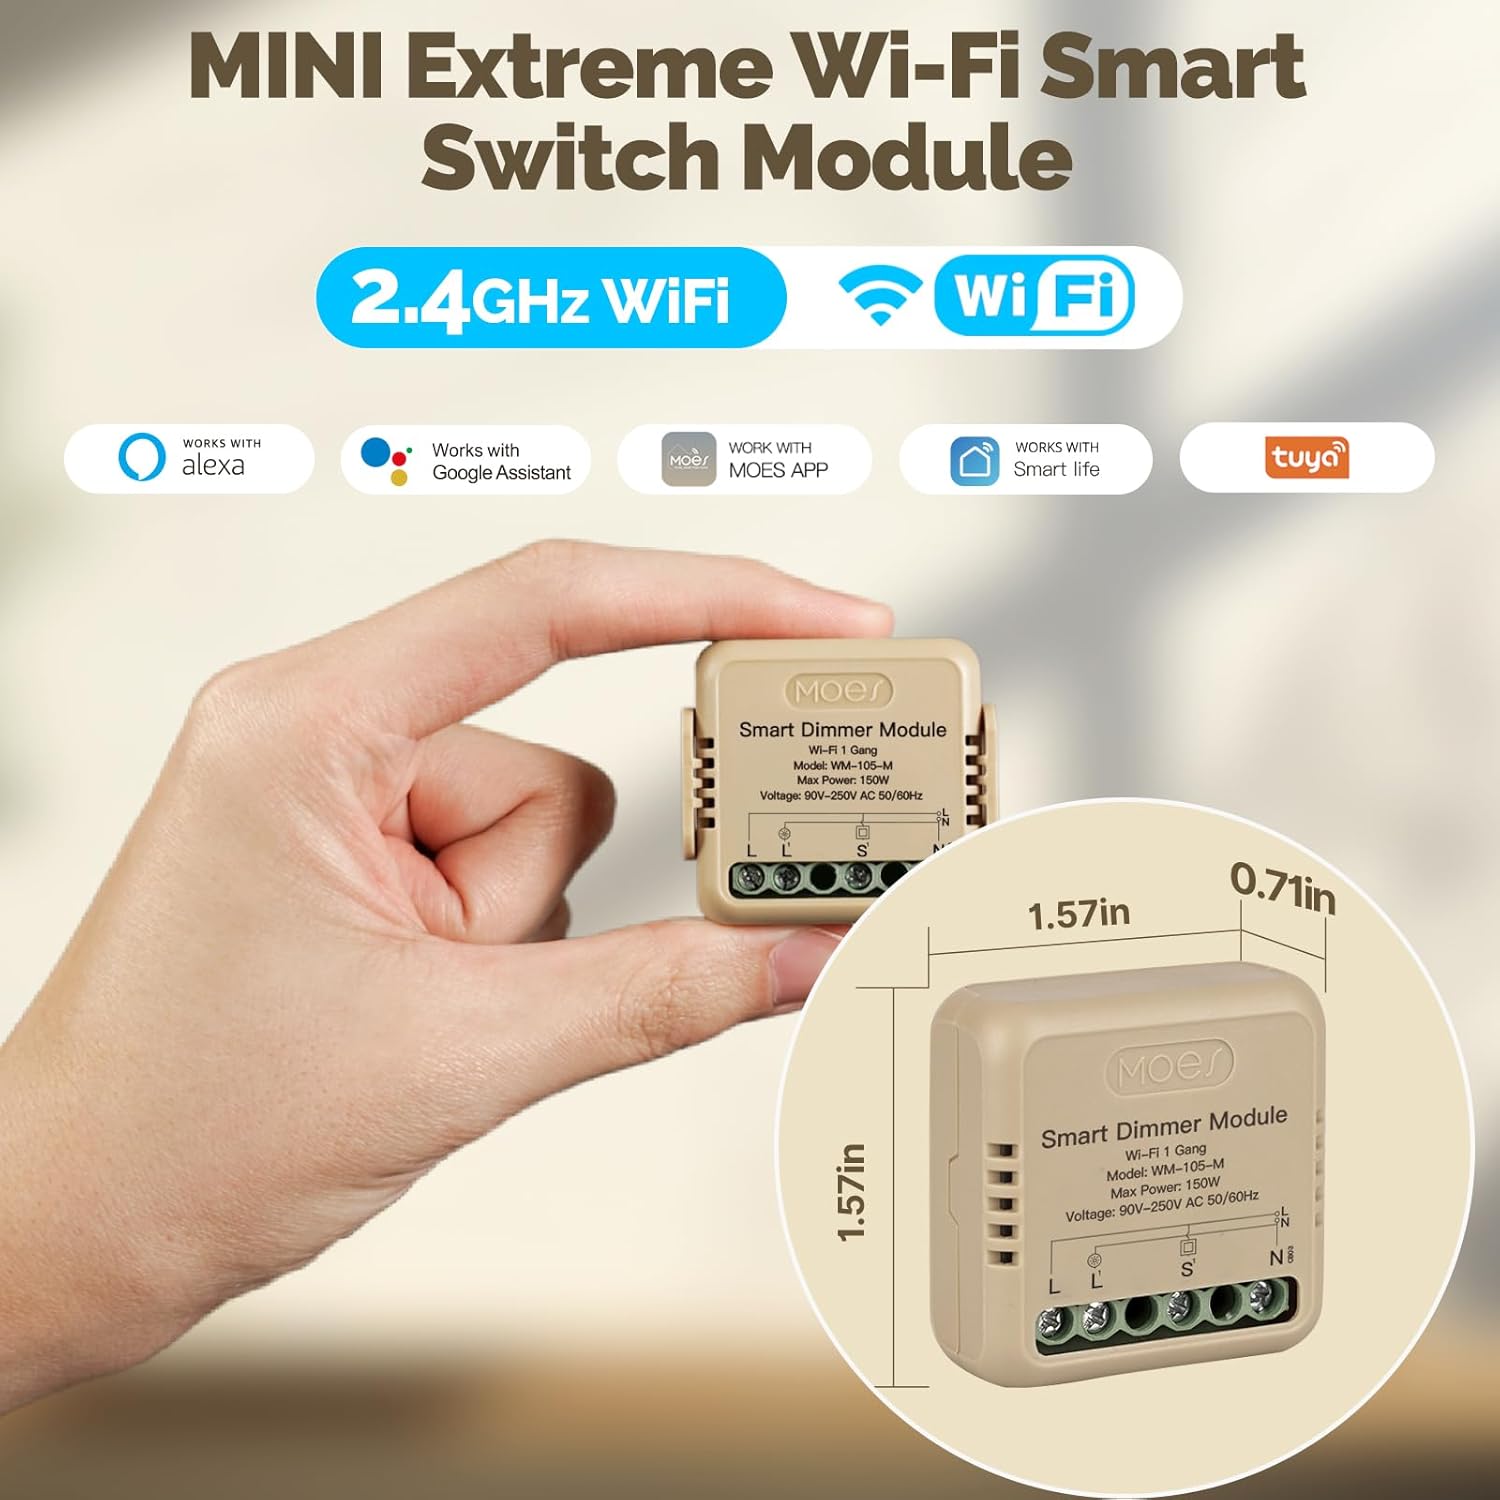
Image 3.1: Physical dimensions of the MOES Smart Dimmer Module.
4. Installation
Before proceeding with installation, ensure you have read and understood the safety information in Section 2.
4.1 Compatibility
This smart dimmer module is specifically designed for use with Rocker Switches and Self-Reset Switches. It is not compatible with Glass Panel Touch Switches.

Image 4.1: Illustration of compatible (rocker, self-reset) and incompatible (glass touch) switch types.
4.2 Wiring Diagram
The module requires Live (L), Neutral (N), Switch (S), and Load (L1) connections. Refer to the diagram below for correct wiring. If you are unsure, consult a qualified electrician.
Image 4.2: Close-up of the MOES Smart Dimmer Module showing L, S, N, and L1 terminals for wiring.
Wiring Steps:
- Turn off Power: Locate the circuit breaker controlling the light switch and turn it OFF. Verify power is off using a voltage tester.
- Identify Wires: In your switch box, identify the Live (L), Neutral (N), Switch (S), and Load (L1) wires. A neutral wire is required.
- Connect Wires: Connect the wires from your electrical system to the corresponding terminals on the MOES module:
- Connect the Live wire from the power supply to the 'L' terminal on the module.
- Connect the Neutral wire from the power supply to the 'N' terminal on the module.
- Connect the wire going to your light fixture (Load) to the 'L1' terminal on the module.
- Connect the wire from your physical wall switch to the 'S' terminal on the module.
- Secure Connections: Ensure all wire connections are tight and secure.
4.3 Physical Installation
The compact design allows for installation in various standard switch boxes or on a DIN rail.

Image 4.3: Two primary installation methods: inside a hidden switch box or mounted on a DIN rail.
- In-Wall Switch Box: After wiring, carefully place the module into the switch box behind your existing wall switch. Ensure there is enough space and no wires are pinched.
- DIN Rail Mounting: If preferred, the module can be mounted on a standard DIN rail using the provided adapter (if included, or purchased separately).
- Restore Power: Once the module is securely installed and all connections are checked, turn the power back ON at the circuit breaker.
5. Setup and Configuration
5.1 App Download and Registration
- Download the MOES App or Tuya Smart Life App from the Apple App Store or Google Play Store.
- Register for a new account or log in with an existing one.
5.2 Pairing the Device
- Ensure your smartphone is connected to a 2.4GHz Wi-Fi network.
- Open the MOES/Tuya Smart Life App.
- Tap the '+' icon in the top right corner to add a device.
- Select 'Electrical' > 'Switch (Wi-Fi)' or 'Dimmer (Wi-Fi)'.
- Follow the in-app instructions to put the device into pairing mode. This usually involves turning the connected light ON/OFF several times until it blinks rapidly.
- Confirm the indicator light is blinking rapidly in the app.
- Enter your Wi-Fi network password and proceed. The app will search for and connect to the device.
- Once connected, you can rename the device and assign it to a room.
5.3 Voice Control Integration
The MOES Smart Dimmer Module is compatible with Amazon Alexa and Google Assistant.

Image 5.1: Example of hands-free voice control using Amazon Alexa or Google Assistant.
- For Amazon Alexa:
a. Open the Alexa App.
b. Go to 'Skills & Games' and search for 'Smart Life' or 'MOES'.
c. Enable the skill and link your MOES/Tuya Smart Life account.
d. Discover devices. - For Google Assistant:
a. Open the Google Home App.
b. Tap '+' > 'Set up device' > 'Works with Google'.
c. Search for 'Smart Life' or 'MOES'.
d. Link your MOES/Tuya Smart Life account.
You can now use voice commands such as: "Alexa, turn on the living room light" or "Hey Google, dim the bedroom light to 50%."
6. Operating Instructions
6.1 Manual Control
Your existing physical wall switch will continue to function. For rocker switches, a simple press will toggle the light ON/OFF. For self-reset switches, a short press will toggle ON/OFF, and a long press will adjust the dimming level.

Image 6.1: Demonstrates dimming functionality using both rocker and self-reset switches.
6.2 App Control
The MOES/Tuya Smart Life App provides comprehensive control over your smart dimmer module.

Image 6.2: Remote control of the smart dimmer module via the mobile application.
- Remote ON/OFF: Toggle the light on or off from anywhere using the app.
- Dimming: Adjust the brightness level from 1% to 100% using a slider in the app.
- Timer Function: Set schedules, countdowns, circulating timers, random timers, or inching timers for automated control.
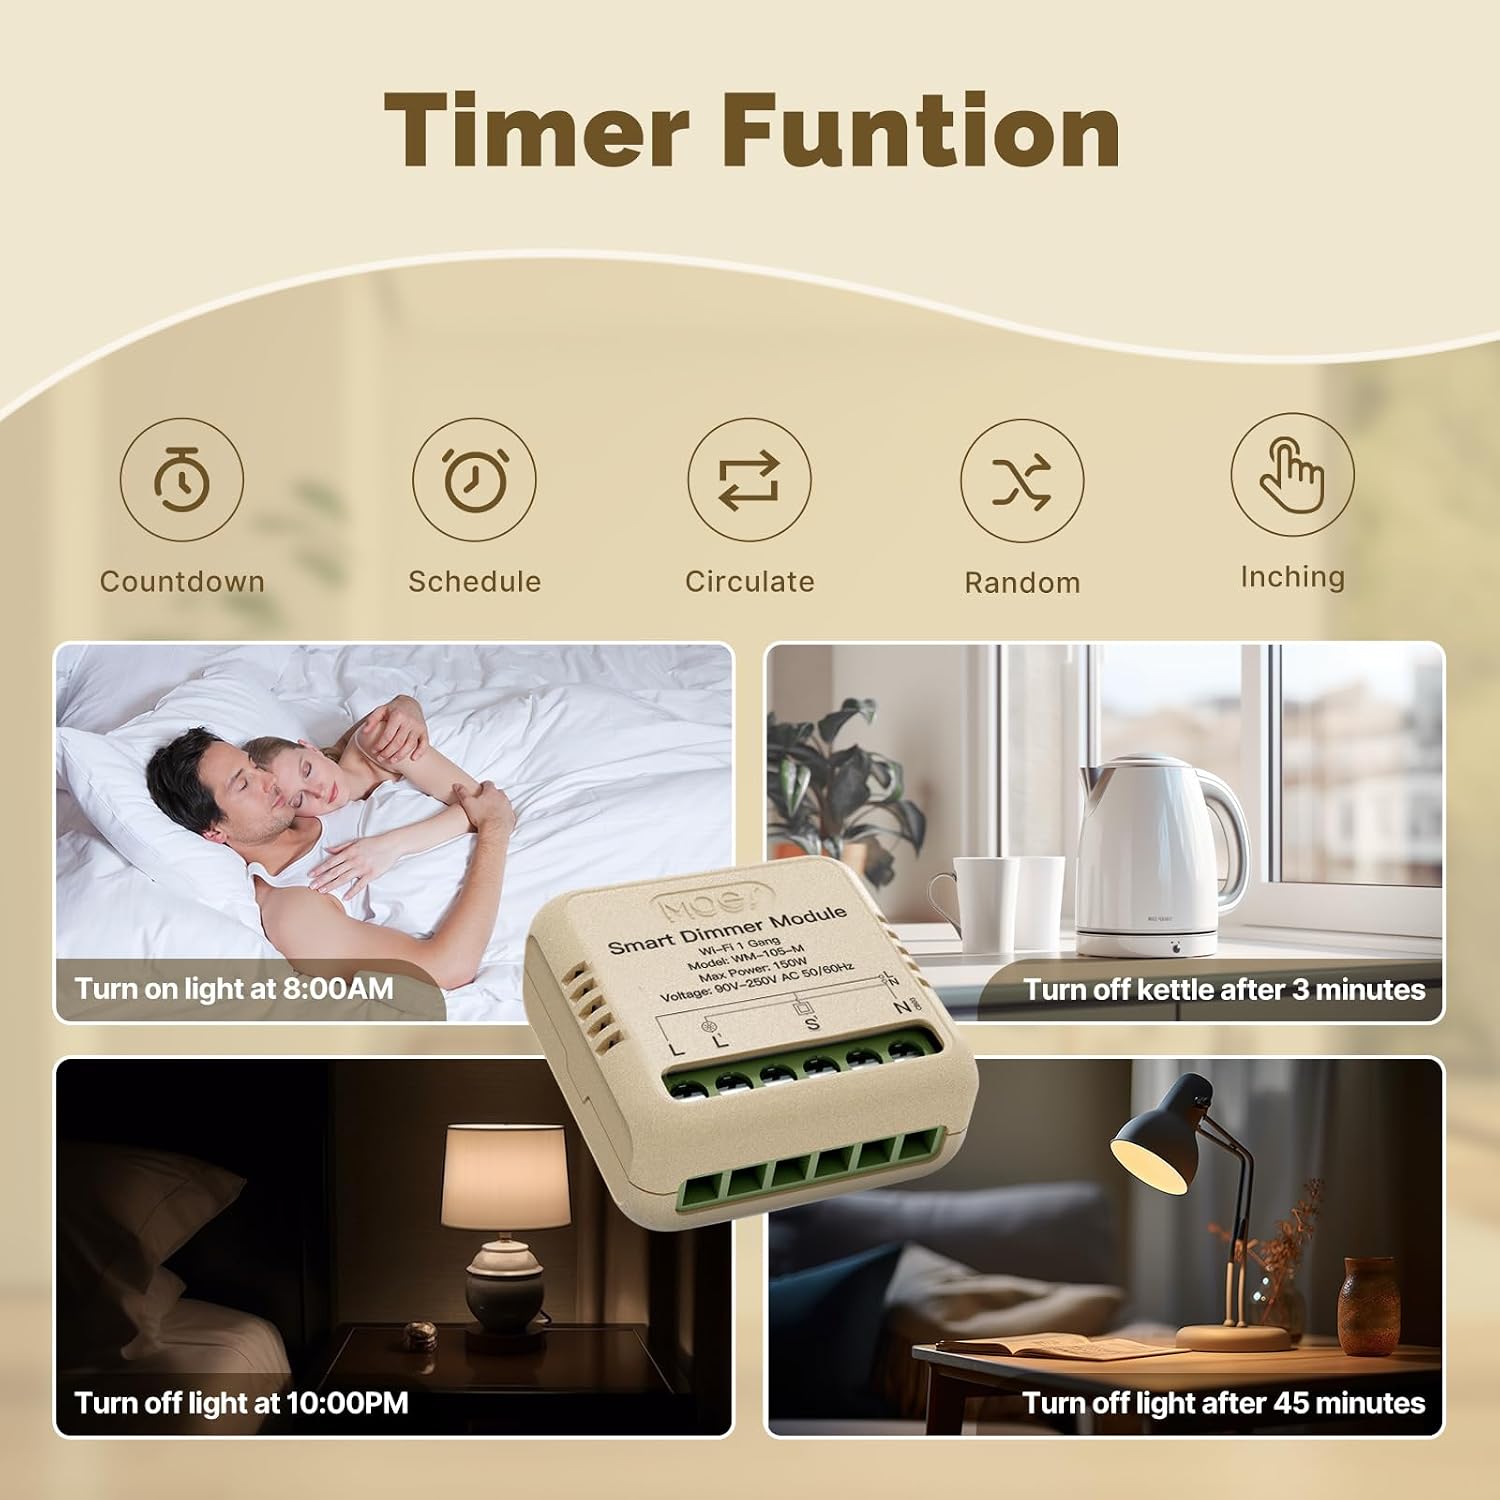
Image 6.3: Examples of timer functions: Countdown, Schedule, Circulate, Random, and Inching.
- Multi-Control Association: Configure multiple physical switches to control the same light through the app.

Image 6.4: Illustration of multi-control association, enabling control of a single light from multiple points.
- Power-on Status Setting: Configure the module to remember the last status, turn ON, or turn OFF after a power outage.

Image 6.5: App settings for defining the power-on state of the module.
7. Maintenance
The MOES Smart Dimmer Module is designed for minimal maintenance. Follow these guidelines to ensure optimal performance:
- Cleaning: Ensure the module is powered off before cleaning. Use a dry, soft cloth to wipe the exterior. Do not use liquid cleaners or sprays.
- Connection Checks: Periodically (e.g., annually) check the wiring connections to ensure they remain secure. Always turn off power at the circuit breaker before inspecting connections.
- Firmware Updates: Keep the MOES/Tuya Smart Life App updated to receive the latest firmware for your device, which may include performance improvements and security patches.
8. Troubleshooting
| Problem | Possible Cause | Solution |
|---|---|---|
| Device not pairing/connecting to Wi-Fi | Incorrect Wi-Fi band (only 2.4GHz supported), weak Wi-Fi signal, incorrect pairing mode, incorrect Wi-Fi password. | Ensure your router is broadcasting a 2.4GHz network. Move the device closer to the router. Re-enter pairing mode (usually by cycling power). Double-check Wi-Fi password. Avoid metal junction boxes if possible. |
| Light not dimming or flickering | Incompatible light bulb (non-dimmable LED), incorrect switch type (not rocker/self-reset), module malfunction. | Ensure you are using dimmable LED bulbs. Verify your physical switch is a rocker or self-reset type. If the issue persists, contact support. |
| Physical switch not working | Incorrect wiring of the 'S' terminal, switch malfunction. | Check the wiring to the 'S' terminal as per the diagram. Ensure the physical switch itself is functional. |
| Voice control not responding | Skill not enabled, account not linked, device name not recognized. | Verify the 'Smart Life' or 'MOES' skill is enabled and your account is linked in the Alexa/Google Home app. Try renaming the device to something simpler. |
| Device frequently goes offline | Weak Wi-Fi signal, Wi-Fi interference, router issues. | Improve Wi-Fi signal strength near the device. Reduce interference from other 2.4GHz devices. Restart your Wi-Fi router. |
9. Warranty and Support
MOES products are designed for reliability and performance. For specific warranty details, please refer to the warranty card included with your product or visit the official MOES website.
If you encounter any issues not covered in this manual or require further assistance, please contact MOES customer support through their official website or the MOES/Tuya Smart Life application.
Ask a question about this manual
Ask about setup, troubleshooting, compatibility, parts, safety, or missing instructions. Manuals+ will review the question and use this page’s manual context to help answer it.