
1. Introduction
This manual provides essential instructions for the safe and efficient operation, setup, and maintenance of your YOUSHENG V-i140sv Vacuum Pump. Please read this manual thoroughly before using the product to ensure proper function and to prevent damage or injury. Keep this manual for future reference.
2. Safety Instructions
- Electrical Safety: Ensure the power supply matches the rated voltage (220V~/50Hz) of the pump. Do not operate with wet hands or in damp conditions. Always disconnect power before performing maintenance or repairs.
- Ventilation: Operate the pump in a well-ventilated area to prevent heat buildup and ensure proper exhaust.
- Oil Handling: Vacuum pump oil can be irritating. Avoid skin and eye contact. In case of contact, wash thoroughly with soap and water. Dispose of used oil responsibly according to local regulations.
- Hot Surfaces: The pump motor and housing may become hot during operation. Avoid touching these surfaces to prevent burns.
- Stable Placement: Place the pump on a stable, level surface to prevent tipping during operation.
- Intended Use: This pump is designed for vacuum applications as specified. Do not use it for purposes other than its intended design.
3. Product Overview
The YOUSHENG V-i140sv is a high-performance vacuum pump designed for various applications, including automotive air conditioning and refrigeration systems. It features a two-stage rotating blade design for improved vacuum and pumping speed, an anti-oil back structure, and a gas ballast design.

Figure 3.1: Front view of the YOUSHENG V-i140sv Vacuum Pump, showcasing its compact design and included accessories such as hoses, adapters, and a vacuum gauge.

Figure 3.2: Side view of the vacuum pump highlighting the location of the main start-stop switch for easy power control.

Figure 3.3: Top view illustrating the oil filling port (oil hole) and the oil catcher, which must be installed and refueled before initial use.

Figure 3.4: Rear view of the pump, showing the start switch and the motor housing.
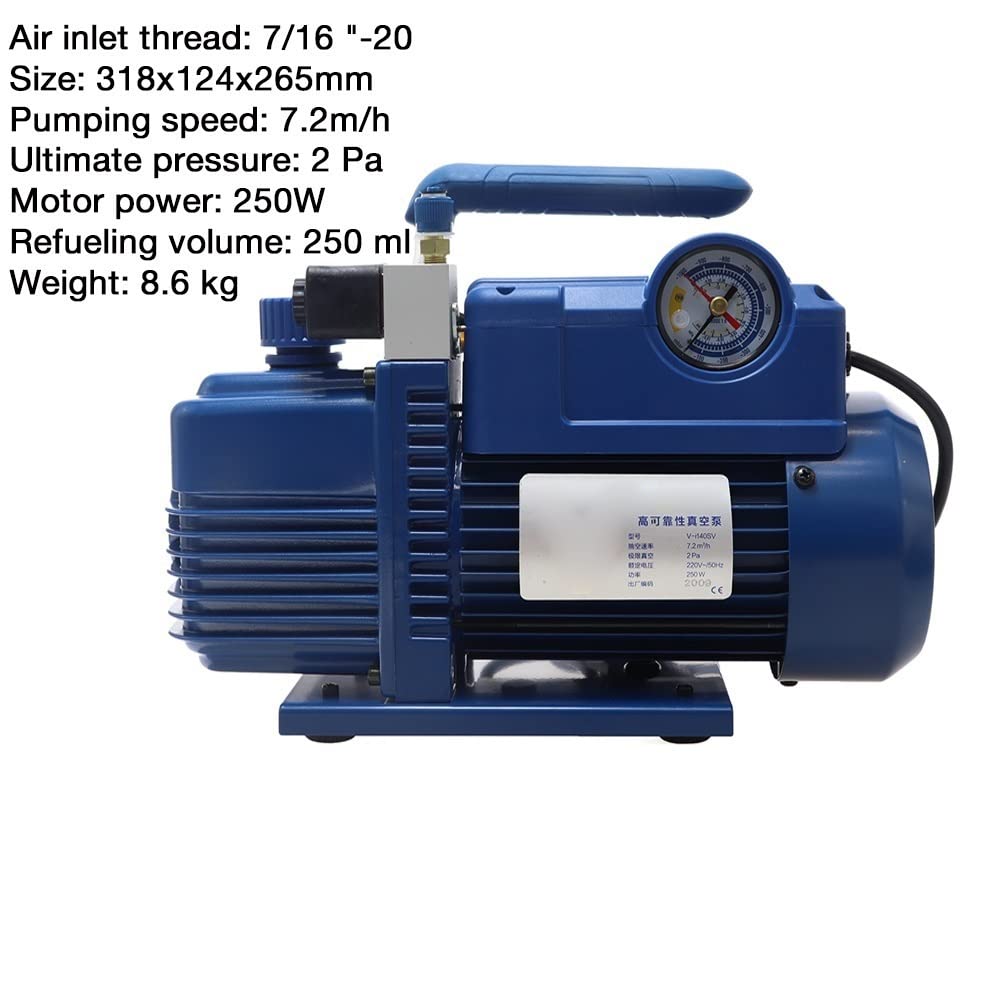
Figure 3.5: Side view displaying key specifications such as air inlet thread, dimensions, pumping speed, ultimate pressure, motor power, refueling volume, and weight.
4. Setup
- Unpacking: Carefully remove the vacuum pump and all accessories from the packaging. Inspect for any shipping damage.
- Placement: Position the pump on a firm, level, and stable surface in a well-ventilated area. Ensure adequate space around the pump for air circulation.
- Install Catcher: As indicated in Figure 3.3, ensure the oil catcher is properly installed.
- Fill with Oil: Before first use, or after an oil change, remove the oil hole cap (Figure 3.3) and fill the pump with appropriate vacuum pump oil. The oil level should be visible in the sight glass and reach the indicated fill line. The refueling volume is approximately 50ml (or 250ml as per some images, refer to specifications for exact volume).
- Connect Hoses: Connect the appropriate vacuum hose to the intake line (7/16" -20unf) of the pump and to the system you intend to evacuate. Ensure all connections are tight to prevent leaks.
- Power Connection: Connect the power cord to a grounded 220V~/50Hz electrical outlet.
5. Operation
- Pre-Operation Check: Verify that the oil level is correct and all connections are secure.
- Start the Pump: Flip the start-stop switch (Figure 3.2 and 3.4) to the "ON" position. The pump will begin to operate.
- Monitor Vacuum: Observe the vacuum gauge (if connected) to monitor the evacuation process.
- Gas Ballast (if applicable): If evacuating systems with high moisture content, consider opening the gas ballast valve to reduce condensation of water vapor within the pump.
- Anti-Oil Back Structure: The integrated anti-oil back structure (solenoid valve) prevents oil from flowing back into the system being evacuated when the pump is turned off or power is lost.
- Shut Down: Once the desired vacuum level is achieved, or the operation is complete, first close the valve to the system being evacuated, then turn off the pump by flipping the start-stop switch to the "OFF" position. Disconnect the power cord.
6. Maintenance
- Oil Change: Regularly check the oil level and clarity. Change the vacuum pump oil when it appears discolored, cloudy, or after extended use. Refer to the oil hole and catcher in Figure 3.3.
- Filter Cleaning/Replacement: The intake filter prevents foreign matter from entering the pump. Inspect and clean or replace the filter as needed to maintain optimal performance.
- General Cleaning: Keep the exterior of the pump clean and free of dust and debris to ensure proper cooling.
- Storage: When not in use for extended periods, drain the oil, cap all ports, and store the pump in a dry, clean environment.
7. Troubleshooting
| Problem | Possible Cause | Solution |
|---|---|---|
| Pump does not start | No power supply; Faulty switch; Motor issue | Check power connection and outlet; Ensure switch is ON; Contact support if motor is faulty. |
| Low vacuum or slow pumping | Leaking connections; Low or contaminated oil; Clogged intake filter; Worn pump components | Check all hose connections for leaks; Change oil; Clean/replace intake filter; Contact support for internal component issues. |
| Excessive noise or vibration | Low oil level; Pump not on a stable surface; Internal mechanical issue | Check and add oil; Place pump on a stable, level surface; Contact support for internal issues. |
| Oil mist from exhaust | Overfilled oil; Exhaust filter saturated; High moisture content in system | Check oil level and drain if overfilled; Replace exhaust filter; Use gas ballast if applicable. |
8. Specifications
| Model: | V-i140SV |
| Rated Voltage: | 220V~/50Hz |
| Pumping Speed: | 7.2 m³/h |
| Final Pressure: | 2 Pa |
| Motor Power: | 250W |
| Refueling Volume: | 50ml (Note: Some images suggest 250ml. Please verify with product label.) |
| Dimensions (L x W x H): | 318 x 124 x 234 mm (approx. 12.5 x 4.9 x 9.2 inches) |
| Weight: | 8.6 Kg (approx. 19 lbs) |
| Intake Line: | 7/16" -20unf |
9. Warranty and Support
For warranty information, technical support, or service inquiries, please contact the seller or manufacturer directly. Retain your proof of purchase for any warranty claims.
Manufacturer: YOUSHENG
Model Number: HGLYABMHM-220V