1. Introduction
Thank you for choosing the SOTOMO DA80 Smart Toilet. This manual provides essential information for the safe installation, operation, and maintenance of your new smart toilet. Please read these instructions thoroughly before installation and use, and retain them for future reference.
2. Safety Information
Always follow basic safety precautions to reduce the risk of fire, electric shock, and injury. Ensure all electrical connections comply with local codes. Do not immerse the product in water. Disconnect power before servicing. This product is designed for indoor use only.
3. Package Contents
Verify that all components are present before beginning installation.
- Smart Toilet (1 set)
- Remote controller set (1 set)
- Two AAA Batteries
- Installation Book & User Manual
- T-valve (1 pc)
- Water supply (1 pc)
- Battery box assembly (1 set)
- Mounting accessory kit (2 pcs)
- Sealing Flange
- Wax Ring (1 pcs)
- Mounting Template
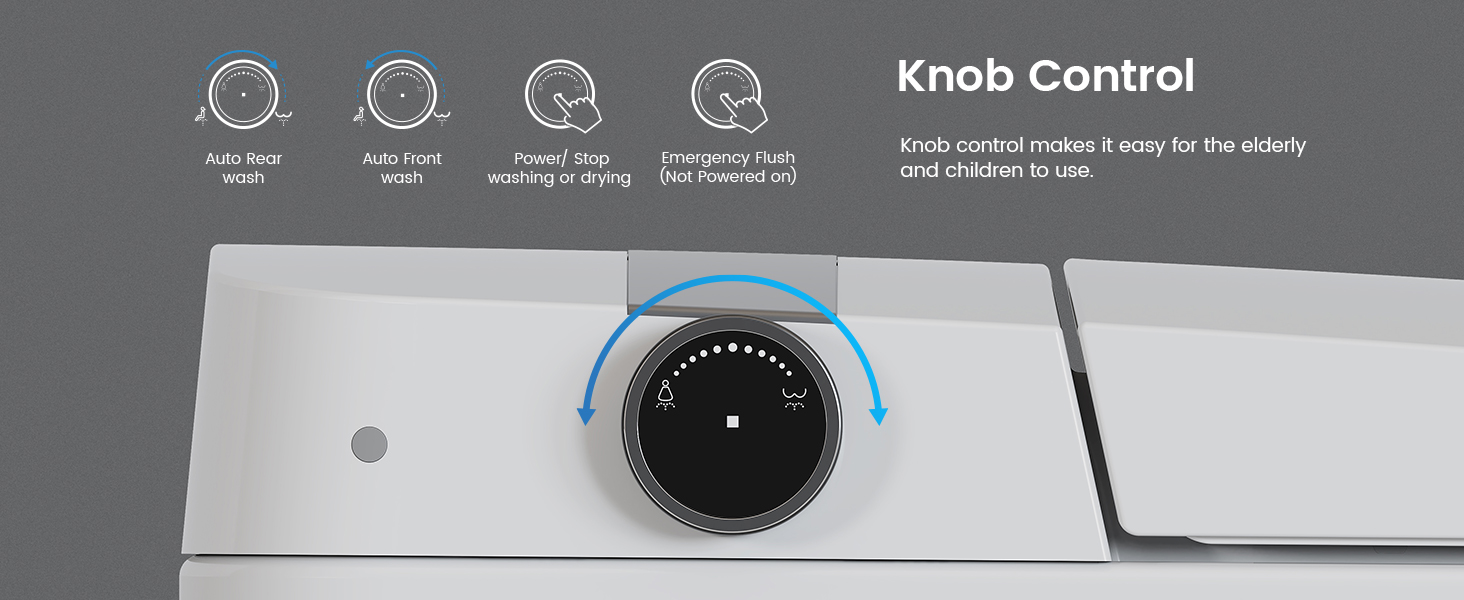
Figure 3.1: Included components for the SOTOMO DA80 Smart Toilet.
4. Setup and Installation
The SOTOMO DA80 smart toilet is designed for a standard 12-inch rough-in and comes mostly pre-assembled. Follow these steps for a smooth installation. It is recommended to watch the installation video for visual guidance.
4.1 Preparation
- Cut off any excess sewage pipes to ensure a flush surface.
- Grind the edges of the sewage outlet for a smooth finish.
- Clean the ground thoroughly around the installation area.
- Check the water and power supply positions to ensure they are accessible and correctly located.
4.2 Flange Plate Installation
- Place the flange plate into the sewage outlet.
- Mark the screw positions of the flange plate on the floor.
- Drill screw holes at the marked points.
- Assemble the mounting block together with the flange plate, then place it on the sewage pipe.
- Tighten the 4 screws to secure the flange plate.
4.3 Toilet Placement and Connections
- Stick the wax ring (sludge) on the sewage outlet at the ceramic bottom of the toilet.
- Carefully install the toilet onto the floor, aligning it with the flange plate.
- Insert screws and decorative hats to secure the toilet to the floor.
- Connect the T-valve to the angle valve and tighten the pipes securely.
- Secure the ceramic base to the floor using sealant around the perimeter. Wait 24 hours before using the toilet to ensure proper curing.
- Connect the power supply to a suitable electrical outlet.
Video 4.1: SOTOMO Smart Toilet Installation Guide. This video demonstrates the step-by-step process for installing the smart toilet, from preparing the sewage pipes to connecting the water and power supplies.
Video 4.2: SOTOMO Smart Toilet Installation Video. A detailed video guide showing the physical installation of the smart toilet.
5. Operating Instructions
The SOTOMO DA80 Smart Toilet offers a range of automatic and customizable features for enhanced comfort and hygiene.
5.1 Automatic Functions
- Auto Open/Close Lid: The lid automatically opens as you approach and closes when you leave.
- Auto Flush: The toilet flushes automatically after you leave.
- Pre-wet Function: Activates when seated to help maintain a cleaner bowl.
- Night Light: A soft white LED night light provides guidance in the dark.
- Auto Deodorization: Activates immediately upon use to provide a better air experience.

Figure 5.1: Overview of SOTOMO DA80 Smart Toilet functions.
5.2 Bidet Wash Modes
Customize your cleansing experience with various wash options:
- Rear Wash
- Front Wash
- Oscillating Wash
- Aerated Wash
- Hot/Cold Massage Mode
Adjust water temperature, pressure, and nozzle position using the remote control.
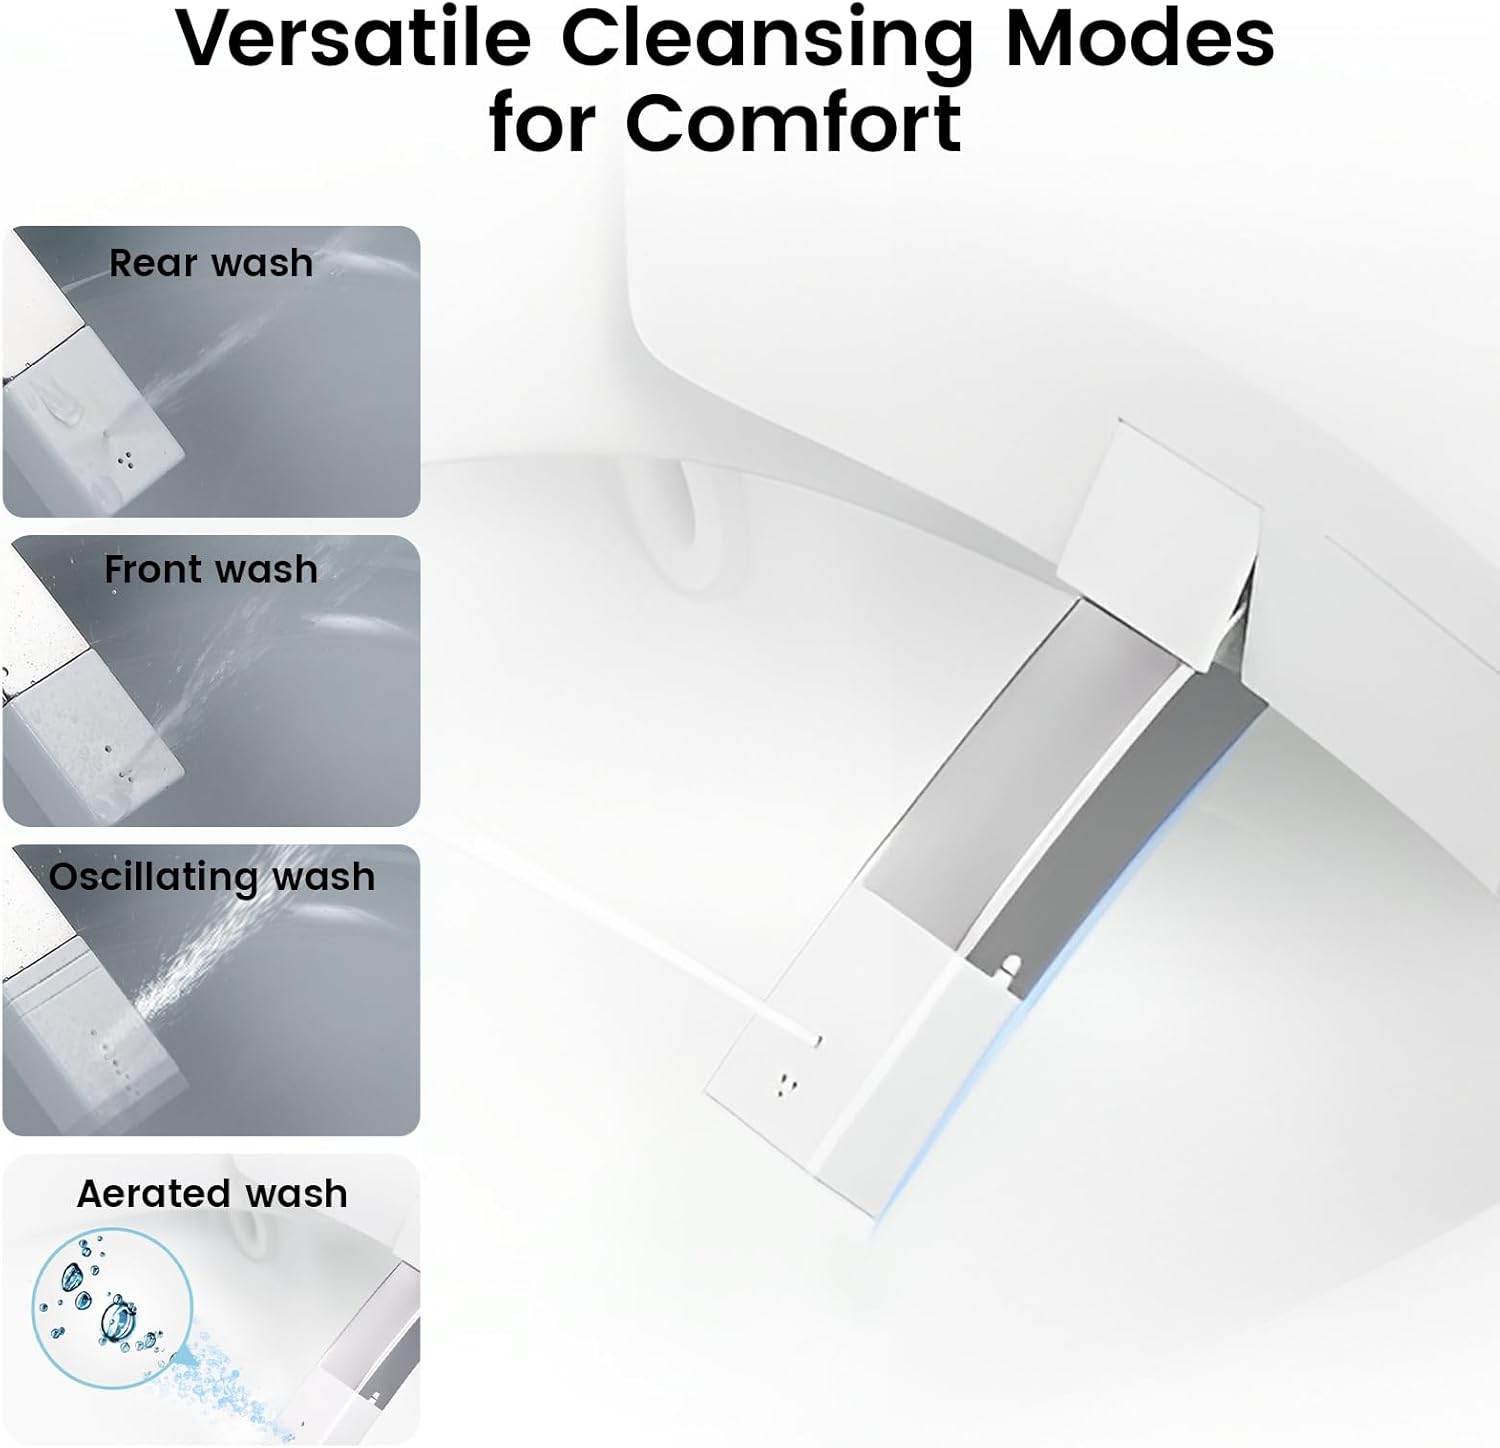
Figure 5.2: Versatile cleansing modes for personalized comfort.
5.3 Heated Seat and Warm Air Dryer
Enjoy customizable warmth with a heated seat and a warm air dryer. The heated seat offers 3-level temperature selection.

Figure 5.3: Adjustable heated seat for tailored comfort.
5.4 Flushing Options
- Automatic Flush: Flushes when you leave the toilet.
- Foot Kick Flush: A foot kick button allows you to flush without using your hands.
- Remote Control Flush: Use the remote to initiate a flush.
- Knob Control Flush: Rotate the knob for flushing.
- Emergency Flush: In case of a power outage, press the center knob to flush manually.

Figure 5.4: Emergency flush mechanism.
Video 5.1: DA80 Siphonic Smart Toilet Flush Test with Pump & Tank. This video demonstrates the powerful and consistent flushing performance of the DA80 smart toilet, even with various items.
Video 5.2: DA80 Smart Toilet Overview: Flush, Dryer & Warm Seat. An overview of the DA80's key features including flushing, warm air drying, and heated seat.
Video 5.3: One of the usage paths for the SOTOMO smart toilet. This video illustrates a typical user interaction with the smart toilet's automatic features.
6. Maintenance
Regular maintenance ensures the longevity and hygiene of your SOTOMO DA80 Smart Toilet.
6.1 Nozzle Cleaning and Sterilization
- Nozzle Self-Cleaning: The nozzle performs a self-clean before and after each use.
- UV Light Sterilization: The nozzle is sterilized with UV light after each use.
- Detachable Nozzle: The nozzle can be easily detached for manual cleaning.

Figure 6.1: Nozzle self-cleaning and UV sterilization.
Video 6.1: Hygienic SOTOMO Smart Toilet Nozzle System. This video highlights the self-cleaning and UV sterilization features of the nozzle for optimal hygiene.
7. Troubleshooting
If you encounter any issues with your SOTOMO DA80 Smart Toilet, please refer to the following general advice. For specific problems not listed here, or if issues persist, contact SOTOMO customer support.
- No Power: Check if the power cord is securely plugged in and if the circuit breaker has tripped.
- No Water: Ensure the water supply valve is fully open and there are no kinks in the water supply hose.
- Weak Flush: Verify that the water pressure is adequate (minimum 11.6 PSI). The built-in pump should assist in low-pressure situations.
- Lid Not Opening/Closing Automatically: Ensure the microwave sensor is not obstructed and is clean.
- Bidet Not Functioning: Check water pressure and ensure the nozzle is not clogged. Perform a nozzle clean cycle.
8. Specifications
| Feature | Detail |
|---|---|
| Color | White |
| Product Dimensions | 26.97"D x 15.75"W x 18.5"H |
| Material | Plastic smart bidet, White ceramic one piece smart toilet |
| Item Weight | 101 Pounds |
| Installation Type | Floor Mounted |
| Shape | Oblong |
| Rough-in | 12-inch standard |
| Flush Volume | 1.06 GPF |
| Water Pressure Requirement | ≥ 11.6 PSI |
| Batteries | 8 CR123A batteries required (included) |

Figure 8.1: SOTOMO DA80 Smart Toilet dimensions and rough-in.
9. Warranty and Support
The SOTOMO DA80 Smart Toilet comes with a 12-month worry-free warranty. We also offer lifetime friendly customer support with a 24-hour response time. For any installation or accessory issues, please contact our customer service team for quick resolution.
Contact Information: Refer to the contact details provided in your product packaging or visit the official SOTOMO website.


