
Introduction
This manual provides instructions for the DykbRadio DP to EDP Driver Board Signal Adapter Board, designed to connect various 30-pin and 40-pin EDP computer LCD display screens to a DisplayPort signal source. It supports resolutions up to 2K 165Hz, 4K 144Hz, and 8K, depending on the board version (30PIN for 2LAN, 40PIN for 4LAN).
Setup Instructions
Important Safety Warning:
It is strictly prohibited to plug or unplug EDP cables while the board or screen is powered on. Doing so may cause damage to the screen or the adapter board. Always ensure all power is turned off and disconnected before connecting or disconnecting EDP cables. Disconnect all other ports before unplugging EDP cables.
Connections:
- Power Input: Connect a TYPE-C USB cable to the board for power. The working voltage is 4.2-5V, requiring 2-3A.
- Signal Input: Connect your DisplayPort (DP) source to the DP input port on the board.
- Signal Output: Connect the EDP cable from your LCD display to the appropriate EDP30 or EDP40 port on the board.
- The 30PIN version is designed for 2-lane EDP screens.
- The 40PIN version is designed for 4-lane EDP screens.
The board can drive an EDP screen up to 15W, providing a backlight voltage of 12V and a driving voltage of 3.3V.
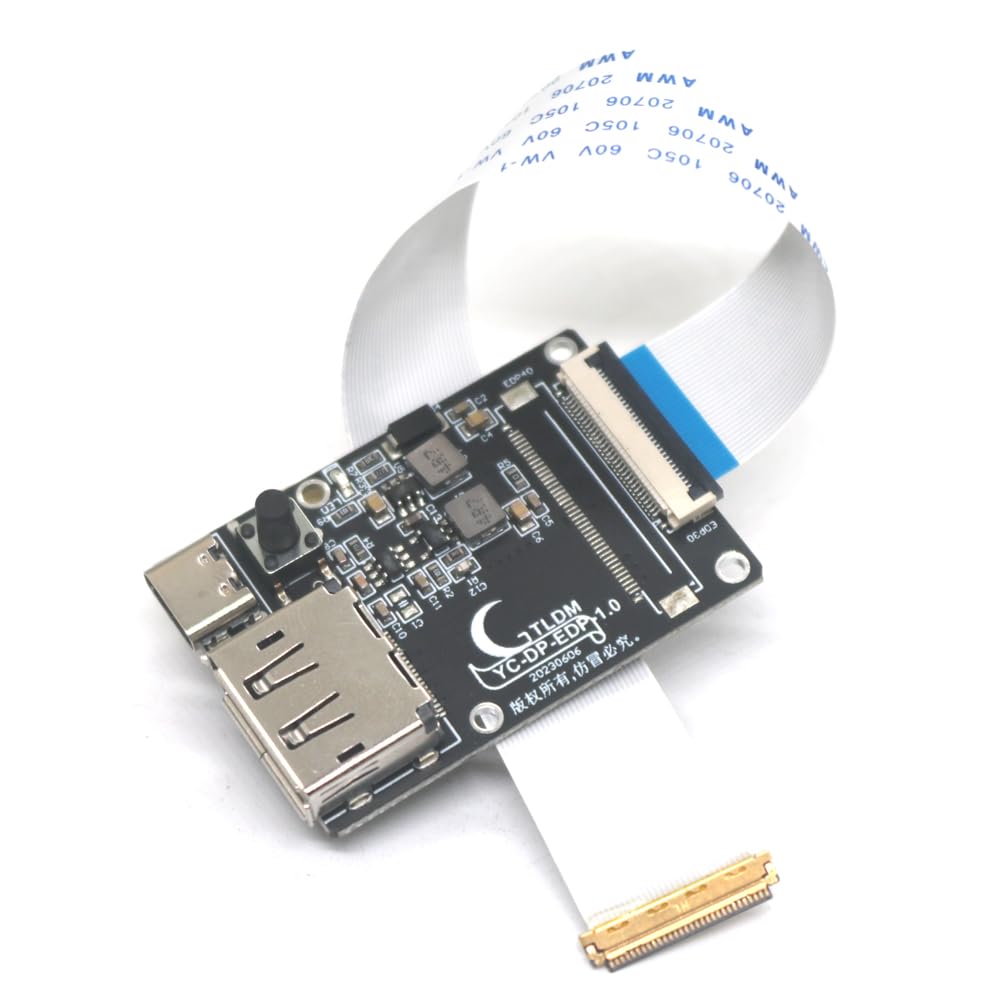
Image Description: This image displays two versions of the DykbRadio DP to EDP Driver Board. The left board is the 30P version, featuring a standard DP signal input, a Type-C power input, and an eDP 30P (Reverse line) connector at the bottom. The right board is the 40P version, also with a standard DP signal input and Type-C power input, but includes a power on button (with brightness adjust function), an LED power indicator, and an eDP 40P connector (for 40P to 40P coaxial line, same side) at the bottom. Both boards are black PCBs with various electronic components.
Operating Instructions
Power On/Off and Brightness Control:
- The product is initially in a shutdown state.
- To power on, short press the power button (less than 1 second) after the power signal is connected. The initial backlight brightness upon startup is 90%.
- To power off, short press the power button again.
- The power button also functions for brightness adjustment. Further details on brightness adjustment may be available in advanced settings or through specific button press sequences (not detailed in current information).
The dimming frequency for the backlight is 20KHz.
Maintenance and Sensitivity Adjustment
The C9 capacitor on the PCBA serves as the sensitivity adjustment capacitor input port. Users can adjust the sensitivity of touch buttons (if applicable to the specific board variant or connected display) by modifying the capacitance value at the CAP port.
- Recommended Adjustment Range: 102-103.
- Capacitor Type: Use polyester capacitors with an accuracy of 5% for best results.
- Effect of Capacitance:
- Increasing capacitance will increase sensitivity but may reduce anti-interference ability.
- Reducing capacitance will decrease sensitivity but enhance anti-interference ability.
For general use, no routine maintenance is required beyond ensuring proper connections and operating within specified environmental conditions.
Troubleshooting
- No Signal/Display Issues with HDMI Source: This board strictly uses the DisplayPort protocol. Using a standard HDMI to DisplayPort cable will generally not work. An active HDMI to DisplayPort converter board might be required for HDMI sources, but direct DisplayPort input is recommended for optimal compatibility and performance.
- Display Not Working or Incorrect Resolution:
- Verify that your screen's native resolution and refresh rate are compatible with the board's specifications (see Specifications section).
- Ensure the correct EDP cable (30-pin or 40-pin) is used and securely connected to the corresponding port on the adapter board.
- Confirm that the power supply meets the required 4.2-5V and 2-3A.
- Board Not Powering On: Check the Type-C power connection and ensure the power source is providing sufficient voltage and current.
Technical Specifications
| Working Voltage | 4.2-5V |
| Current Requirement | 2-3A |
| Power Input | TYPE-C USB |
| Signal Input | DisplayPort (DP) |
| Signal Output | EDP30 (2-lane) / EDP40 (4-lane) |
| Max Screen Power Output | 15W |
| Backlight Voltage | 12V |
| Driving Voltage | 3.3V |
| Button Lifespan | 50,000 times |
| Working Temperature | -40°C to 85°C |
| Dimming Frequency | 20KHz |
| Max Resolution (EDP30-2LAN) | 2560 x 1440 |
| Max Resolution (EDP40-4LAN) |
|
| Compatible Devices | Desktop computers, Laptops (with compatible DP output) |
| Tested Compatible Screens (Examples) | B156ZAN05.1 (4K 120Hz), 1080p 300Hz screens, 1080p 240Hz screens, Ne173qhm ny2, MNF601EA1-1, Ne156qhm_Ny2, N156kme, N156KME-GNA (2K 165Hz), B133ZANxx.x, B156ZANxx.x, NE156QUMxxx, LQ156M1JWxx, B156HANxx.x, NV156QUM-N72, LTN156FLxx, MNG007DA1-1, B156HAN08.2/0, LQ156D1JW02, NV156FHM-N4N/K. |
| Tested Configurations (Examples) | Desktop T1000 + NV140DRM N61, Desktop 3080 + B156ZAN05.1, Desktop RX580 + NE156QHM NY1, Desktop 3050Ti + NE160QDM-NY2, Xbox (HDMI to DP) + NE160QDM-NY2 (supports native 2K only), Notebook 3070 + N161HCA GA1, Notebook 3070 + NE156QHM NY1, 5300G + N156KME-GNA, 5600G + N156KME-GNA, B156ZAN03.2, NV156FHM-NY0, N156HRA EA1. |
Warranty Information
Warranty information for this product is not provided in this manual. Please refer to the product packaging, seller's website, or contact DykbRadio customer support for details regarding warranty coverage and terms.
Customer Support
For technical assistance, troubleshooting beyond this manual, or product inquiries, please contact DykbRadio customer support through their official channels. Refer to your purchase documentation or the manufacturer's website for contact information.