
1. Safety Information
Please read all instructions carefully before installation and use. Improper installation can lead to vehicle damage or personal injury. It is recommended that installation be performed by a qualified professional.
- Disconnect Battery: Always disconnect the vehicle's negative battery terminal before beginning any electrical work.
- Wiring: Ensure all wiring is correctly connected and insulated to prevent short circuits.
- Airbags: Be cautious around airbag components. Do not obstruct airbag deployment paths.
- Driving Safety: Do not operate the unit in a way that distracts you from driving. Always prioritize road safety.
- Ventilation: Ensure the unit has adequate ventilation and is not covered to prevent overheating.
2. Package Contents
Verify that all items are present in your package:
- Radio Unit
- Power Harness (includes CAN bus)
- 2x USB Cables
- RCA Cable (with 4G SIM card slot)
- GPS Antenna
- 4G Antenna
- External Microphone
- CAM In Adapter
3. Product Overview
The Strpump Tesla Style 12.1 Inch Android 12 Car Stereo is designed to enhance your driving experience with advanced features and seamless integration. It features a large vertical touchscreen display and a powerful Android 12 operating system.
Key Features:
- Operating System: Latest Android 12.0 for fast and stable performance.
- Processor & Memory: True Octa Core Processor with 4GB RAM + 64GB ROM.
- Display: 12.1-inch Tesla Style vertical screen with clear and delicate display quality.
- Connectivity: Built-in wireless & wired Apple CarPlay and wired Android Auto.
- Internet: Integrated 4G and WIFI module for online access.
- Navigation: Built-in GPS with support for online and offline navigation apps (e.g., Google Maps, Yandex, Waze, IGO). IGO offline maps are preinstalled.
- Audio: Built-in DSP Sound System with 48-band EQ setting and sound field adjustment.
- Bluetooth: Bluetooth 5.0 for hands-free phone calls, music streaming, and phonebook access.
- Radio: FM/AM radio tuner.
- Vehicle Integration: Supports original steering wheel controls, AC control, and optional AHD rearview camera/USB DVR camera.

Figure 3.1: Main screen interface with various applications.
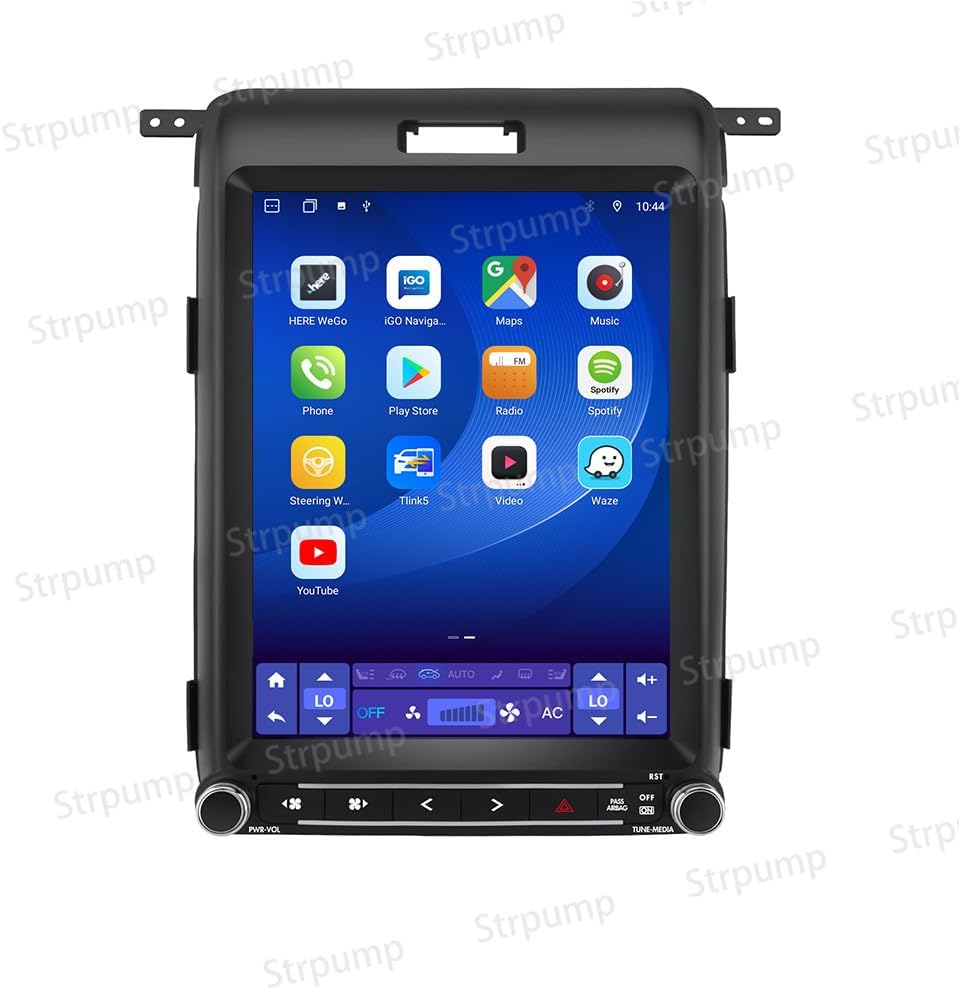
Figure 3.2: Alternative main screen layout with media and navigation shortcuts.
4. Installation Guide
This section provides a step-by-step guide for installing your Strpump Tesla Style Car Stereo. For visual assistance, please refer to the installation video below.
Video 4.1: Detailed installation guide for Ford F150 2013-2014 models.
4.1. Compatibility Check
Ensure your Ford F150 dashboard matches the compatible types for 2013-2014 models.

Figure 4.1: Dashboard compatibility for Ford F150 2009-2014. Your vehicle should have a '13-14 YEAR (C TYPE)' or '13-14 YEAR (D TYPE) (SYNC 2代)' dashboard.
4.2. Preparation
- Park your vehicle on a flat, stable surface and engage the parking brake.
- Turn off the engine and remove the key from the ignition.
- Disconnect the negative terminal of your vehicle's battery to prevent electrical shorts.
- Gather necessary tools: plastic pry tools, screwdrivers (Phillips and flathead), socket wrench set.
4.3. Removing Existing Components
- Remove Right Storage Box: Use a plastic pry tool to carefully detach the right storage box from the dashboard. Unscrew any visible screws at the bottom of the right drawer.
- Remove Dashboard Frame Kit: Unscrew the screws above the left dashboard. Use a plastic pry tool to carefully remove the dashboard frame kit surrounding the original radio and air vents.
- Remove Air Vent Screws: Unscrew the screws on both sides of the air vents.
- Open Storage Box: Open the storage box located below the original radio.
- Remove Storage Box Frame: Carefully take off the frame of the storage box.
- Remove Car Stereo Screws: Unscrew the screws holding the original car stereo in place.
- Disassemble Original Radio Interface: Carefully pull out the original car radio interface and disconnect all electrical connectors.
4.4. Connecting the New Unit
- Connect Wiring Harness: Connect the provided wiring harness from the new Strpump unit to the vehicle's existing wiring. Ensure all connectors are securely plugged in.
- Connect Antennas: Connect the GPS antenna and 4G antenna to the corresponding ports on the new unit. Position the antennas in a location with clear signal reception.
- Connect USB & RCA Cables: Plug in the USB cables and RCA cable (with 4G SIM card slot) as needed for external devices or accessories.
- External Microphone: Connect the external microphone and route it to a suitable location for clear voice pickup.
4.5. Installing the New Unit
- Mount New Unit: Carefully slide the new Strpump car stereo into the dashboard opening. Ensure it aligns correctly with the mounting points.
- Secure Unit: Fasten the new unit with the screws previously removed.
- Reassemble Dashboard: Reinstall the dashboard frame kit, air vents, and storage box in reverse order of removal.
4.6. Initial Power-Up and Testing
- Reconnect Battery: Reconnect the negative terminal of your vehicle's battery.
- Power On: Turn on the vehicle ignition and power on the car stereo.
- Test Functions: Verify all functions are working correctly, including:
- Touchscreen responsiveness
- Audio output (radio, media)
- Bluetooth connectivity
- GPS navigation
- Steering wheel controls
- AC control integration

Figure 4.2: Integrated AC control interface on the new stereo.
5. Operating Instructions
This section covers the basic operation and key features of your Strpump Android 12 Car Stereo.
5.1. Basic Operation
- Power On/Off: The unit typically powers on with the vehicle ignition. Press and hold the power button (if available) to manually turn it on or off.
- Volume Control: Use the physical knobs or on-screen controls to adjust the volume.
- Touchscreen: Navigate through menus and applications by tapping, swiping, and pinching on the 12.1-inch capacitive touchscreen.
5.2. Navigation
The unit comes with a built-in GPS module and preinstalled IGO offline maps. You can also download and use other online navigation apps from the Google Play Store.
- Access Navigation: Tap the 'Navigation' icon on the home screen.
- Search Destinations: Use the search bar to enter addresses or points of interest.
- Map Updates: Maps are typically updated annually. Contact customer support for the latest map files.
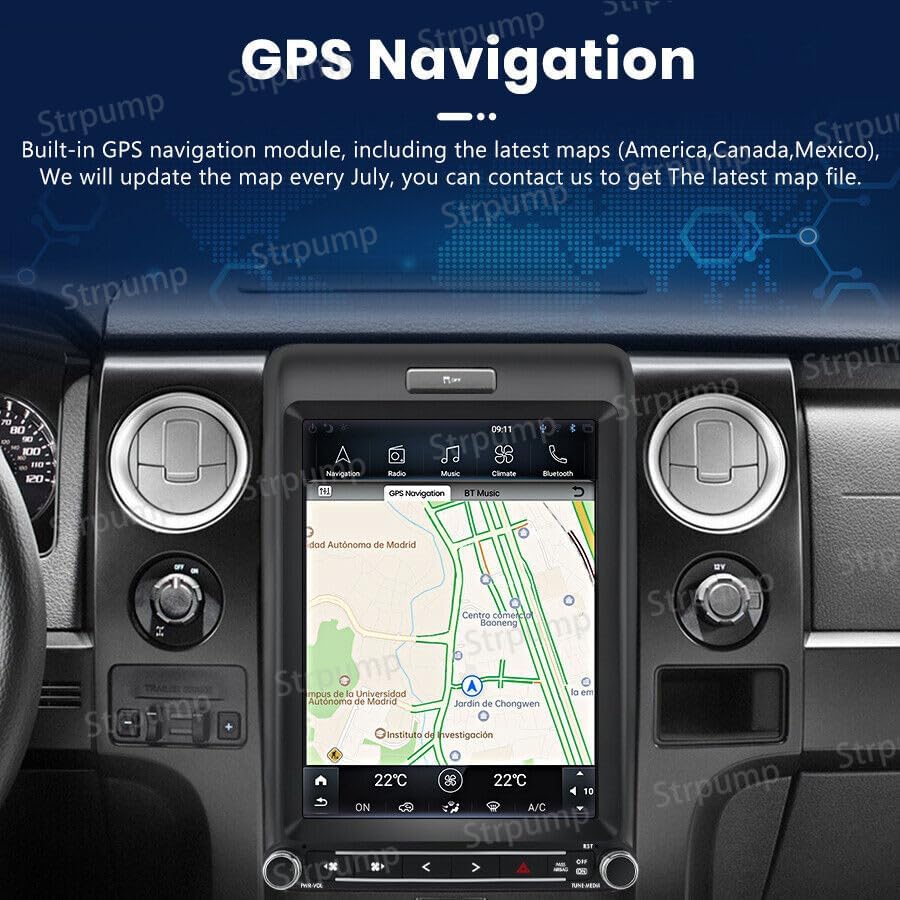
Figure 5.1: GPS Navigation interface.
5.3. Apple CarPlay & Android Auto
Connect your smartphone for seamless integration of apps, navigation, and communication.
- Wireless Connection: Enable Bluetooth and Wi-Fi on your smartphone and connect to the unit. Follow the on-screen prompts to activate wireless CarPlay or Android Auto.
- Wired Connection: Connect your smartphone to the unit via a USB cable. The system should automatically detect and launch CarPlay or Android Auto.
5.4. Bluetooth 5.0
Pair your smartphone via Bluetooth for hands-free calling and audio streaming.
- Pairing: Go to Bluetooth settings on the unit and your phone. Search for available devices and select the unit's name. Enter the pairing code if prompted.
- Hands-Free Calls: Make and receive calls directly from the unit's screen.
- Music Streaming: Play audio from your phone through the car's speakers.
5.5. Radio (FM/AM)
Access local radio stations with the built-in FM/AM tuner.
- Frequency Ranges: FM: 87.5-108.0 MHz (Europe/America), 65.0-108.0 MHz (Russia). AM: 522-1620 kHz (Europe), 530-1710 kHz (America), 522-1620 kHz (Russia).
- Scanning: Use the on-screen controls to scan for stations or manually tune to a specific frequency.
5.6. DSP Sound System
Customize your audio experience with the Digital Sound Processor.
- 48-Band EQ: Adjust individual frequency bands to create your desired sound profile.
- Sound Field Adjustment: Optimize the sound stage for different seating positions.
- Subwoofer Output: Control subwoofer levels for enhanced bass.
5.7. Internet Connectivity (4G & WIFI)
Stay connected on the go with built-in 4G and Wi-Fi capabilities.
- Wi-Fi: Connect to available Wi-Fi networks (e.g., mobile hotspot) to access online content.
- 4G: Insert a 4G SIM card into the designated slot (on the RCA cable) for direct cellular data access.
- Google Play: Download and install various applications like Spotify, YouTube, Netflix, and more.
5.8. Split Screen Functionality
The unit supports split-screen mode, allowing you to run two applications simultaneously, such as navigation and music playback.
6. Maintenance
To ensure the longevity and optimal performance of your car stereo, follow these maintenance guidelines:
- Cleaning: Use a soft, dry cloth to clean the screen and exterior. Avoid abrasive cleaners or solvents.
- Software Updates: Periodically check for software updates to ensure you have the latest features and bug fixes. Updates can usually be performed via Wi-Fi.
- Temperature: Avoid exposing the unit to extreme temperatures.
7. Troubleshooting
If you encounter issues with your car stereo, refer to the following common problems and solutions:
- No Power:
- Check vehicle battery connection.
- Verify wiring harness connections are secure.
- Check vehicle fuses.
- No Sound:
- Check volume levels and mute settings.
- Ensure speaker wires are correctly connected.
- Verify audio source selection.
- GPS Not Working:
- Ensure GPS antenna is properly installed and has a clear view of the sky.
- Check GPS settings in the unit.
- Verify map data is loaded and up to date.
- Bluetooth Connection Issues:
- Ensure Bluetooth is enabled on both the unit and your smartphone.
- Delete previous pairings and try reconnecting.
- Restart both devices.
- Touchscreen Unresponsive:
- Restart the unit.
- Ensure the screen is clean and free of debris.
If problems persist, please contact Strpump customer support for further assistance.
8. Specifications
Detailed technical specifications for the Strpump Tesla Style Car Stereo:
| Feature | Specification |
|---|---|
| Brand | Strpump |
| Model Name | Strpump Navi |
| Screen Size | 12.1 Inches |
| Operating System | Android 12.0 |
| Memory Storage Capacity | 64 GB (ROM) |
| RAM | 4 GB |
| Processor | True Octa Core |
| Connectivity Technology | Bluetooth, USB, Wireless (Wi-Fi, 4G) |
| Special Features | Apple CarPlay, Android Auto, 4G, Navigation, Radio, DSP Sound System |
| Map Type | Europe, North America (IGO offline map preinstalled) |
| Audio Output Mode | Stereo |
| Mounting Type | Dashboard Mount, Panel Mount |
| Human-Interface Input | Touchscreen |
| Supported Satellite Navigation System | GPS |
| Are Batteries Included | No |
9. Warranty and Support
Your Strpump Tesla Style Car Stereo comes with a comprehensive warranty and dedicated customer support.
- Warranty: This product includes a 1-year warranty from the date of purchase. Please retain your proof of purchase for warranty claims.
- Technical Support: For technical assistance, troubleshooting, or warranty inquiries, please contact Strpump customer service through the retailer where the product was purchased.
- Online Resources: Visit the official Strpump website or the product page on Amazon for additional resources, FAQs, and software updates.