
ECONTROLLY RM-U185
RM-U185 RM-U306 RM-U306A RM-U306B Replacement Remote Control User Manual
Model: RM-U185 | Brand: ECONTROLLY
1. Introduction
This manual provides detailed instructions for the ECONTROLLY RM-U185, RM-U306, RM-U306A, RM-U306B Replacement Remote Control. This remote is designed to function as a direct replacement for your original Sony AV System remote, offering seamless operation without the need for complex programming. It is built with durable ABS material to ensure a long lifespan and reliable performance.
2. Compatibility
This replacement remote control is compatible with a wide range of Sony AV System models. Please verify your model number against the list below to ensure compatibility:
- STR-K740P, STRK740P
- HT-DDW840, HT-DDW740
- STR-DE485E, HTDDW840, HTDDW740, STRDE585, STRDE485E, STRDE485
- RM-U307, STR-DE495, STR-DE497, STR-DE585E, STR-DE595, STR-DE597, STR-DE695, TA-DE585
- RM-U185, RM-U306, RM-U306A, RM-U306B, RMU185
- HT-1700D, STR-DE485, STR-DE585, STR-DE182, STR-DE185, STR-DE197, STRDE185, STRDE197
- 147713311, RT147713311
For models not explicitly listed, please refer to the product's original description or contact customer support for verification.
3. Key Features
- Direct Replacement: Functions immediately upon battery insertion; no programming or setup required.
- Durable Construction: Made from high-quality ABS material, ensuring wear-resistance and long-term durability.
- Cost-Effective Solution: Provides a fully functional replacement at a lower cost than original manufacturer remotes.
- Pre-tested: Each remote control undergoes testing to ensure perfect functionality before shipment.
4. Setup Guide
This remote control is designed for immediate use. Simply install the batteries, and it will be ready to operate your compatible Sony AV System.
4.1. Battery Installation
- Locate the battery compartment on the back of the remote control.
- Slide the battery compartment cover downwards or in the direction indicated by an arrow to open it.
- Insert two (2) AA alkaline batteries, ensuring the positive (+) and negative (-) terminals align correctly with the markings inside the compartment. Note: For optimal performance and to avoid issues, use brand new alkaline batteries. Rechargeable batteries are not recommended.
- Close the battery compartment cover by sliding it back into place until it clicks securely.

Figure 4.1: Back view of the remote control with the battery cover removed, illustrating the battery insertion points. This image helps users correctly install the batteries.
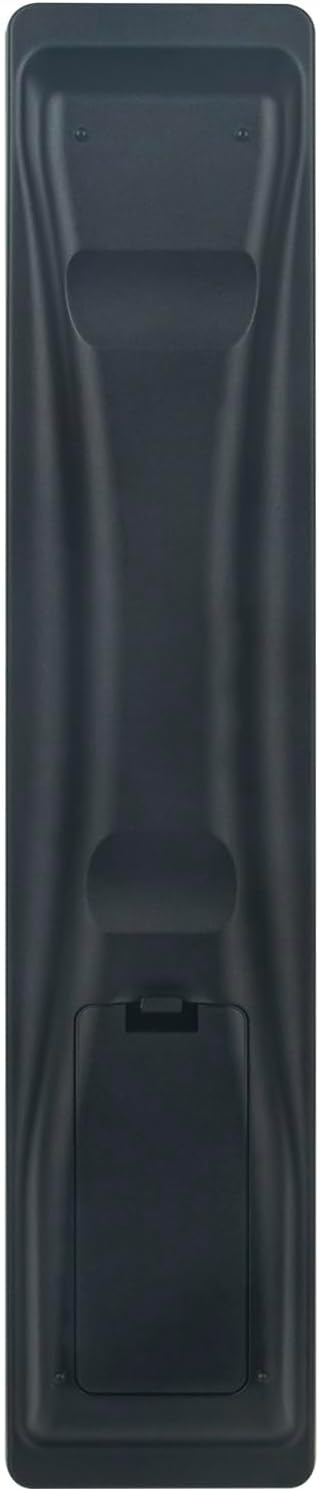
Figure 4.2: Back view of the remote control with the battery compartment closed. This shows the appearance of the remote after battery installation is complete.
Once batteries are installed, the remote control is ready for use with your compatible Sony AV System.
5. Operating Instructions
This remote control functions identically to the original Sony remote for the specified models. Simply point the remote at your Sony AV System and press the desired button. Ensure there are no obstructions between the remote and the AV system's infrared sensor.

Figure 5.1: Front view of the replacement remote control. This image displays the layout of all buttons, including power, input selection, numeric keypad, navigation, volume, channel, and sound field controls, allowing users to identify functions.
5.1. Basic Functions
- Power (I/O): Press to turn the AV system on or off.
- Input Selection (VIDEO1, VIDEO2, DVD/LD, DVD, MD/TAPE, CD, SA-CD, TUNER): Selects the desired audio/video input source.
- Numeric Keypad (0-9): Used for direct channel selection or inputting numbers.
- Volume Control (TV VOL +, -): Adjusts the volume level.
- Channel Control (TV CH +, -): Changes TV channels.
- Navigation (ENTER, Arrow Buttons): Used to navigate menus and confirm selections.
- MENU: Accesses the system's main menu.
- SOUND FIELD: Adjusts audio sound field modes.
5.2. Comparison with Original
The replacement remote is designed to replicate the functionality and button layout of the original Sony remote controls it replaces. Minor cosmetic differences may exist, but core functions remain consistent.

Figure 5.2: Comparison of the replacement remote (left) with various original Sony remote models (right). This image visually confirms that the replacement remote is similar in design and button layout to the original units it is intended to replace.
6. Maintenance
To ensure the longevity and optimal performance of your remote control, follow these simple maintenance guidelines:
- Cleaning: Wipe the remote control regularly with a soft, dry cloth. For stubborn dirt, slightly dampen the cloth with water or a mild, non-abrasive cleaner. Avoid using harsh chemicals or abrasive materials.
- Battery Replacement: Replace batteries when the remote's response becomes sluggish or stops working. Always replace both batteries at the same time with new alkaline batteries.
- Storage: Store the remote control in a cool, dry place away from direct sunlight, extreme temperatures, and high humidity.
- Avoid Drops: Protect the remote from physical impact, as drops can damage internal components.
- Liquid Exposure: Keep the remote away from liquids to prevent damage to the electronics.
7. Troubleshooting
If you experience issues with your remote control, please refer to the following common troubleshooting steps:
| Problem | Possible Cause | Solution |
|---|---|---|
| Remote control is not working. |
|
|
| Remote control works intermittently. |
|
|
If these steps do not resolve the issue, please contact customer support for further assistance.
8. Product Specifications
| Attribute | Detail |
|---|---|
| Product Dimensions | 6 x 3 x 0.5 inches |
| Item Weight | 2 ounces |
| Model Number | RM-U185 |
| Manufacturer | ECONTROLLY |
| Brand | ECONTROLLY |
| Color | Black |
| Power Source | 2 x AA Batteries (Not Included) |
| Material | ABS |
| Compatible Devices | Television, AV System |
9. Warranty and Support
This product is designed for reliable performance. For any questions, concerns, or issues regarding your remote control, please contact the seller directly through the platform where the purchase was made.
The product description states: "If you are not sure whether it can work for your product, you can leave us message on line, we will try our best to resolve the problem and offer you the best service, thank you!"
Please retain your purchase receipt for any warranty claims or support inquiries.
Ask a question about this manual
Ask about setup, troubleshooting, compatibility, parts, safety, or missing instructions. Manuals+ will review the question and use this page’s manual context to help answer it.