
Introduction
This manual provides detailed instructions for the proper use and maintenance of your Godox TT520II Universal On-Camera Flash Speedlite and AT-16 Wireless Trigger. Please read this manual thoroughly before use to ensure optimal performance and longevity of the product. This flash unit is designed for use with most DSLR cameras featuring a standard hot shoe.
Package Contents
Verify that all items listed below are included in your package:
- 2 x Godox TT520II Flash Speedlite (batteries not included)
- 2 x AT-16 Wireless Trigger Transmitter
- 2 x Mini Stand
- 2 x Soft Diffuser Cover
- Color Filter Gels (quantity may vary)

Image: The complete Godox TT520II Speedlite kit, including two flash units, two wireless triggers, mini stands, diffusers, and color gels.
Product Overview
Familiarize yourself with the components and controls of the Godox TT520II Speedlite.

Image: A detailed diagram illustrating the various parts of the Godox TT520II Speedlite, including the flash head, built-in panel, optic control sensor, hot shoe, lock ring, mini stand, PC sync socket, charging socket, mode selection button, output level indicator, flash power level button, motion selection, power switch, test button, battery compartment, and charging indicator.
Key Components:
- Flash Head: Emits light. Can be rotated for bounce flash.
- Built-in Panel: Displays current settings.
- Optic Control Sensor: Used for S1/S2 slave modes.
- Hot Shoe: Connects the flash to the camera or mini stand.
- Lock Ring: Secures the flash to the hot shoe.
- Mini Stand: Allows the flash to stand independently.
- PC Sync Socket: For wired synchronization with cameras.
- Charging Socket: For external power input (if applicable).
- Battery Compartment: Holds AA batteries.
- Control Buttons: Mode, Power, Test, On/Off, +/-, S1/S2.
Setup
1. Battery Installation
- Open the battery compartment cover on the back of the flash unit.
- Insert four (4) AA batteries, ensuring correct polarity (+/-).
- Close the battery compartment cover securely.
2. Mounting the Flash on Camera
- Slide the flash unit's hot shoe onto your camera's hot shoe mount.
- Tighten the lock ring clockwise until the flash is securely fastened.
3. Setting up the Wireless Trigger
The AT-16 wireless trigger allows for off-camera flash control.
- Insert a battery into the AT-16 transmitter.
- Mount the AT-16 transmitter onto your camera's hot shoe.
- Ensure the flash unit is powered on and set to a slave mode (S1 or S2) if not directly mounted on the camera.
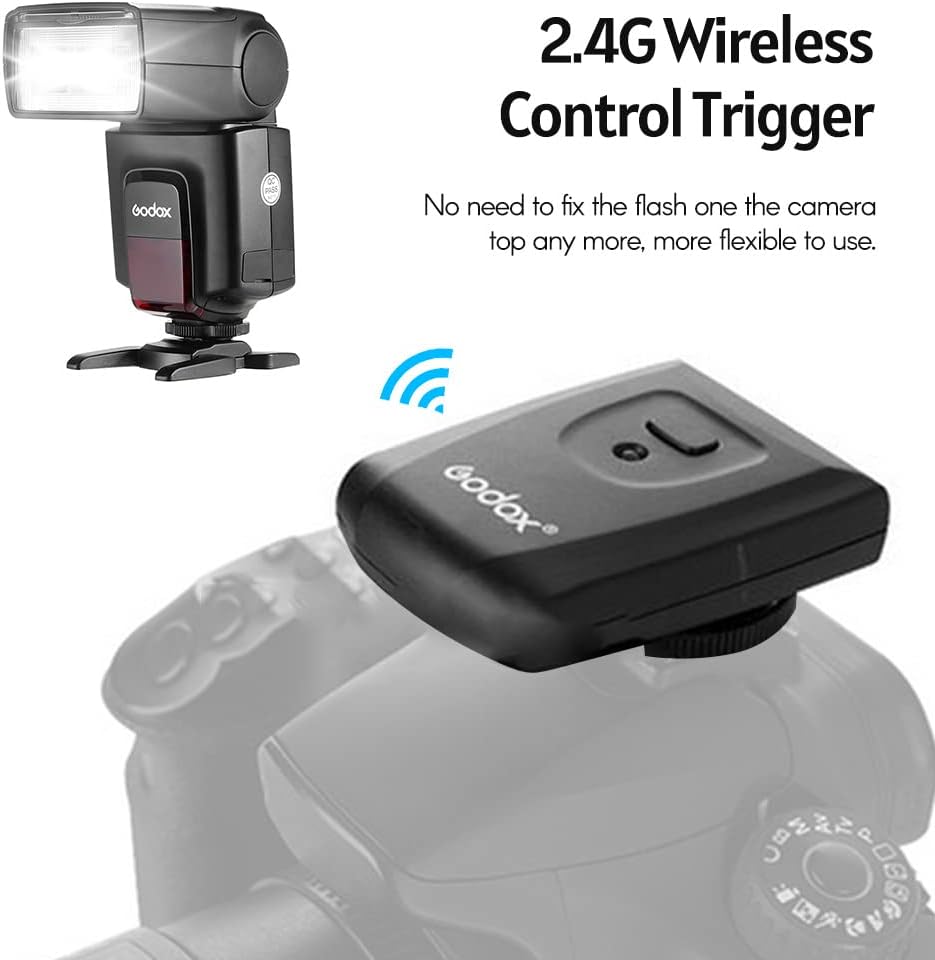
Image: The Godox TT520II Speedlite positioned next to the AT-16 wireless trigger, demonstrating off-camera flash capability.
Operating Instructions
1. Power On/Off
Press the 'ON/OFF' button to power the flash unit on or off.
2. Mode Selection
Press the 'MODE' button to cycle through the available flash modes:
- M (Manual Mode): Allows manual adjustment of flash power output.
- S1 (Slave Mode 1): The flash fires in response to the first flash from a master flash. Suitable for manual flash or TTL flash systems.
- S2 (Slave Mode 2): The flash fires in response to the second flash from a master flash, ignoring the pre-flash. Suitable for TTL flash systems with pre-flash.
3. Power Output Adjustment
In Manual (M) mode, use the '+' and '-' buttons to adjust the flash power output from 1/1 (full power) down to 1/128 in 8 steps.

Image: Visual representation of different flash power settings (1/128 to 1/1) and their effect on exposure, highlighting the flash's Guide Number 33 at ISO 100.
4. Flash Head Rotation
The flash head can be rotated horizontally up to 270 degrees and vertically up to 90 degrees for bounce flash photography, allowing for softer and more natural lighting.

Image: Diagrams illustrating the Godox TT520II Speedlite's ability to rotate 90 degrees vertically and 270 degrees horizontally, enabling flexible light direction.
5. Test Flash
Press the 'TEST' button to fire a test flash and check the light output.
Maintenance
- Cleaning: Use a soft, dry cloth to clean the flash unit. For stubborn dirt, a slightly damp cloth can be used, followed by a dry cloth. Do not use solvents or abrasive cleaners.
- Storage: When not in use for extended periods, remove the batteries to prevent leakage. Store the flash in a cool, dry place away from direct sunlight and extreme temperatures.
- Battery Care: Always use fresh, high-quality AA batteries. Replace all batteries at the same time.
Troubleshooting
| Problem | Possible Cause | Solution |
|---|---|---|
| Flash does not fire. | Low or dead batteries; incorrect mode; flash not securely mounted. | Replace batteries; check mode setting (M, S1, S2); ensure flash is securely attached to hot shoe. |
| Flash fires inconsistently in slave mode. | Optic sensor obstructed; incorrect slave mode (S1/S2) for master flash. | Ensure optic sensor has clear line of sight to master flash; switch between S1 and S2 modes to match master flash behavior (pre-flash or no pre-flash). |
| Flash recycle time is too long. | Low batteries; high power output setting. | Replace batteries; reduce flash power output. |
| Wireless trigger not working. | Trigger battery low; trigger not properly mounted; flash not in slave mode. | Replace trigger battery; ensure trigger is securely mounted on camera hot shoe; set flash to S1 or S2 mode. |
Specifications
| Feature | Specification |
|---|---|
| Model Number | TT520II |
| Guide Number | 33 (at ISO 100) |
| Flash Modes | M (Manual), S1 (Slave 1), S2 (Slave 2) |
| Power Output Control | 8 steps (1/1 to 1/128) |
| Flash Duration | 1/300s - 1/20000s |
| Recycle Time | Approx. 0.1-5 seconds |
| Vertical Rotation Angle | 0-90 degrees |
| Horizontal Rotation Angle | 0-270 degrees |
| Power Source | 4 x AA batteries (Alkaline or Ni-MH) |
| Wireless Trigger Frequency | 2.4G (for AT-16 transmitter) |
| Compatible Mountings | Canon, Nikon, Pentax, Olympus, Fujifilm, Panasonic DSLR Cameras with Hot Shoe (Not compatible with cameras without standard hot shoe, e.g., Canon EOS Rebel SL3 / 250D Rebel T7 / 1500D 2000D Rebel T100 / 3000D 4000D) |
| Product Dimensions | 2 x 3.03 x 2.17 inches |
| Item Weight | 2.16 pounds |
Warranty and Support
Godox products are designed for reliability and performance. For warranty information, please refer to the warranty card included with your purchase or visit the official Godox website. For technical support or service inquiries, please contact your retailer or Godox customer service directly.
Keep your purchase receipt as proof of purchase for warranty claims.