
Introduction
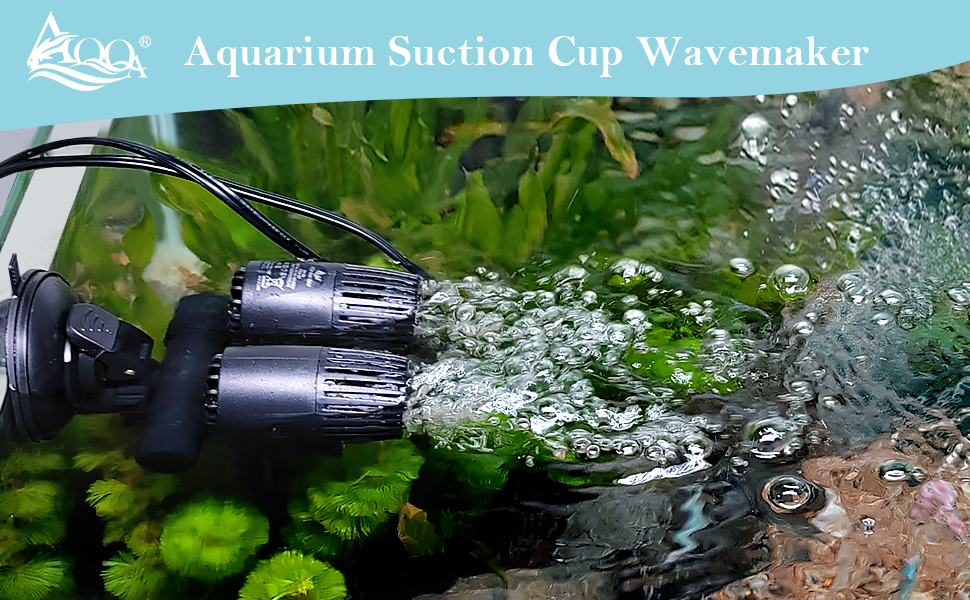
The AQQA Aquarium Wave Maker is designed to enhance water circulation in your aquarium, creating a more dynamic and healthy environment for aquatic life. This device helps simulate natural water currents, which can improve fish vitality and overall aesthetic appeal. It also aids in distributing oxygen, preventing the accumulation of debris, and supporting the efficiency of filtration systems.
Safety Information
- Ensure the wave maker is completely submerged in water before connecting it to a power source. Operating the pump dry can cause damage.
- Use with a 110V/60Hz power supply. Incorrect voltage or frequency may lead to operational issues or damage.
- When attaching the unit, gently slide the magnet into position to ensure a secure fit without excessive force.
- Keep electrical cords away from water and ensure they are not pinched or damaged.

Setup Instructions
Follow these steps to properly install your AQQA Aquarium Wave Maker:
- Prepare the Suction Cup: Open the latch on the suction cup mechanism.
- Position the Wave Maker: Place the wave maker firmly against the inner glass wall of your aquarium at the desired location.
- Secure the Suction Cup: Close the latch on the suction cup to exhaust air and create a strong, stable seal. Ensure the unit is securely attached to prevent it from detaching.
- Adjust Direction: The wave maker features 360-degree rotation for the main unit and 180-degree rotation for each powerhead. Adjust the direction of water flow as needed to optimize circulation in your tank.
- Submerge Completely: Ensure the entire pump is fully submerged in water before connecting to power.


Operating Instructions
Once installed and fully submerged, connect the wave maker to a standard 110V/60Hz power outlet. The pump is designed for continuous operation and features a shock absorber nail design to reduce vibration, ensuring ultra-quiet performance below 30 decibels when submerged.

Maintenance
Regular cleaning is essential to prevent jamming and maintain optimal performance of your wave maker. The unit is constructed with a ceramic shaft impeller, designed for durability in both freshwater and saltwater environments.
Cleaning Steps:
- Disconnect the wave maker from the power supply.
- Carefully remove the unit from the aquarium.
- Disassemble the pump components, including the encrypted thickened filter cover and impeller.
- Rinse all parts thoroughly with clean water to remove any debris or buildup. A soft brush can be used for stubborn residue.
- Reassemble the components, ensuring all parts are correctly seated.
- Return the wave maker to the aquarium and ensure it is fully submerged before reconnecting power.

This video demonstrates the cleaning process for the AQQA Aquarium Wave Maker, focusing on impeller removal and rinsing to maintain optimal performance.
Troubleshooting
- Weak Flow or Not Working: If the wave-making power is weak or the pump stops working, try unplugging and re-plugging the power cord several times. This can sometimes reset the unit or correct a temporary issue.
- Pump Not Sticking: Ensure the suction cup and the aquarium glass are clean and free of algae or debris before installation. Press firmly and close the latch completely to exhaust all air for a secure attachment.
- Unusual Noise/Vibration: Check that the pump is fully submerged and securely attached. Ensure no debris is obstructing the impeller. Disassemble and clean the impeller if necessary.
- Dry Operation: Never run the pump out of water. Dry running can cause irreversible damage to the motor and impeller.
Specifications
| Feature | Specification |
|---|---|
| Model No. | AQ039-8W, AQ039-12W, AQ039-20W, AQ039-25W |
| Voltage/Frequency | AC 110-120V/60Hz |
| Flow Rate (GPH/L/H) | 8W: 1585GPH/6000L/H 12W: 3170GPH/12000L/H 20W: 427GPH/16000L/H 25W: 6605GPH/25000L/H |
| Cord Length | 5.9FT / 1.8M |
| Recommended Aquarium Size | 8W: 15-152 GAL 12W: 80-206 GAL 20W: 200-396 GAL 25W: >400 GAL |
| Material | Acrylonitrile Butadiene Styrene, Ceramic |
| Power Source | Corded Electric |
| Product Style | Submersible |

Warranty and Support
Specific warranty information and direct customer support contact details are not provided within this manual. Please refer to the product packaging or the retailer's website for warranty terms and customer service options.
Additional Benefits
Beyond basic circulation, the AQQA Wave Maker contributes to a healthier aquarium ecosystem:
- For Heaters: Improves water circulation around heaters, preventing localized overheating and ensuring even temperature distribution.
- For Filters: Enhances the filtering effect by preventing impurities and fish waste from settling at the bottom, allowing filters to capture more debris.
- For Fish: Avoids stagnant water, encouraging more natural movement and activity for fish, contributing to their overall health.
- For Water Quality: Accelerates dissolved oxygen levels, increasing oxygen content in the water for all aquatic inhabitants.


