
Introduction
This manual provides detailed instructions for the proper setup, operation, and maintenance of your Dancing Wings Hobby Hot RC Transmitter HT-10A (HT8AL). This 8-channel digital proportional radio control system is designed for remote-controlled airplane models. Please read this manual thoroughly before using the product to ensure safe and efficient operation.
Product Features
- 8-channel digital proportional radio control system.
- Designed for RC model airplanes.
- Available in American Hand (Mode 2) and Japanese Hand (Mode 1) configurations. This specific model is HT8AL (Mode 2, Left Hand).
- Supports combo options with a compatible receiver (receiver sold separately for this HT8AL model).
- Portable design for ease of use.
Safety Information
WARNING: Before using this product, please follow all instructions for use. Failure to do so may result in property damage, injury, or other serious consequences. Always operate your RC model in a safe and responsible manner. Keep the transmitter away from water, moisture, and extreme temperatures. Do not attempt to modify or disassemble the transmitter. Use only recommended batteries and chargers.
Package Contents
- Hot RC Transmitter HT-10A (HT8AL)
- User Manual
- Note: Receiver and batteries are typically sold separately unless a specific combo package is purchased.
Product Overview
Familiarize yourself with the various components and controls of your HT-10A transmitter.
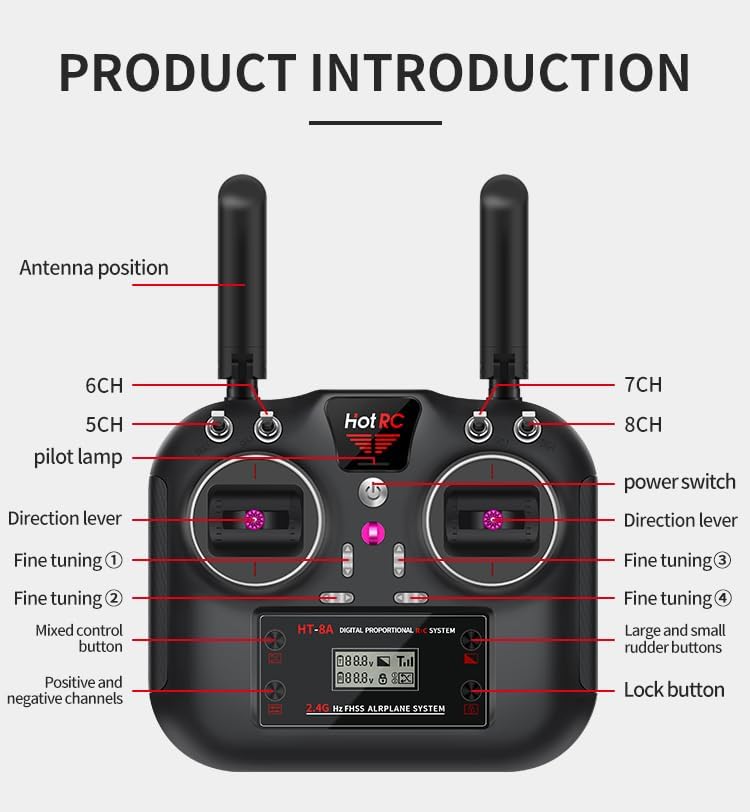
Image: Front view of the HT-10A transmitter with labels indicating various controls and ports. This image shows the antenna positions, channel switches (5CH, 6CH, 7CH, 8CH), pilot lamp, direction levers, fine-tuning buttons (1, 2, 3, 4), mixed control button, positive and negative channels, large and small rudder buttons, lock button, and power switch.
Component Identification:
- Antenna Position: For signal transmission. Ensure antennas are properly oriented during operation.
- 5CH, 6CH, 7CH, 8CH Switches: Auxiliary channel switches for controlling additional functions on your model.
- Pilot Lamp: Indicates power status and binding status.
- Direction Lever: Main control sticks for pitch, roll, yaw, and throttle (depending on mode).
- Fine Tuning (1, 2, 3, 4): Trim buttons for precise adjustment of control surfaces.
- Mixed Control Button: Used for advanced mixing functions.
- Positive and Negative Channels: Buttons for adjusting channel direction.
- Large and Small Rudder Buttons: For rudder control.
- Lock Button: Functionality may vary, often used for menu navigation or specific settings.
- Power Switch: Turns the transmitter on and off.
- DSC Port: (Located on the back, visible in other images) Digital Simulator Cable port for connecting to flight simulators.
Setup
1. Battery Installation
The HT-10A transmitter requires AAA batteries for operation.
- Locate the battery compartment on the back of the transmitter.
- Slide the battery compartment cover downwards to open it.
- Insert the required number of AAA batteries, ensuring correct polarity (+/-).
- Close the battery compartment cover securely.
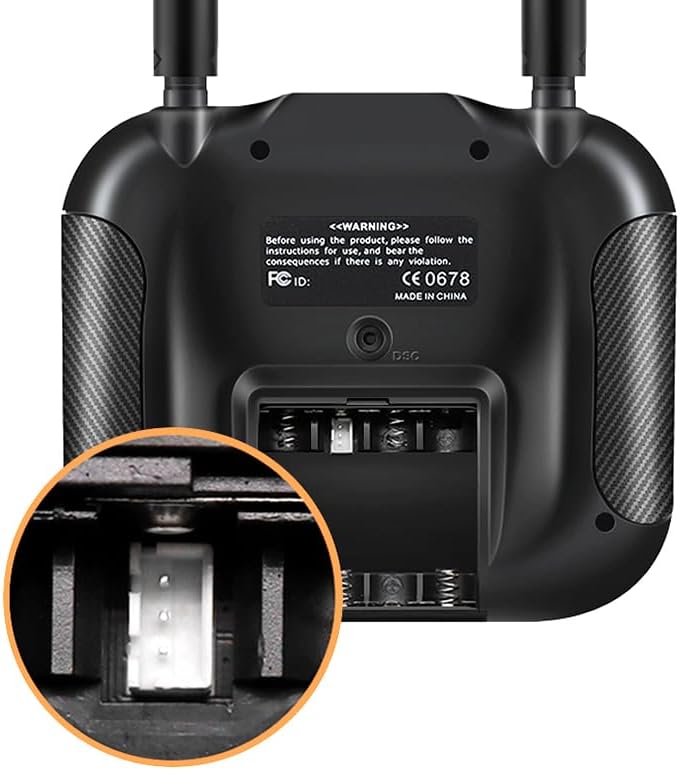
Image: Rear view of the HT-10A transmitter, highlighting the battery compartment and the DSC port. The battery compartment is open, showing the internal battery contacts.
2. Binding the Transmitter and Receiver
To establish communication between your HT-10A transmitter and a compatible receiver (sold separately), a binding process is required. Refer to your receiver's manual for specific binding instructions, as procedures can vary. Generally, the steps involve:
- Ensure both the transmitter and receiver are powered off.
- Place the receiver in binding mode (often by holding a bind button while powering on).
- Power on the transmitter while holding its bind button (if applicable, or follow specific sequence).
- Observe the indicator lights on both devices. A solid light usually indicates successful binding.
- Power cycle both devices and test controls before flight.
Operating Instructions
1. Powering On/Off
- To power on: Ensure the throttle stick is at its lowest position, then press and hold the power switch until the pilot lamp illuminates.
- To power off: Press and hold the power switch until the pilot lamp turns off. Always power off the model first, then the transmitter.
2. Basic Controls (Mode 2 - Left Hand Throttle)
The HT8AL model operates in Mode 2, meaning the throttle control is on the left stick.
- Left Stick (Throttle/Rudder):
- Up/Down: Controls throttle (engine speed/power).
- Left/Right: Controls rudder (yaw, turning the nose of the aircraft).
- Right Stick (Aileron/Elevator):
- Up/Down: Controls elevator (pitch, nose up/down).
- Left/Right: Controls ailerons (roll, banking the aircraft).
- Fine Tuning Buttons: Use these small buttons adjacent to the sticks to make minor adjustments to the control surfaces while the model is stationary or in flight, ensuring straight and level flight without constant stick input.
- Channel Switches (5CH-8CH): These switches can be assigned to control various auxiliary functions on your model, such as landing gear, flaps, lights, or other special features, depending on your receiver and model configuration.
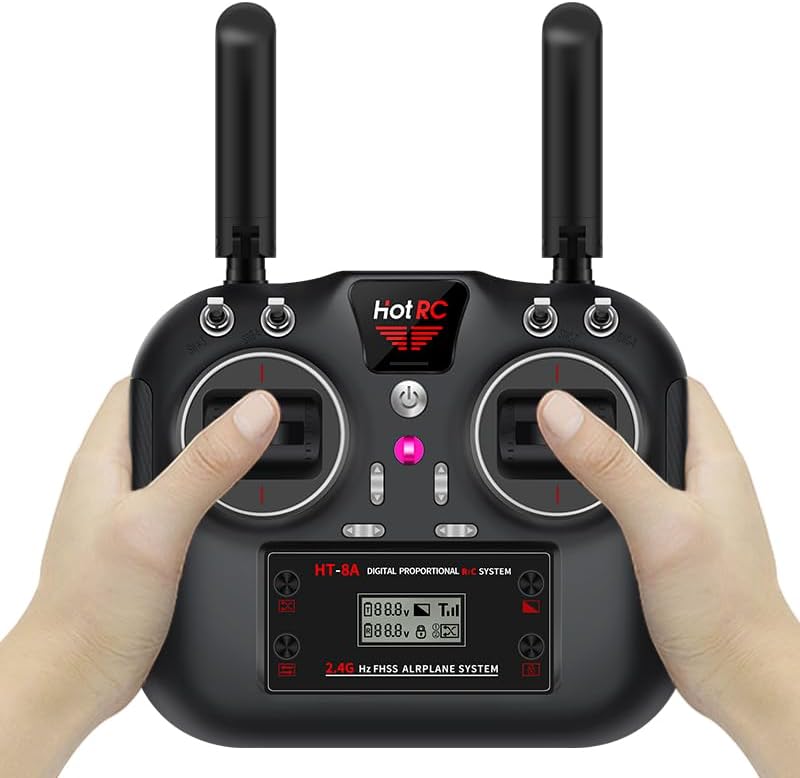
Image: A user's hands demonstrating the grip and typical operation of the HT-10A transmitter, showing the placement of fingers on the control sticks and surrounding buttons.
Maintenance
- Cleaning: Wipe the transmitter with a soft, dry cloth. Do not use solvents or abrasive cleaners.
- Storage: Store the transmitter in a cool, dry place away from direct sunlight and extreme temperatures. Remove batteries if storing for extended periods to prevent leakage.
- Antennas: Ensure antennas are not bent or damaged. Handle them with care.
- Battery Care: Always use fresh batteries or fully charged rechargeable batteries. Dispose of old batteries responsibly.
Troubleshooting
| Problem | Possible Cause | Solution |
|---|---|---|
| Transmitter does not power on. | Dead or incorrectly installed batteries. | Check battery polarity. Replace with fresh AAA batteries. |
| No control response from model. | Transmitter and receiver not bound; receiver not powered; model's battery low. | Perform binding procedure. Ensure receiver has power. Check model's battery. |
| Controls are reversed. | Channel reverse setting is active. | Adjust the positive/negative channel settings on the transmitter as needed. |
| Erratic control or short range. | Interference; damaged antenna; low transmitter battery. | Operate in an open area away from interference sources. Check antennas for damage. Replace transmitter batteries. |
Specifications
| Feature | Detail |
|---|---|
| Brand | Dancing Wings Hobby (Manufacturer: HOT RC) |
| Model Name | HT-10A |
| Model Number | HT10A (Variant: HT8AL) |
| Channels | 8 |
| Compatible Devices | RC Airplane Model |
| Connectivity Technology | Radio Frequency (2.4GHz FHSS) |
| Controller Type | Button Control |
| Battery Type | AAA |
| Item Weight | 16 ounces |
| Special Feature | Portable |
| UPC | 768713955221 |
Warranty and Support
For warranty information and technical support, please contact the manufacturer, HOT RC, or your authorized dealer. Keep your purchase receipt as proof of purchase for any warranty claims.
Manufacturer: HOT RC
Brand: Dancing Wings Hobby