
Introduction
This manual provides comprehensive instructions for the KEVWR Bluetooth OBD2 Wireless Scanner Diagnostic Tool. This compact and portable device allows users to diagnose vehicle issues, read real-time engine sensor data, and clear trouble codes directly from their smartphone or tablet. It is designed for broad compatibility with Android, iOS, and Windows devices, supporting various OBD2 protocols.

Image: KEVWR Bluetooth OBD2 Wireless Scanner Diagnostic Tool, front view.
Product Overview
The KEVWR OBD2 scanner is a compact and lightweight device designed for ease of use. It features indicator lights for power, connection status, and OBD data activity.
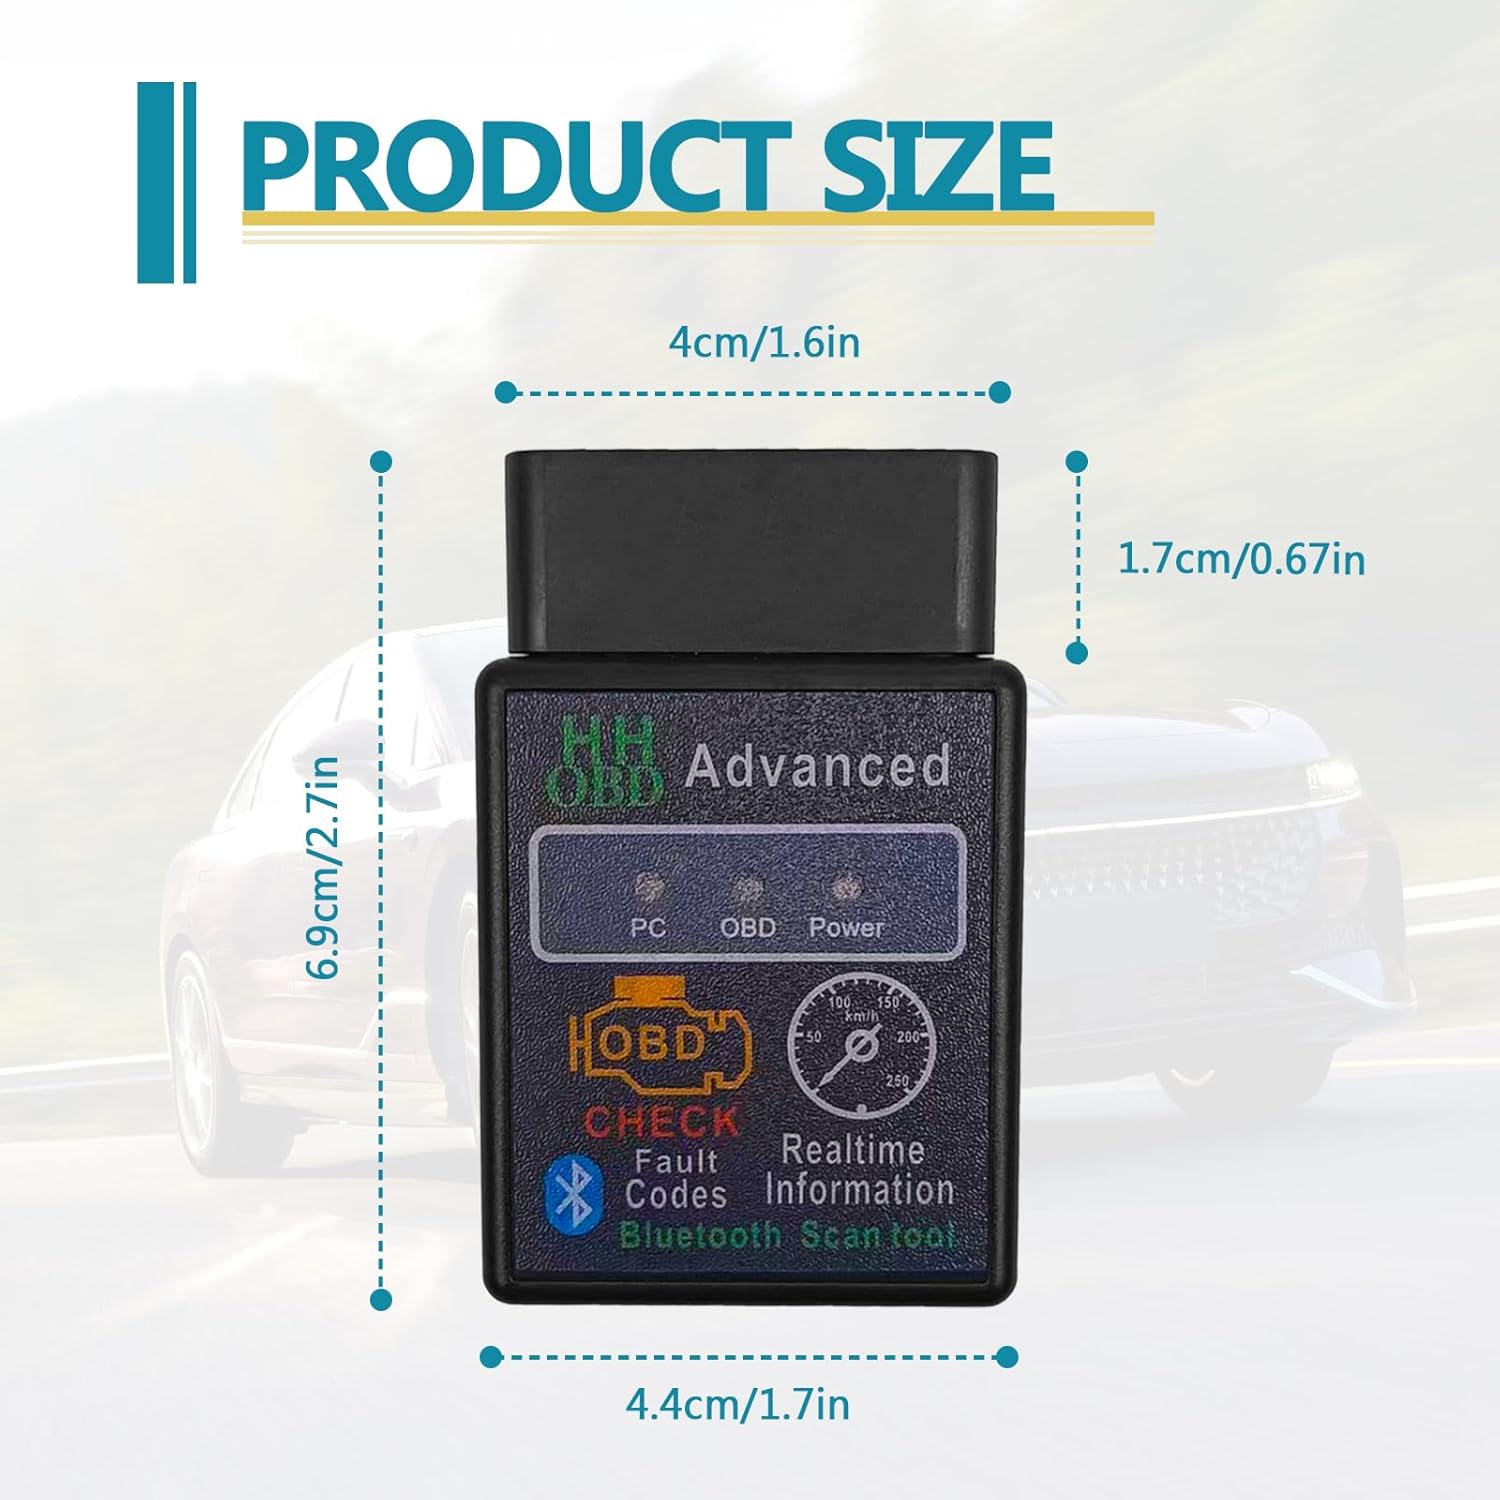
Image: Product dimensions showing the scanner is approximately 6.9cm (2.7in) long, 4.4cm (1.7in) wide, and 1.7cm (0.67in) thick.

Image: The scanner plugged into a vehicle's OBD2 port, highlighting the Power Indicator, Connect Indicator, and OBD Data Light.
Setup and Connection
Follow these steps to connect your KEVWR OBD2 scanner to your device and vehicle:
- Step 1: Download the Application
Download a compatible OBD2 application from your device's app store (e.g., Play Store for Android). Recommended apps include Torque (Lite or Pro), OBD Car Doctor, OBD Fusion, Car Scanner, ScanMaster-ELM, ScanTool.net, or PCMSCAN. - Step 2: Plug into Vehicle OBD Port
Locate your vehicle's OBD2 port (typically under the dashboard on the driver's side) and firmly plug in the KEVWR OBD2 scanner. Turn your car's ignition to the "ON" position (all dash lights should illuminate, but the engine does not need to be running). - Step 3: Pair via Bluetooth
On your smartphone or tablet, enable Bluetooth. Search for available devices and select "B03 HH". If prompted for a password, enter "1234" or "0000". Ensure a successful pairing. - Step 4: Configure App and Connect
Open your chosen OBD2 application. Go to the app's settings and select the OBD2 adapter. Ensure the connection type is set to Bluetooth. The app should then connect to your vehicle's ECU, allowing you to access live data and diagnostic information.

Image: Visual representation of the four-step Bluetooth connection process, showing app download, device plugging, Bluetooth pairing, and app configuration.
The scanner is compatible with Android, iOS, and Windows operating systems, utilizing Bluetooth 5.1 for stable communication.

Image: Diagram illustrating compatibility with Android, iOS, and Windows systems, highlighting the ELM327V1.5 with OBD SOC Chip.
Operating Instructions
Once connected, the KEVWR OBD2 scanner provides access to various vehicle diagnostic functions:
- Real-Time Monitoring: Display live engine sensor data including Engine RPM, Calculated Load Value, Coolant Temperature, Fuel System Status, Vehicle Speed, Short Term Fuel Trim, Long Term Fuel Trim, Intake Manifold Pressure, Timing Advance, Intake Air Temperature, Air Flow Rate, Absolute Throttle Position, Oxygen sensor voltages/associated short term fuel trims, Fuel System status, and Fuel Pressure.
- Fault Code Reading and Clearing: Easily read Diagnostic Trouble Codes (DTCs) and clear the Check Engine Light.
- Data Logging: Record and review vehicle performance data over time.
- Vehicle Information: Access general vehicle information.

Image: Infographic detailing the Bluetooth 5.1 features, including Check Engine, Data Logging, Real-Time Connected, Vehicle Information, Detect/Clear Fault Code, and Display Current Sensor Data.
The scanner supports a wide range of OBD-II protocols, ensuring compatibility with most modern vehicles:
- SAE J1850 PWM (41.6 kbaud)
- SAE J1850 VPW (10.4 kbaud)
- ISO 9141-2 (5 baud init, 10.4 kbaud)
- ISO 14230-4 KWP (5 baud init, 10.4 kbaud)
- ISO 14230-4 KWP (fast init, 10.4 kbaud)
- ISO 15765-4 CAN (11 bit ID, 500 kbaud)
- ISO 15765-4 CAN (29 bit ID, 500 kbaud)
- ISO 15765-4 CAN (11 bit ID, 250 kbaud)
- ISO 15765-4 CAN (29 bit ID, 250 kbaud)

Image: Visual list of the nine basic signal protocols supported by the KEVWR OBD2 scanner.
Maintenance
To ensure the longevity and optimal performance of your KEVWR Bluetooth OBD2 Wireless Scanner, follow these general maintenance guidelines:
- Keep the device clean and free from dust and debris. Use a soft, dry cloth for cleaning.
- Avoid exposing the device to extreme temperatures, direct sunlight, or high humidity.
- Store the scanner in a cool, dry place when not in use.
- Do not attempt to disassemble or modify the device, as this may void any potential warranty and cause damage.
Troubleshooting
If you encounter issues with your KEVWR OBD2 scanner, consider the following troubleshooting steps:
- Connection Failure:
- Ensure the scanner is firmly plugged into the vehicle's OBD2 port and the ignition is in the "ON" position.
- Verify Bluetooth is enabled on your device and that you are attempting to pair with "B03 HH".
- Confirm the correct password ("1234" or "0000") is entered during Bluetooth pairing.
- Check your OBD2 app settings to ensure Bluetooth is selected as the connection type and the correct adapter is chosen.
- Restart your smartphone/tablet and the vehicle's ignition, then try connecting again.
- No Data or Incorrect Readings:
- Ensure the app is fully connected to the vehicle's ECU.
- Verify your vehicle is OBD2 compliant (generally 1996 and newer for gasoline vehicles in the US). Note that some older OBD-II vehicles (roughly 1996-2004) using pre-CAN protocols might not be fully supported by this device's ELM327 1.0 firmware.
- Try a different compatible OBD2 application.
- Device Not Powering On:
- Ensure the scanner is correctly inserted into the OBD2 port. The vehicle's OBD2 port provides power to the device.
- Check your vehicle's fuse for the OBD2 port if no power is detected.
If issues persist after following these steps, contact customer support for further assistance.
Specifications
| Feature | Detail |
|---|---|
| Brand | KEVWR |
| Model Number | KEVWRAI |
| Connectivity | Bluetooth (Bluetooth 5.1) |
| Compatibility | Android, iOS, Windows devices |
| Supported Protocols | J1850 PWM, J1850 VPW, ISO9141-2, ISO14230-4 KWP, ISO15765-4 (Can-BUS) |
| Item Weight | 0.634 ounces |
| Package Dimensions | 2.72 x 1.77 x 1.26 inches |
| Screen Size | 0.1 Inches (referring to indicator lights, not a display screen) |
Support and Warranty
For technical support, warranty information, or further inquiries, please refer to the manufacturer's official website or contact their customer service department. Specific warranty details are not provided in this manual.