1. Introduction
This manual provides essential information for the safe and efficient operation, installation, and maintenance of your MELLCOM 100-inch Electric Fireplace Insert. Please read all instructions carefully before installation and use. Retain this manual for future reference.
The MELLCOM electric fireplace offers realistic flame effects with 12 adjustable colors and 5 brightness options, complemented by a crystal ember bed. It features a heating function with two power levels (750W/1500W) and a temperature range of 62°F to 82°F, capable of heating up to 400 square feet. The flame effect and heating function can operate independently. Control is available via a screen button panel and a remote control, with an integrated timer function.
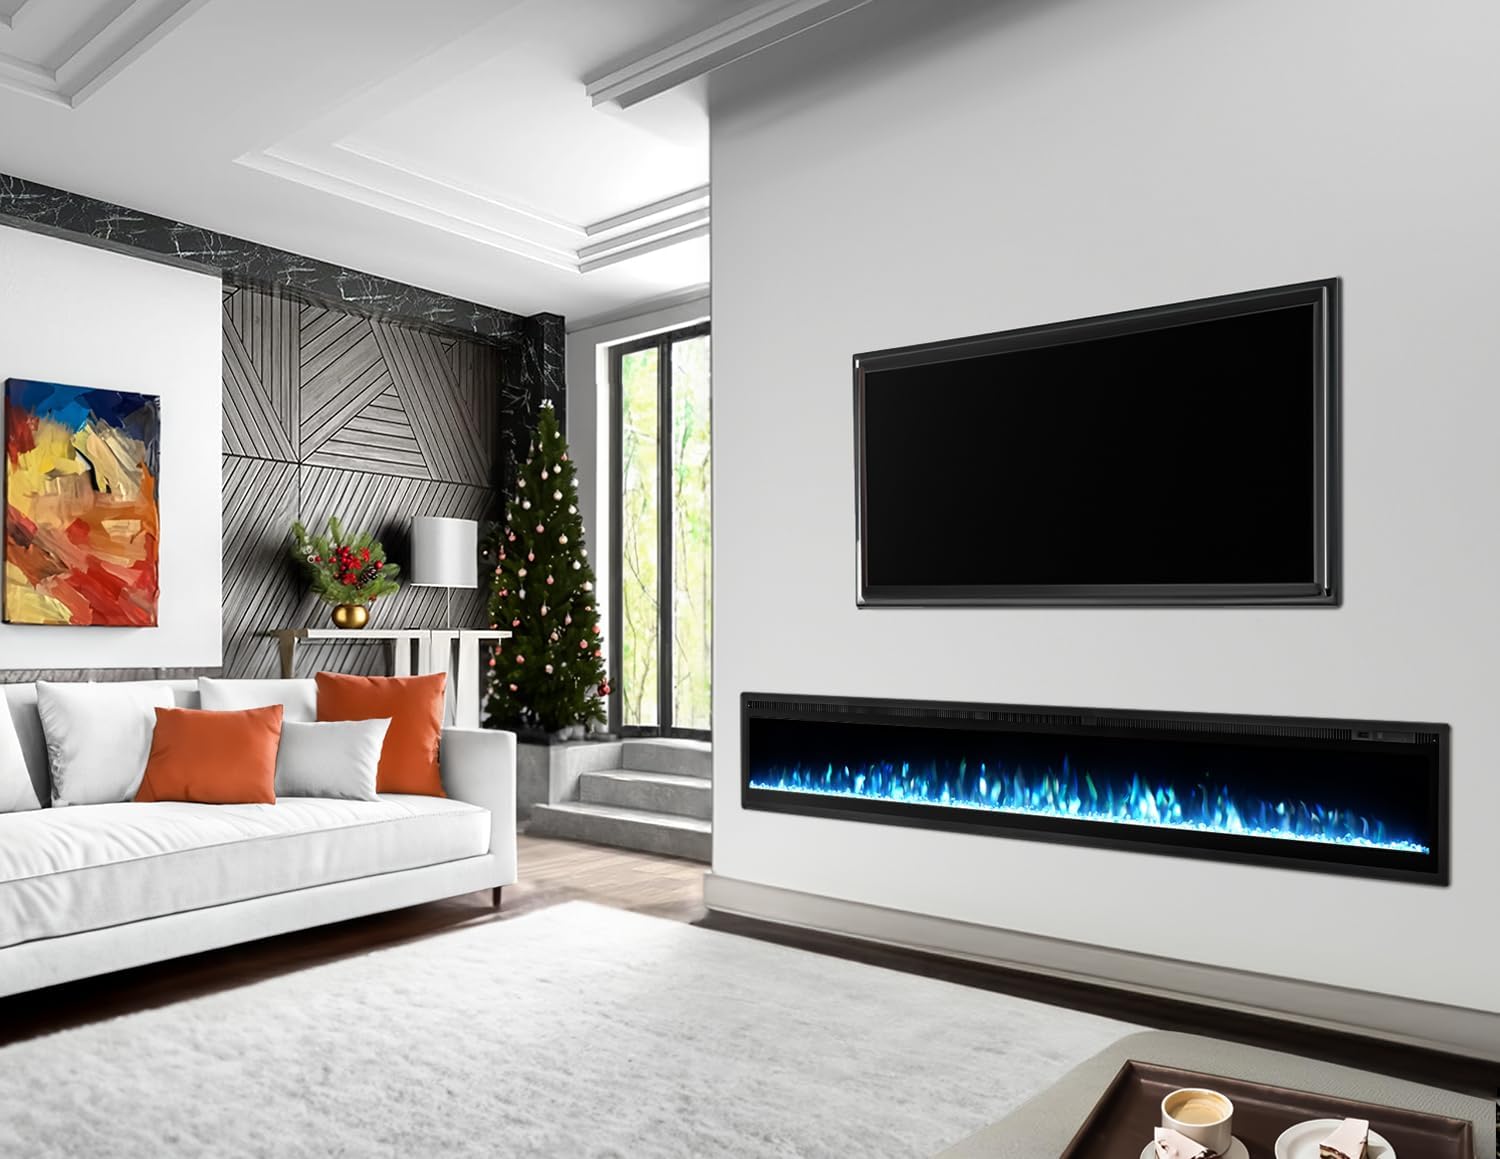
Image 1.1: MELLCOM 100-inch Electric Fireplace installed in a modern living room, showcasing blue flame effects.
2. Safety Information
Adherence to the following safety guidelines is crucial to prevent electric shock, fire, injury, or property damage.
- This appliance is for indoor use only.
- Ensure the power source matches the requirements specified on the rating label of the appliance.
- Do not operate the fireplace with a damaged cord or plug, or if the heater malfunctions or has been dropped or damaged in any manner.
- To prevent overheating, do not cover the heater or block the air inlets/outlets.
- Maintain a minimum clearance of 8 inches (20 cm) above the top exhaust for proper heat dissipation.
- Keep combustible materials such as furniture, pillows, bedding, papers, clothes, and curtains at least 3 feet (0.9 meters) from the front of the heater.
- This fireplace is equipped with a safety thermal cut-out for overheating protection. If the temperature becomes too high, the heater will automatically shut off.
- Do not insert or allow foreign objects to enter any ventilation or exhaust opening as this may cause an electric shock or fire, or damage the heater.
- Always unplug the fireplace when not in use.
3. Package Contents
Upon opening the package, verify that all components are present and undamaged:
- MELLCOM 100-inch Electric Fireplace Insert Unit
- Remote Control
- Mounting Hardware (screws, brackets, etc. - specific to installation type)
- User Manual (this document)
If any parts are missing or damaged, do not attempt to assemble or operate the fireplace. Contact customer support immediately.
4. Specifications
| Feature | Specification |
|---|---|
| Brand | MELLCOM |
| Model Name | d75d59bd-b118-4564-b887-c937f1472a1c |
| Product Dimensions | 5.6"D x 100"W x 13.4"H |
| Power Source | 110-120V AC |
| Heat Output | 5120 British Thermal Units (BTU) |
| Heating Levels | 750W / 1500W |
| Heating Coverage | Up to 400 sq ft |
| Adjustable Flame Colors | 12 |
| Flame Brightness Options | 5 |
| Timer Function | 1 to 8 hours |
| Installation Type | Recessed, Wall Mounted, Freestanding |
| Material | Stainless Steel |
| Item Weight | 108 Pounds |
| Certifications | CSA, ETL Safety Certified |

Image 4.1: Dimensional diagram of the MELLCOM 100-inch Electric Fireplace.
5. Installation
The MELLCOM electric fireplace supports three installation methods: recessed, wall-mounted, and freestanding. The unit requires no assembly; simply connect the power supply after installation.
5.1 Recessed Installation
For a recessed installation, ensure the wall opening dimensions are appropriate for the fireplace unit. Consult the dimensional diagram (Image 4.1) for precise measurements. Ensure adequate clearance around the unit, especially for the top exhaust, as specified in the safety guidelines.
5.2 Wall-Mounted Installation
To wall-mount the fireplace, use the provided mounting hardware. Select a sturdy wall location that can support the weight of the unit. Mark the drilling points according to the mounting bracket positions. Secure the brackets to the wall, then carefully lift and attach the fireplace unit to the brackets.

Image 5.1: Example of a wall-mounted MELLCOM electric fireplace with remote control.
5.3 Freestanding Installation
For freestanding use, ensure the fireplace is placed on a stable, level surface. No additional mounting is required. This option allows for immediate use by simply connecting to a power outlet.
Important:
- Always ensure the fireplace is connected to a grounded outlet.
- Do not run the power cord under carpeting or cover it with throw rugs, runners, or similar coverings.
- Ensure the power cord is not pinched or in contact with sharp edges.
6. Operation
The fireplace can be controlled using the touch screen buttons on the unit or the included remote control.
6.1 Control Panel and Remote Control
The control panel is located on the unit, typically on the right side. The remote control provides convenient operation from a distance.

Image 6.1: Remote control and touch screen button functions.
6.2 Power On/Off
- Press the Power button on the control panel or remote to turn the unit on or off.
6.3 Adjusting Flame Effects
The fireplace features 12 realistic flame colors and 5 brightness options.
- Press the Color button to cycle through the 12 flame color options.
- Press the Flame button to adjust the flame brightness (5 levels).

Image 6.2: Examples of 12 adjustable flame colors and the crystal ember bed.
6.4 Heating Function
The heating function operates independently of the flame effect. It offers two power levels and a temperature range.
- Press the Heater button to activate the heating function.
- Press the Temp button to adjust the desired temperature between 62°F and 82°F.
- The heater can operate at 750W or 1500W, automatically adjusting based on the set temperature and room conditions.
- After the heater turns off, the fan will continue to blow cool air for 30 seconds to prevent overheating.

Image 6.3: Heating power levels and temperature range.
6.5 Timer Function
The integrated timer allows you to set an automatic shut-off time.
- Press the Timer button to set the automatic shutdown time from 1 hour to 8 hours.

Image 6.4: Electronic timer function for automatic shut-off.
7. Maintenance
Regular maintenance ensures the longevity and optimal performance of your electric fireplace.
7.1 Cleaning
- Always unplug the fireplace before cleaning.
- Wipe the exterior surfaces with a soft, damp cloth. Do not use abrasive cleaners or solvents.
- Gently clean the glass panel with a soft cloth and glass cleaner.
- Periodically vacuum the air inlets and outlets to remove dust and debris, ensuring proper airflow.
7.2 Storage
If storing the fireplace for an extended period, unplug it and store it in a dry, dust-free location. It is recommended to keep the original packaging for storage.
8. Troubleshooting
Refer to the following table for common issues and their solutions.
| Problem | Possible Cause | Solution |
|---|---|---|
| Fireplace does not turn on | No power supply; Power cord not plugged in; Circuit breaker tripped; Unit is off. | Ensure the unit is plugged into a working outlet. Check the circuit breaker. Press the power button on the unit or remote. |
| No heat output | Heater function not activated; Temperature setting too low; Overheating protection activated. | Press the Heater button. Increase the temperature setting. Unplug the unit for 15 minutes to reset the thermal cut-out, then ensure proper clearance. |
| Remote control not working | Batteries are dead or incorrectly inserted; Remote is too far or obstructed. | Replace batteries. Ensure correct polarity. Operate the remote within range and without obstructions. |
| Flame effect not visible or flickering | Flame brightness set too low; LED components issue. | Adjust flame brightness using the Flame button. If the issue persists, contact customer support. |
If you encounter problems not listed here or if the issue persists after attempting the suggested solutions, please contact MELLCOM customer support.
9. Warranty and Support
9.1 Limited Warranty
This MELLCOM electric fireplace comes with a limited warranty. Please refer to the warranty card included with your purchase or contact customer support for specific terms and conditions. The warranty typically covers manufacturing defects and malfunctions under normal use.
9.2 Customer Support
For technical assistance, warranty claims, or any questions regarding your MELLCOM electric fireplace, please contact MELLCOM customer support through the retailer where the product was purchased or visit the official MELLCOM website for contact information.


