
Moukey MTs10-2-W
Moukey Karaoke Machine
Model: MTs10-2-W User Manual
Your guide to setting up, operating, and maintaining your Moukey Karaoke Machine for an optimal audio experience.
1. Getting Started: Setup
Follow these steps to set up your Moukey Karaoke Machine and begin your audio experience.
1.1 Unboxing and Initial Inspection
Carefully remove all components from the packaging. Ensure the following items are present:
- Moukey MTs10-2-W Karaoke Machine (Speaker)
- 2 x UHF Wireless Microphones
- Remote Control
- Power Adapter
- 3.5mm AUX Cable
- Tablet Holder
- User Manual (this document)
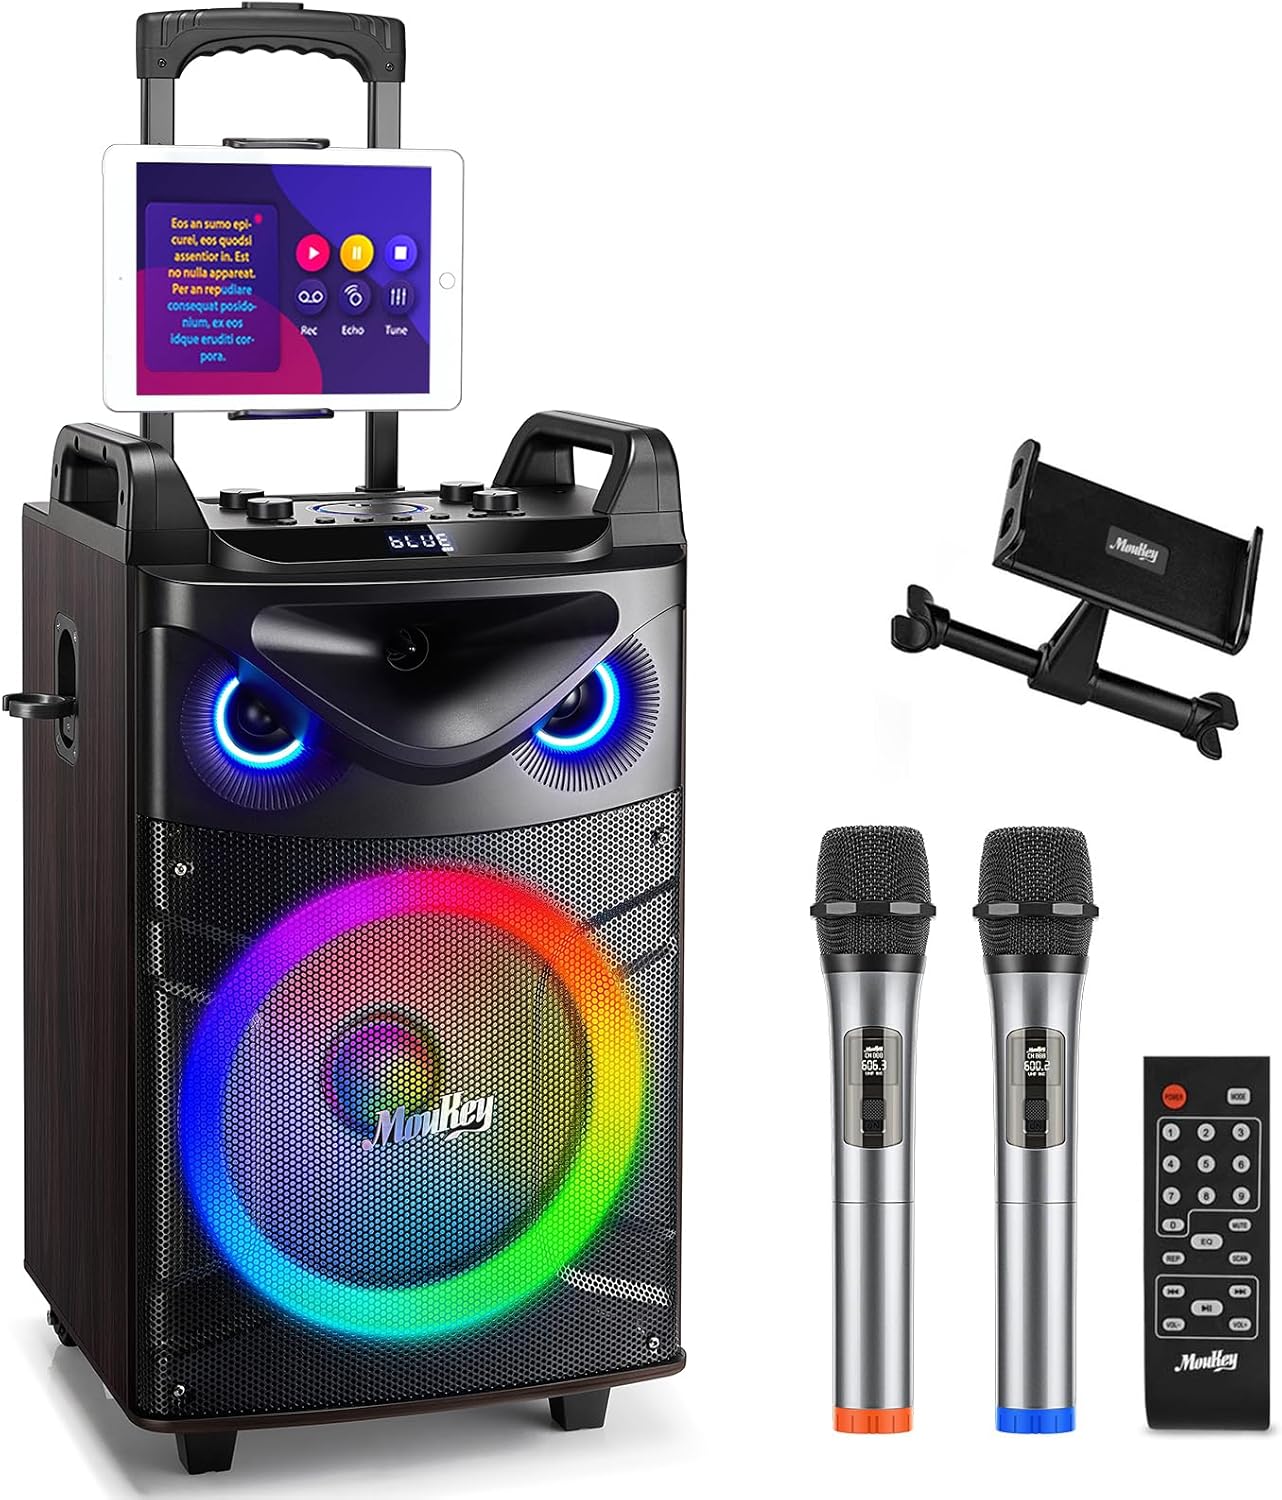
Figure 1: Moukey MTs10-2-W Karaoke Machine and included accessories.
1.2 Charging the Unit
Before first use, fully charge the karaoke machine. Connect the provided power adapter to the charging port on the unit and plug it into a standard electrical outlet. The charging indicator light will show the charging status. A full charge provides approximately 14 hours of playing time.
1.3 Microphone Battery Installation
Each wireless microphone requires 2 AA batteries (not included). Open the battery compartment on each microphone and insert the batteries, observing the correct polarity. Close the compartment securely.
1.4 Powering On
Press and hold the power button on the control panel to turn on the karaoke machine. The display will illuminate, and the LED lights will activate.
2. Components and Controls
Familiarize yourself with the main components and control panel of your Moukey Karaoke Machine.
2.1 Main Unit (Speaker)
The main unit features a 10-inch woofer and a 3-inch tweeter for powerful and clear sound output. It also includes integrated LED party lights and a retractable handle with durable wheels for easy portability.

Figure 2: Internal speaker components: 10-inch woofer and 3-inch tweeter.
2.2 Control Panel
The top-mounted control panel provides access to all functions and adjustments:
- MIC Volume Knob: Adjusts the volume of the connected microphones.
- ECHO Knob: Controls the echo effect for microphones.
- BASS Knob: Adjusts the low-frequency sound output.
- TREBLE Knob: Adjusts the high-frequency sound output.
- VOL (Master Volume) Knob: Controls the overall volume of the unit. This knob also features a light ring design.
- LIGHT FX Button: Cycles through different LED light modes.
- INST/TWS Button: Initiates True Wireless System (TWS) pairing.
- REC Button: Activates recording function.
- Playback Control Buttons: Previous track, Play/Pause/Scan, Next track.
- BT Button: Toggles Bluetooth mode.
- MODE Button: Switches between input modes (Bluetooth, AUX, USB, TF, FM Radio).
- USB Port: For USB flash drive playback (up to 32GB).
- TF Card Slot: For Micro TF card playback (up to 32GB).
- AUX IN Port: For connecting external audio devices via 3.5mm cable.
- 6.35mm Microphone Jacks: Two additional inputs for wired microphones.
3. Operating Instructions
3.1 Bluetooth Connection
- Power on the Moukey Karaoke Machine.
- Press the MODE button until "BLUE" appears on the display, or press the BT button directly. The unit will enter Bluetooth pairing mode.
- On your mobile device (smartphone, tablet, laptop), enable Bluetooth and search for "Moukey MTs10-2-W" in the list of available devices.
- Select "Moukey MTs10-2-W" to pair. Once connected, you will hear an audible confirmation.
- You can now play audio from your device wirelessly through the karaoke machine.
3.2 Wired Connections (AUX, USB, TF)
The unit supports various wired input methods:
- AUX IN: Connect an external audio device (e.g., MP3 player, TV) using the provided 3.5mm AUX cable to the AUX IN port. Press the MODE button until "LINE" appears on the display.
- USB Playback: Insert a USB flash drive (up to 32GB, formatted to FAT32) containing audio files into the USB port. The unit will automatically switch to USB mode and begin playback. If not, press the MODE button.
- TF Card Playback: Insert a Micro TF card (up to 32GB, formatted to FAT32) containing audio files into the TF card slot. The unit will automatically switch to TF mode and begin playback. If not, press the MODE button.

Figure 3: Multiple connectivity options for the MTs10-2-W.
3.3 Microphone Usage
The unit comes with two UHF wireless microphones. Simply power them on, and they will automatically connect to the karaoke machine. You can also connect additional wired microphones to the 6.35mm jacks.
- Adjust microphone volume using the MIC knob.
- Add an echo effect using the ECHO knob.
3.4 Sound Adjustment
Fine-tune your audio output using the dedicated knobs:
- BASS Knob: Rotate clockwise to increase bass, counter-clockwise to decrease.
- TREBLE Knob: Rotate clockwise to increase treble, counter-clockwise to decrease.
- VOL Knob: Adjusts the overall master volume.
3.5 LED Party Lights
The integrated LED lights can change color with the beat of the music, creating a dynamic atmosphere. Press the LIGHT FX button to cycle through different light modes or turn them off.

Figure 4: Dynamic LED lighting effects.
3.6 True Wireless System (TWS) Function
The MTs10-2-W supports TWS, allowing you to connect two MTs10-2 units wirelessly for a stereo sound experience. (Note: This function requires two separate MTs10-2 units.)
- Ensure both MTs10-2 units are powered on and in Bluetooth mode.
- On one unit, press and hold the INST/TWS button. You will hear a prompt indicating TWS pairing mode.
- The two units will automatically connect. Once connected, you will hear a confirmation sound.
- Now, connect your mobile device to one of the paired units via Bluetooth. Audio will play through both speakers in stereo.
4. Maintenance and Care
Proper maintenance ensures the longevity and optimal performance of your karaoke machine.
- Cleaning: Use a soft, dry cloth to clean the exterior of the unit. Do not use abrasive cleaners or solvents.
- Storage: Store the unit in a cool, dry place away from direct sunlight and extreme temperatures.
- Battery Care: For optimal battery life, fully charge the unit before long periods of storage. If storing for extended periods, charge the battery every 3-6 months to prevent deep discharge.
- Microphone Care: Remove batteries from microphones if they will not be used for an extended period to prevent leakage.
5. Troubleshooting
If you encounter issues with your Moukey Karaoke Machine, refer to the following common problems and solutions:
| Problem | Possible Cause | Solution |
|---|---|---|
| Unit does not power on. | Low battery; Power adapter not connected or faulty. | Charge the unit fully. Ensure power adapter is securely connected and working. |
| No sound output. | Volume too low; Incorrect input mode; Device not connected properly. | Increase master volume. Press MODE button to select correct input. Reconnect Bluetooth or wired device. |
| Microphones not working. | Microphone batteries low/dead; Microphone not powered on; MIC volume too low. | Replace AA batteries in microphones. Ensure microphones are powered on. Increase MIC volume knob. |
| Bluetooth connection unstable. | Device too far from unit; Interference from other devices. | Move device closer to the unit (within 33 feet/10 meters). Avoid placing unit near other wireless devices. |
| LED lights not functioning. | Lights turned off; Unit malfunction. | Press the LIGHT FX button to turn on/cycle lights. If issue persists, contact customer support. |
6. Specifications
Key technical specifications for the Moukey MTs10-2-W Karaoke Machine:
| Feature | Detail |
|---|---|
| Model Number | MTs10-2-W |
| Woofer Size | 10 inches |
| Tweeter Size | 3 inches |
| Max Power Output | 160 Watt |
| Connectivity | Bluetooth 5.0, AUX, USB, TF Card, FM Radio |
| Battery Type | Lithium Ion (included) |
| Playing Time | Up to 14 hours |
| Dimensions (L x W x H) | 14.45 x 14.45 x 24.65 inches |
| Item Weight | 21.8 pounds |
| Material | Engineered Wood |
7. Warranty and Support
Moukey products are designed and manufactured to the highest quality standards. For information regarding warranty coverage, technical support, or service inquiries, please refer to the contact details provided on the official Moukey website or the product packaging.
Please retain your proof of purchase for any warranty claims.
Related documentsMTs10-2-W


Ask a question about this manual
Ask about setup, troubleshooting, compatibility, parts, safety, or missing instructions. Manuals+ will review the question and use this page’s manual context to help answer it.