Introduction
Thank you for choosing the Espressions Smart Pressure Cooker 5.7L. This appliance is designed to provide efficient and versatile cooking, including pressure cooking and sous-vide functions. Please read this manual thoroughly before first use to ensure safe operation and optimal performance. Keep this manual for future reference.
Important Safety Instructions
- Always ensure the lid is properly closed and locked before operating under pressure.
- Do not fill the cooker above the MAX fill line to prevent clogging of the pressure release valve.
- Exercise extreme caution when releasing pressure. Keep hands and face away from the steam release valve.
- Never attempt to force the lid open while the cooker is pressurized.
- Do not immerse the main unit in water or other liquids. Clean with a damp cloth.
- Keep out of reach of children.
- Always unplug the appliance when not in use and before cleaning.
- Regularly inspect the sealing ring and pressure release valve for wear or damage. Replace if necessary.
Setup and First Use
1. Unpacking and Component Identification
Carefully remove all packaging materials. Identify the following components:
- Main Unit with Control Panel
- Inner Pot (Stainless Steel)
- Lid with Sealing Ring, Float Valve, and Steam Release Valve
- Condensation Collector (usually attached to the back)

Figure 1: Exploded view showing the main unit, inner pot, and lid assembly.
2. Initial Cleaning
Before first use, wash the inner pot, lid, and sealing ring with warm, soapy water. Rinse thoroughly and dry all parts completely. Wipe the exterior of the main unit with a damp cloth. Ensure all parts are dry before assembly.
3. Assembly
- Place the inner pot into the main unit. Ensure it sits correctly and is level.
- Insert the condensation collector into its slot at the back of the cooker.
- Ensure the sealing ring is properly seated inside the lid.
- Place the lid onto the main unit, aligning the arrow on the lid with the unlock symbol on the cooker body. Rotate clockwise until the arrow aligns with the lock symbol.
Operating Instructions
Control Panel Overview
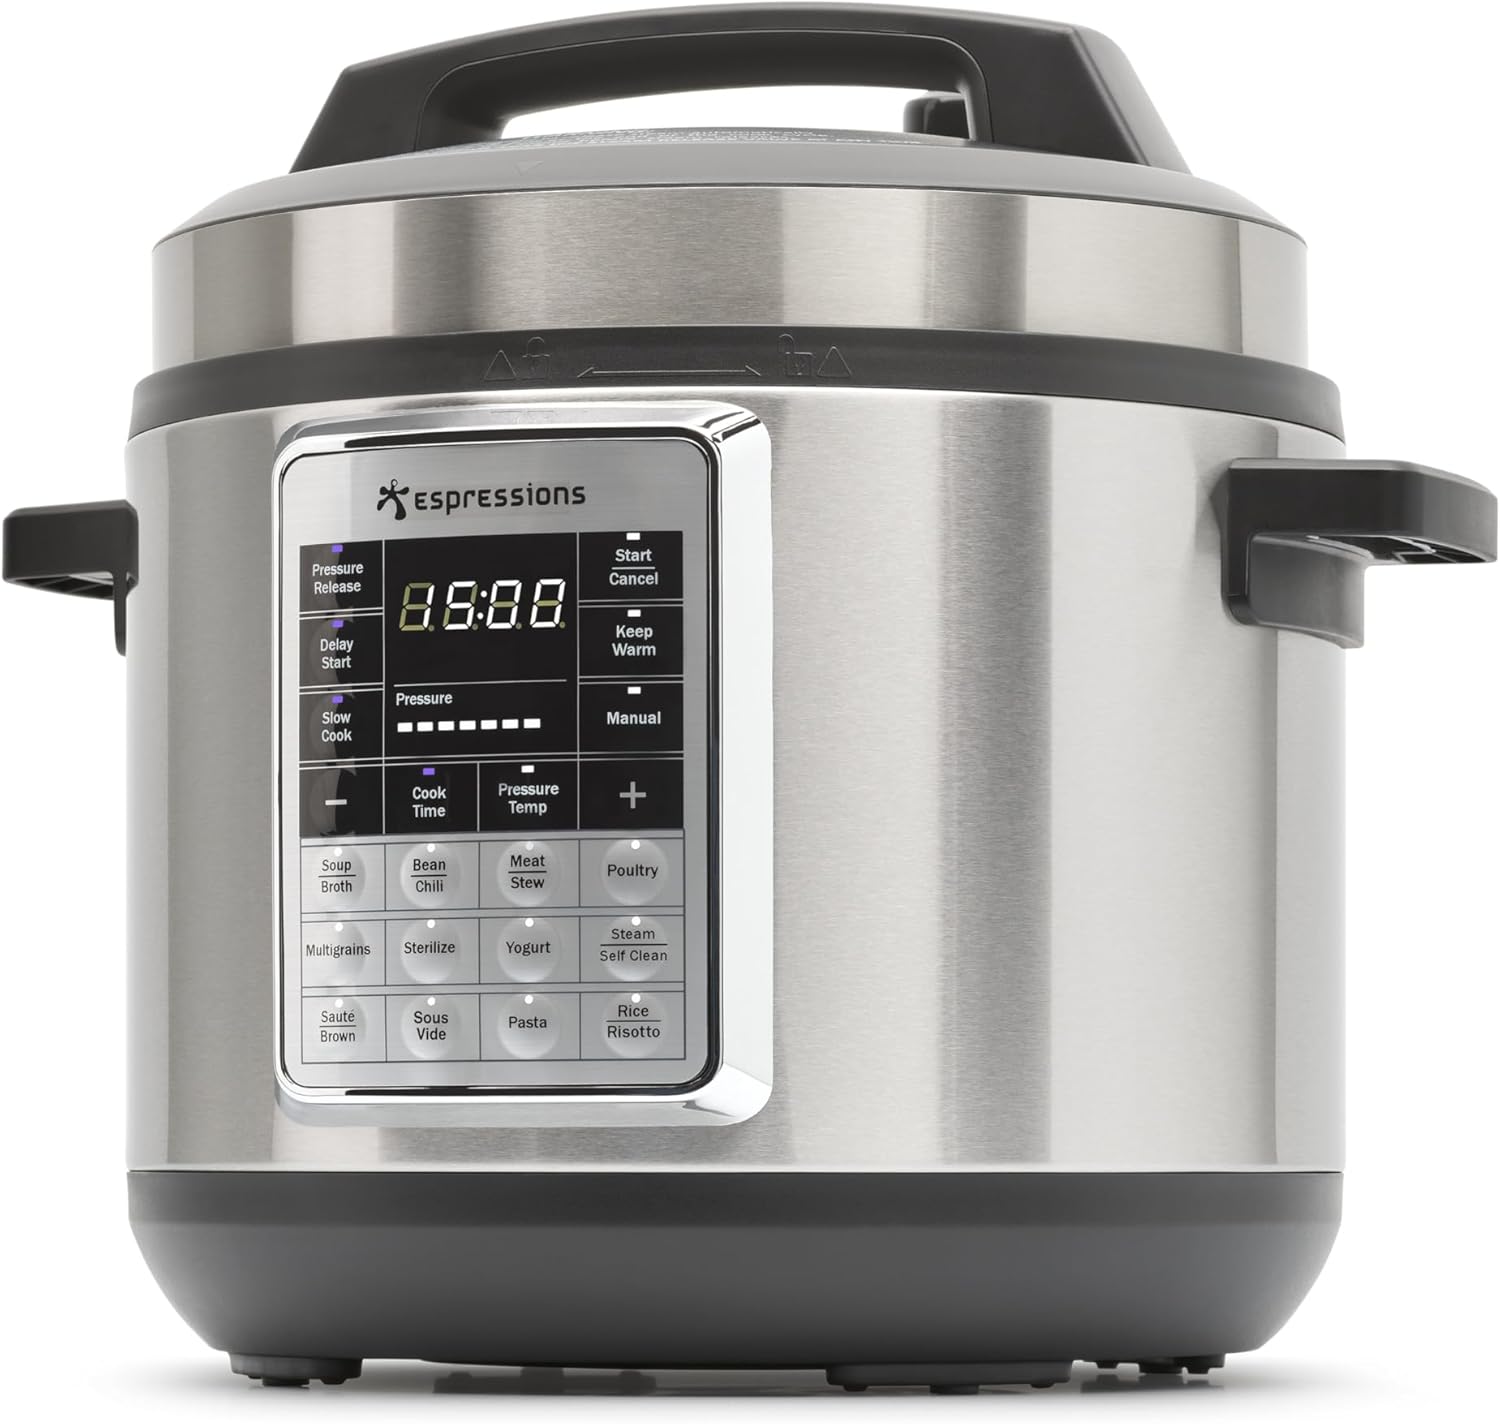
Figure 2: Front view of the Espressions Smart Pressure Cooker, highlighting the control panel.
The control panel features a digital display and various function buttons for different cooking modes. Common buttons include: Pressure Release, Delay Start, Slow Cook, Pressure Cook, Cook Time, Pressure Temp, Manual, Keep Warm, Start/Cancel, and specific program buttons like Soup/Broth, Meat/Stew, Sous Vide, Rice/Risotto, etc.
Basic Pressure Cooking
- Add ingredients and liquid to the inner pot. Do not exceed the MAX fill line.
- Secure the lid and ensure the steam release valve is in the "Sealing" position.
- Plug in the cooker. Select a preset program (e.g., "Meat/Stew") or use "Manual" mode.
- Adjust cooking time and pressure level using the "+" and "-" buttons if needed.
- Press "Start/Cancel" to begin. The cooker will preheat, then pressure cook.
- Once cooking is complete, the cooker will beep and may switch to "Keep Warm" mode.
- Release pressure using one of the methods below.
Pressure Release Methods
- Natural Release: Allow the pressure to dissipate naturally. This is suitable for foamy foods or large cuts of meat. The float valve will drop when pressure is released.
- Quick Release: Carefully turn the steam release valve to the "Venting" position. Caution: Steam will be released forcefully. Use a utensil to avoid direct contact with steam.
Sous-Vide Function
- Fill the inner pot with water to the appropriate level for your food.
- Place vacuum-sealed food into the water bath.
- Select the "Sous Vide" program.
- Adjust the temperature and cooking time as required for your recipe.
- Press "Start/Cancel". The cooker will heat the water to the set temperature and maintain it for the duration.
Care and Maintenance
Cleaning
- Always unplug the cooker and allow it to cool completely before cleaning.
- Inner Pot: The stainless steel inner pot is dishwasher safe. For hand washing, use warm, soapy water and a non-abrasive sponge.
- Lid: Remove the sealing ring and wash it, the lid, and the condensation collector with warm, soapy water. Rinse and dry thoroughly. Ensure the float valve and steam release valve are clear of food debris.
- Main Unit: Wipe the exterior with a damp cloth. Never immerse the main unit in water.
- Sealing Ring: Inspect the sealing ring for cracks, deformation, or damage. Replace every 12-18 months, or sooner if wear is visible, to ensure proper sealing.
Storage
Ensure all components are clean and dry before storing. Store the cooker in a dry place. You may invert the lid on the inner pot to prevent the sealing ring from compressing over time.
Troubleshooting Guide
| Problem | Possible Cause | Solution |
|---|---|---|
| Cooker not building pressure | Lid not properly sealed; steam release valve in "Venting" position; sealing ring damaged or missing; insufficient liquid. | Ensure lid is locked and steam release valve is in "Sealing" position. Check sealing ring for proper placement and condition. Add more liquid if necessary. |
| Steam leaking from lid | Sealing ring not seated correctly or damaged; food debris on rim; lid not closed properly. | Open lid, check and reposition sealing ring. Clean lid and inner pot rim. Ensure lid is locked correctly. |
| Float valve not rising | Insufficient liquid; float valve clogged; cooker not building pressure. | Add more liquid. Clean float valve. Refer to "Cooker not building pressure" solution. |
| Food not cooked thoroughly | Incorrect cooking time or pressure level; cooker did not reach full pressure. | Adjust cooking time/pressure. Ensure cooker built pressure correctly. |
Product Specifications
- Model Number: EP6005
- Capacity: 5.7 Liters
- Material: Stainless Steel
- Control Mode: Manual
- Dishwasher Safe (Inner Pot): Yes
- ASIN: B0CQSX5ZPM
Warranty Information
This product comes with a standard manufacturer's warranty. Please refer to the warranty card included in your product packaging or contact the retailer for specific details regarding warranty coverage and duration. Keep your proof of purchase for warranty claims.
Customer Support
For technical assistance, troubleshooting beyond this guide, or spare parts, please contact your retailer or the manufacturer's customer service. Contact details are typically found on the product packaging or the manufacturer's official website.


