
1. Introduction
This manual provides detailed instructions for the setup, operation, and maintenance of your BALDR 341HRF3 Wireless Weather Station. This device is designed to provide accurate indoor and outdoor temperature and humidity readings, automatic time synchronization via DCF radio signal, and weather forecasts. It also includes an alarm clock with snooze function and supports up to three external sensors.

Image: BALDR Wireless Weather Station and Outdoor Sensor. The main unit is cream-colored with an LCD display, accompanied by a compact outdoor sensor.
2. Package Contents
- Weather Station Main Unit
- Outdoor Sensor (2023 Version)
- User Manual
Note: Batteries are not included. Please prepare 2x AAA batteries for the main unit and 2x AAA batteries for the outdoor sensor.
3. Setup
3.1 Battery Installation
- Open the battery compartment on the back of the main unit.
- Insert 2 AAA batteries, observing the correct polarity (+/-).
- Close the battery compartment.
- Repeat steps 1-3 for the outdoor sensor.
3.2 Sensor Pairing
After inserting batteries into both units, the main unit will automatically search for the outdoor sensor. The outdoor temperature and humidity should appear on the main unit's display within a few minutes. If not, press the 'CH' button on the main unit to initiate a manual search.
3.3 Outdoor Sensor Placement
For accurate data, position the outdoor sensor 2-2.5 meters (6.5-8.2 feet) above the ground. Ensure it is placed in a shaded area, away from direct sunlight and heat sources, to prevent inaccurate temperature readings. The sensor has an IP54 waterproof rating, protecting it from rain, but avoid submerging it in water. The wireless transmission range is up to 100 meters (328 feet) without obstacles.
3.4 DCF Radio Signal Reception
Upon initial setup or after a reset, the weather station will automatically attempt to receive the DCF radio signal for time and date synchronization. This process may take several minutes. Ensure the main unit is placed away from electronic devices that may cause interference.

Image: Weather station receiving RCC radio signals for automatic time synchronization. The main unit displays '10:30' and the outdoor sensor is shown transmitting.
4. Operating Instructions
4.1 Display Overview
The LCD display shows various information including indoor/outdoor temperature and humidity, time, date, day of the week, weather forecast icons, comfort level indicator, and battery status.
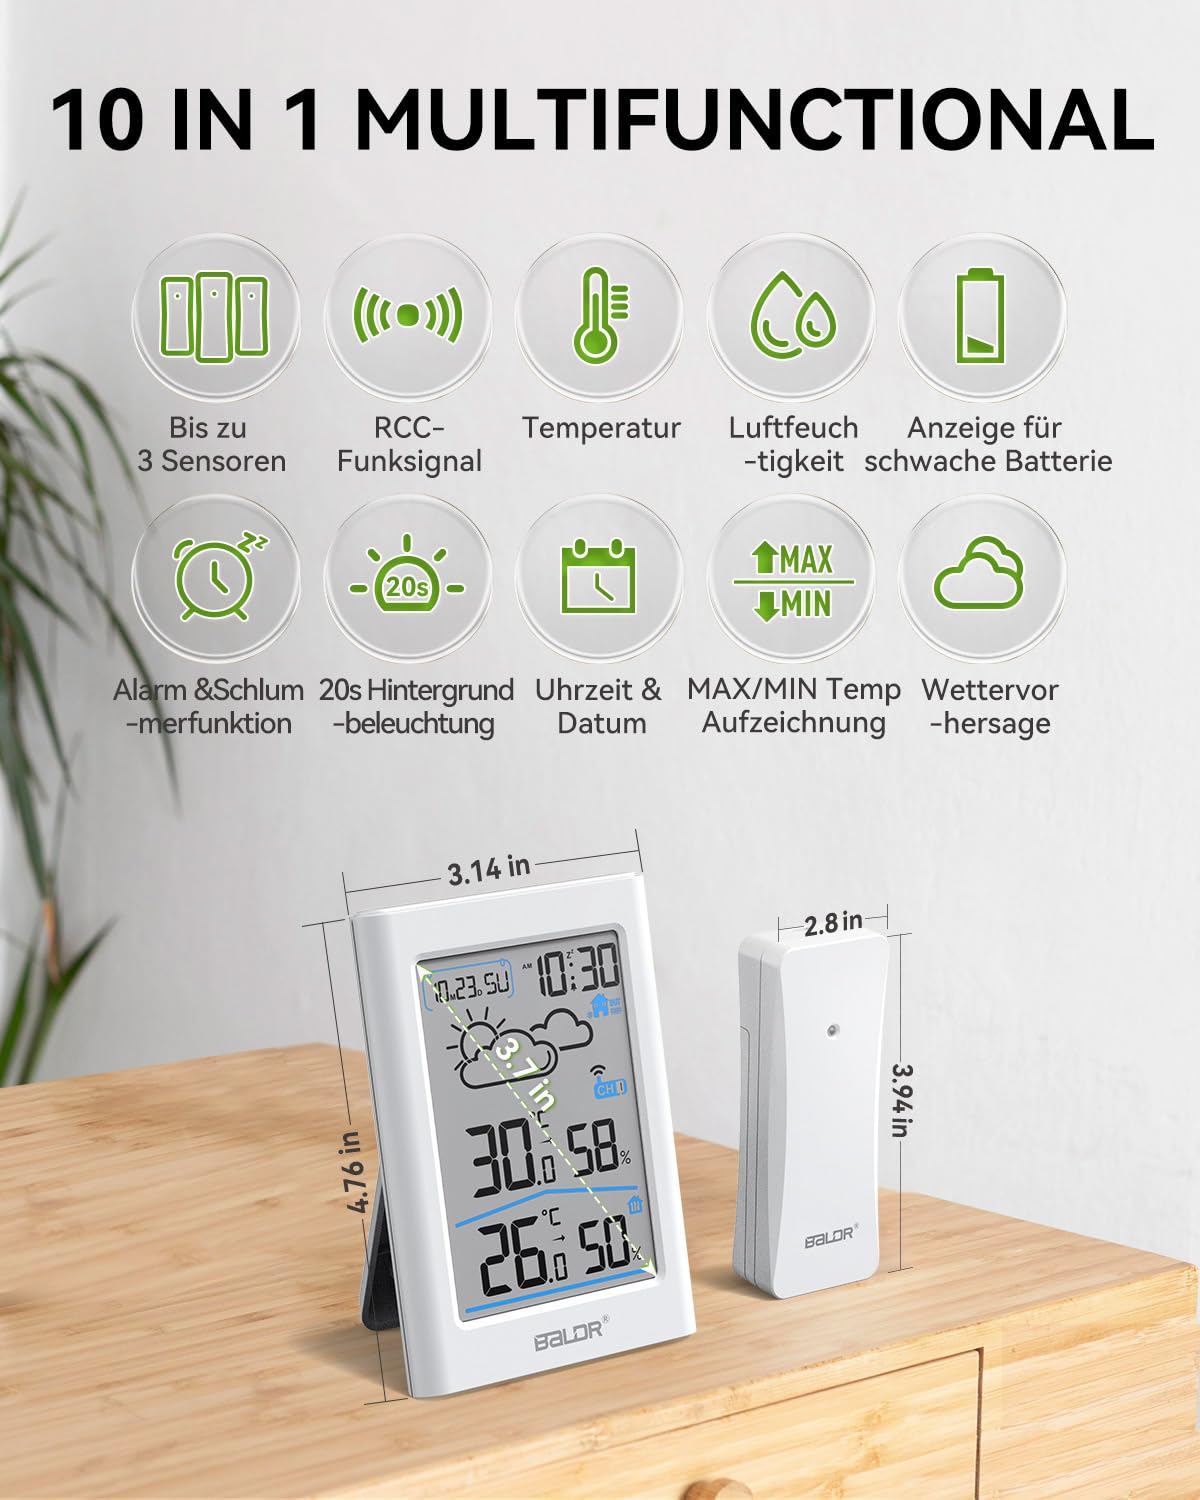
Image: Diagram highlighting the 10-in-1 multifunctional features of the weather station, including support for 3 sensors, RCC signal, temperature, humidity, low battery indicator, alarm & snooze, 20s backlight, time & date, max/min temperature recording, and weather forecast. Dimensions of the main unit and sensor are also shown.
4.2 Time and Date Settings
The time and date are automatically set via the DCF radio signal. If manual adjustment is required (e.g., in areas without DCF reception), refer to the detailed instructions in the full manual for setting time zone, 12/24-hour format, and calendar.
4.3 Temperature and Humidity Monitoring
The display updates temperature and humidity data every 10 seconds, offering high sensitivity and responsiveness. The device achieves maximum accuracy through a stable thermal sensor and improved ventilation strips on both the station and the outdoor sensor.

Image: Weather station displaying indoor and outdoor temperature and humidity readings, with a woman comfortably seated in the background.
4.3.1 Comfort Level Indicator
- Comfort: Temperature between 10°C and 30°C, Humidity between 40% and 70%.

Image: Comfort indicator showing optimal temperature (10-30°C) and humidity (40-70%) with a green smiling face.
- Normal Comfort: Temperature between 10-17.89°C or 26.06-30°C, Humidity between 30-39% or 61-70%.

Image: Normal comfort indicator showing acceptable temperature and humidity with a blue neutral face.
- Discomfort: Temperature below 18°C or above 26°C, Humidity below 30% or above 70%.

Image: Discomfort indicator showing temperature or humidity outside optimal range with a red sad face.
4.4 Max/Min Records
The weather station automatically records the maximum and minimum temperature and humidity values. Press the 'MAX/MIN' button to view these records. Press again to clear them.
4.5 Alarm and Snooze Function
The device includes an alarm clock. When the alarm sounds, press the 'SNOOZE' button for a 5-minute snooze period. Refer to the full manual for detailed instructions on setting the alarm time.

Image: Depicting the alarm clock and snooze function of the weather station, with an alarm icon and snooze icon next to the main unit.
4.6 Backlight Function
The display features a 20-second backlight for improved visibility in low-light conditions. Press any button to activate the backlight.

Image: Digital weather station with a backlit display, clearly visible in a dimly lit room.
4.7 Multi-Channel Support
The weather station can synchronize with up to 3 external sensors. Use the 'CH' button on the main unit to switch between channels (CH1, CH2, CH3) or to activate a cycle display mode.

Image: Illustrating the weather station's ability to connect with up to 3 outdoor sensors (CH1, CH2, CH3) for monitoring different locations, with a range of up to 100m.
4.8 Weather Forecast
The weather station provides a weather forecast based on atmospheric pressure changes. The forecast is indicated by icons on the display (e.g., sunny, partly cloudy, cloudy, rainy, snowy).

Image: Weather forecast icons displayed on the unit: Sunny, Partly Cloudy, Cloudy, Rainy, Snowy.
5. Maintenance
5.1 Battery Replacement
When the low battery icon appears on the display, replace the batteries in the respective unit (main station or outdoor sensor) promptly to ensure continuous operation and accurate readings.

Image: Weather station display showing a low battery icon, indicating the need for battery replacement.
5.2 Cleaning
Wipe the device with a soft, dry cloth. Do not use abrasive cleaners or solvents. Keep the ventilation strips on the sensor clear of dust and debris.
6. Troubleshooting
- No outdoor temperature/humidity reading:
- Ensure batteries are correctly installed in both units.
- Press the 'CH' button on the main unit to re-initiate sensor search.
- Reduce the distance between the main unit and the outdoor sensor.
- Avoid major obstacles (thick walls, metal objects) between units. - Incorrect temperature/humidity readings:
- Ensure the outdoor sensor is not in direct sunlight or near heat sources.
- Check for proper ventilation around both units. - DCF time not synchronizing:
- Place the main unit near a window, away from electronic interference.
- Allow several hours for the signal to be received, especially during initial setup.
7. Specifications
| Brand | Baldr |
| Model | 341HRF3 |
| Connectivity Technology | 433 MHz Wireless |
| Outdoor Sensor Range | Up to 100m (328ft) without obstacles |
| Temperature Accuracy | ±2°C |
| Data Update Rate | Every 10 seconds |
| Display Type | LCD with 20-second backlight |
| Power Source | Battery powered (AAA, not included) |
| Outdoor Sensor Waterproof Rating | IP54 |
| Max External Sensors | 3 |
| Special Features | 16-in-1 Multifunction, DCF Radio Clock, Alarm & Snooze, Max/Min Records, Weather Forecast |
| Color | Cream |
| Material Type | Bamboo (Note: This may refer to packaging or a minor component) |
| Country of Origin | China |
8. Warranty and Support
BALDR products are designed for reliability and performance. For warranty information or technical support, please refer to the contact details provided with your purchase or visit the official BALDR website. Keep your purchase receipt as proof of purchase.


