
MekedeTech MekedeTech Android Car Radio Stereo GPS Head Unit
MekedeTech Android Car Radio Stereo GPS Head Unit User Manual
For Volkswagen VW Passat B6 B7 B8 CC Magotan (2011-2015)
1. Introduction
This manual provides comprehensive instructions for the installation, operation, and maintenance of your MekedeTech Android Car Radio Stereo GPS Head Unit. Please read this manual thoroughly before installation and use to ensure proper function and to maximize your user experience.
This head unit is designed for specific Volkswagen models:
- Volkswagen VW Passat B6 (2011-2015)
- Volkswagen VW Passat B7 (2011-2015)
- Volkswagen VW Passat B8 (2011-2015)
- Volkswagen VW CC (2011-2015)
- Volkswagen Magotan (2011-2015)
The unit features an Android 13 OS, an 8-Core A53 1.8GHz CPU, 8GB RAM, and 258GB ROM, providing a responsive and powerful in-car entertainment and navigation system.

Image 1.1: The MekedeTech Android Car Radio Stereo GPS Head Unit displaying its navigation and music interface.
2. Setup and Installation
The MekedeTech Android Head Unit is designed for a plug-and-play installation in compatible Volkswagen models. It includes all necessary accessories for installation.
2.1 Included Components
Before beginning installation, verify that all components are present:
- Head Unit
- Dash Kit (for seamless integration)
- Power Cable
- RCA Cable
- Reversing Camera Cable
- USB Cables
- GPS Antenna
- Bluetooth Antenna
2.2 Installation Steps
- Preparation: Ensure the vehicle's ignition is off and the battery is disconnected before starting any electrical work.
- Remove Original Head Unit: Carefully remove the existing car radio stereo from your dashboard. Refer to your vehicle's specific service manual for detailed instructions on removing trim panels and the original unit.
- Connect Wiring: Connect the provided power cable, RCA cable, reversing camera cable, and USB cables to the corresponding ports on the new MekedeTech head unit and the vehicle's wiring harness. Ensure all connections are secure.
- Connect Antennas: Attach the GPS antenna and Bluetooth antenna to the designated ports on the head unit. Position the GPS antenna in a location with a clear view of the sky for optimal signal reception.
- Install Dash Kit: If required, integrate the head unit with the provided dash kit for a flush and factory-like fit into your vehicle's dashboard.
- Secure Head Unit: Carefully slide the new head unit into the dashboard opening and secure it using the appropriate mounting brackets or screws.
- Reconnect Battery and Test: Reconnect the vehicle's battery. Turn on the ignition and power on the head unit to test its functionality. Verify that all features, including audio, touch screen, GPS, and steering wheel controls, are working correctly.
- Reassemble Dashboard: Once confirmed operational, reassemble any removed trim panels.

Image 2.1: Comparison of a standard car dashboard before and after installation of the MekedeTech head unit.

Image 2.2: The head unit seamlessly integrated into a Volkswagen Passat dashboard, showing the radio interface.

Image 2.3: The head unit installed in a Volkswagen Passat dashboard, displaying a navigation map.
2.3 Cooling Fan Setup
The unit is equipped with a cooling fan to manage internal temperatures, especially during prolonged use or in warm environments. Proper setup ensures optimal performance and longevity.
- Connect Cooling Fan: Ensure the cooling fan cable is securely connected to the designated port on the head unit.
- Access Settings: On the head unit, navigate to Settings > Device > Sound.
- Enable AMP: Locate and enable the AMP ON option.
- Verify Fan Operation: The cooling fan should activate, helping to maintain normal operating temperatures.
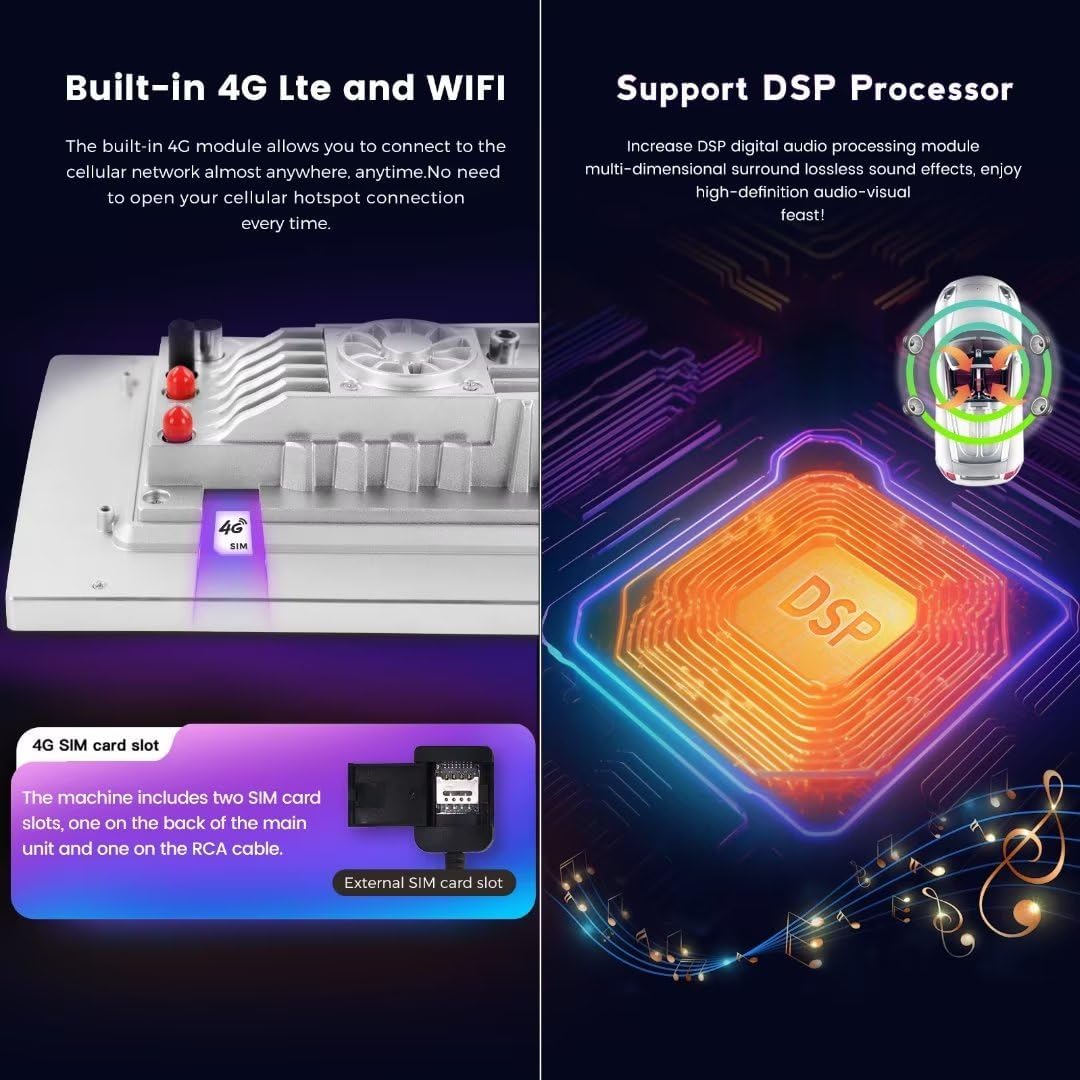
Image 2.4: Diagram illustrating the cooling fan connection steps and the temperature difference with and without the cooling fan enabled.
3. Operating Instructions
Your MekedeTech head unit offers a variety of features for navigation, entertainment, and connectivity.
3.1 Basic Operation
- Power On/Off: The unit typically powers on with the vehicle's ignition. Press and hold the power button (if available) to manually turn it off or on.
- Touch Screen: Navigate through menus and applications using the responsive 1280x720 IPS touch screen.
- Steering Wheel Controls: The unit supports original steering wheel control functions, allowing you to adjust volume, switch songs/channels, and answer calls without taking your hands off the wheel.
3.2 Navigation (GPS)
The head unit includes built-in GPS navigation with pre-installed maps. To use:
- Tap the 'Navigation' or 'Maps' icon on the home screen.
- Enter your destination using the on-screen keyboard or voice command (if configured).
- Follow the on-screen directions and voice prompts for your route.
3.3 Wireless CarPlay and Android Auto
Enjoy seamless integration with your smartphone via wireless CarPlay (for iOS devices) and Android Auto (for Android devices).
3.3.1 Wireless CarPlay (iOS System)
- Connect Bluetooth: On your iPhone, go to Bluetooth settings and pair with the head unit.
- Open 'Car Link': On the head unit, open the 'Car Link' application.
- Wait for Connection: The unit will automatically connect to CarPlay. (CarPlay can also be connected via USB Cable if preferred).
3.3.2 Wireless Android Auto (Android System)
- Connect Bluetooth: On your Android phone, go to Bluetooth settings and pair with the head unit.
- Open 'Car Link': On the head unit, open the 'Car Link' application.
- Wait for Connection: The unit will automatically connect to Android Auto. (Android Auto can also be connected via USB Cable if preferred).
Image 3.1: Visual guide for connecting and using wireless CarPlay and Android Auto with the head unit.
3.4 4G LTE and Wi-Fi Connectivity
The head unit supports 4G LTE and Wi-Fi for internet access.
- 4G LTE: Insert a 4G SIM card into the designated slot on the unit to access cellular data anytime, anywhere.
- Wi-Fi: Connect to a Wi-Fi hotspot (e.g., from your smartphone or a portable hotspot) to access the internet. Navigate to Settings > Network & Internet > Wi-Fi to connect.
3.5 Bluetooth 5.0
Bluetooth 5.0 provides high-quality audio for calls and music streaming.
- Pairing: Go to Settings > Connected devices > Bluetooth on the head unit and enable Bluetooth. On your phone, search for and select the head unit's Bluetooth name to pair.
- Hands-Free Calling: Once paired, you can make and receive calls directly through the head unit.
- Audio Streaming: Stream music from your paired smartphone to the head unit.
Image 3.2: Illustration of the 4G LTE SIM card slot and the integrated DSP processor for enhanced audio quality.
4. Maintenance
Regular maintenance ensures the longevity and optimal performance of your MekedeTech head unit.
- Screen Cleaning: Use a soft, lint-free cloth specifically designed for electronics to clean the touch screen. Avoid abrasive cleaners or harsh chemicals that can damage the screen coating.
- Software Updates: Periodically check for and install software updates provided by MekedeTech to ensure you have the latest features, bug fixes, and performance improvements. These updates are typically available via Wi-Fi or USB.
- Ventilation: Ensure the cooling fan and ventilation openings are not obstructed to prevent overheating.
- Cable Connections: Occasionally check all cable connections (power, USB, RCA, antennas) to ensure they are secure and free from damage.
5. Troubleshooting
This section addresses common issues you might encounter with your head unit.
5.1 No Power / Unit Not Turning On
- Check Power Connections: Ensure the power cable is securely connected to both the head unit and the vehicle's wiring harness.
- Vehicle Battery: Verify that your vehicle's battery is charged and properly connected.
- Fuses: Check the vehicle's fuse box and any inline fuses for the head unit. Replace any blown fuses.
5.2 No Sound / Poor Audio Quality
- Volume Level: Ensure the volume is turned up on both the head unit and any connected devices (e.g., smartphone for Bluetooth audio).
- Speaker Connections: Verify that all speaker wires are correctly connected to the head unit and the vehicle's speakers.
- Audio Settings: Check the audio settings on the head unit (e.g., balance, fader, equalizer) to ensure they are configured correctly.
- Microphone Quality: If experiencing poor call quality, ensure the microphone is not obstructed and is positioned optimally. While the built-in microphone is functional, an external microphone (if supported and installed) may offer improved performance.
5.3 GPS Signal Issues
- Antenna Placement: Ensure the GPS antenna is installed in a location with a clear, unobstructed view of the sky. Avoid placing it under metal objects.
- Antenna Connection: Verify the GPS antenna is securely connected to the head unit.
- Software: Ensure your navigation software and maps are up to date.
5.4 CarPlay/Android Auto Connection Issues
- Bluetooth Pairing: Confirm that your smartphone is successfully paired with the head unit via Bluetooth.
- 'Car Link' App: Ensure the 'Car Link' application is open on the head unit.
- USB Connection: If wireless connection fails, try connecting via a USB cable to rule out wireless issues.
- Phone Settings: Check your phone's settings to ensure CarPlay or Android Auto is enabled and allowed to connect to the head unit.
5.5 Overheating
- Cooling Fan: Ensure the cooling fan is properly connected and enabled in the settings (refer to Section 2.3).
- Ventilation: Check that the unit's ventilation openings are not blocked.
- Environmental Factors: High ambient temperatures can contribute to overheating. Ensure adequate airflow around the unit.
6. Specifications
| Feature | Specification |
|---|---|
| Operating System | Android 13 |
| CPU | 8-Core A53 1.8GHz |
| Memory (RAM) | 8GB |
| Storage (ROM) | 258GB |
| Display Size | 10 Inches |
| Display Type | IPS Touch Screen |
| Display Resolution | 1280 x 720 |
| Power Output | 4*50W |
| Connectivity | 4G LTE, Wi-Fi, Bluetooth 5.0 |
| Special Features | Wireless Android Auto, Wireless CarPlay, Touchscreen |
| Navigation | Built-in GPS, Worldwide Map Type |
| Audio Output Mode | Stereo |
| Mounting Type | Dashboard Mount |
| Supported Audio Formats | APE/FLAC/WAV/MP3/WMA etc. |
| Supported Video Formats | MKV/RMVB/AVI/MP4/MDV etc. |
| Supported Picture Formats | PNG/JPEG/JPG/GIF/WBMP/BNP etc. |
| Manufacturer | Shenzhen Mekede Technology Co.,Ltd |
7. Warranty Information
The MekedeTech Android Car Radio Stereo GPS Head Unit comes with a 1-Year Warranty from the date of purchase. This warranty covers manufacturing defects and malfunctions under normal use.
Please retain your proof of purchase for warranty claims. The warranty does not cover damage caused by improper installation, misuse, accidents, unauthorized repairs, or normal wear and tear.
8. Customer Support
If you encounter any issues not covered in this manual or require further assistance, please contact MekedeTech customer support through the following channels:
- Online Support: Visit the official MekedeTech website for FAQs, troubleshooting guides, and contact forms.
- Email Support: Refer to your product packaging or the official website for the customer support email address.
- Amazon Store: You can also reach out to the seller, Mekedetech, via your Amazon order details page for product-specific inquiries.
When contacting support, please provide your product model number and a detailed description of the issue.
Ask a question about this manual
Ask about setup, troubleshooting, compatibility, parts, safety, or missing instructions. Manuals+ will review the question and use this page’s manual context to help answer it.