Introduction
This manual provides detailed instructions for the installation, operation, and maintenance of your Gearwiz Wiz-Loc1 Fingerprint Keyless Entry Deadbolt Lock. This smart lock offers enhanced security and convenience through multiple access methods, including fingerprint recognition, keypad codes, and traditional keys. Please read this manual thoroughly before installation and use to ensure proper function and longevity of your device.
Product Overview
The Gearwiz Wiz-Loc1 is a keyless deadbolt lock designed for residential security. It integrates advanced biometric technology with traditional access methods to provide a secure and flexible entry solution.
Key Features:
- Multiple Access Methods: Fingerprint unlock, keypad code entry, and traditional key access.
- Biometric Fingerprint Identification: Unlocks in approximately 0.3 seconds with a high recognition rate.
- Keypad Entry: Supports up to 100 unique user codes.
- One-Time PIN Codes: Generate temporary codes for visitors that automatically delete after single use.
- Automatic Locking: Customizable auto-lock function (10-99 seconds) after door closure.
- One-Touch Auto-Lock: Securely lock the door by pressing and holding any keypad key for 2 seconds.
- Emergency Power: Equipped with a USB emergency power socket for temporary power in case of battery depletion.
- Weather Resistant: Designed to withstand various weather conditions.
- Low Power Reminder: Alerts when batteries are low.

Image 1: Front and side view of the Gearwiz Wiz-Loc1 Fingerprint Keyless Entry Deadbolt Lock in Matte Black. The front features a keypad, fingerprint sensor, and keyhole.
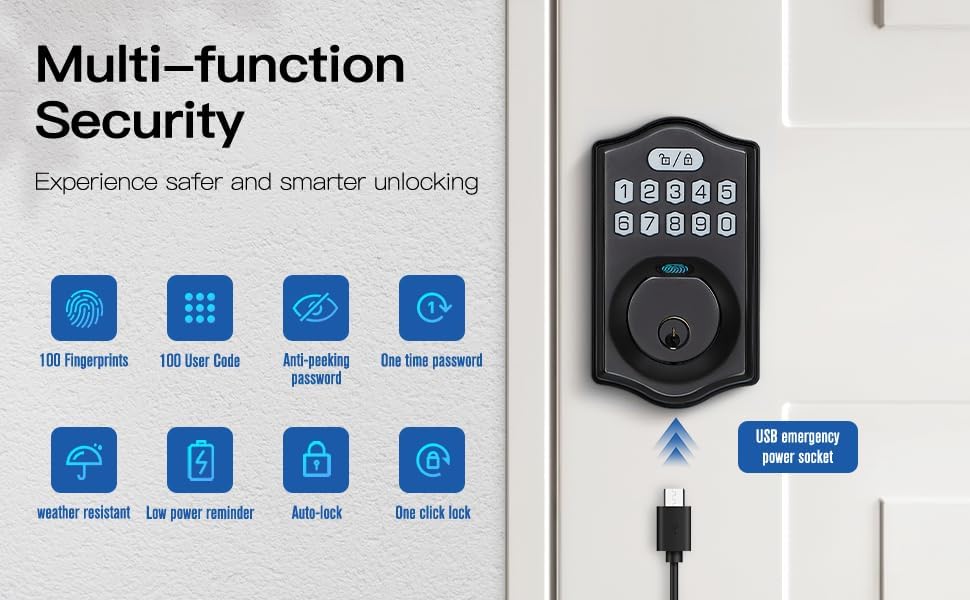
Image 2: Diagram illustrating the multi-function security features of the Gearwiz Wiz-Loc1. Icons represent 100 fingerprints, 100 user codes, anti-peeking password, one-time password, weather resistance, low power reminder, auto-lock, and one-click lock. A USB emergency power socket is also highlighted.
Setup and Installation
The Gearwiz Wiz-Loc1 deadbolt lock is designed for straightforward installation and is compatible with most US standard door sizes. It can be installed on both left-handed and right-handed doors. A screwdriver is typically the only tool required.
Before Installation:
- Ensure your door thickness is between 1-3/8" to 2" (35-50mm).
- Verify the hole diameter is 2-1/8" (54mm) and the bore diameter is 0.70" (18mm).
- Gather necessary tools: Phillips head screwdriver.
- Prepare 3 AA alkaline batteries (not included).
Installation Steps:
- Prepare the Door: If replacing an existing deadbolt, remove it. Ensure the door frame and bore holes are clean and clear.
- Install the Latch Bolt: Insert the latch bolt into the door edge. Ensure the "UP" arrow on the latch bolt faces upwards. Secure with screws.
- Install the Exterior Assembly: Route the cable through the door hole. Align the exterior keypad assembly with the latch bolt and secure it to the door.
- Install the Interior Mounting Plate: Attach the interior mounting plate to the door, securing it to the exterior assembly with screws. Ensure the cable passes through the plate.
- Connect the Cable: Connect the cable from the exterior assembly to the interior assembly.
- Install the Interior Assembly: Attach the interior assembly to the mounting plate, ensuring the thumb turn spindle engages correctly with the latch bolt mechanism. Secure with screws.
- Insert Batteries: Open the battery cover on the interior assembly and insert 3 AA alkaline batteries, observing polarity.
- Door Handing Process: After battery installation, the lock will automatically detect door handing. Follow any prompts or refer to the quick start guide for specific reset procedures to enable automatic door recognition.

Image 3: Diagram showing the product dimensions and door compatibility requirements for the Gearwiz Wiz-Loc1 lock. It specifies door thickness (1-3/8" to 2"), hole diameter (2-1/8"), and bore diameter (0.70").
Operating Instructions
Your Gearwiz Wiz-Loc1 lock offers several convenient ways to secure and access your property.
1. Unlocking Methods:
- Fingerprint Unlock: Place a registered finger on the fingerprint sensor. The lock will unlock in approximately 0.3 seconds if the fingerprint is recognized.
- Keypad Code Unlock: Enter your registered 4-8 digit user code on the keypad, then press the lock/unlock button.
- Traditional Key Unlock: Insert the physical key into the keyhole and turn to unlock. This is an emergency backup method.

Image 4: Visual representation of the three unlocking methods: fingerprint, password (keypad), and traditional key.
2. Locking Methods:
- Automatic Locking: The lock can be set to automatically lock after a period of 10-99 seconds once the door is closed. Refer to the programming section for setting this feature.
- One-Touch Auto-Lock: To manually lock the door from the outside, press and hold any key on the keypad for 2 seconds.
- Manual Locking (Interior): Turn the thumb turn on the interior assembly to lock the deadbolt.

Image 5: Illustration of the auto-lock feature, which engages within 1-99 seconds after closing the door, and the one-touch locking function activated by holding any key for 2 seconds.
3. User Management and Programming:
Detailed programming instructions for adding/deleting fingerprints, user codes, and setting auto-lock times are typically found in the quick start guide provided with your lock. General steps include:
- Adding Fingerprints: Access programming mode (usually via a master code or button on the interior unit), then follow prompts to register new fingerprints. The lock can store up to 100 fingerprints.
- Adding User Codes: In programming mode, enter a new 4-8 digit code and confirm. Up to 100 user codes can be stored.
- Creating One-Time PIN Codes: Generate temporary codes for guests. These codes are automatically deleted after a single use.
- Setting Auto-Lock Time: Adjust the delay for the automatic locking feature within the 10-99 second range.
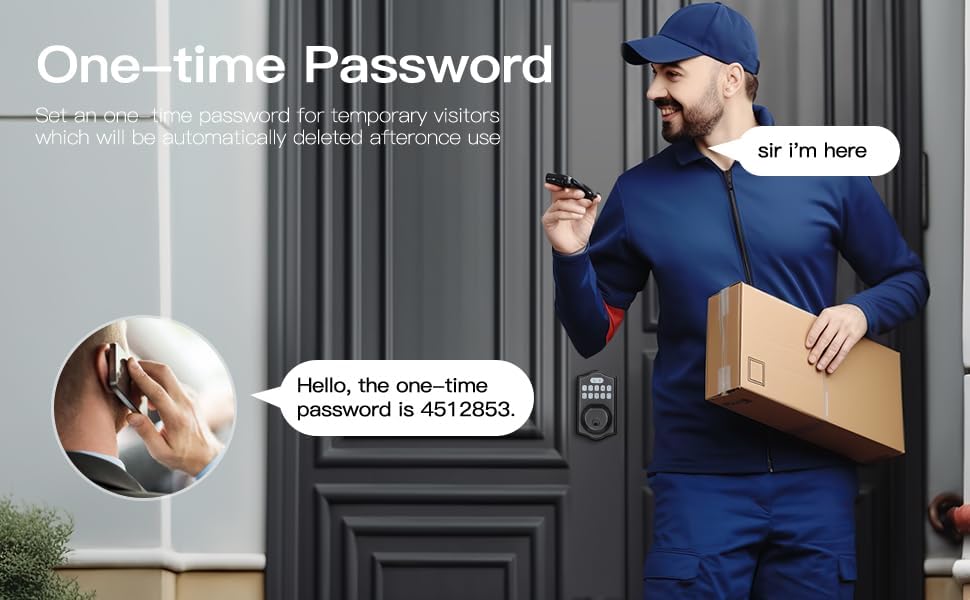
Image 6: Scenario depicting the use of a one-time password for temporary visitors, such as a delivery person. The password is automatically deleted after use.
Maintenance
Proper maintenance ensures the optimal performance and longevity of your Gearwiz Wiz-Loc1 lock.
- Battery Replacement: The lock requires 3 AA alkaline batteries. Replace them promptly when the low power reminder activates. Using high-quality alkaline batteries is recommended. Avoid rechargeable batteries as they may not provide consistent voltage.
- Emergency Power: In case of complete battery depletion, you can temporarily power the lock using a power bank connected to the USB emergency power socket located on the exterior unit. This allows you to enter a code or use a fingerprint to unlock and then replace the batteries.
- Cleaning: Clean the keypad and fingerprint sensor with a soft, dry cloth. Avoid abrasive cleaners or solvents that could damage the finish or electronic components.
- Environmental Considerations: While weather-resistant, extreme temperatures (especially very cold conditions below 20°F) can affect the performance of the biometric scanner and keypad. Ensure the lock is protected from direct heavy rain or snow if possible.
Troubleshooting
If you encounter issues with your Gearwiz Wiz-Loc1 lock, refer to the following common troubleshooting steps.
- Lock Not Responding:
- Check battery levels. Replace with fresh AA alkaline batteries if low.
- Use the USB emergency power socket with a power bank to temporarily power the lock.
- Ensure the cable connection between the exterior and interior assemblies is secure.
- Fingerprint Not Recognized:
- Ensure your finger is clean and dry.
- Try different angles or apply slight pressure.
- Re-register your fingerprint if recognition remains inconsistent.
- Note that very cold temperatures can sometimes affect biometric scanner performance.
- Keypad Not Working:
- Verify you are entering the correct code.
- Ensure the keypad is clean and free from debris.
- Check battery levels.
- In extreme cold, keypad responsiveness might be reduced.
- Auto-Lock Malfunction:
- Ensure the auto-lock feature is enabled and correctly configured in the programming settings.
- Check for any obstructions preventing the deadbolt from fully extending.
- Verify the door sensor (if applicable) is clean and unobstructed.
- Lock Beeps Continuously:
- This often indicates low battery. Replace batteries.
- Could also indicate an error during programming or an attempt to enter an incorrect code too many times. Refer to the quick start guide for error code interpretations.
- Difficulty with Installation:
- Double-check all measurements against the product specifications.
- Ensure the latch bolt is correctly oriented and fully extended/retracted during testing.
- Verify all screws are tightened appropriately, but do not overtighten.
If problems persist after following these steps, consult the quick start guide or contact Gearwiz customer support for further assistance.
Specifications
| Feature | Detail |
|---|---|
| Brand | Gearwiz |
| Model Name | Wiz-Loc1 |
| Lock Type | Keypad, Fingerprint |
| Special Feature | Fingerprint Recognition, Keyless Entry |
| Material | Metal (Aluminum) |
| Color | Matte Black (other variants available) |
| Product Dimensions (L x W x H) | 5 x 3 x 0.5 inches (Exterior Assembly) |
| Item Weight | 2.55 pounds |
| Recommended Door Thickness | 1-3/8" to 2" (35-50mm) |
| Power Source | 3 AA Batteries (not included) |
| Emergency Power | USB-C Port |
| Connectivity Protocol | Bluetooth (Note: Functionality is standalone; no app connectivity for this model.) |
| UPC | 704001436256 |
Warranty and Support
For specific warranty information and customer support, please refer to the documentation included with your product packaging or visit the official Gearwiz website. Keep your purchase receipt as proof of purchase for any warranty claims.
Manufacturer: Gearwiz