1. Introduction
This manual provides essential instructions for the safe and effective operation of your HTRC 3-Amp 6V/12V Smart Automatic Battery Charger and Maintainer, Model 3A-Z. This device is designed to charge and maintain various 6V and 12V batteries, including Lead-Acid (AGM, GEL, STD, Flooded, WET, EFB), Lithium, and LiFePO4 types. Please read this manual thoroughly before use and retain it for future reference.

Image 1.1: The HTRC 3-Amp 6V/12V Smart Automatic Battery Charger and Maintainer with alligator clips and ring terminals.
2. Safety Instructions
WARNING: Read all safety warnings and instructions. Failure to follow the warnings and instructions may result in electric shock, fire, and/or serious injury.
- Always wear eye protection and protective clothing when working with batteries.
- Ensure the charging area is well-ventilated.
- Never charge a frozen battery. Allow it to warm to room temperature first.
- Keep the charger away from flammable materials and liquids.
- Do not operate the charger if it has received a sharp blow, been dropped, or otherwise damaged.
- Disconnect the AC power before making or breaking connections to the battery.
- Do not attempt to charge non-rechargeable batteries.
- This charger is not intended for use by persons (including children) with reduced physical, sensory, or mental capabilities, or lack of experience and knowledge, unless they have been given supervision or instruction concerning use of the appliance by a person responsible for their safety.
3. Package Contents
Verify that all items are present in your package:
- HTRC 3-Amp 6V/12V Smart Automatic Battery Charger (Model 3A-Z)
- DC Output Cable with Alligator Clips
- DC Output Cable with Ring Terminals
- Instruction Manual
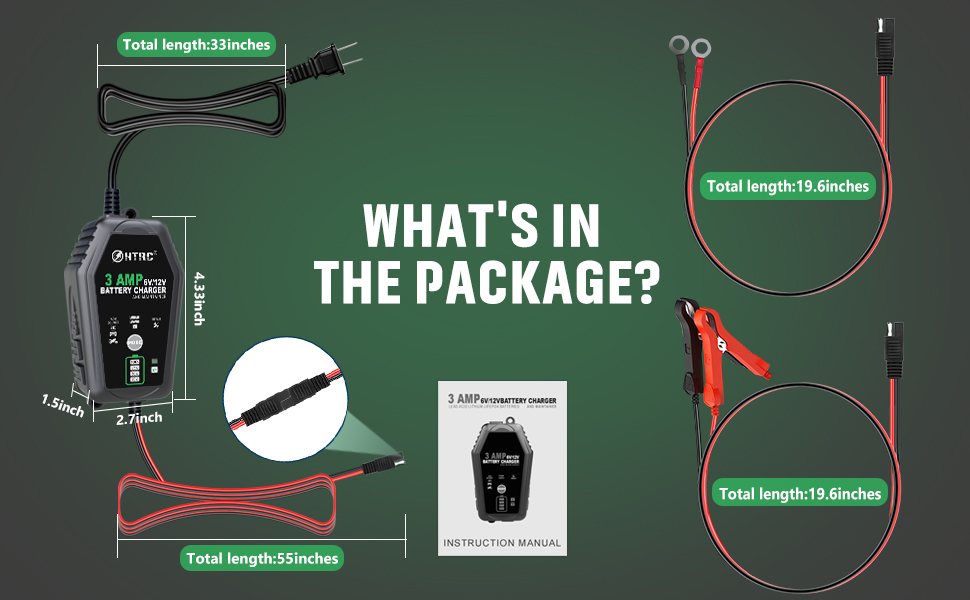
Image 3.1: Illustration of the HTRC 3-Amp battery charger and its included accessories.
4. Product Features
- Universal Compatibility: Charges 6V and 12V batteries, including Lead-Acid (AGM, GEL, STD, Flooded, WET, EFB), Lithium, and LiFePO4.
- Smart Charging Modes: Features dedicated modes for different battery types and a repair mode.
- Automatic Temperature Compensation: Adjusts charging parameters for optimal performance in hot (up to 104°F/40°C) and cold (down to 58°F/10°C) climates, preventing over- or under-charging.
- Multi-Level Safety Protection: Includes safeguards against over-load, short circuit, high-voltage, over-temperature, low-voltage, over-discharge, reverse connection, and overcharge.
- User-Friendly Interface: LCD screen displays charging status and battery information.
- Flexible Connectivity: Comes with interchangeable alligator clips and ring terminals for various applications.

Image 4.1: The charger's broad battery compatibility for 6V and 12V systems.

Image 4.2: The charger's ability to adjust charging based on ambient temperature.

Image 4.3: Overview of the charger's comprehensive safety protection features.
5. Setup
Before connecting the charger, ensure the battery terminals are clean and free of corrosion. Always connect the charger to the battery before plugging it into an AC outlet.
5.1 Connecting to the Battery
- Choose Connection Method: Select either the alligator clips or the ring terminals based on your battery's accessibility and intended use. The charger features standard SAE connectors for easy interchangeability.
- Connect Positive: Attach the RED (+) connector (alligator clip or ring terminal) to the positive (+) battery terminal.
- Connect Negative: Attach the BLACK (-) connector (alligator clip or ring terminal) to the negative (-) battery terminal.
- Ensure Secure Connection: Confirm that both connections are firm and secure to prevent arcing or poor contact.
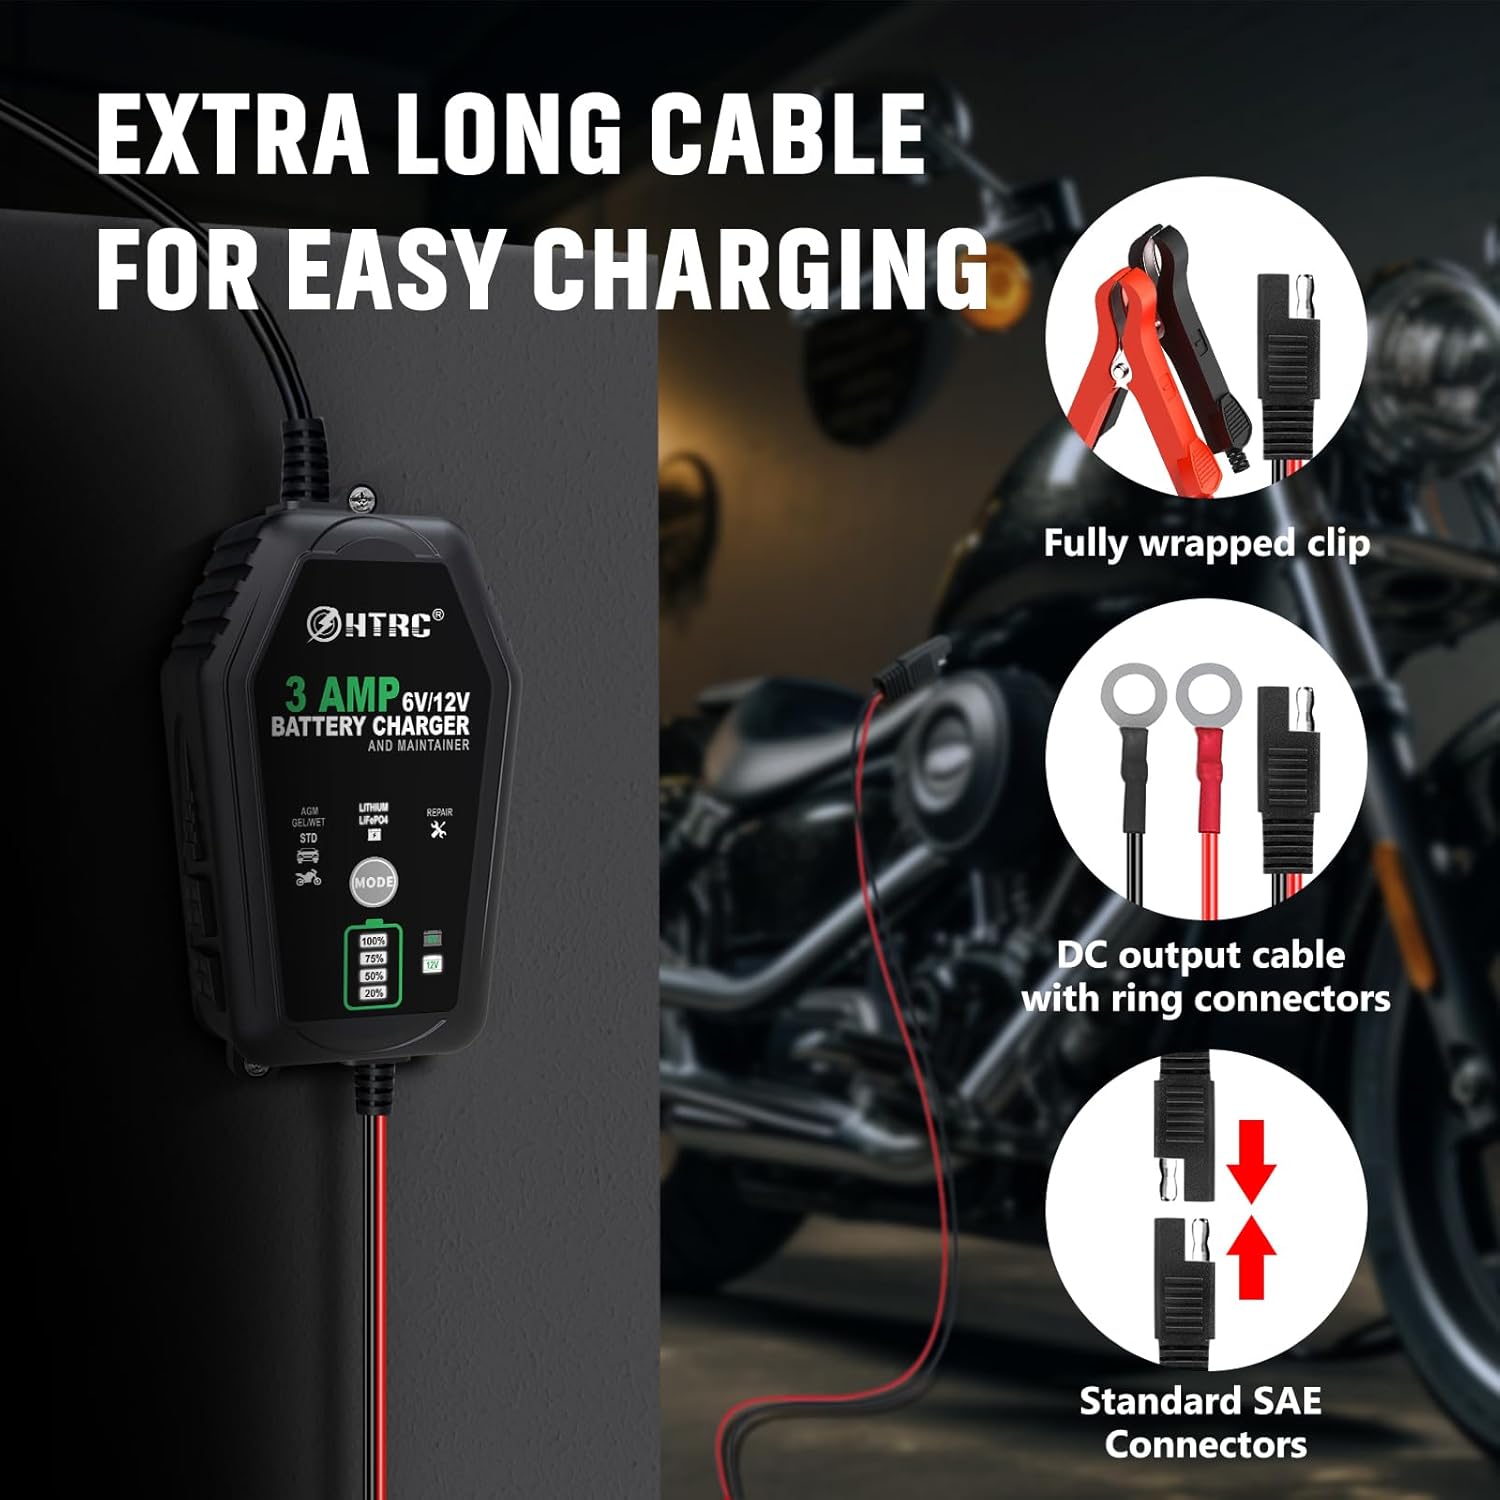
Image 5.1: The charger's flexible connection options: alligator clips and ring terminals.
5.2 Connecting to Power
Once the charger is securely connected to the battery, plug the AC power cord into a standard 100-240V AC electrical outlet.
6. Operating Instructions
The charger will automatically detect the battery voltage (6V or 12V). You will need to manually select the appropriate charging mode.
6.1 Selecting Charging Mode
Press the MODE button on the charger to cycle through the available charging modes:
- AGM/GEL/WET/STD: For standard Lead-Acid batteries, including AGM, Gel, Wet, and Standard flooded batteries.
- Lithium LiFePO4: For Lithium Iron Phosphate batteries.
- Repair: A specialized mode designed to increase battery health status or activate deeply discharged batteries. Use this mode with caution and only when necessary.

Image 6.1: The charger's display indicating the three selectable charging modes.
6.2 Charging Process
- After selecting the mode, the charger will begin the charging process. The LCD screen will display the charging progress (e.g., 20%, 50%, 75%, 100%) and the current battery voltage.
- The charger will automatically switch to maintenance mode once the battery is fully charged to prevent overcharging.
- When charging is complete, the display will show 100%.
6.3 Disconnecting the Charger
To disconnect the charger:
- Unplug the AC power cord from the electrical outlet.
- Disconnect the BLACK (-) connector from the negative (-) battery terminal.
- Disconnect the RED (+) connector from the positive (+) battery terminal.
7. Maintenance
- Cleaning: Clean the charger casing with a soft, dry cloth. Do not use abrasive cleaners or solvents.
- Cable Inspection: Regularly inspect the AC power cord and charging cables for any signs of damage, cuts, or fraying. Do not use if damaged.
- Storage: Store the charger in a cool, dry place when not in use. Keep it away from moisture and direct sunlight.
8. Troubleshooting
| Problem | Possible Cause | Solution |
|---|---|---|
| Charger does not turn on. | No AC power; faulty connection; charger malfunction. | Check AC outlet; ensure all connections are secure; contact support if problem persists. |
| Charger not charging battery. | Incorrect mode selected; poor battery connection; battery too deeply discharged; battery fault. | Verify correct mode; check connections; try Repair mode for deeply discharged batteries; have battery tested by a professional. |
| Charger displays error code or warning. | Reverse polarity; short circuit; over-temperature. | Disconnect immediately; check connections for correct polarity; allow charger to cool down; inspect cables for damage. |
| Battery not holding charge after charging. | Battery is old or damaged; internal battery fault. | This indicates a battery issue, not a charger issue. Consider replacing the battery. |
9. Specifications
| Specification | Detail |
|---|---|
| Model | 3A-Z |
| Input Voltage | 100-240V AC |
| Output Voltage | 6V / 12V DC (Automatic Detection) |
| Output Current | 3 Amp |
| Output Power | 60W |
| Supported Battery Types | Lead-Acid (AGM, GEL, STD, Flooded, WET, EFB), Lithium, LiFePO4 |
| Operating Temperature | -10°C to 40°C (14°F to 104°F) |
| Dimensions (L x W x H) | 4.5 x 1.7 x 1.5 inches (11.43 x 4.32 x 3.81 cm) |
| Item Weight | 0.02 Kilograms (approx. 0.71 ounces) |
| Certifications | CE |
| Manufacturer | ZHIHIUI |
10. Warranty and Support
For warranty information or technical support, please refer to the product packaging or contact the manufacturer directly. Keep your purchase receipt as proof of purchase.


