
Product Overview
The PARKVISION Wireless Solar 1080P Reversing Camera Kit provides a reliable and convenient solution for enhancing vehicle safety and maneuverability. This system features a 7-inch IPS monitor and a magnetic, solar-powered 1080P camera, designed for easy installation on various vehicles including RVs, trucks, and utility vehicles.
- Ultra-Fast Magnetic Installation: The powerful magnetic base allows for quick attachment to any metallic surface, eliminating the need for drilling or complex wiring.
- Long-lasting Battery & Dual Charging: Equipped with a 9600mAh battery, the camera supports extended operation and can be recharged via solar power (auxiliary) or a standard Type-C cable (main).
- Integrated DVR Loop Recording: The system automatically records and saves recent footage, providing an added layer of security during maneuvers. A Micro SD card (up to 256GB) is required and sold separately.
- Dual Camera Support: The monitor features two video inputs, allowing for the connection of a second camera (sold separately) to expand your field of view and eliminate blind spots.
- Full HD 1080P & High-Performance Night Vision: The 1080P CMOS sensor and 7-inch IPS screen deliver clear, detailed color images day and night. Infrared LEDs ensure optimal visibility in low-light conditions.
Setup Instructions
Follow these steps to set up your PARKVISION Wireless Solar Reversing Camera Kit:
- Charge the Camera: Before first use, fully charge the camera's 9600mAh battery using the provided Type-C cable. While solar charging is available, a full initial charge via cable is recommended.
- Mount the Camera: Attach the camera to a suitable metallic surface on the rear of your vehicle. The strong magnetic base ensures a secure fit. For non-metallic surfaces, a metallic adhesive plate (sold separately) is required. Ensure the solar panel faces upwards for optimal charging.
- Install the Monitor: Secure the 7-inch IPS monitor to your dashboard or windshield using the suction cup holder. Adjust the angle for optimal viewing.
- Power the Monitor: Connect the monitor to your vehicle's cigarette lighter socket or a USB port using the provided power cord.
- Power On and Pair: Turn on the monitor. The camera and monitor should automatically pair. If not, refer to the operating instructions for manual pairing.
- Insert Micro SD Card (Optional): For DVR loop recording, insert a Micro SD card (up to 256GB, not included) into the designated slot on the monitor.

Figure 1: Quick installation steps for the magnetic camera and monitor.

Figure 2: Included components in the product package.
Operating Instructions
Monitor Functions
- Power On/Off: Press the power button on the monitor to turn it on or off.
- Brightness/Contrast/Hue Adjustment: Use the menu buttons on the monitor to access settings for adjusting image brightness, contrast, and hue to your preference.
- Image Flip Mode: The monitor supports image flipping, useful for different camera mounting orientations.
- Parking Guidelines: Customizable parking guidelines can be adjusted for left/right, up/down, and width to assist with precise maneuvering.
- Channel Switching (for Dual Cameras): If a second camera is connected, use the 'CH' button to switch between camera views or display a split screen.
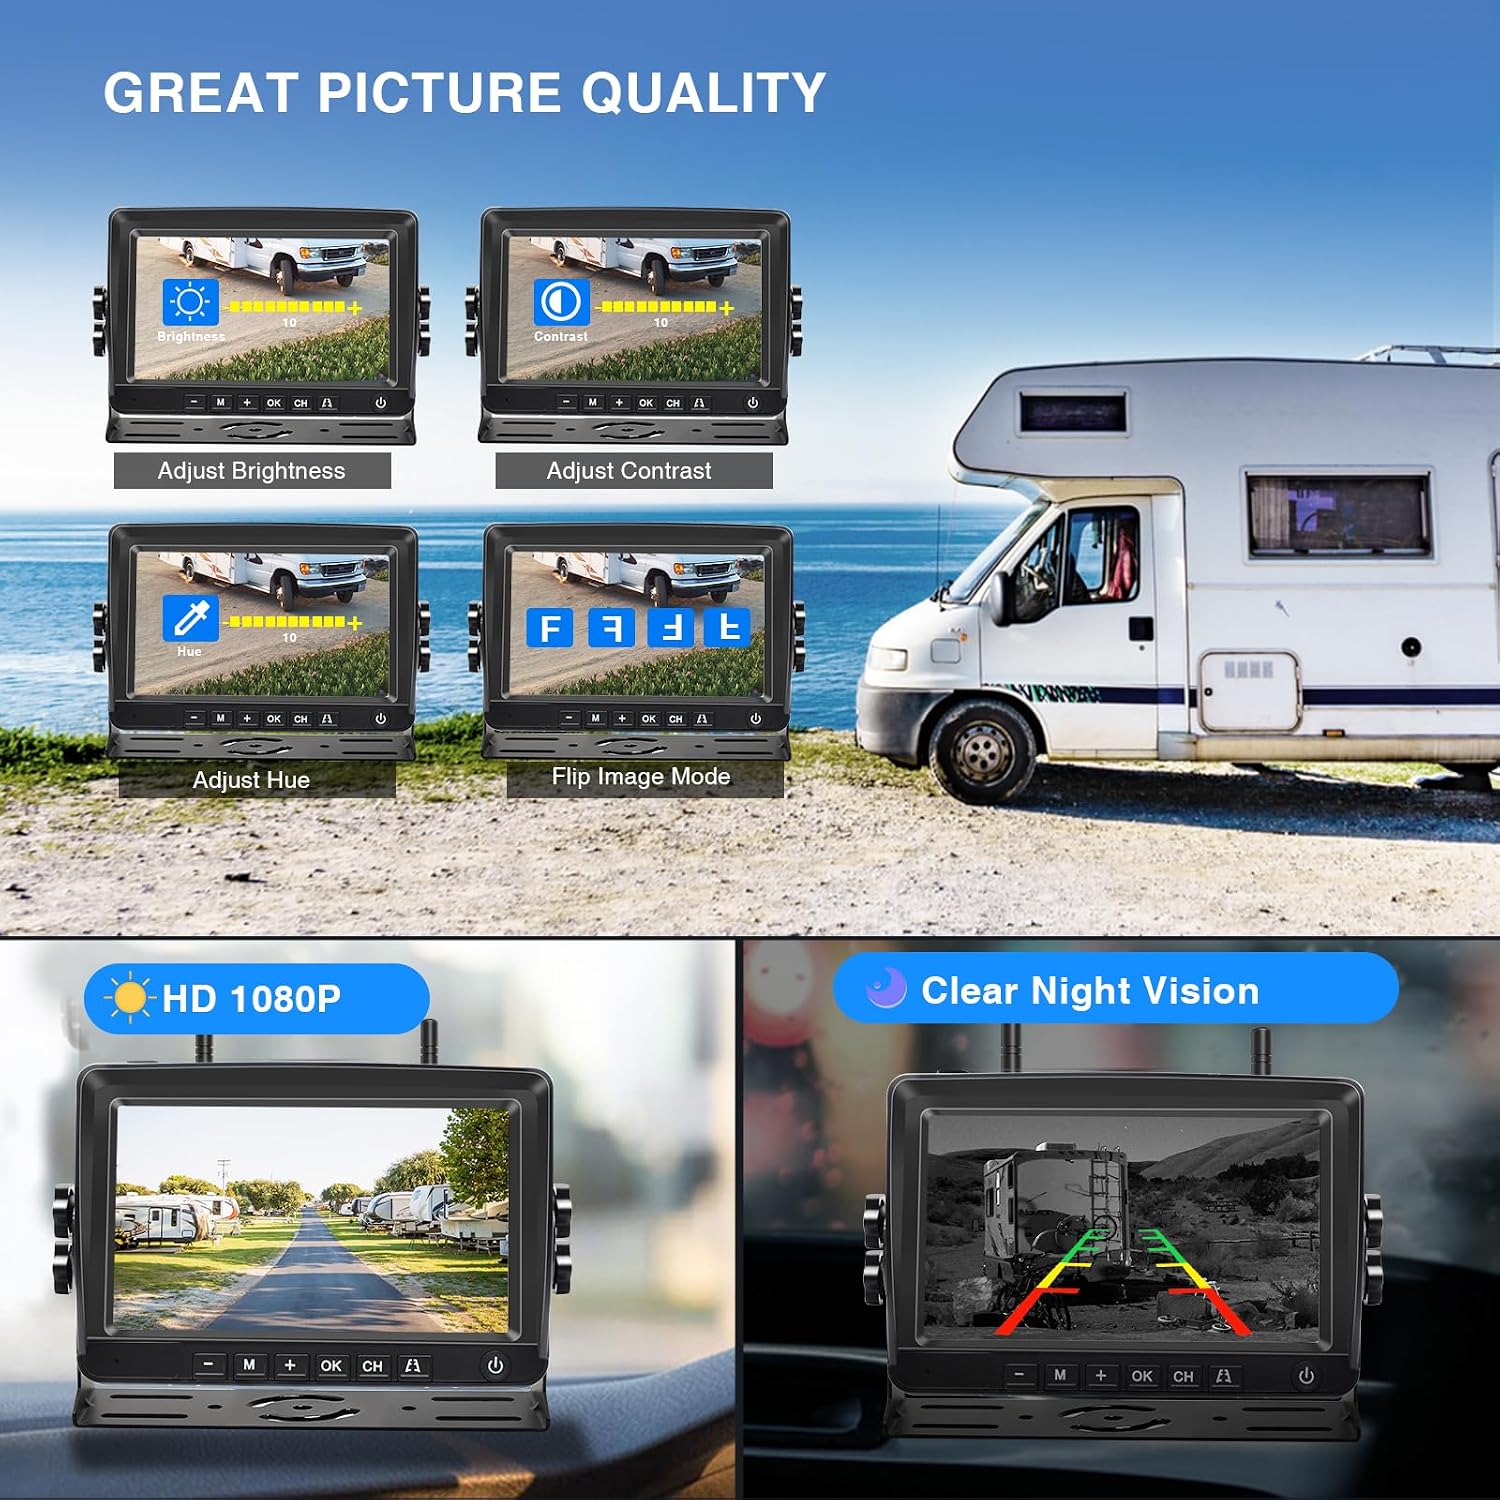
Figure 3: Monitor display with image adjustment options and examples of day/night vision.

Figure 4: Camera view angle and customizable parking guidelines.
Battery and Charging
The camera features a 9600mAh battery for extended use. It supports dual charging methods:
- Solar Charging: The integrated solar panel provides auxiliary charging during daylight hours, extending battery life.
- Type-C Charging: For primary and faster charging, connect the camera via the Type-C cable to a power source.
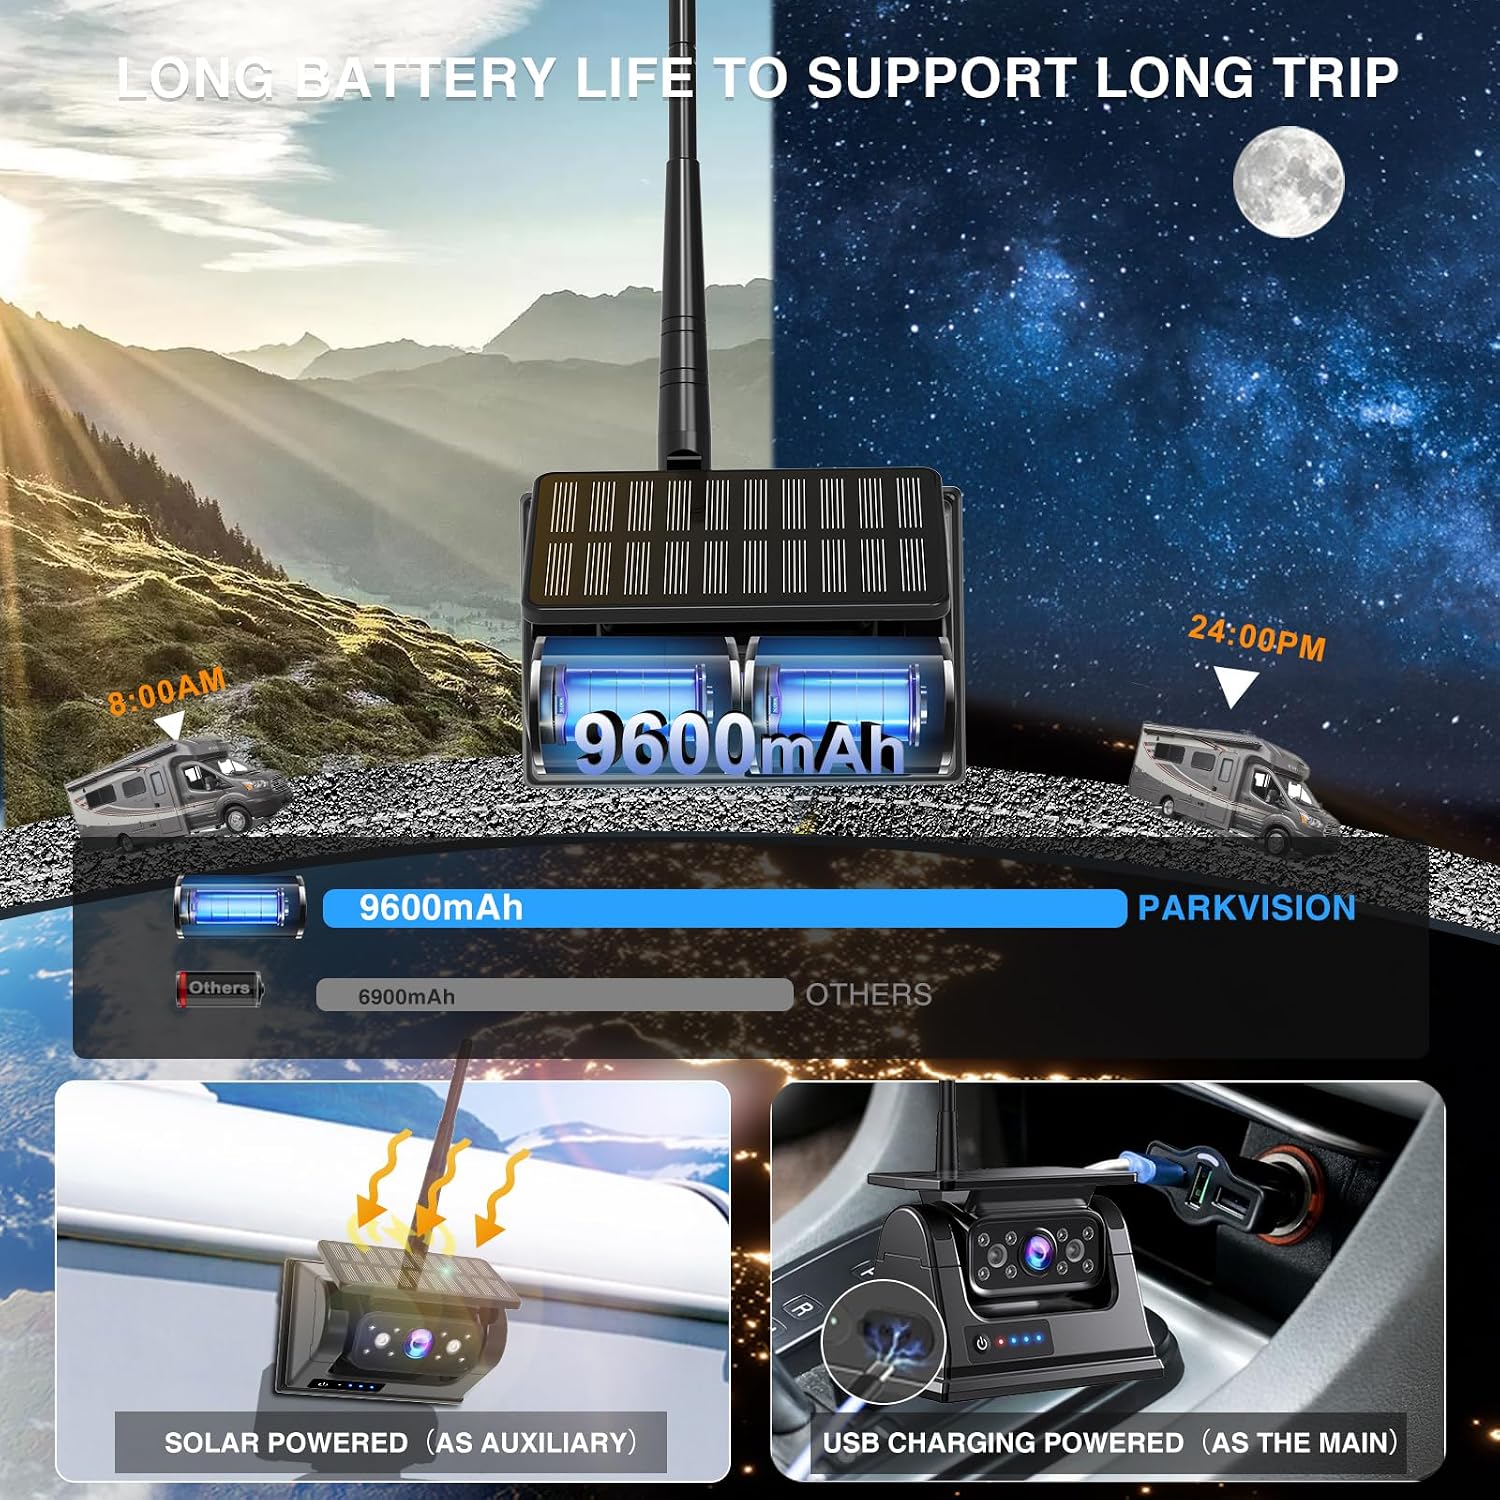
Figure 5: Battery capacity and dual charging methods.
DVR Loop Recording
With a Micro SD card inserted, the system will automatically begin loop recording. Older footage will be overwritten by new recordings once the card is full. This feature helps secure your maneuvers and provides evidence if needed.
- Recording: The system continuously records video.
- Playback: Access recorded footage directly from the monitor.
- Storage: Supports Micro SD cards up to 256GB (not included).

Figure 6: DVR loop recording functionality.
Dual Camera System
The monitor supports two video inputs, allowing you to connect an additional wireless camera (sold separately) for expanded coverage. This is particularly useful for monitoring trailers, the rear of large RVs, or other critical blind spots.

Figure 7: System overview with optional second camera for expanded view.
Maintenance
- Cleaning: Regularly clean the camera lens and monitor screen with a soft, dry cloth to ensure clear visibility. Avoid abrasive cleaners.
- Solar Panel: Keep the solar panel on the camera free from dirt, dust, and obstructions to maximize charging efficiency.
- Battery Care: For optimal battery longevity, avoid prolonged exposure to extreme temperatures. If storing the camera for an extended period, ensure it is partially charged.
- Magnetic Base: Periodically check the magnetic base for any debris that might affect its adhesion to the vehicle surface.
- Firmware Updates: Check the PARKVISION official website periodically for any available firmware updates for your device.
Troubleshooting
| Problem | Possible Cause | Solution |
|---|---|---|
| No image on monitor | Monitor not powered; Camera not powered; Pairing lost; Signal interference. | Ensure monitor is plugged in and turned on. Check camera battery level and charge if necessary. Re-pair camera and monitor (refer to manual for specific steps). Reduce distance between camera and monitor, or move away from other wireless devices. |
| Image is blurry or distorted | Dirty camera lens; Poor signal; Monitor settings. | Clean the camera lens. Check for signal interference. Adjust brightness, contrast, or hue settings on the monitor. |
| Camera battery drains quickly (especially at night) | Insufficient solar charging; Heavy night vision usage; Battery degradation. | Ensure solar panel is clean and exposed to direct sunlight. For night driving, consider connecting the camera to a continuous power source via Type-C if possible, or fully charge before use. If battery life significantly degrades, contact support. |
| Video turns red or displays abnormal colors | Camera malfunction; Signal issue. | Restart both the camera and monitor. Check for strong signal. If the problem persists, the camera may be faulty; contact PARKVISION support for assistance. |
| DVR recording not working | No Micro SD card; SD card full or corrupted; Incorrect card format. | Insert a Micro SD card (up to 256GB). Format the SD card via the monitor's settings menu. Try a different SD card. |
Specifications
| Feature | Detail |
|---|---|
| Brand | PARKVISION |
| Model Number | PJ-7SM1080 |
| Screen Size | 7 Inches |
| Product Dimensions (L x W x H) | 17L x 8W x 12H centimeters |
| Compatible Devices | Most vehicles (RV, Truck, Utility Vehicle) |
| Installation Type | Aftermarket Wireless, Magnetic |
| Voltage | 12 Volts |
| Optical Sensor Technology | CMOS |
| Lens Type | Wide Angle |
| Real View Angle | 170 Degrees |
| Connectivity | Wireless Transmitter |
| Optical Sensor Size | 1/3 inch |
| Video Capture Format | MP4 |
| Display Technology | LCD |
| Screen Capture Resolution | 1080p |
| UPC | 768253676778 |
| Item Weight | 1 Kilogram |
| Country of Origin | China |
| Box Contents | 1 x Solar Wireless Magnetic Rear Camera |
Warranty Information
This PARKVISION product comes with a 1-year warranty from the date of purchase. The warranty covers manufacturing defects and malfunctions under normal use. Please retain your proof of purchase for warranty claims. The warranty does not cover damage caused by misuse, accidents, unauthorized modifications, or improper installation.
Customer Support
For technical assistance, warranty claims, or any questions regarding your PARKVISION Wireless Solar Reversing Camera Kit, please contact PARKVISION customer support. Refer to the contact information provided in the packaging or visit the official PARKVISION website for the most up-to-date support details.
Online Resources:
- Visit the PARKVISION Brand Store on Amazon for product information and updates.
