1. Introduction
This manual provides detailed instructions for the setup, operation, and maintenance of your JALL PH01 16-inch Large Digital Wall Clock. Please read this manual thoroughly before using the product to ensure proper function and longevity.
2. Product Overview
The JALL PH01 Digital Wall Clock features a large LED display for clear visibility, a remote control for convenient operation, and multiple functions including dual alarms, 8 RGB color modes, automatic Daylight Saving Time (DST) adjustment, and an integrated night light. It is designed for both wall mounting and desktop placement.

Image 2.1: Front view of the JALL PH01 Digital Wall Clock, showing its large display and ambient night light.
3. Package Contents
- JALL PH01 Digital Wall Clock Unit
- Remote Control
- Power Adapter (5V/2A)
- Power Cable (approximately 11.5 feet)
- Paper Hanging Assistant
- User Manual (this document)
4. Setup
4.1 Power Connection
- Locate the power input port on the back of the clock.
- Connect the provided power cable to the clock.
- Plug the power adapter into a standard electrical outlet.
Note: The clock is not battery operated for its main functions and requires continuous power. A CR2032 memory battery is pre-installed to retain time settings during power outages, but it does not power the display or LED lights.
4.2 Placement and Mounting
The JALL PH01 clock can be placed on a desktop or mounted on a wall.
- Desktop Placement: Ensure the clock is placed on a stable, flat surface.
- Wall Mounting: Use the integrated hanging holes on the back of the clock. A paper hanging assistant is included to aid in marking drill points for accurate installation.

Image 4.1: Rear view of the clock illustrating the hanging holes, backup battery location, and power input port.
5. Operating Instructions
All functions of the JALL PH01 clock are controlled via the included remote control.
5.1 Time and Date Setting
Refer to the remote control for specific buttons to enter time/date setting mode. Typically, a 'SET' or 'MODE' button initiates the process, and arrow keys or number buttons are used to adjust values. Confirm settings with an 'OK' or 'SET' button.
5.2 Alarm Settings
The clock supports dual alarms. Use the remote control to access alarm settings. Set the desired alarm time and activate/deactivate each alarm independently. Instructions for setting specific alarm tones or snooze functions will be detailed on the remote control's button layout.
5.3 RGB Color Modes
The clock features 8 distinct color modes, including 4 pure colors and 4 RGB changing colors for the main time display. Use the 'COLOR' button on the remote to cycle through these options.

Image 5.1: Examples of the 8 available color display modes for the time digits.
5.4 Brightness Adjustment
- Auto Dimming: The clock is equipped with a light sensor that automatically adjusts the display brightness based on ambient light conditions, ensuring comfortable viewing at any time.
- Night Light: The integrated night light at the bottom of the clock offers 10 adjustable brightness levels. Use the dedicated night light button on the remote to control its intensity.

Image 5.2: Illustration of the clock's auto-dimming function adapting to different light environments.

Image 5.3: The clock's warm night light feature providing ambient illumination.
5.5 Automatic Daylight Saving Time (DST)
The clock is designed to automatically adjust for Daylight Saving Time in March (Spring Forward) and November (Fall Back), eliminating the need for manual time changes.
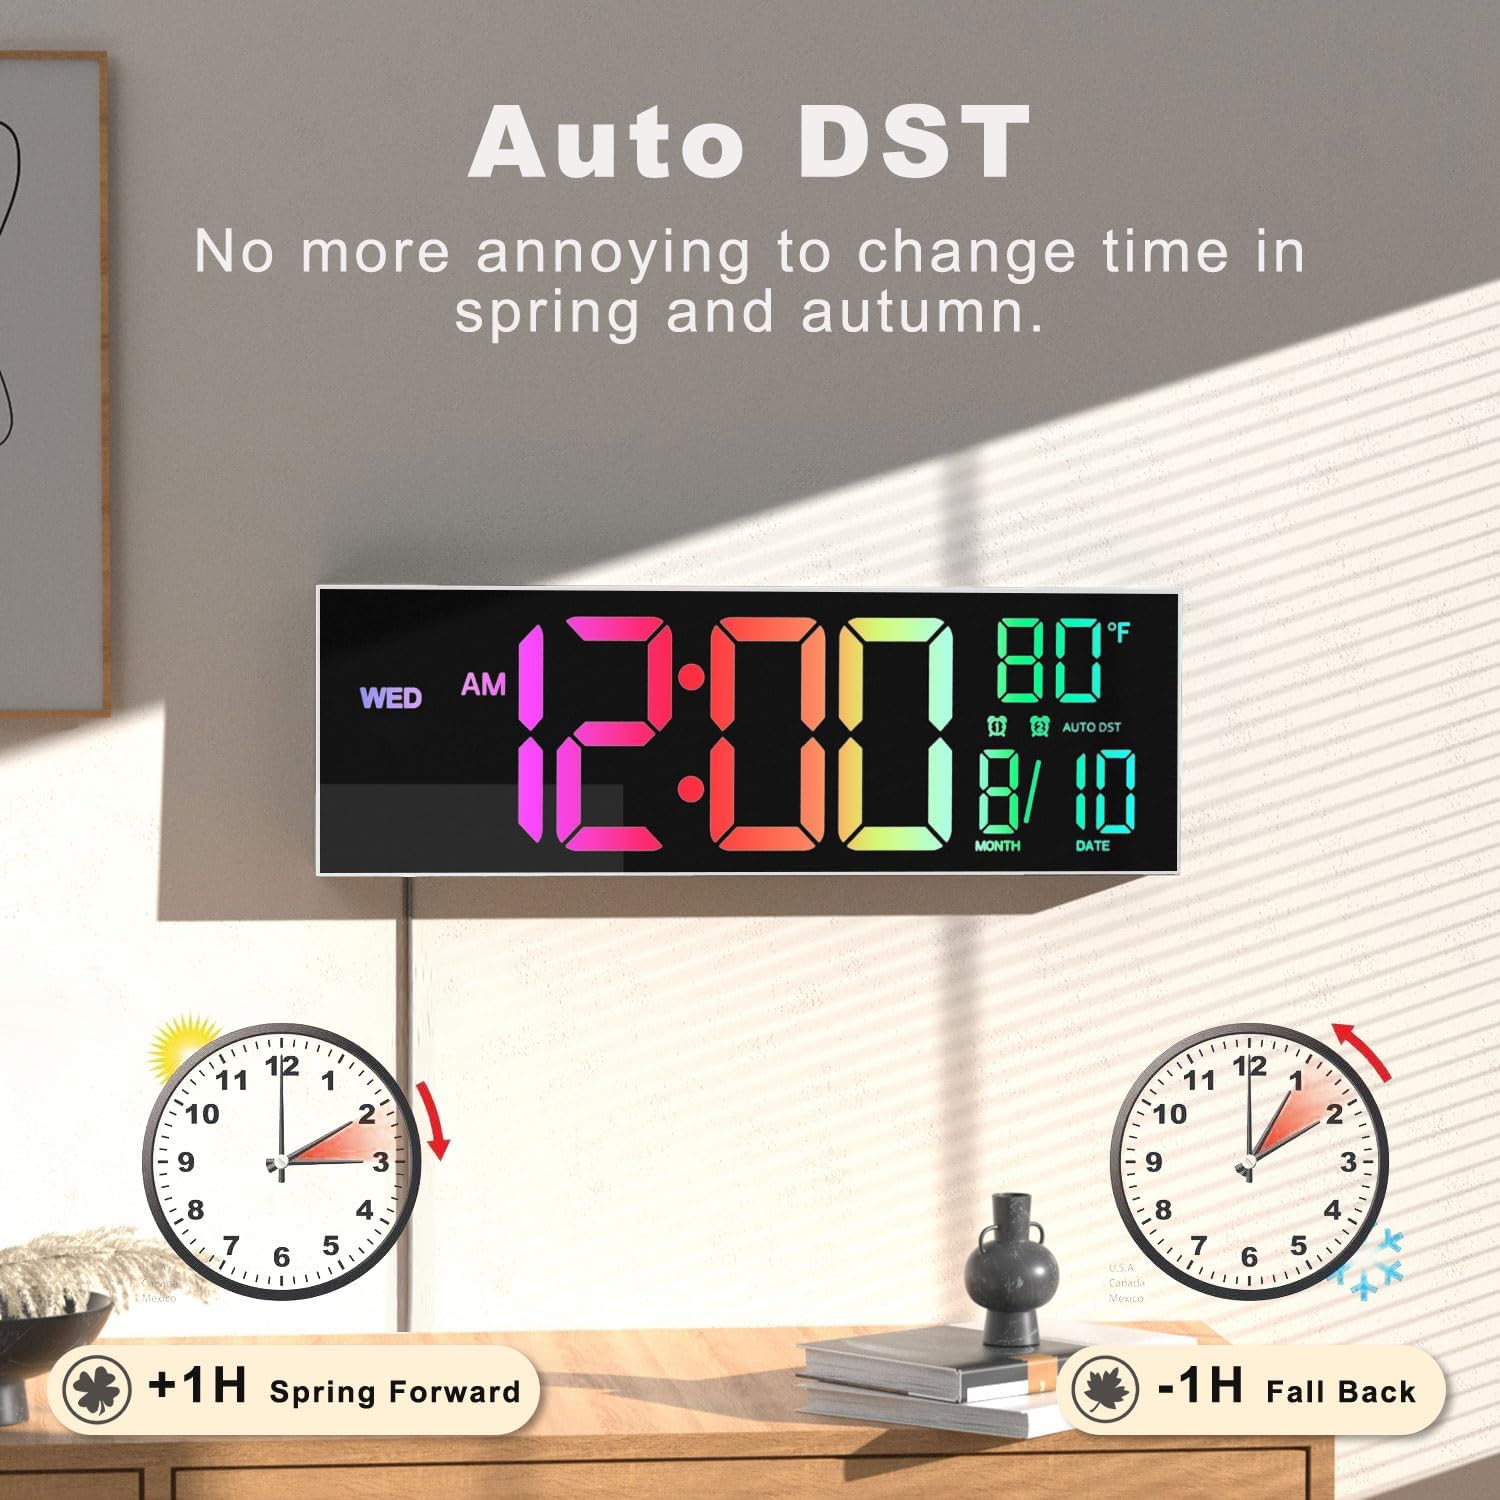
Image 5.4: Visual representation of the automatic DST feature.
5.6 Countdown Timer
A countdown timer function is available, allowing settings from 0 to 99 minutes. This feature is suitable for various activities such as yoga, gym workouts, office tasks, or classroom use.

Image 5.5: The countdown timer feature, useful for timed activities.
6. Maintenance
To maintain your JALL PH01 Digital Wall Clock, follow these guidelines:
- Cleaning: Use a soft, dry cloth to gently wipe the display and casing. Avoid abrasive cleaners or solvents, as they may damage the surface.
- Power: Ensure the clock remains connected to a stable power source.
- Backup Battery: The internal CR2032 battery is for memory retention only. If time settings are frequently lost after power outages, the backup battery may need replacement. Consult customer support for assistance.
7. Troubleshooting
| Problem | Possible Cause | Solution |
|---|---|---|
| Clock display is off | No power supply | Check power cable connection and wall outlet. Ensure the power adapter is functioning. |
| Display flickers or shows incorrect time | Unstable power, internal malfunction | Try plugging into a different outlet. If the issue persists, contact customer support. |
| Remote control not working | Dead battery, obstruction, out of range | Replace remote control battery. Ensure no obstructions between remote and clock. Operate within effective range. |
| Time settings lost after power outage | Backup battery depleted | The internal CR2032 memory battery may need replacement. Contact customer support for guidance. |
8. Specifications
| Feature | Detail |
|---|---|
| Model Number | PH01 |
| Dimensions (L x W x H) | 33.91 x 3.81 x 12.98 cm (15.35 x 1.5 x 5.1 inches) |
| Item Weight | 762 g |
| Material | Plastic Acrylic |
| Power Input | 5V/2A (via included adapter and 11.5 ft cable) |
| Backup Battery | CR2032 (for timekeeping memory) |
| Special Features | Auto DST, Auto Brightness, 8 RGB Colors, Dual Alarm, Countdown Timer, Night Light |
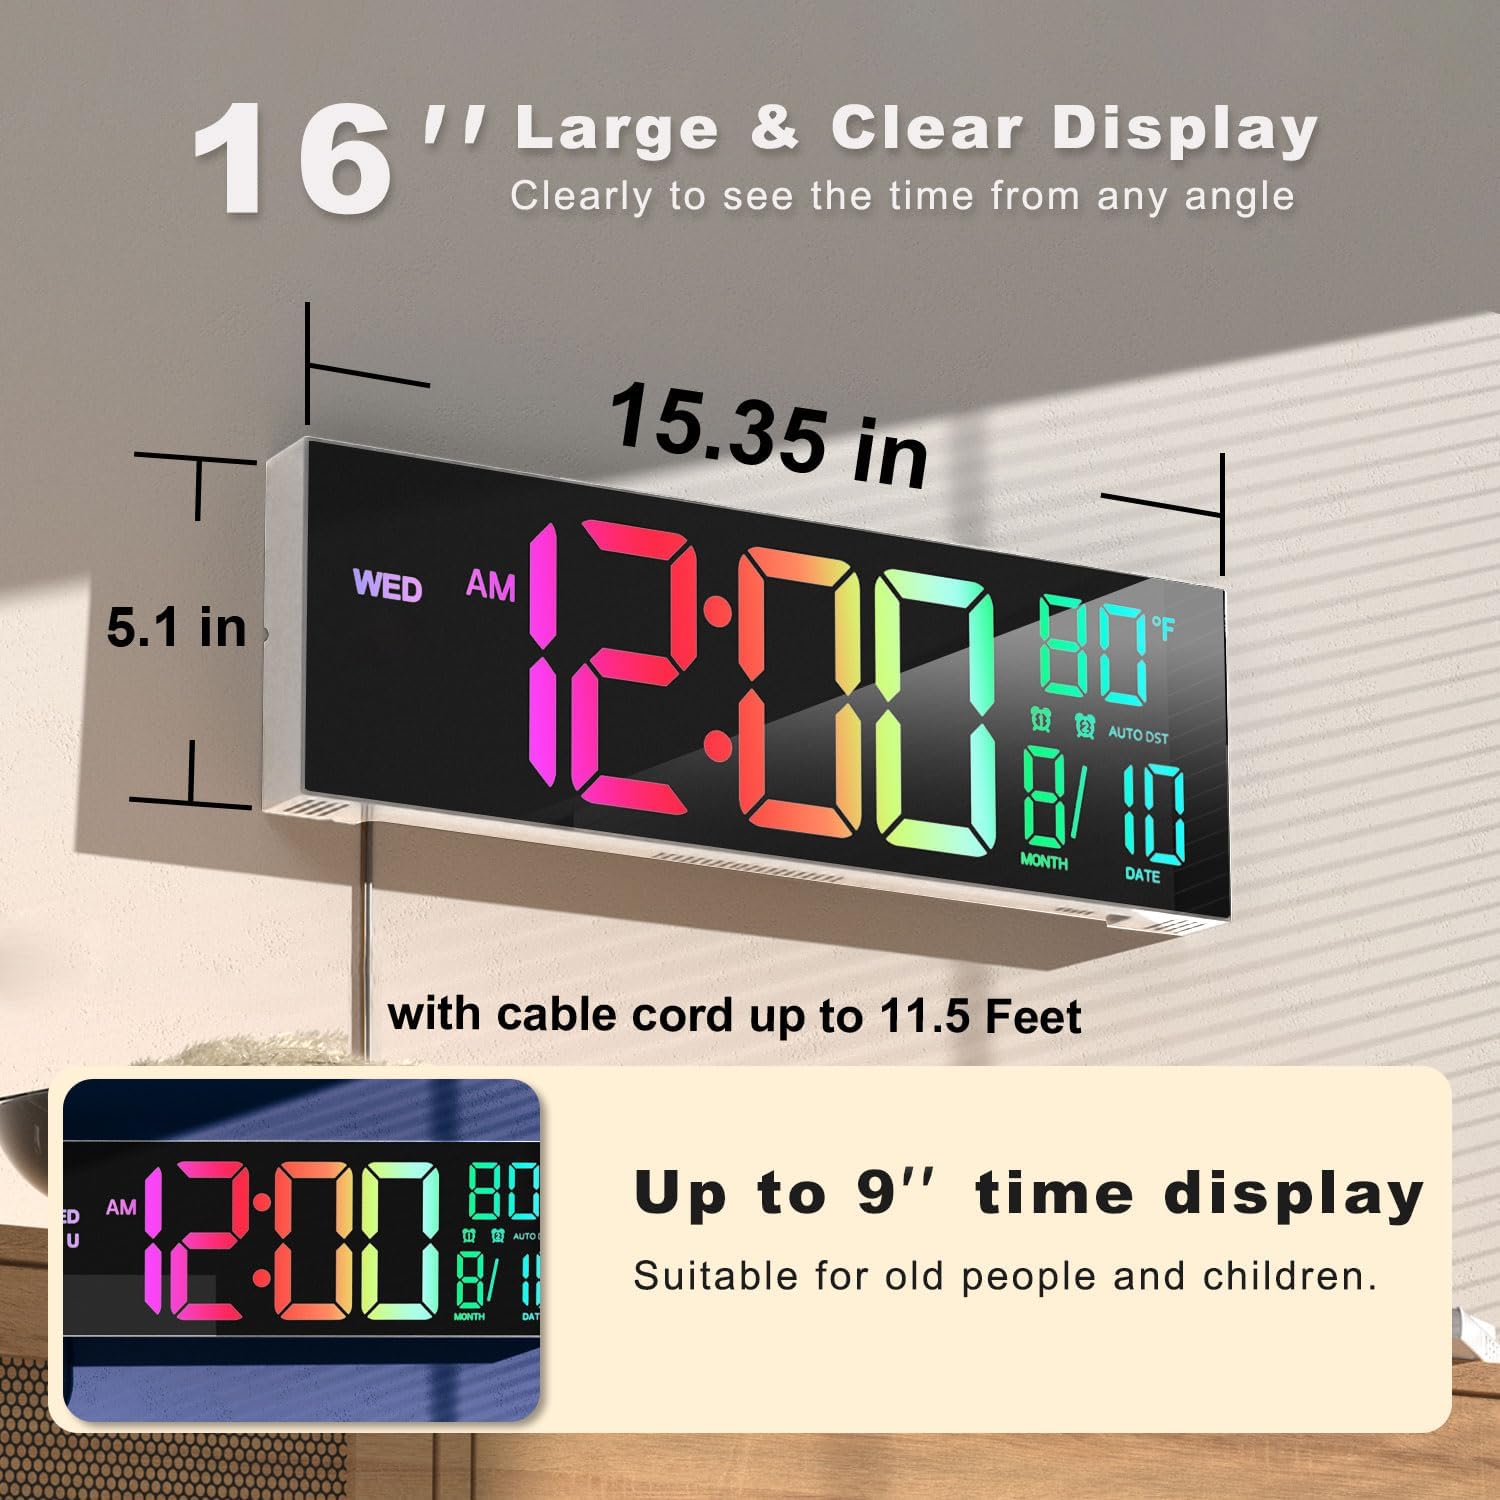
Image 8.1: Key dimensions of the JALL PH01 Digital Wall Clock.
9. Warranty and Support
For warranty information, technical support, or any inquiries regarding your JALL PH01 Digital Wall Clock, please contact JALL customer service through the retailer's platform or the official JALL website. Please have your product model number (PH01) and purchase details ready when contacting support.


