
1. Introduction
This manual provides comprehensive instructions for the installation, operation, maintenance, and troubleshooting of your SODOLA 8-Port 10GbE SFP+ Easy Web Managed Switch. This device is designed to provide high-speed network connectivity and advanced management features for various network environments.
2. Product Overview and Components
The SODOLA 8-Port 10GbE SFP+ Easy Web Managed Switch features eight 10GbE SFP+ ports, offering high-bandwidth connectivity. It includes indicators for system status and power, a reset button, and options for wall or desktop mounting.

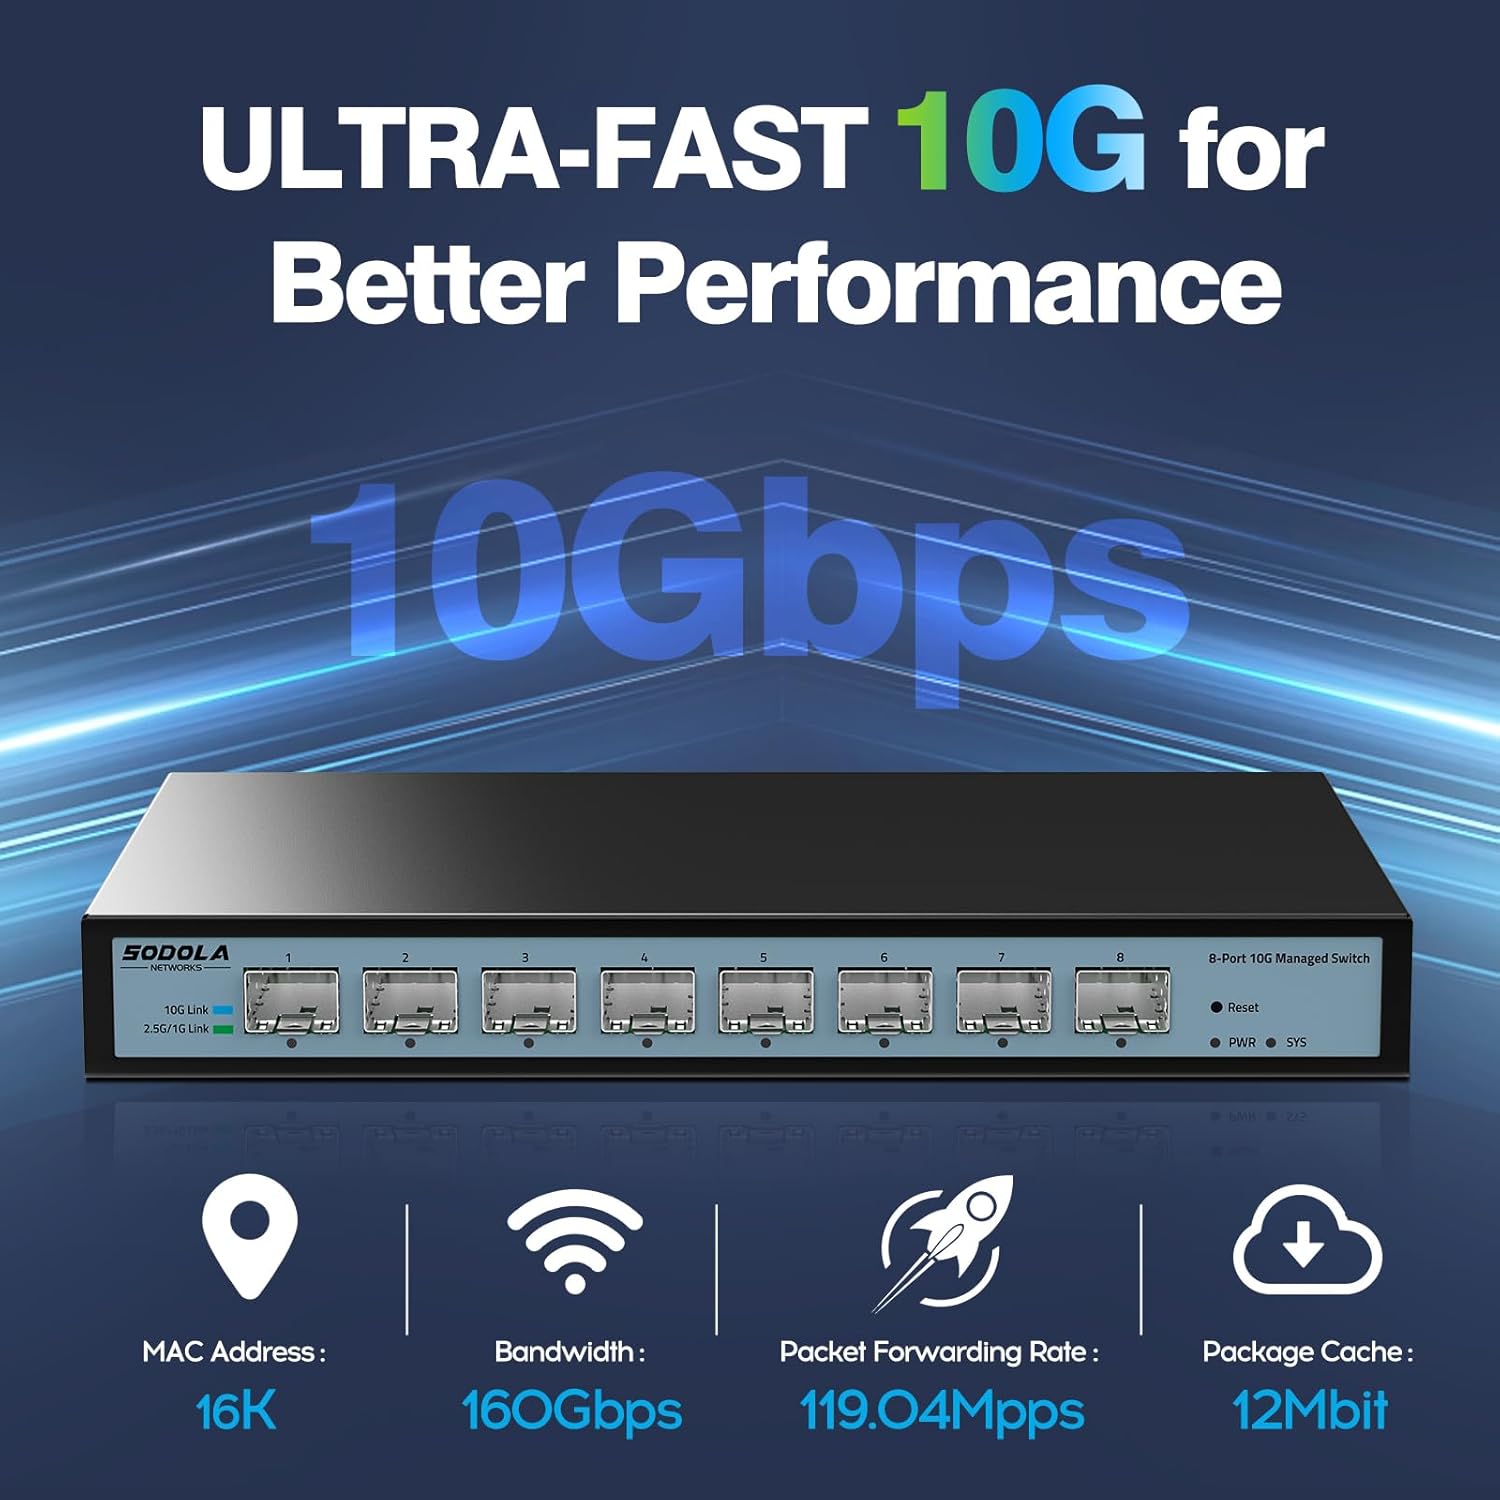
3. Setup and Installation
3.1 Package Contents
- 1 x SODOLA 8-Port 10GbE SFP+ Easy Web Managed Switch
- 1 x Power Adapter (DC 12V 2A)
- User Manual (this document)
3.2 Physical Installation
The switch can be placed on a desktop or mounted on a wall. Ensure adequate ventilation around the device to prevent overheating.
- Desktop Placement: Place the switch on a flat, stable surface. Ensure no objects block the ventilation holes on the sides.
- Wall Mounting: Use the wall mounting holes on the rear of the switch. Secure the switch firmly to a wall using appropriate screws. For optimal heat dissipation, consider mounting the switch vertically if space allows.


3.3 Power Connection
Connect the provided power adapter to the DC 12V 2A input port on the rear of the switch, then plug the adapter into a power outlet. The PWR indicator light on the front panel will illuminate when the switch receives power.
3.4 Network Connection
Insert compatible SFP+ modules (not included) into the SFP+ ports. Connect fiber optic cables or DAC cables to the SFP+ modules. Ensure the modules and cables are correctly seated for proper operation.

4. Initial Configuration (Web Management)
4.1 Accessing the Web Interface
The SODOLA Easy Web Managed Switch can be configured via a web browser. Follow these steps to access the management interface:
- Clear Browser Cache: Before attempting to log in, clear your web browser's cache to prevent potential issues.
- Adjust Network Settings: Configure your computer's IP address to be in the same subnet as the switch's default IP address. The default IP address for the switch is 192.168.2.1. For example, set your computer's IP to 192.168.2.10 with a subnet mask of 255.255.255.0.
- Access Login Page: Open a web browser and enter the default IP address
192.168.2.1into the address bar. - Login Credentials: Enter the default username and password:
Username: admin
Password: admin


5. Operating the Switch
5.1 Port Settings
The switch ports are adaptive and support 1G, 2.5G, and 10G speeds. By default, the mode might be set to 10G/2.5G. If you are using 1G modules, you may need to manually adjust the port speed settings in the web interface.
- Navigate to the Port Settings section in the web management interface.
- Select the specific port you wish to configure.
- Choose the desired speed (e.g., 1000M for 1G modules) and duplex settings.
- Click Apply to save the changes.
- After applying changes, ensure you click the Save button (usually located at the top right) to permanently store the configuration.
- Reboot the switch if prompted or if changes do not take effect immediately.


5.2 Advanced Management Features
The Easy Web Managed interface provides access to various advanced features to optimize network efficiency:
- Link Aggregation (LACP): Combine multiple physical links into a single logical link for increased bandwidth and redundancy.
- VLAN Management: Segment your network into virtual LANs to improve security and performance.
- Spanning Tree Protocol (STP/RSTP): Prevent network loops and ensure network stability.
- Quality of Service (QoS): Prioritize network traffic for critical applications.
- Jumbo Frame: Support for larger Ethernet frames to improve data transfer efficiency.
- Multicast: Efficiently deliver data to multiple destinations simultaneously.
- MAC Address Table: View and manage MAC address entries.
- Storm Control: Prevent network performance degradation due to broadcast, multicast, or unknown unicast storms.
- Port Mirroring: Monitor network traffic by sending a copy of packets from one port to another.
- DHCP Snooping: Enhance network security by filtering untrusted DHCP messages.
- SNMP: Monitor and manage network devices remotely.


5.3 Application Scenarios
The SODOLA 8-Port 10GbE SFP+ Easy Web Managed Switch is suitable for various high-bandwidth applications:
- Network Attached Storage (NAS): Connect your NAS devices for high-speed data transfer and backup.
- Home Entertainment: Ensure smooth streaming and gaming experiences.
- LAN Parties: Provide robust and fast network connections for multiple users.
- Office Environments: Enhance network performance for demanding business applications.
- PC Workstations: Connect high-performance workstations for data-intensive tasks.


6. Maintenance
6.1 Cleaning
Regularly clean the exterior of the switch with a soft, dry cloth. Do not use liquid or aerosol cleaners. Ensure the ventilation holes are free from dust and obstructions.
6.2 Heat Management
The switch features a fanless design for silent operation. Proper heat dissipation is crucial for longevity. Ensure the switch is placed in a well-ventilated area. Vertical mounting can improve airflow and cooling efficiency, especially when using multiple 10G SFP+ modules which can generate significant heat.

6.3 Firmware Updates
Periodically check the manufacturer's official website for available firmware updates. Firmware updates can improve performance, add new features, and address security vulnerabilities. Follow the instructions provided with the firmware update package carefully.
7. Troubleshooting
7.1 Common Issues
- Cannot Access Web Interface:
- Ensure your computer's IP address is in the same subnet as the switch (default 192.168.2.1).
- Clear your web browser's cache.
- Verify physical network connection to the switch.
- 1G Modules Not Functioning:
- The switch's default port mode might be 10G/2.5G. Access the web interface and manually set the port speed to 1000M for 1G modules. Remember to apply and save changes.
- No Power:
- Check the power adapter connection to both the switch and the power outlet.
- Ensure the power outlet is functional.
- Verify the PWR indicator light is illuminated.
7.2 Factory Reset
If you encounter persistent issues or forget the login credentials, you can restore the switch to its factory default settings:
- With the switch powered on, locate the RESET button on the front panel (refer to Figure 1).
- Use a thin, pointed object (like a paperclip) to press and hold the RESET button for approximately 8 seconds.
- Release the button. The switch will reboot with factory default settings.
8. Specifications
| Feature | Specification |
|---|---|
| Brand | Sodola |
| Model Number | 8X10G SFP+(Managed) |
| Part Number | SL-SWTGW2C8F |
| Manufacturer | Shenzhen hongyavision Technology Co.,Ltd. |
| Number of Ports | 8 |
| Interface Type | SFP+ |
| Data Transfer Rate | 10 Gigabits per second |
| Housing Material | Metal |
| Color | Black |
| Included Components | 8-Port 10GbE SFP+ Ethernet Switch |
| Platform | All platforms |
| Number of Items | 1 |
9. Warranty and Support
9.1 Warranty Information
For detailed warranty information, please refer to the product packaging or the official Sodola website. Warranty terms and conditions may vary by region and purchase date.
9.2 Technical Support
If you require technical assistance or have questions not covered in this manual, please visit the official Sodola support website or contact their customer service. Support resources often include FAQs, troubleshooting guides, and contact information for direct assistance.


