
EasySMX X10
EasySMX X10 Wireless PC Controller User Manual
Model: X10 | Brand: EasySMX
Introduction
The EasySMX X10 Wireless PC Controller is a versatile gaming controller designed for a superior gaming experience across multiple platforms. Featuring advanced Hall Effect joysticks and triggers, mechanical keys, and a long-lasting battery, it offers precise control and comfort. This manual provides detailed instructions for setup, operation, and maintenance of your controller.

Figure 1: EasySMX X10 Wireless PC Controller (Dark Purple variant shown)
Key Features
- Magnetic Swappable Faceplate: Customize the controller's appearance with easily interchangeable faceplates.
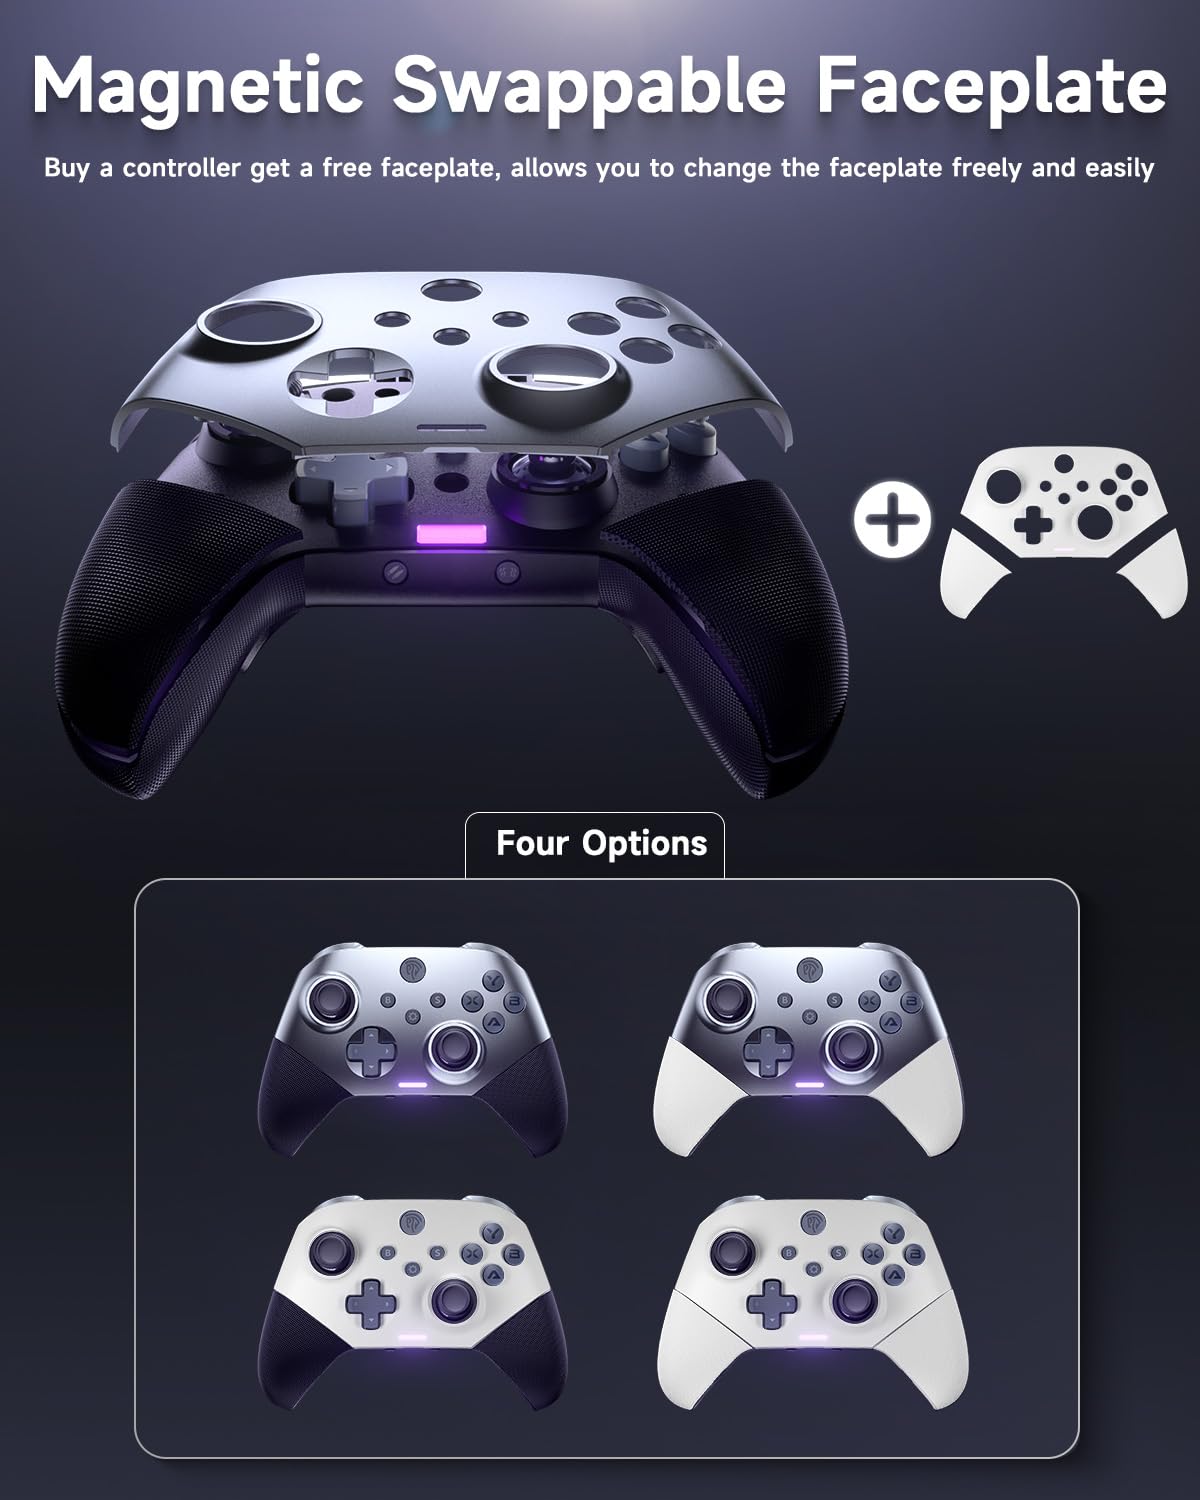
Figure 2: Magnetic Swappable Faceplate feature, showing different color options.
- Hall Effect Joysticks and Triggers: Equipped with contactless Hall sensors for precise, drift-free, and long-lasting input.

Figure 3: Diagram illustrating Hall Effect Joysticks for enhanced precision.

Figure 4: Diagram illustrating Hall Effect Triggers with 0.1mm accuracy.
- 40 Hours Battery Life: A 1000mAh upgraded battery provides extended gameplay on a single charge.

Figure 5: Visual representation of the controller's 1000mAh battery capacity and 40-hour playtime.
- All Triple Mechanical Keys: Enjoy tactile and responsive feedback with durable mechanical buttons.

Figure 6: Close-up view of the mechanical A, B, X, Y buttons, highlighting their design.
- Versatile Compatibility: Compatible with PC, Switch, iOS, and Android devices.

Figure 7: Infographic showing compatibility with various platforms including PC, Steam Deck, Tesla, Raspberry Pi, Smartphones, Android TV, and Nintendo Switch consoles.
- Customizable Back Keys and APP: Includes 2 custom back keys (M1, M2) and supports an app for button remapping.
Package Contents
Please check the package contents upon unboxing:
- EasySMX X10 Wireless PC Controller
- USB 2.4G Wireless Dongle
- USB-C Charging Cable (5FT Braided)
- Swappable Faceplate (White)
- User Manual (this document)
Controller Layout
Familiarize yourself with the buttons and components of your EasySMX X10 controller:
| Component | Description |
|---|---|
| Left/Right Analog Sticks | Hall Effect joysticks for precise 360-degree movement. |
| A/B/X/Y Buttons | Mechanical action buttons for in-game commands. |
| D-Pad | Directional pad for precise directional input. |
| LB/RB Buttons | Shoulder buttons. |
| LT/RT Triggers | Hall Effect linear triggers for analog input. |
| M1/M2 Back Buttons | Programmable back paddles for custom functions. |
| Home Button | Powers on/off the controller and accesses system menus. |
| Select/Start Buttons | Standard menu navigation buttons. |
| Toggle Button | Switch between different connection modes (NS, BT, Wired). |
| USB-C Port | For charging and wired connection. |
Setup Guide
1. Charging the Controller
Before first use, fully charge the controller. Connect the supplied USB-C cable to the controller's USB-C port and the other end to a USB power source (e.g., PC, USB wall adapter). The charging indicator light will show charging status and turn off when fully charged. A full charge takes approximately 3.5 hours.
2. Connecting to Devices
The EasySMX X10 supports multiple connection methods:
2.1. 2.4G Wireless Connection (PC, Steam Deck, Tesla, Raspberry Pi)
- Insert the 2.4G USB dongle into an available USB port on your device.
- Turn on the controller by pressing the Home button.
- Ensure the toggle button on the back of the controller is set to the 2.4G wireless mode.
- The controller will automatically connect to the dongle. The indicator light will become solid when connected.
Video 1: Demonstrates how to pair the EasySMX X10 Controller with a PC using the 2.4G wireless dongle.
2.2. Bluetooth Connection (PC, Smartphones, Android TV, Steam Deck)
- Ensure your device's Bluetooth is enabled.
- Turn on the controller by pressing the Home button.
- Set the toggle button on the back of the controller to Bluetooth mode.
- On your device, search for new Bluetooth devices and select "EasySMX X10" (or similar) from the list.
- The controller's indicator light will become solid once paired.
Video 2: Guide on pairing the EasySMX X10 Controller with an iOS device via Bluetooth.
Video 3: Instructions for pairing the EasySMX X10 Controller with an Android mobile device using Bluetooth.
2.3. Wired Connection (PC, Android TV, Smartphones)
Connect the controller directly to your device using the supplied USB-C cable. The controller will automatically be recognized as a wired gamepad.
3. Swapping Faceplates
The EasySMX X10 features a magnetic swappable faceplate for customization. Gently lift the existing faceplate from the controller to detach it. Align the new faceplate with the controller's body and allow the magnets to snap it into place.
Operating Instructions
1. Power On/Off
- Power On: Press the Home button.
- Power Off: Press and hold the Home button for 3-5 seconds until the controller powers off. The controller will also automatically power off after a period of inactivity to save battery.
2. Customizable Back Keys (M1/M2)
The M1 and M2 back buttons can be programmed to replicate other button inputs or complex macros. Refer to the EasySMX companion app for detailed customization options.
Video 4: Demonstrates how to easily remap buttons using the EasySMX companion application.
3. Turbo Function
The Turbo function allows a button to be pressed repeatedly as long as it is held down. To activate/deactivate Turbo for a button, press and hold the desired button, then press the Turbo button (if available, or refer to app for assignment). Repeat the process to clear the Turbo setting.
4. Adjustable Dual Vibration
The controller features dual vibration motors for immersive feedback. Vibration intensity can typically be adjusted through the connected device's settings or the EasySMX companion app.
5. 6-Axis Gyro Motion Control
For compatible games and platforms (e.g., Nintendo Switch), the built-in 6-axis gyro provides motion control capabilities. Ensure your game supports this feature.
Maintenance
- Keep the controller clean by wiping it with a soft, dry cloth.
- Avoid exposing the controller to extreme temperatures, humidity, or direct sunlight.
- Do not disassemble the controller, as this may void the warranty and cause damage.
- Store the controller in a safe place when not in use to prevent accidental damage.
Troubleshooting
| Problem | Possible Solution |
|---|---|
| Controller does not power on. | Ensure the controller is charged. Connect it to a power source using the USB-C cable and allow it to charge for at least 15 minutes before attempting to power on again. |
| Controller does not connect to device. |
|
| Input lag or dropped connections (Wireless). |
|
| Buttons or joysticks are unresponsive/drifting. |
|
| Squeaky triggers. | This can sometimes occur with new mechanical components. Continued use may reduce the sound. If persistent and affecting functionality, contact customer support. |
Specifications
| Feature | Detail |
|---|---|
| Model Number | X10 |
| Connectivity | 2.4G Wireless, Bluetooth, Wired (USB-C) |
| Compatibility | PC, Switch, iOS, Android, Steam Deck, Android TV, Tesla, Raspberry Pi |
| Joysticks & Triggers | Hall Effect Sensors |
| Buttons | Triple Mechanical Keys (A/B/X/Y), Programmable M1/M2 Back Buttons |
| Battery Capacity | 1000mAh Lithium Polymer |
| Battery Life | Up to 40 hours (approx.) |
| Charging Time | Approx. 3.5 hours |
| Dimensions | 6.1 x 2.36 x 4.25 inches |
| Weight | 1.37 Pounds |
| Special Features | Magnetic Swappable Faceplate, Adjustable Dual Vibration, 6-Axis Gyro Motion Control, Turbo Function, Companion App Support |
Warranty and Support
EasySMX products come with a standard manufacturer's warranty. For detailed warranty information, technical support, or service inquiries, please visit the official EasySMX website or contact their customer support team. Please retain your proof of purchase for warranty claims.
EasySMX Official Website: www.easysmx.com
Related documentsX10


Ask a question about this manual
Ask about setup, troubleshooting, compatibility, parts, safety, or missing instructions. Manuals+ will review the question and use this page’s manual context to help answer it.