
1. Introduction
Thank you for choosing the SWAREY Digital Decibel Meter. This device is designed to accurately measure sound levels in various environments, providing real-time monitoring and an intelligent alarm function. It is ideal for maintaining quiet zones in schools, hospitals, libraries, offices, and homes. This manual provides detailed instructions for setup, operation, maintenance, and troubleshooting to ensure optimal performance and longevity of your device.
2. Safety Information
- Do not expose the device to extreme temperatures, humidity, or direct sunlight.
- Avoid dropping or subjecting the device to strong impacts.
- Keep the device away from water and other liquids.
- Do not attempt to disassemble or repair the device yourself. Refer to qualified personnel for service.
- Use only the specified power adapter and batteries.
- Prolonged exposure to high decibel levels can cause hearing damage. Use the device responsibly.
3. Package Contents
Please check the package contents to ensure all items are present:
- 1 x SWAREY Digital Decibel Meter (ET-968)
- 6 x AA batteries
- 1 x AC adapter
- 1 x User Manual (this document)
- 1 x Form tray
- 1 x Color box
4. Product Overview
The SWAREY Digital Decibel Meter features a large, easy-to-read LCD display and intuitive controls. It measures sound levels from 35dB to 135dB with high accuracy. The display color changes to provide visual feedback on noise levels, and an alarm function can be set to remind users when sound exceeds a predefined threshold.

Figure 4.1: Noise Measurement Range and Corresponding Decibel Levels.

Figure 4.2: Display Screen Color Variation based on Noise Level.

Figure 4.3: Meter and Display Description with labeled components.
5. Setup
5.1 Powering the Device
The decibel meter can be powered by either 6 AA batteries or the included AC adapter.
- Battery Installation: Open the battery compartment on the back of the device. Insert 6 AA batteries, ensuring correct polarity.
- AC Adapter Connection: Plug the AC adapter into the DC INPUT port on the side of the device, then plug the adapter into a standard wall outlet.

Figure 5.1: Two Charging Methods: DC Input and Battery Compartment.
5.2 Mounting Options
The device is designed for versatile placement, either wall-mounted or placed on a tabletop.
- Tabletop Placement: Simply place the device on any flat, stable surface.
- Wall Mounting: Use the provided screws to secure the device to a wall. The back of the device has keyholes for easy mounting.
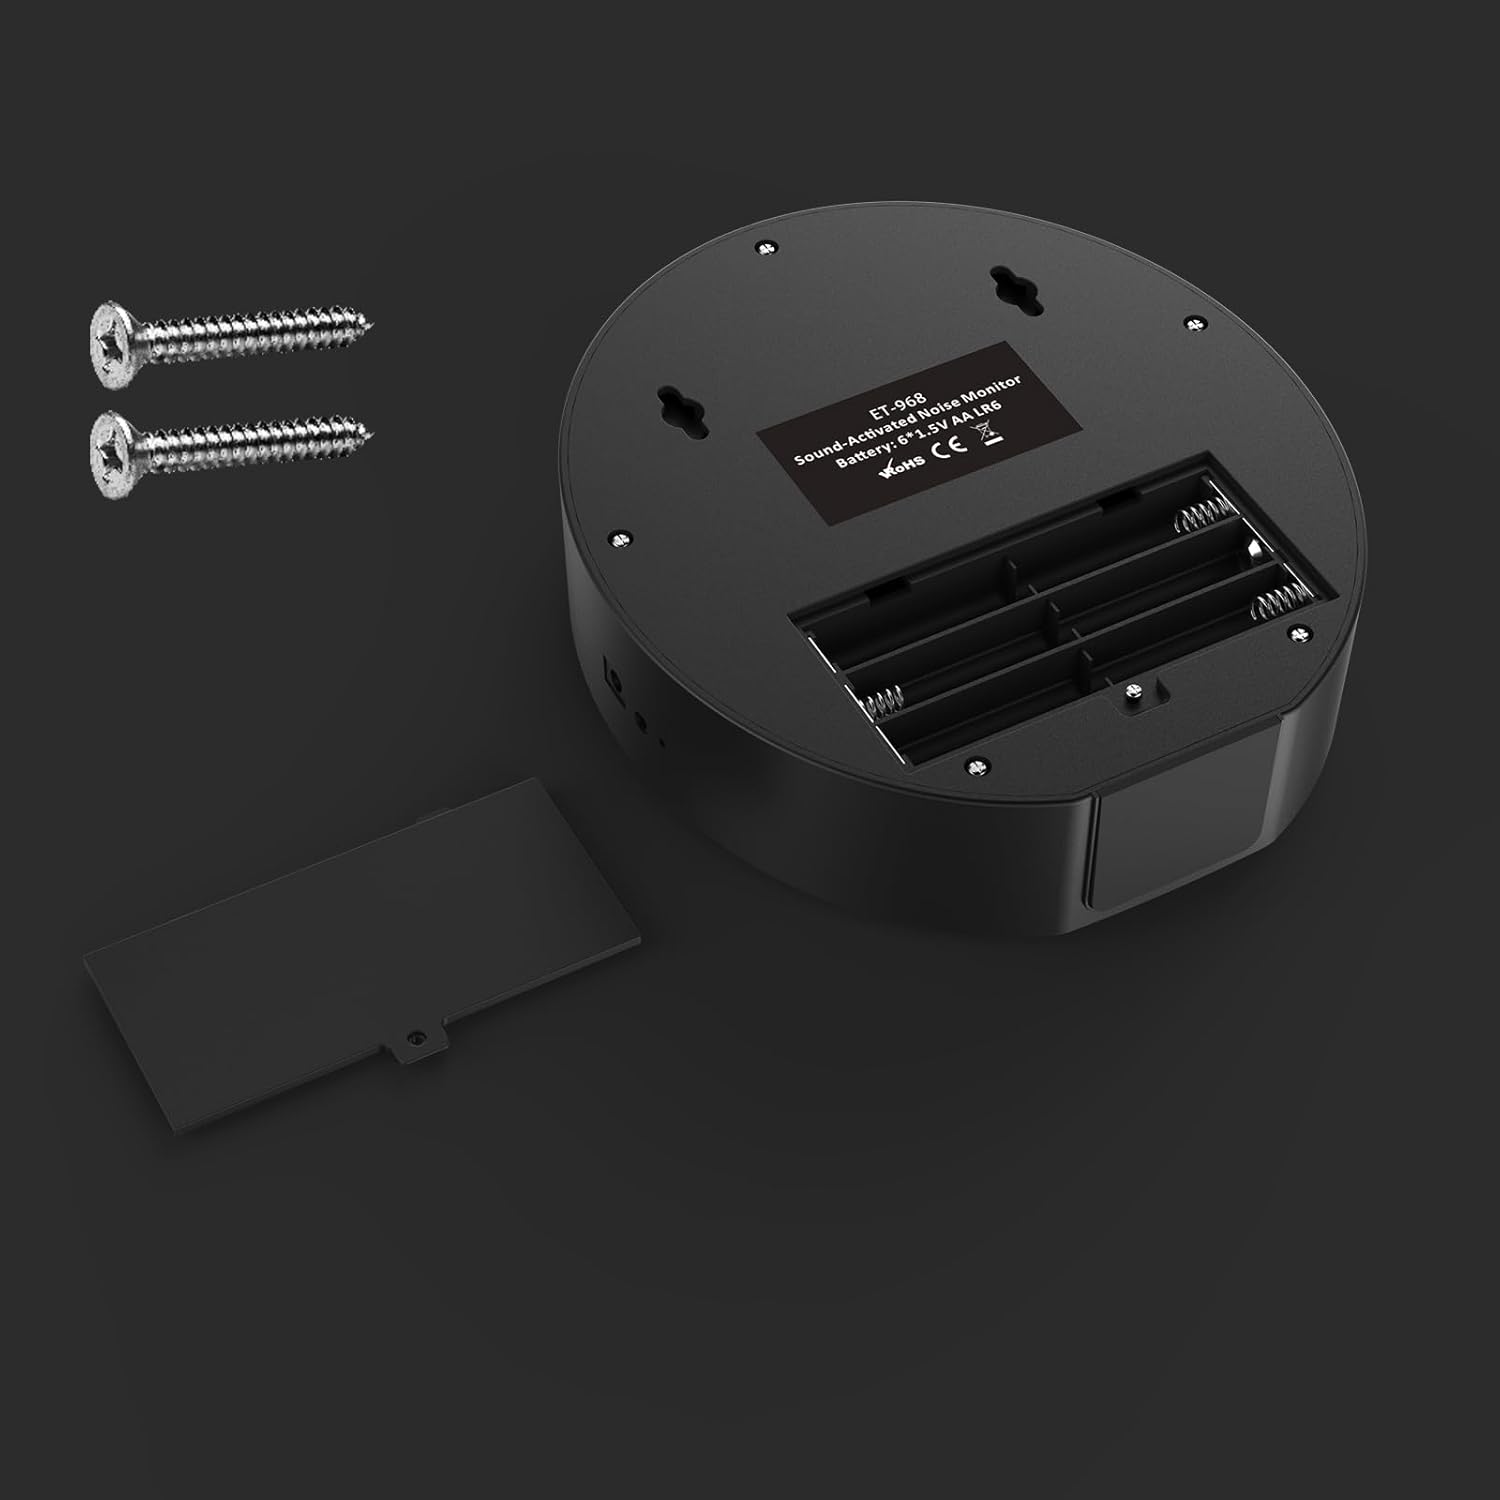
Figure 5.2: Wall Mounting Points on the back of the device.
6. Operating Instructions
6.1 Power On/Off
Press the Power button (labeled with a power symbol) to turn the device on or off.
6.2 Real-time Sound Level Monitoring
The large LCD display shows the current decibel level in real-time. The display color provides an immediate visual indication of the noise environment:
- Green: Indicates a healthy and quiet sound level.
- Orange: Indicates a slightly noisy environment.
- Red: Signals that the noise level is too loud and potentially harmful.
Video 6.1: Demonstration of the SWAREY Digital Decibel Meter's real-time sound level monitoring and color-changing display. This video illustrates how the device visually indicates noise levels, transitioning from green for quiet to red for loud, and plays the "Please be quiet" alarm when a high decibel threshold is crossed.
6.3 Setting the Alarm Threshold
The device can be configured to trigger an alarm when the sound level exceeds a specific decibel threshold. The default threshold is 35dB, but it is fully adjustable.
- Press the SET button to enter the alarm setting mode.
- Use the UP and DOWN buttons to adjust the desired decibel threshold.
- Press SET again to confirm and save the setting.
6.4 Customizing the Reminder Sound
The device comes with a default "Please be quiet" voice reminder. You can also record your own voice message (up to 15 seconds) to be played when the alarm threshold is exceeded.
- Press and hold the REC button to begin recording your custom message. The display will indicate recording status.
- Speak clearly into the microphone.
- Release the REC button to stop recording.
- To test your recording, briefly press the REC button.
Video 6.2: Instructions on how to record and customize the reminder sound on the SWAREY Digital Decibel Meter. This video demonstrates the process of recording a personalized voice message that will play when the noise level exceeds the set threshold.
6.5 Adjusting Speaker Volume
The speaker volume for the alarm and voice reminders can be adjusted to 6 levels.
- Press the MODE button repeatedly until the volume adjustment option appears on the display.
- Use the UP and DOWN buttons to select the desired volume level.
- The device will automatically save the setting after a few seconds of inactivity or you can press SET to confirm.

Figure 6.3: Speaker Volume Adjustment and Display Indicators.
7. Maintenance
- Cleaning: Wipe the device clean with a soft, dry cloth. Do not use abrasive cleaners or solvents.
- Battery Replacement: Replace all 6 AA batteries when the low voltage prompt symbol appears on the display to ensure continuous operation.
- Storage: If storing the device for an extended period, remove the batteries to prevent leakage. Store in a cool, dry place.
8. Troubleshooting
| Problem | Possible Cause | Solution |
|---|---|---|
| Device does not power on. | Low or dead batteries; AC adapter not connected properly. | Replace batteries or ensure AC adapter is securely plugged in. |
| Alarm does not sound. | Alarm function disabled; threshold set too high; volume too low. | Check alarm settings, adjust threshold, increase speaker volume. |
| Inaccurate readings. | Sensor obstructed; device placed in an unsuitable environment. | Ensure sensor is clear; relocate device to an open area away from direct noise sources or vibrations. |
| Display is dim or flickering. | Low battery power. | Replace batteries or use AC adapter. |
9. Specifications
| Feature | Detail |
|---|---|
| Model Number | ET-968 |
| Measurement Range | 35dB to 135dB |
| Accuracy | ± 2.0 dB |
| Display Type | LCD with Backlight |
| Power Source | 6 x AA batteries (included) or AC Adapter |
| Material | ABS+PC |
| Dimensions | 11.97 x 9.09 x 2.52 inches |
| Weight | 2.12 Pounds |
| Special Feature | Noise Level Monitor with Alarm |
10. Warranty and Support
SWAREY products are manufactured to the highest quality standards. For detailed warranty information and customer support, please refer to the official SWAREY website or contact our customer service team.
You can also find additional resources and product information on the SWAREY Brand Store on Amazon.
A digital version of this user manual is available for download: User Manual (PDF).
