1. Introduction
This manual provides detailed instructions for the operation and maintenance of your TIDRADIO TD-H3 GMRS Radio. Please read this manual thoroughly before using the device to ensure proper function and safety.

Image 1.1: TIDRADIO TD-H3 GMRS Radio and included accessories.
2. Package Contents
Verify that all items are present in your package:
- 3 x TIDRADIO TD-H3 GMRS Radios
- 3 x 2500mAh Type-C Batteries
- 3 x GMRS Antennas
- 3 x USB Chargers with Cables (for charging and programming)
- 3 x G-shape Earpieces
- 3 x Belt Clips
- 1 x User Manual
3. Setup
3.1 Battery Installation
- Align the 2500mAh battery with the battery compartment on the back of the radio.
- Slide the battery into place until it clicks securely.
3.2 Antenna Attachment
- Screw the GMRS antenna clockwise onto the antenna connector at the top of the radio until it is finger-tight. Do not overtighten.
3.3 Charging the Battery
The TD-H3 features a 2500mAh USB-C rechargeable battery. A full charge takes approximately 3 hours and provides up to 48 hours of standby time or 36 hours of light use.
- Connect the provided USB-C cable to the USB-C charging port on the radio and to a compatible USB power adapter.
- The charging indicator on the radio will show the charging status.

Image 3.1: USB-C Charging Port and Programming Port location.
3.4 Programming the Radio
The TD-H3 supports multiple programming methods:
- Phone App Wireless Programming: Use the Odmaster App for wireless programming via Bluetooth.
- Open the Odmaster App.
- Connect to the radio via Bluetooth. If connection issues occur, long-press the Bluetooth button to restart Bluetooth on the radio.
- Program the radio through the app. This method allows saving data in advance for outdoor use without network access.
- USB-C Programming: The included Type-C cable can be used for programming.
- Connect the radio to a computer using the USB-C cable.
- Use compatible software like CHIRP or CPS (via the 2-Pin Kenwood Port) for programming.

Image 3.2: Multiple Programming Methods (Odmaster App, USB-C/CHIRP).
4. Operating Instructions
4.1 Power On/Off and Volume Control
- To power on, rotate the top knob clockwise.
- To power off, rotate the top knob counter-clockwise until it clicks.
- Adjust the volume by rotating the same knob.
4.2 Multi-band Reception and Transmission
The TD-H3 supports 8-band frequencies for both receiving and transmitting (where applicable and licensed):
- GMRS Frequency: 462.5500 ~ 467.7250 MHz (Rx & Tx)
- FRS: 467.5625, 467.5875, 467.6125, 467.6375, 467.6625, 467.6875, 467.7125 MHz
- UHF: 400-470MHz, 470-600MHz (RX)
- VHF: 136-174MHz, 174-350MHz, 350-400MHz (RX)
- AM: 108-136MHz (RX)
- FM: 50-76MHz, 76-108MHz (RX)

Image 4.1: Multi-band Receiving and Transmitting Frequencies.
4.3 NOAA Weather Receiver
The radio includes a NOAA Weather Receiver function for emergency weather alerts.

Image 4.2: NOAA Weather Radio Functionality.
4.4 One Key Frequency Match
This feature allows quick identification of a transmitting frequency and CTCSS/DCS code.
- Enable the Dec.code function (Menu 47).
- Long press button [1] to enter the Match interface.
- When another radio transmits, the TD-H3 display will show its frequency and CTCSS/DCS.
4.5 Wireless Frequency Replication
Copy all data from another TD-H3 radio without needing a PC.
- Long press the Customized button (located below the PTT button) and power on the radio simultaneously to enter the Replication interface.
- Press the Customized button again to activate the replication process.
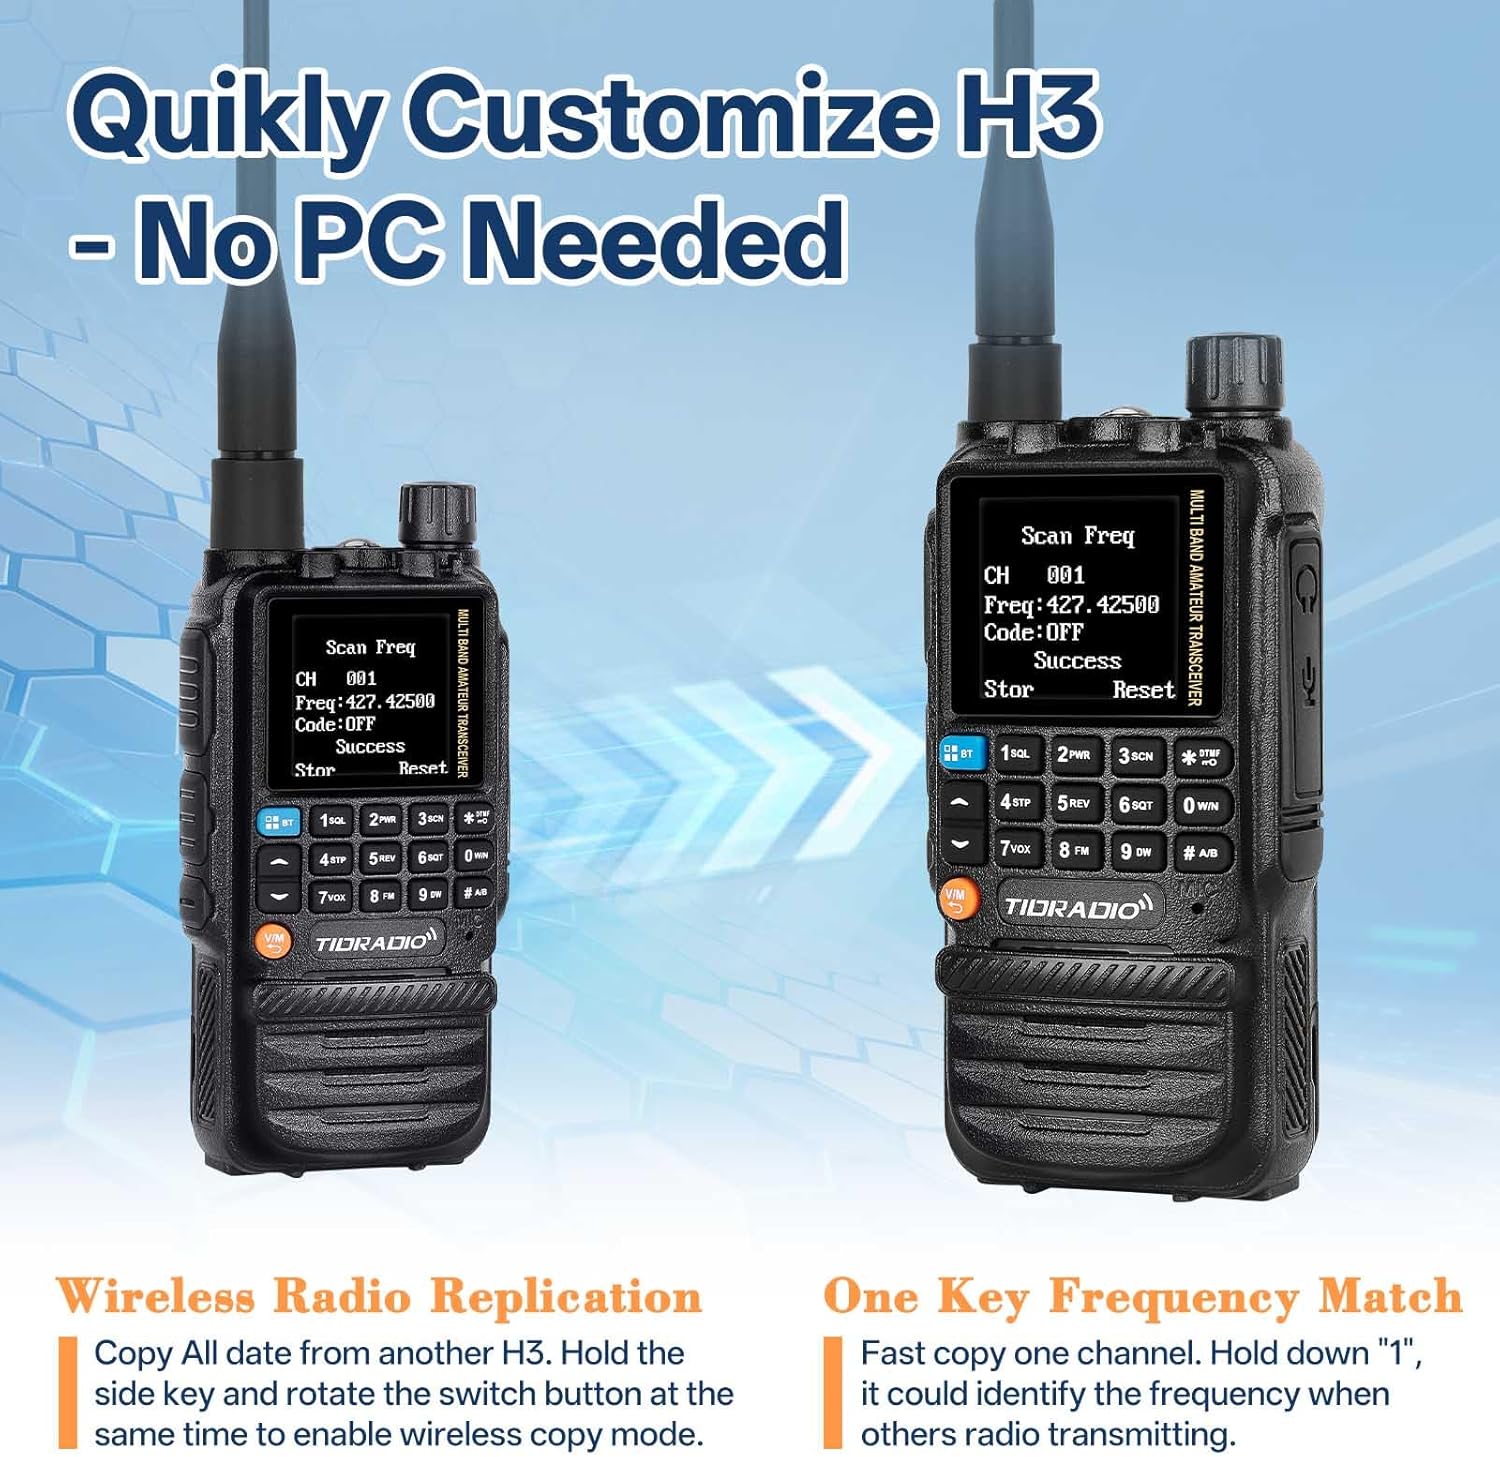
Image 4.3: Wireless Radio Replication and One Key Frequency Match.
4.6 DTMF Function (Kill/Stun Code)
This feature allows for privacy protection by remotely disabling or limiting a radio's functionality.
- Kill Code: Set a 5-digit Kill Code using Odmaster software. Any radio on the same frequency can dial this code via DTMF to lock your H3. The radio will remain inactive until the same 5-digit code followed by "#" is sent.
- Stun Code: Similar to the Kill Code, a Stun Code limits your H3 radio to receive signals only, preventing transmission.
- Example: To kill or stun, send "12345". To reactivate, send "12345#".
4.7 Dual Watch, Dual Display, and Dual PTT
- Dual Watch: Monitor two different frequencies simultaneously.
- Dual Display: View two frequencies on the screen at the same time.
- Dual PTT: The radio features two Push-To-Talk buttons, allowing for quick switching between two active channels (A and B bands).
4.8 Flashlight
The radio includes a built-in flashlight for convenience in low-light conditions.
Image 4.4: Flashlight location on the radio.
5. Maintenance
5.1 Battery Care
- Avoid fully discharging the battery frequently to prolong its lifespan.
- Store the radio and battery in a cool, dry place when not in use.
- If the battery shows signs of damage or malfunction, replace it with an authorized TIDRADIO battery.
5.2 Cleaning
- Use a soft, damp cloth to clean the radio's exterior.
- Do not use harsh chemicals or abrasive cleaners.
- Ensure all ports are dry before charging or connecting accessories.
5.3 Firmware Updates
Firmware updates may be released to improve performance or add new features. For information on available updates and installation instructions, please contact customer support or visit the official TIDRADIO website.
6. Troubleshooting
If you encounter any issues with your TD-H3 radio, refer to the following common problems and solutions:
| Problem | Possible Cause | Solution |
|---|---|---|
| Radio does not power on. | Battery is depleted or not properly installed. | Charge the battery fully. Ensure the battery is securely attached. |
| Cannot transmit or receive. | Incorrect frequency/channel, antenna not connected, radio in "stun" mode. | Verify frequency settings. Ensure antenna is securely attached. Check if a Stun Code has been activated. |
| Programming via Bluetooth fails. | Bluetooth connection issue, app malfunction. | Restart Bluetooth on the radio by long-pressing the Bluetooth button. Ensure the Odmaster App is up to date. |
| Poor audio quality or limited range. | Antenna issue, environmental interference, low battery. | Check antenna connection. Move to an area with less obstruction. Ensure battery is charged. |
7. Specifications
| Feature | Specification |
|---|---|
| Model Number | TD-H3 GMRS |
| Product Dimensions | 9.92 x 8.46 x 2.24 inches (25.2 x 21.5 x 5.7 cm) |
| Item Weight | 2.36 pounds (1.07 kg) |
| Battery Type | Lithium Ion (2500mAh) |
| Number of Channels | 199 |
| Connectivity | Bluetooth, USB-C |
| Special Features | Automatic Squelch, Dual Band, Long Range, Weather Alert, Air Frequency Band, Dual Watch, Dual Display, Dual PTT, Flashlight |
| Frequency Range (RX) | AM: 108-136MHz; FM: 50-76MHz, 76-108MHz; UHF: 400-470MHz, 470-600MHz; VHF: 136-174MHz, 174-350MHz, 350-400MHz |
| Frequency Range (TX) | GMRS: 462.5500 ~ 467.7250 MHz |
| Talking Range Maximum | 5 Kilometers (3.1 miles) |
| Voltage | 7.4 Volts |
| Water Resistance Level | Water Repellent |
8. Warranty and Support
8.1 Warranty Information
TIDRADIO products are manufactured to high-quality standards. For specific warranty details, please refer to the warranty card included with your product or contact TIDRADIO customer support.
8.2 Customer Support
If you encounter any issues, require technical assistance, or have questions regarding missing accessories, please contact TIDRADIO customer support:
- Via Amazon: Contact us through your Amazon order details.
- Via Email: For a satisfactory solution to technical issues.
- Website: For firmware downloads and additional resources, visit walkietalkiesoftware.com.


