
1. Introduction
This manual provides essential instructions for the safe and effective use of your LANGGER V Extra Large Under Bed Safe, Model DCTO1XL. This heavy-duty safe is designed to provide secure storage for firearms, ammunition, documents, and other valuables, keeping them protected from unauthorized access. Its design allows for discreet placement under beds, in closets, or within vehicles.
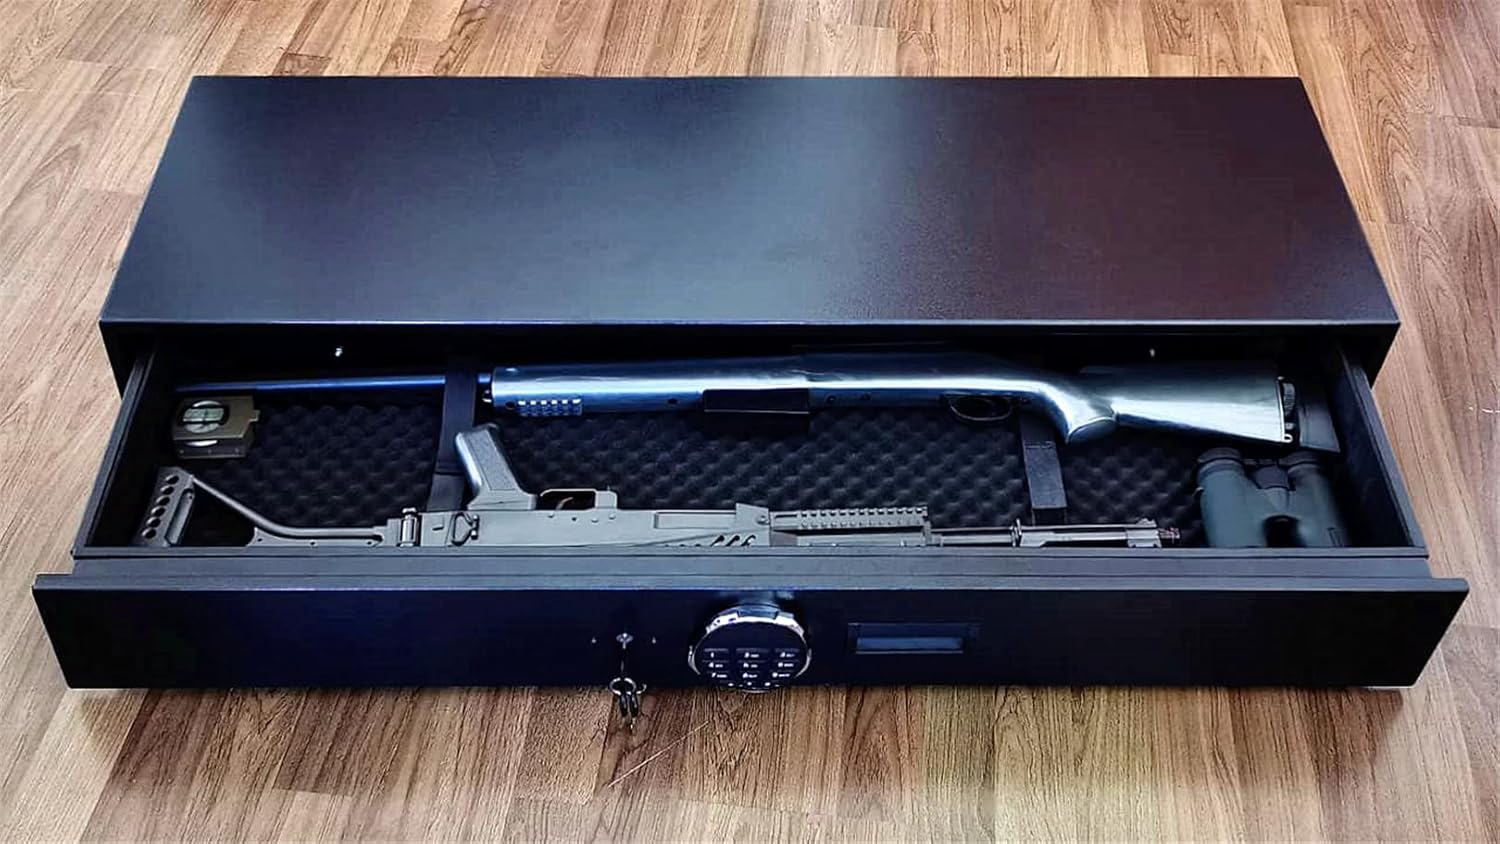
The LANGGER V Under Bed Safe provides secure storage for rifles, pistols, ammunition, and other valuables.
2. Safety Information
- Always keep the safe's backup keys and digital PIN code in a secure location, separate from the safe itself, and away from children or unauthorized individuals.
- Never store loaded firearms in the safe unless specifically designed for quick access and in accordance with all local laws and regulations.
- Ensure the safe is securely mounted to prevent unauthorized removal.
- Do not store flammable materials or liquids inside the safe.
- Regularly check the battery level of the electronic keypad to ensure continuous functionality.
3. Package Contents
Verify that all components are present upon unboxing:
- 1 x LANGGER V Under Bed Safe (Model DCTO1XL)
- 1 x Mounting Screws Set
- 2 x Backup Keys
- 1 x User Manual (this document)
4. Setup
4.1 Unpacking
Carefully remove the safe from its packaging. Inspect the safe for any signs of damage during transit. Report any damage to customer service immediately.
4.2 Mounting the Safe
The safe is designed for floor mounting, under-bed placement, or installation in a closet. Secure mounting is crucial for theft prevention and stability.
- Choose a suitable location that is flat, stable, and provides adequate clearance for the drawer to slide open fully.
- Position the safe in the desired location. The safe features pre-punched mounting holes in the back and bottom.
- Using the provided mounting screws, secure the safe to the floor or a sturdy surface. Ensure all screws are tightened firmly.
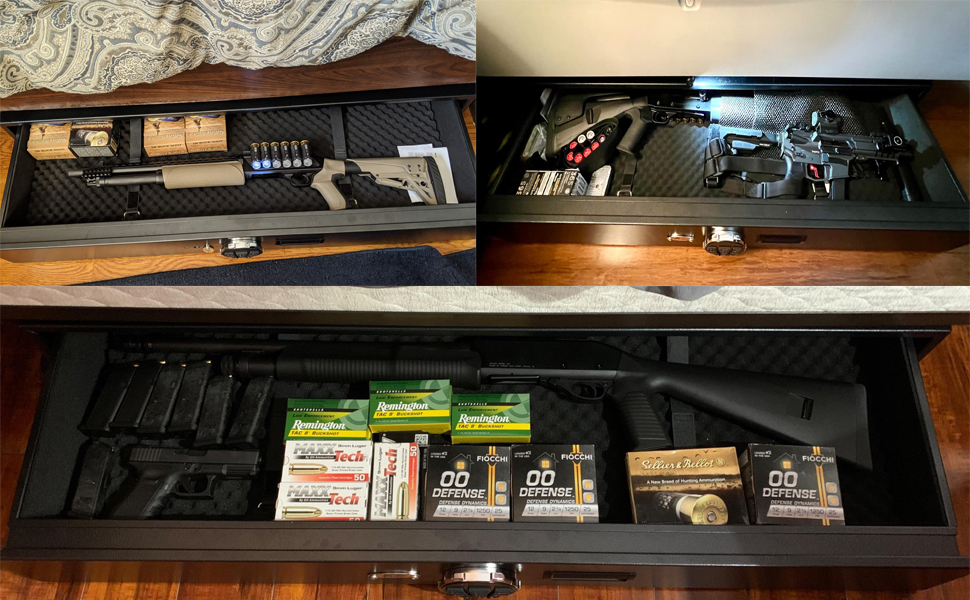
The safe is designed to fit discreetly under a bed, providing convenient access.
4.3 Initial Code Setup and Components Overview
Before first use, familiarize yourself with the safe's access mechanisms and components.

Detailed view of the safe's components: steel locking bolts for security, an internal LED light, the backup keyhole, and the electronic keypad.
5. Operating Instructions
5.1 Setting Your Digital PIN Code
Refer to the specific instructions included with your safe for detailed steps on setting your personal digital PIN code. Typically, this involves pressing a program button, entering your desired code (usually 4-8 digits), and confirming it. Test the new code multiple times with the safe door open before closing it.
5.2 Accessing the Safe with Digital PIN Code
- Enter your programmed digital PIN code on the keypad.
- The display will show "DONE" (or similar confirmation) and the locking mechanism will disengage.
- Pull the drawer open.

The electronic keypad confirms successful code entry with a "DONE" message.
5.3 Accessing the Safe with Backup Keys
In case of battery failure or forgotten PIN code, use the backup keys:
- Locate the keyhole, usually concealed near the keypad.
- Insert one of the backup keys and turn it to unlock the safe.
- Pull the drawer open.
5.4 Silent Mode
The safe features a silent mode function. To activate or deactivate, refer to the specific instructions provided with your safe. This feature is useful for discreet access without audible beeps.
5.5 Alarm System
The safe is equipped with an alarm system. If an incorrect PIN code is entered three consecutive times, the safe will emit an alarm and temporarily lock access via the keypad. The alarm will also activate if the safe is tampered with or moved unexpectedly.
6. Maintenance
6.1 Battery Replacement
The electronic keypad requires batteries (typically AA or AAA, refer to your specific model's instructions). When the batteries are low, the keypad may indicate this with a warning light or a series of beeps. Replace batteries promptly to ensure continuous electronic access.
- Open the battery compartment, usually located on the back of the keypad or inside the safe door.
- Remove old batteries and insert new ones, ensuring correct polarity.
- Close the battery compartment.
6.2 Cleaning
Clean the exterior of the safe with a soft, damp cloth. Avoid using abrasive cleaners or solvents, as these can damage the finish. Do not spray cleaning solutions directly onto the keypad or locking mechanism.
6.3 Regular Inspection
Periodically inspect the safe for any signs of wear, damage, or tampering. Ensure the locking bolts operate smoothly and the drawer slides without obstruction.
7. Troubleshooting
7.1 Keypad Not Responding
- Check the batteries. Replace them if they are low or depleted.
- Ensure you are pressing the keys firmly and accurately.
7.2 "Wrong Access Beep" / Alarm Activation
If an incorrect PIN code is entered three times, the safe will beep and temporarily deny keypad access. Wait for the lockout period to expire before attempting to enter the code again. If the alarm activates due to tampering, ensure the safe is secure and then use a valid PIN or backup key to open it.
7.3 Forgotten PIN Code
If you forget your digital PIN code, use the backup keys to open the safe. Once open, you can reset the PIN code following the instructions in Section 5.1.
7.4 Drawer Not Opening/Closing Smoothly
- Check for any obstructions inside the safe or along the drawer slides.
- Ensure the safe is on a level surface and securely mounted.
8. Specifications
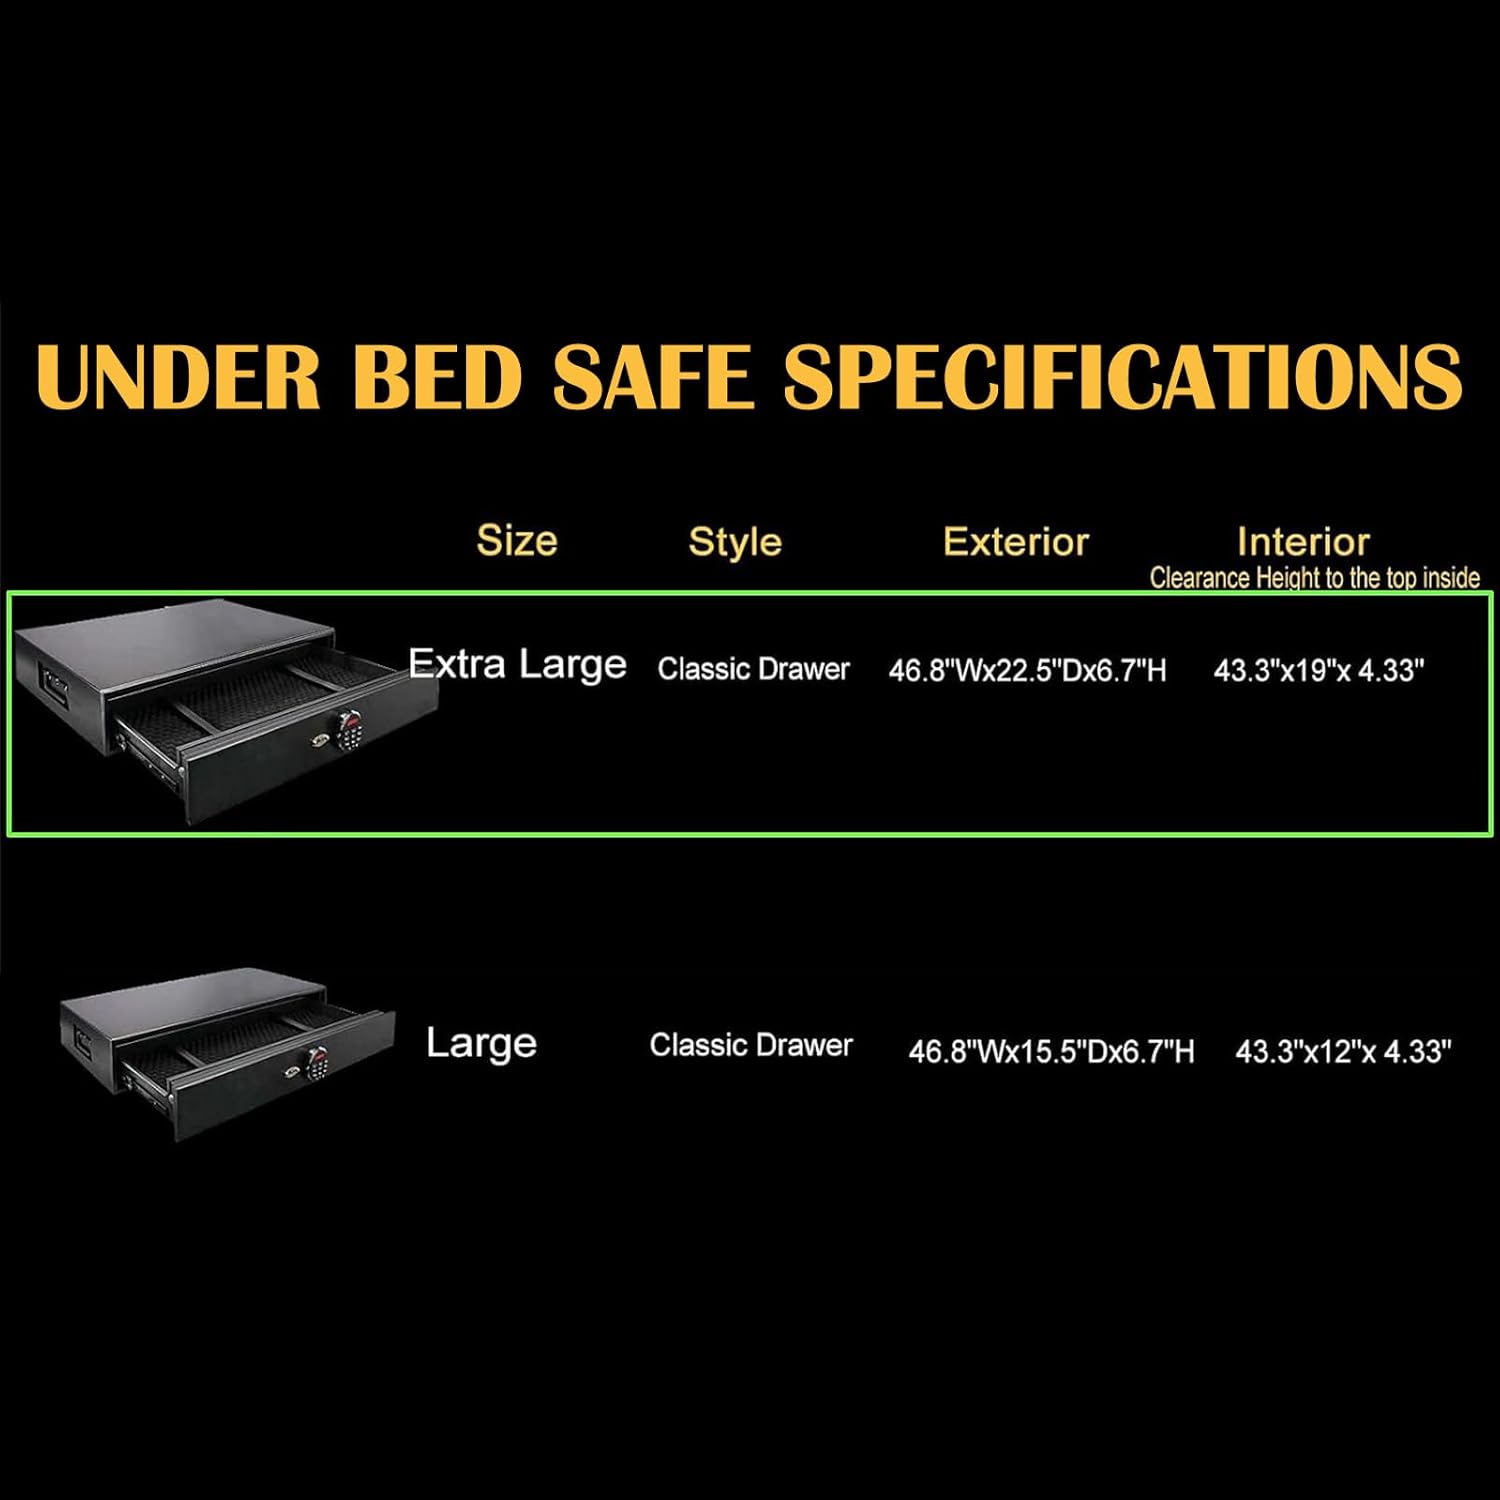
Dimensions and specifications for the LANGGER V Under Bed Safe.
| Feature | Specification |
|---|---|
| Brand | LANGGER V |
| Model Number | DCTO1XL |
| Product Dimensions (Exterior) | 46.9" (Width) x 22.5" (Depth) x 6.7" (Height) |
| Interior Dimensions of Drawer (Clearance Height) | 43.3" (Width) x 20" (Depth) x 4.33" (Height) |
| Item Weight | 110 Pounds |
| Lock Type | Electronic Combination Lock, Backup Key |
| Color | Black |
| Material | Carbon Steel |
| Special Features | Alarm System, Anti-Theft, Combination Lock, Sensor Light |
| Mounting Type | Floor Mount / Under Bed / Closet |
| Water Resistance Level | Not Water Resistant |
9. Warranty and Support
9.1 Warranty Information
This product comes with a standard manufacturer's warranty covering defects in materials and workmanship. Please retain your proof of purchase for warranty claims. Specific warranty terms and duration may vary; refer to the warranty card included with your product or contact customer service for details.
9.2 Customer Support
For any questions, technical assistance, or warranty inquiries, please contact LANGGER V customer service. We provide high-standard 24/7 customer service.
Contact Information:
- Via your order page on Amazon.
- Refer to the contact details provided on the product packaging or the official LANGGER V website.