1. Introduction
Thank you for choosing the PUTORSEN Dual Monitor Arm. This robust and versatile monitor stand is designed to securely hold flat or curved screens from 17 to 49 inches, with a weight capacity of 2 to 20 kg per arm. It offers extensive adjustability to optimize your workspace ergonomics and productivity. This manual provides detailed instructions for installation, operation, and maintenance to ensure safe and efficient use of your monitor arm.

Image: The PUTORSEN Dual Monitor Arm supporting two stacked curved monitors, showcasing its robust design and vertical stacking capability.
2. Safety Information
- Read all instructions carefully before assembly and use.
- Ensure your desk surface is strong enough to support the combined weight of the monitor arm and your monitors.
- Do not exceed the maximum weight capacity of 20 kg (44 lbs) per arm.
- Ensure all screws and connections are tightened securely before attaching monitors.
- Adjust the gas spring tension according to your monitor's weight to prevent sudden drops or rises.
- Keep children and pets away during installation.
- If you are unsure about any part of the installation, seek professional assistance.
3. Package Contents
Please verify that all components are present before beginning installation:
- Monitor Arm Assembly (2 arms, 1 pole)
- Desk Clamp (C-clamp)
- Grommet Base
- VESA Plates (2 units)
- Hardware Kit (screws, washers, spacers)
- Allen Keys for adjustment
- Cable Management Clips
- Instruction Manual
4. Setup and Installation
4.1 Desk Mounting Options
The monitor arm supports two mounting methods: C-clamp and Grommet. Both methods require a desk thickness between 12 mm (0.47 inches) and 50 mm (2 inches).
C-Clamp Installation:
- Attach the C-clamp to the main pole.
- Position the C-clamp on the edge of your desk and tighten the screw until it is secure.
Grommet Installation:
- If your desk has a grommet hole, insert the grommet base through it.
- Secure the grommet base from underneath the desk using the provided hardware.

Image: Detailed product dimensions and illustrations of C-clamp and Grommet mounting options, along with weight and size compatibility.
4.2 Attaching Monitors
The monitor arm features quick-release VESA plates for easy monitor attachment. Ensure your monitors are VESA compatible (75x75mm or 100x100mm).
- Attach the VESA plate to the back of your monitor using the appropriate screws from the hardware kit.
- Slide the monitor with the attached VESA plate onto the arm's mounting head until it clicks into place.
- Repeat for the second monitor.
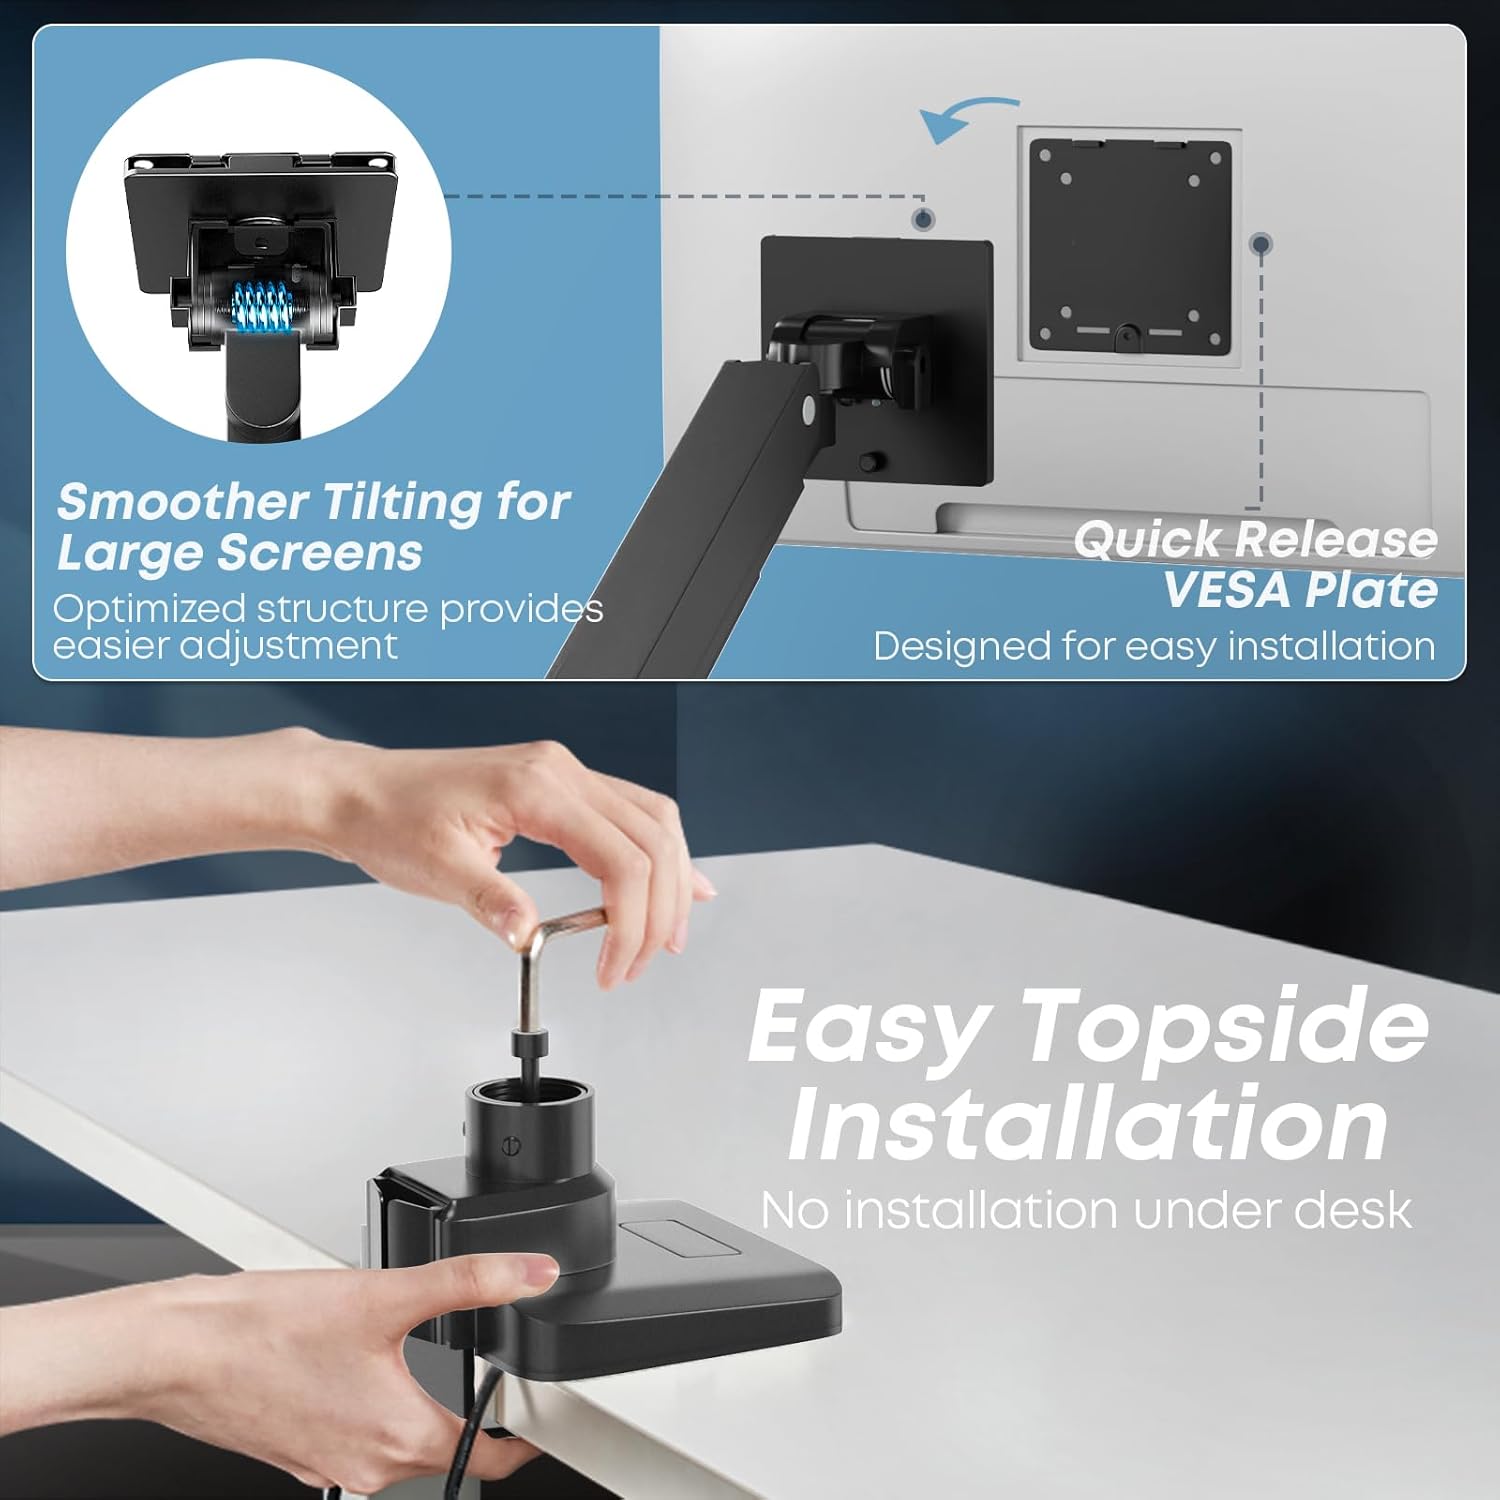
Image: Illustration of the quick-release VESA plate and easy topside installation process, showing no need for under-desk work.
4.3 VESA Compatibility Check
Before purchasing or installing, verify your monitor has VESA mounting holes. If your monitor does not have VESA holes, you may need a separate VESA adapter (not included).

Image: Guide on checking VESA hole availability on monitors and the need for a separate VESA adapter if not present.
5. Operating Instructions
5.1 Adjusting Gas Spring Tension
The integrated gas spring allows for smooth and stable positioning. Use the provided Allen key to adjust the tension based on your monitor's weight. Turn '+' to increase tension for heavier monitors, and '-' to decrease tension for lighter monitors.
5.2 Monitor Positioning and Flexibility
The PUTORSEN Dual Monitor Arm offers extensive adjustability:
- Tilt: +50° to -20° (upward/downward)
- Swivel: 180° (left/right)
- Rotation: 360° (landscape/portrait orientation)
- Height Adjustment: Along the central pole and via gas spring arms.
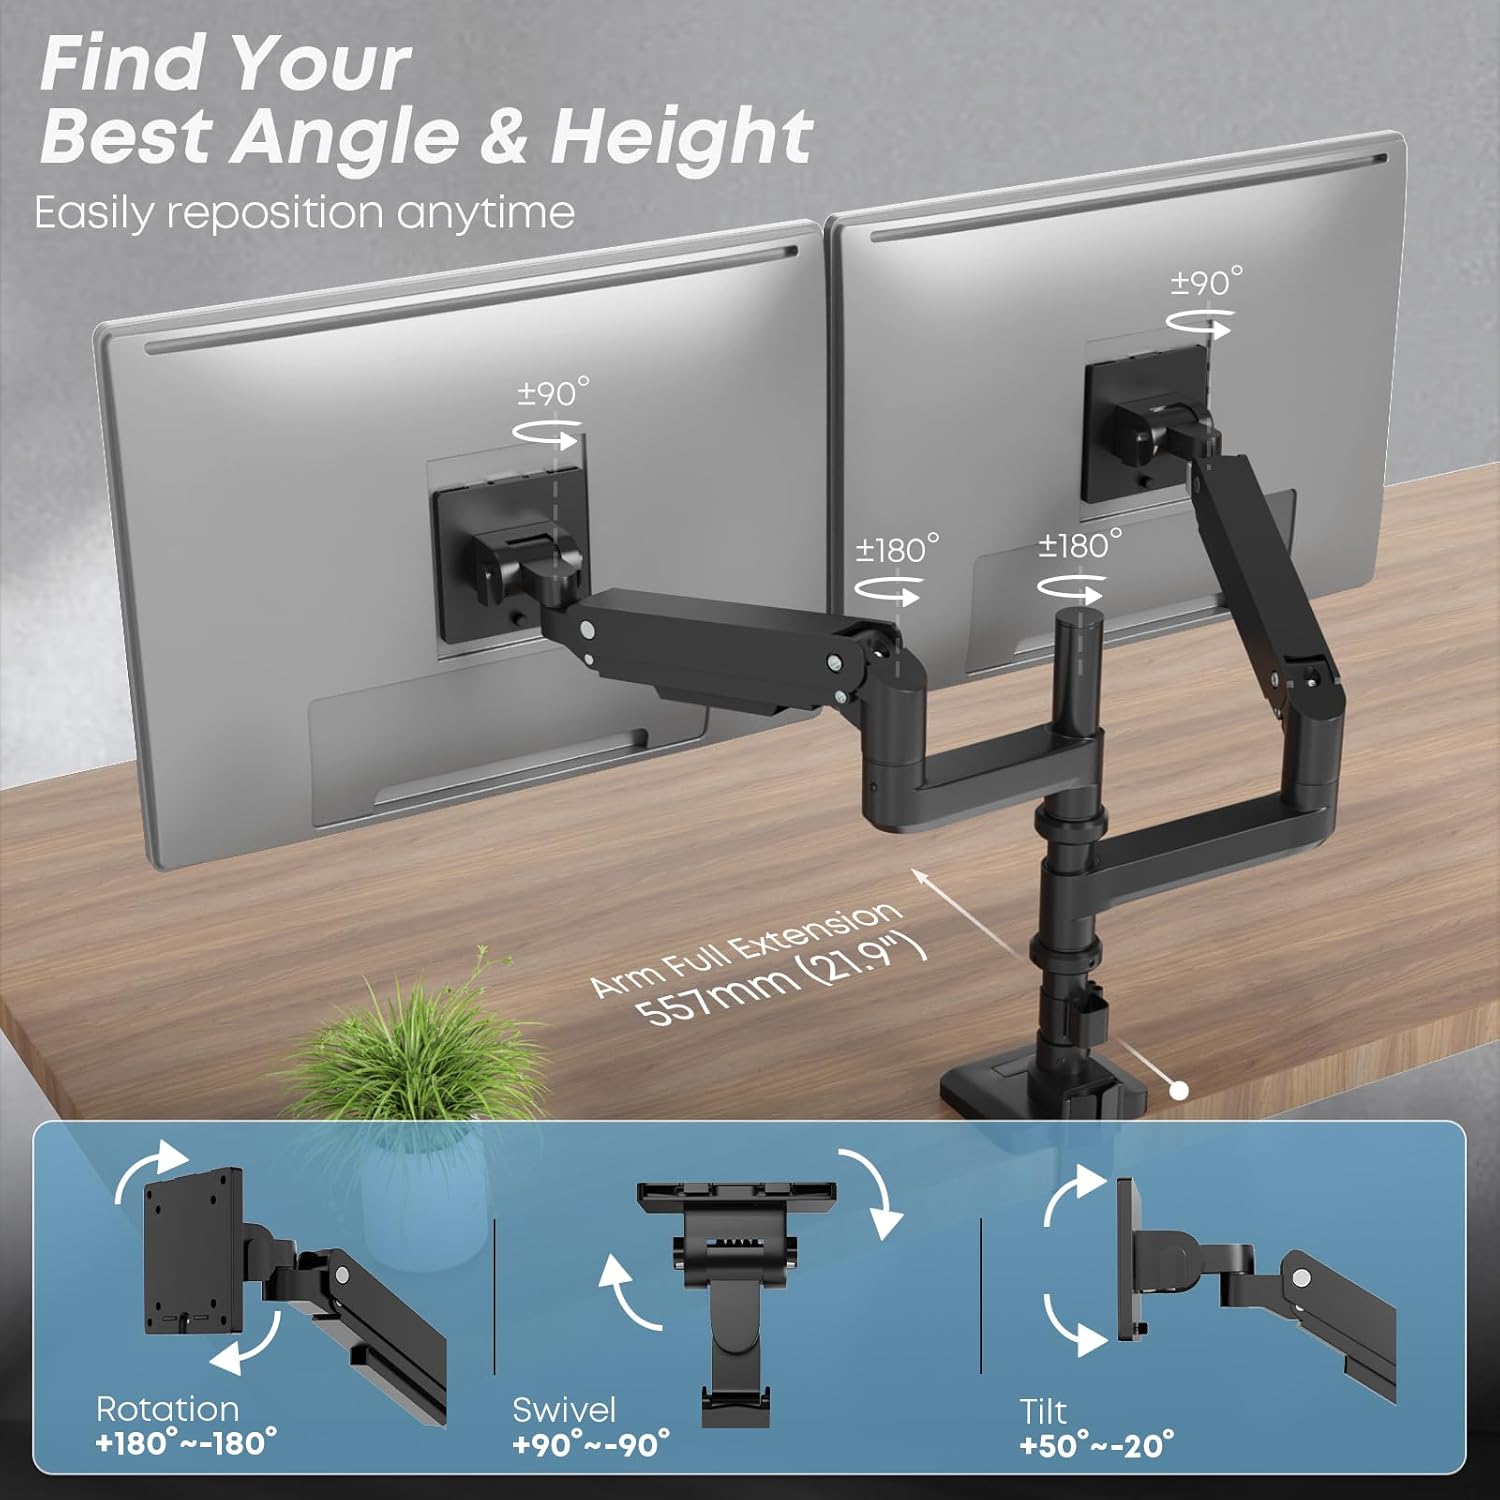
Image: Visual representation of the monitor arm's full range of motion, including rotation, swivel, and tilt angles.
5.3 Configuration Modes
- Vertical Stacking Mode: Supports two ultra-wide screens from 17 to 49 inches. The tall pole (355mm) allows for efficient vertical arrangement, enhancing productivity.
- Side-by-Side Mode: Supports screens from 17 to 35 inches. Note that for larger screens (e.g., 49-inch ultra-wides), side-by-side configuration may not be feasible due to arm length limitations.

Image: Comparison of side-by-side and stacked monitor configurations, illustrating compatible screen sizes for each mode.
5.4 Cable Management
Integrated cable management channels help keep your workspace tidy. Route your monitor cables (power, video, etc.) through the clips or channels along the arms and pole to maintain a clean and organized setup.

Image: A desk setup demonstrating the effective use of the monitor arm's integrated cable management to keep cables hidden and the workspace neat.
6. Maintenance
- Cleaning: Wipe the monitor arm with a soft, damp cloth. Avoid abrasive cleaners or solvents that could damage the finish.
- Periodic Checks: Periodically check all screws and connections to ensure they remain tight and secure. Re-tighten if necessary.
- Gas Spring Adjustment: If you change monitors or notice the arm is not holding its position correctly, re-adjust the gas spring tension.
7. Troubleshooting
| Problem | Possible Cause | Solution |
|---|---|---|
| Monitor arm sags or won't stay up. | Gas spring tension is too low for monitor weight. | Increase gas spring tension by turning the adjustment screw towards '+'. |
| Monitor arm is too stiff to move down. | Gas spring tension is too high for monitor weight. | Decrease gas spring tension by turning the adjustment screw towards '-'. |
| Monitor wobbles or feels unstable. | Mounting screws or arm joints are loose. | Ensure all VESA plate screws and arm joint screws are tightened securely. |
| Cannot achieve desired height for stacked monitors. | Monitor aspect ratios or sizes are not ideal for stacking on the given pole height. | Review monitor dimensions and consider if a different setup (e.g., side-by-side for smaller monitors) is more suitable. Contact support if unsure. |
8. Specifications
| Model Number | LDT69 |
| Material | Aluminum and Steel |
| Color | Black |
| Screen Size Compatibility | 17 - 49 inches (flat or curved) |
| Weight Capacity (per arm) | 2 - 20 kg (4.4 - 44 lbs) |
| VESA Compatibility | 75x75mm, 100x100mm |
| Desk Thickness (C-clamp/Grommet) | 12 - 50 mm (0.47 - 2 inches) |
| Tilt Angle | +50° / -20° |
| Swivel Angle | 180° |
| Rotation Angle | 360° |
| Pole Height | 355 mm (approx. 14 inches) |

Image: Illustration highlighting the durability and quality of materials, tested for over 20,000 cycles.
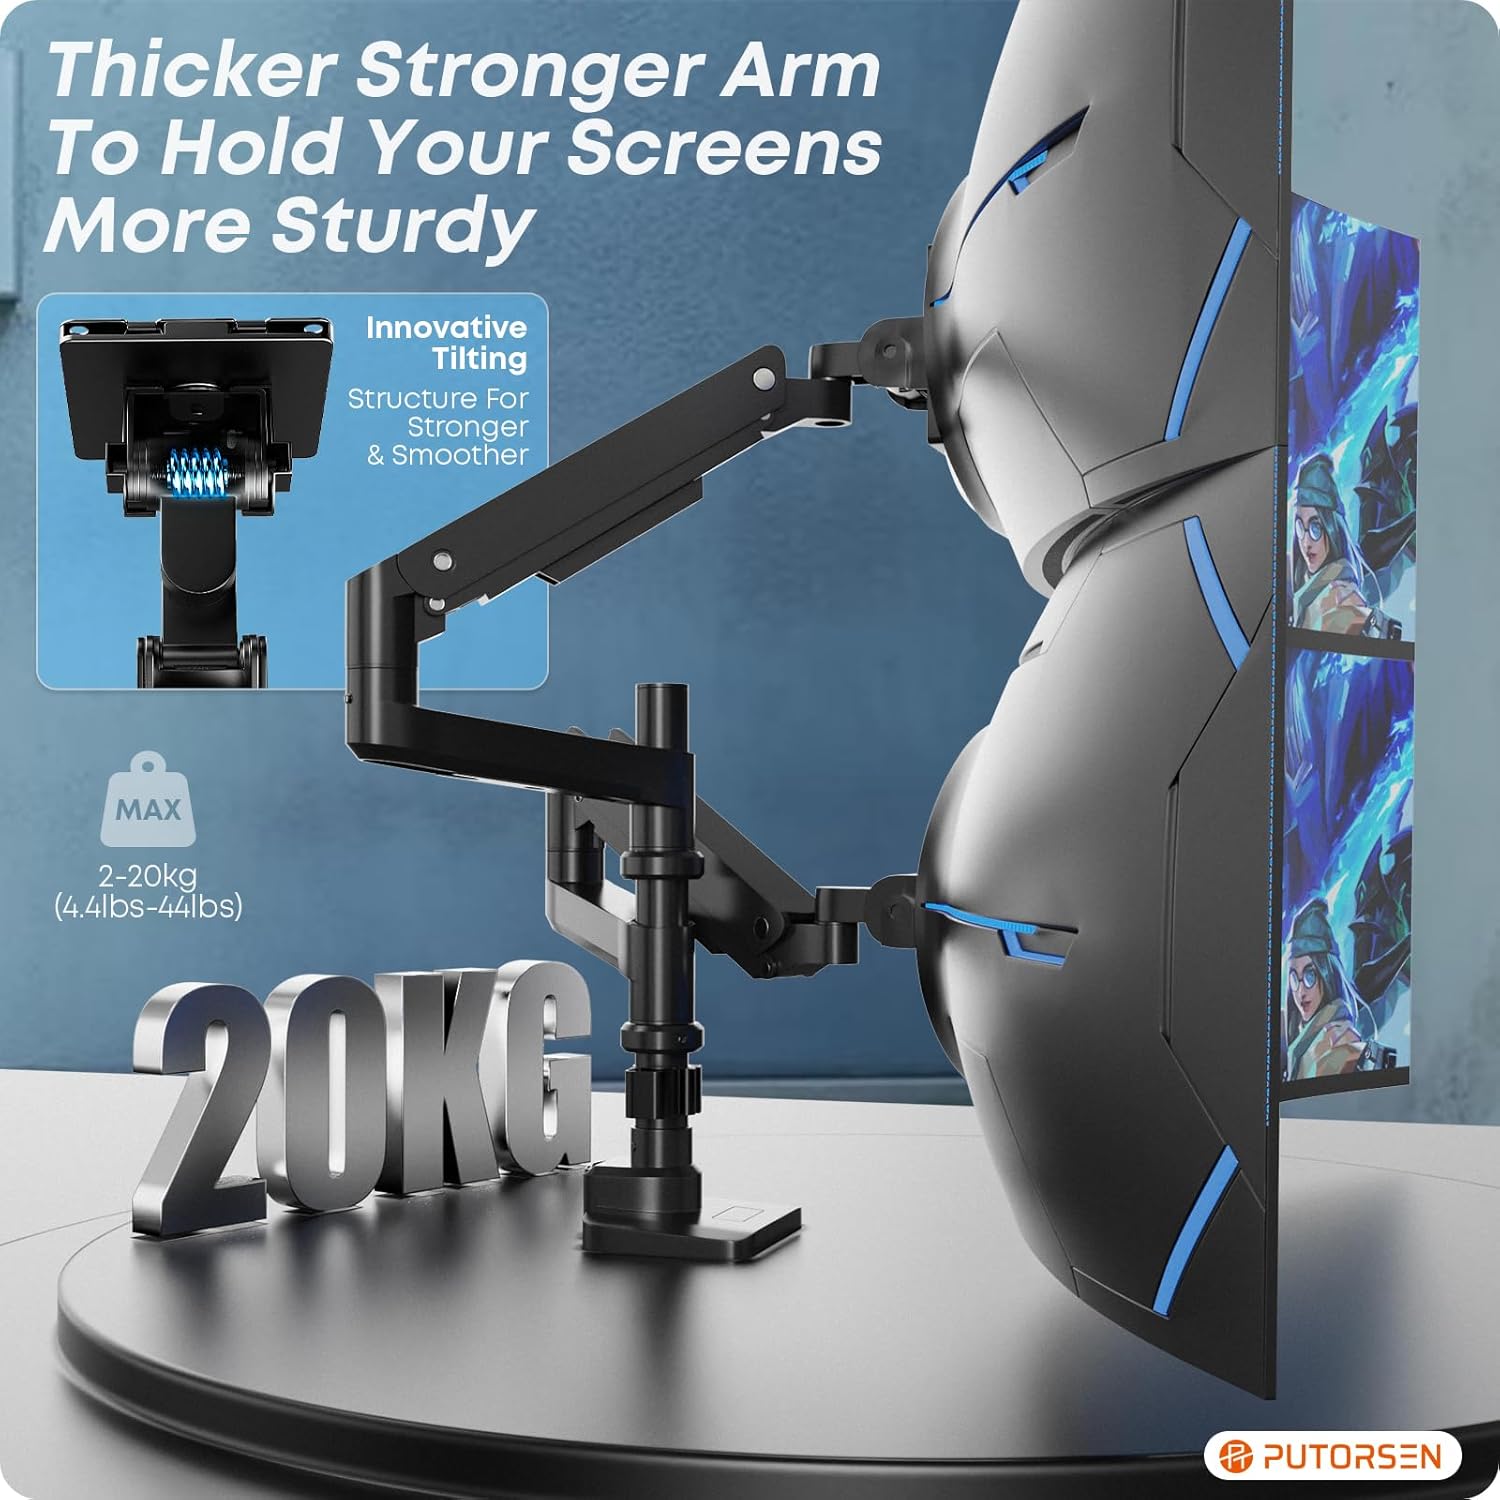
Image: Close-up of the monitor arm emphasizing its robust construction and 20kg weight capacity.
9. Warranty and Support
PUTORSEN offers a lifetime warranty for this product. If you encounter any issues or require assistance, please do not hesitate to contact our customer support team. We are committed to providing prompt and helpful service.
For support, please refer to the contact information provided with your purchase or visit the official PUTORSEN website.