Introduction
This instruction manual provides comprehensive guidance for installing and operating your BRIKSMAX Lighting Kit, specifically designed for the LEGO 21344 The Orient Express Train building set. This kit enhances your LEGO model by adding intricate lighting details, bringing the iconic train to life with illuminated headlights, interior car lights, and tail lights. Please note that the LEGO building set itself is not included with this lighting kit.

Image: The LEGO Orient Express Train model illuminated by the BRIKSMAX lighting kit, showcasing bright headlights and warm interior lighting.
What's Included
Before beginning installation, please verify that all components listed below are present in your BRIKSMAX Lighting Kit package:
- LED Light Kit components (various types and lengths of lights and connecting cables)
- Instruction Manual
- USB Power Cable
- Battery Box (requires AA batteries, not included)
- Expansion Boards
- Adhesive Squares
- Block Parts (random color, for integration)

Image: A visual representation of the contents of the BRIKSMAX Lighting Kit, detailing each type of light, cable, and accessory.
Setup and Installation
The installation process involves carefully integrating the LED lights and wiring into your LEGO 21344 The Orient Express Train model. Follow the provided step-by-step instructions for optimal results. Patience and attention to detail are key during this process.
- Preparation: Ensure your LEGO model is fully assembled according to its original instructions. Gather all BRIKSMAX kit components and the instruction manual.
- Disassembly (Partial): Depending on the specific light placement, you may need to carefully disassemble small sections of your LEGO model. Refer to the BRIKSMAX instruction manual for precise guidance on which parts to remove.
- Light Placement: Position the LED lights in the designated areas, such as headlights, interior compartments, and tail lights. Use the adhesive squares where necessary to secure lights.
- Wire Routing: Carefully route the connecting cables between the lights and the expansion boards. Ensure wires are hidden as much as possible within the LEGO structure to maintain the model's aesthetic. Avoid pinching or sharply bending wires.
- Connecting to Expansion Boards: Connect the LED lights to the appropriate ports on the expansion boards. Pay attention to the polarity if specified.
- Power Connection: Connect the expansion boards to the battery box (with AA batteries, not included) or the USB power cable.
- Reassembly: Reassemble any disassembled LEGO sections, ensuring that wires are not damaged during the process.
- Testing: Before final reassembly, test the lights to ensure all connections are secure and lights are functioning correctly.

Image: Detailed view of the illuminated interior of a train carriage, highlighting the effect of the installed lighting kit.
Video: A demonstration of the BRIKSMAX Lighting Kit installed on the LEGO 21344 The Orient Express Train, showcasing the various illuminated features and overall effect.
Operating Instructions
Once the BRIKSMAX Lighting Kit is fully installed and connected to a power source, operating the lights is straightforward:
- Power On/Off: If using the battery box, ensure batteries are correctly inserted. Use the switch on the battery box to turn the lights on or off. If using the USB cable, connect it to a compatible USB power source (e.g., power bank, USB wall adapter) to activate the lights. Disconnect to turn off.
- Brightness: This kit typically provides a fixed brightness level. There are no adjustable brightness settings unless an optional dimmer module was purchased separately.
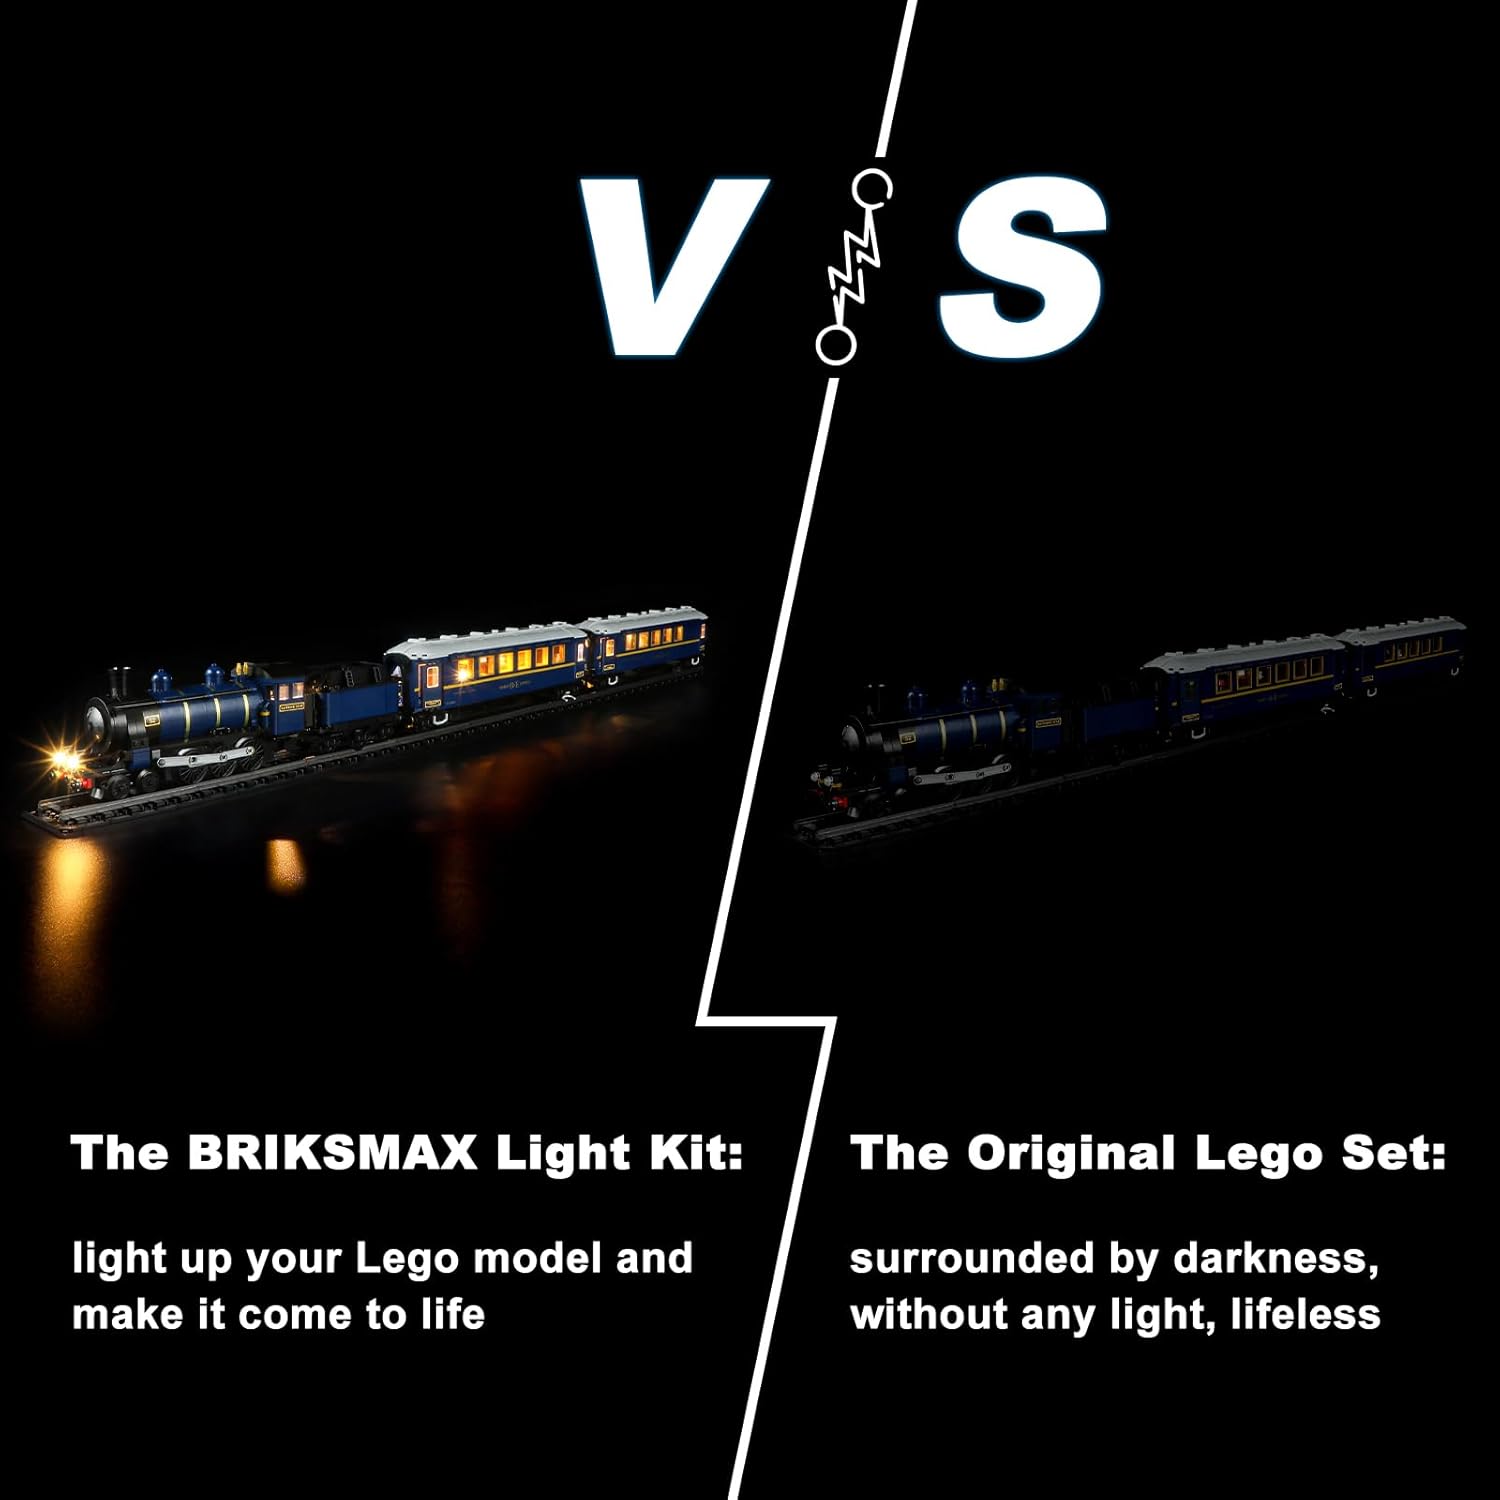
Image: A visual comparison demonstrating the significant enhancement provided by the BRIKSMAX lighting kit compared to the unlit LEGO model.
Maintenance
To ensure the longevity and optimal performance of your BRIKSMAX Lighting Kit, follow these maintenance guidelines:
- Cleaning: Dust the LEGO model and lighting components gently with a soft, dry cloth. Avoid using liquids or abrasive cleaners, as these can damage the electrical components or the LEGO bricks.
- Wire Care: Periodically inspect wires for any signs of wear, fraying, or damage. Ensure they remain securely tucked away and are not under tension.
- Battery Replacement: If using the battery box, replace AA batteries when lights dim or cease to function. Always replace all batteries at once with new ones of the same type.
- Storage: If storing the model for an extended period, disconnect the power source (remove batteries or unplug USB cable) to prevent battery leakage or unnecessary power drain.
Troubleshooting
If you encounter issues with your BRIKSMAX Lighting Kit, refer to the following common problems and solutions:
| Problem | Possible Cause | Solution |
|---|---|---|
| Lights do not turn on. | No power, loose connection, incorrect battery insertion, faulty component. |
|
| Some lights are not working. | Loose connection to a specific light, damaged LED, short circuit. |
|
| Lights are flickering. | Unstable power supply, loose connection. |
|
Specifications
- Product Dimensions: 6.69 x 4.72 x 2.17 inches
- Item Weight: 12 ounces
- Model Number: 21344
- Manufacturer Recommended Age: 8 years and up
- Power Source: USB or AA Battery Box (batteries not included)
Warranty and Support
BRIKSMAX is committed to providing high-quality products and excellent customer service. If you encounter any difficulties with your lighting kit, require assistance with installation, or need to report a faulty component, please contact our customer support team.
For support, please refer to the contact information provided in your product packaging or visit the official BRIKSMAX website. When contacting support, please have your purchase details and model number (21344) available to facilitate a quicker resolution.
We strive to help you solve any problems in a timely manner and ensure your satisfaction with our products.


