
Geek Smart L7
Geek Smart L7 Robot Vacuum and Mop User Manual
Model: L7
1. Introduction
Thank you for choosing the Geek Smart L7 Robot Vacuum and Mop. This device is designed to provide efficient and thorough cleaning for your home, combining powerful vacuuming with intelligent mopping capabilities. Featuring advanced LDS navigation, Wi-Fi connectivity, and smart app control, the L7 ensures a customized cleaning experience for various floor types, including carpets and hard floors.
This manual provides essential information for the safe operation, setup, maintenance, and troubleshooting of your robot vacuum. Please read it carefully before use and retain it for future reference.
2. Safety Instructions
To reduce the risk of injury or damage, read and follow all safety precautions when setting up, using, and maintaining your robot vacuum.
- This appliance can be used by children aged 8 years and above and persons with reduced physical, sensory or mental capabilities or lack of experience and knowledge if they have been given supervision or instruction concerning use of the appliance in a safe way and understand the hazards involved.
- Children should be supervised to ensure they do not play with the appliance.
- Cleaning and user maintenance shall not be made by children without supervision.
- Use only the original power adapter provided by the manufacturer.
- Do not use the robot in environments with open flames or flammable materials.
- Keep hair, loose clothing, fingers, and all parts of the body away from openings and moving parts.
- Do not operate the robot in rooms where an infant or child is sleeping.
- Do not use the robot to pick up large debris, liquids, or burning objects.
- Ensure the robot is placed on a stable surface and cannot fall from high places.
- Turn off the robot and unplug the charging dock before cleaning or maintenance.
3. Package Contents
Verify that all components are present and in good condition upon unpacking.
- Geek Smart L7 Robot Vacuum and Mop
- Charging Dock
- Power Adapter
- Side Brushes (2 pairs)
- Main Brush
- Dust Bin (680ML)
- 2-in-1 Water Tank & Dust Bin (350ML water tank & 260ML dust bin)
- Mop Cloths (2)
- High-Efficiency Filter (pre-installed in dust bin)
- Cleaning Tool
- User Manual
4. Product Overview
Robot Vacuum Components

Image: The Geek Smart L7 Robot Vacuum, showcasing its top view with control buttons, LDS sensor, and accompanying accessories like the charging dock and replacement filters.
- LDS Navigation Sensor: Located on top, for precise mapping and navigation.
- Control Buttons: Power/Clean, Home/Recharge.
- Front Bumper: Detects obstacles.
- Side Brushes: Sweep debris into the main brush path.
- Main Brush: Collects dirt and debris.
- Driving Wheels: Allow movement across various surfaces.
- Charging Contacts: Connect with the charging dock.
- Dust Bin / Water Tank: Removable compartments for dust collection and water for mopping.
Charging Dock
The charging dock provides power to recharge the robot's battery. It should be placed in an open area with sufficient clearance.
5. Setup
5.1 Charging Dock Placement
- Place the charging dock against a wall in an open area.
- Ensure there is at least 0.5 meters (1.6 feet) of clear space on both sides of the dock and 1.5 meters (4.9 feet) in front.
- Connect the power adapter to the charging dock and plug it into a wall outlet.
- Ensure the power indicator on the charging dock illuminates.
5.2 Initial Charging
- Place the robot onto the charging dock, ensuring the charging contacts align.
- The robot will automatically begin charging. Allow it to fully charge before its first use (approximately 4-5 hours).
5.3 App Connection and Mapping

Image: The Geek Smart L7 Robot Vacuum actively scanning its environment using LDS navigation to create a detailed map, with digital map representations floating above it.
- Download the Geek Smart app from your mobile device's app store (available for iOS and Android).
- Register an account and log in.
- Follow the in-app instructions to add your L7 robot vacuum. This typically involves connecting to the robot's Wi-Fi hotspot and then connecting the robot to your home Wi-Fi network.
- Once connected, initiate a full cleaning cycle. The robot will use its LDS navigation to create an accurate map of your home. This map will be saved in the app for future use, allowing for features like selective room cleaning and setting no-go zones. The robot can save up to 5 different maps.
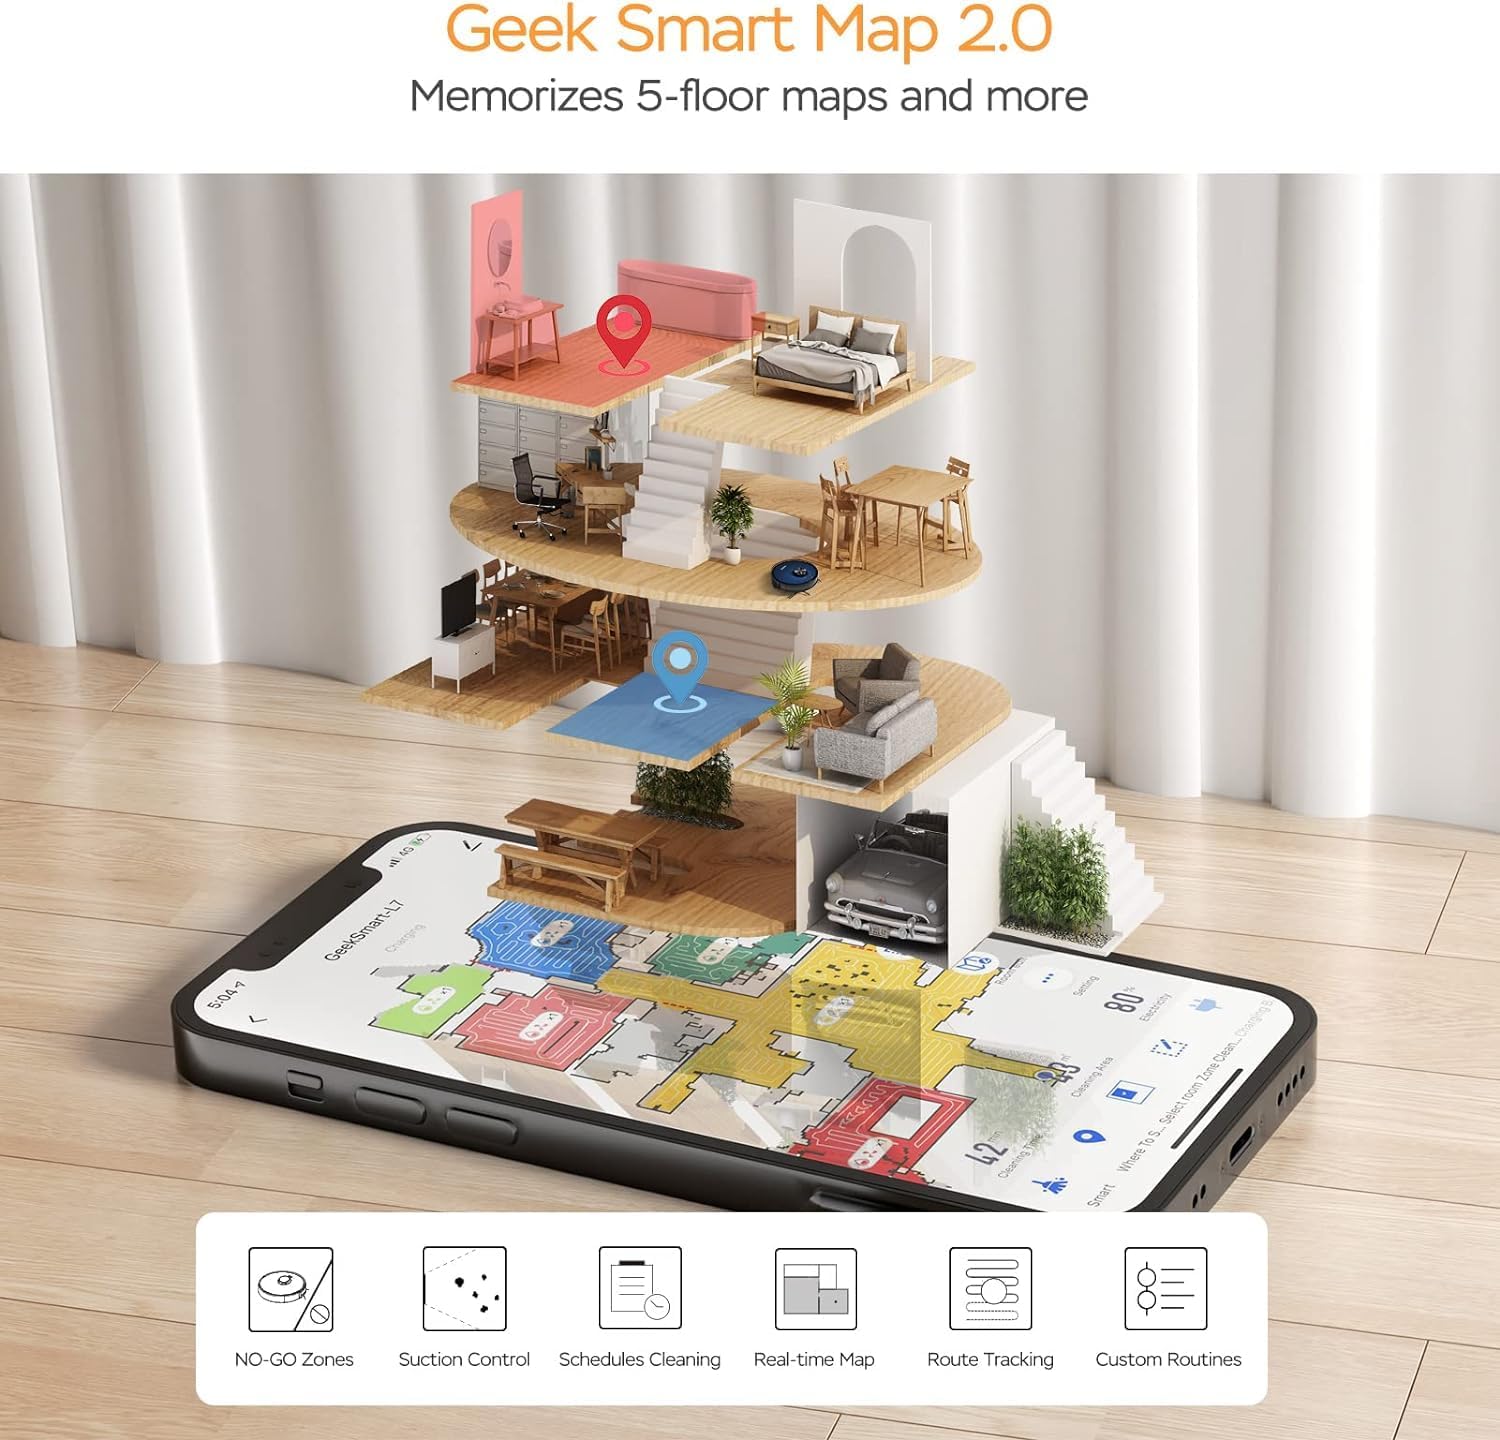
Image: A smartphone screen displaying the Geek Smart app interface, showing a color-coded floor plan map with various cleaning zones and controls.
6. Operating Instructions
6.1 Starting and Stopping Cleaning
- Start Cleaning: Press the Power/Clean button on the robot or tap "Start Cleaning" in the app. The robot will begin a full cleaning cycle.
- Pause Cleaning: Press the Power/Clean button during operation or tap "Pause" in the app.
- Resume Cleaning: Press the Power/Clean button again or tap "Resume" in the app.
- Return to Dock: Press the Home/Recharge button on the robot or tap "Recharge" in the app. The robot will return to its charging dock.
6.2 Cleaning Modes
The L7 offers various cleaning modes to suit different needs.

Image: The Geek Smart L7 Robot Vacuum demonstrating its 2-in-1 sweeping and mopping capabilities on a hard floor, with debris being swept and a damp mop trail visible.
- Auto Cleaning: The robot intelligently plans its cleaning path using LDS navigation.
- Vacuuming: Utilizes up to 2700Pa suction power to clean dirt and debris from various surfaces.
- Mopping: Attach the mop cloth and fill the 2-in-1 water tank. The electronic water tank allows for adjustable water output.
- Vacuum & Mop (Simultaneous): The robot can vacuum and mop simultaneously when the 2-in-1 tank is installed.
- Carpet Boost Mode: The robot automatically increases suction power when it detects carpeted areas for deeper cleaning.

Image: The Geek Smart L7 Robot Vacuum actively cleaning a hard floor, with a visual representation of its powerful 2700Pa suction lifting debris.

Image: The Geek Smart L7 Robot Vacuum transitioning from a hard floor to a carpet, illustrating its Carpet Boost Mode with enhanced suction indicated by glowing lines.

Image: The Geek Smart L7 Robot Vacuum positioned on a floor split between marble and wood, illustrating its integrated mopping system and adjustable water output for different surfaces.
6.3 App Control Features
The Geek Smart app unlocks advanced cleaning customization.
- Selective Room Cleaning: Choose specific rooms or areas on the map for cleaning.
- No-Go Zones / No-Mop Zones: Draw virtual boundaries on the map to prevent the robot from entering certain areas or mopping carpets.
- Invisible Walls: Create virtual walls to restrict the robot's movement.
- Scheduling: Set cleaning schedules for automatic operation at desired times.
- Suction Power Adjustment: Manually adjust the suction level.
- Water Output Adjustment: Control the water flow for mopping.

Image: The Geek Smart L7 Robot Vacuum operating quietly (65dB) in a living room, demonstrating its low noise level suitable for homes with sleeping individuals or pets.
7. Maintenance
Regular maintenance ensures optimal performance and extends the lifespan of your robot vacuum. Always turn off the robot and unplug the charging dock before performing any maintenance.
7.1 Emptying the Dust Bin
- Press the dust bin release button and pull out the dust bin.
- Open the dust bin cover and empty the contents into a trash can.
- Clean the filter and dust bin with the provided cleaning tool or a soft brush.
- Reinstall the dust bin.
7.2 Cleaning the 2-in-1 Water Tank & Dust Bin
- Remove the 2-in-1 tank from the robot.
- Empty any remaining water from the water tank compartment.
- Empty the dust compartment and clean the filter.
- Rinse the water tank compartment with clean water. Do not immerse the entire tank in water, especially the electronic components.
- Allow all parts to air dry completely before reassembling and reinstalling.
7.3 Cleaning the Main Brush
- Flip the robot over and press the release tabs to remove the main brush cover.
- Lift out the main brush.
- Use the cleaning tool to remove hair and debris tangled around the brush and its bearings.
- Reinstall the main brush and cover.
7.4 Cleaning Side Brushes
- Gently pull the side brushes upwards to remove them.
- Remove any hair or debris. If brushes are bent, soak them in warm water for a few minutes to reshape.
- Press the brushes back into place until they click.
7.5 Cleaning Sensors and Charging Contacts
- Use a clean, dry cloth to wipe the cliff sensors (located on the bottom of the robot), wall sensors (on the side), and the charging contacts on both the robot and the charging dock.
- Ensure the LDS sensor on top is also clean and free of obstructions.
8. Troubleshooting
If you encounter issues with your robot vacuum, refer to the following table for common problems and solutions.
| Problem | Possible Cause | Solution |
|---|---|---|
| Robot does not turn on | Low battery; Power switch off | Place robot on charging dock; Ensure power switch is on. |
| Robot cannot charge | Charging contacts dirty; Charging dock not powered | Clean charging contacts on robot and dock; Ensure dock is plugged in. |
| Robot gets stuck frequently | Obstacles on floor; Cliff sensors dirty | Clear cables and small objects; Clean cliff sensors. |
| Poor cleaning performance | Dust bin full; Brushes tangled; Filter clogged | Empty dust bin; Clean main and side brushes; Clean or replace filter. |
| Mopping function not working | Water tank empty; Mop cloth dry; Water outlet clogged | Fill water tank; Moisten mop cloth; Clean water outlet. |
| App connection issues | Incorrect Wi-Fi password; Router too far; Robot offline | Verify Wi-Fi credentials; Move robot closer to router; Restart robot and router. |
9. Specifications
| Feature | Specification |
|---|---|
| Brand | Geek Smart |
| Model Name | L7 |
| Navigation Type | 360° LiDAR |
| Max Suction Power | 2700 Pa |
| Battery Capacity | 2600 mAh |
| Max Runtime | 130 minutes |
| Dust Bin Capacity | 680 ML |
| Water Tank Capacity (2-in-1) | 350 ML |
| Noise Level | Sub-65 dB |
| Product Dimensions | 12.59"L x 12.59"W x 3.74"H |
| Item Weight | 13.39 pounds |
| Compatible Devices | Amazon Echo |
| UPC | 764773837187 |
10. Warranty and Support
Geek Smart products are manufactured to the highest quality standards. For warranty information, technical support, or customer service inquiries, please refer to the contact information provided on the product packaging or visit the official Geek Smart website.
Please retain your proof of purchase for warranty claims.
Related documentsL7


Ask a question about this manual
Ask about setup, troubleshooting, compatibility, parts, safety, or missing instructions. Manuals+ will review the question and use this page’s manual context to help answer it.