
1. Introduction
The Barracuda No Break SR600 is an Uninterruptible Power Supply (UPS) and voltage regulator designed to protect your electronic devices from power outages, surges, and voltage fluctuations. With a capacity of 600VA/240W, it provides reliable backup power and stable voltage for computers, monitors, gaming consoles, routers, and other sensitive equipment. This manual provides essential information for the proper setup, operation, maintenance, and troubleshooting of your SR600 unit.

Figure 1: Barracuda SR600 No Break Unit
This image shows the Barracuda SR600 No Break unit from an angled perspective, highlighting its compact design and front panel.
2. Safety Information
Please read and follow all safety instructions carefully to prevent injury or damage to the unit and connected equipment.
- Do not open the UPS casing. There are no user-serviceable parts inside.
- Do not expose the UPS to rain, moisture, or excessive humidity.
- Ensure the UPS is placed in a well-ventilated area, away from direct sunlight or heat sources.
- Connect the UPS to a grounded AC power outlet only.
- Do not connect non-computer related equipment (e.g., medical equipment, life support systems) to the UPS.
- In case of fire, use a dry chemical extinguisher. Water may cause electrical shock.
3. Product Overview
3.1 Front Panel
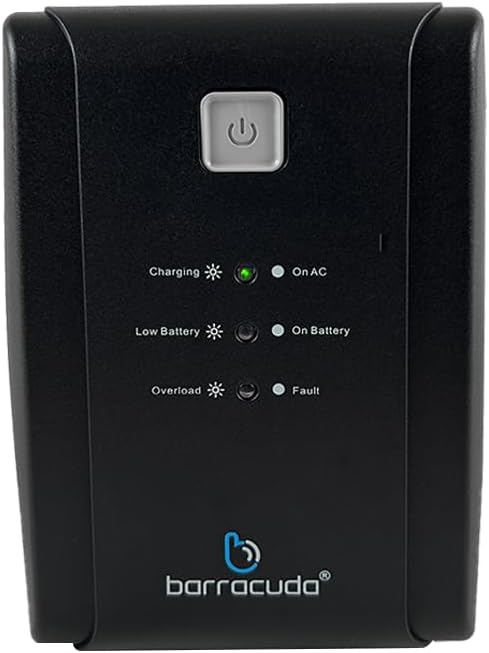
Figure 2: Front Panel of Barracuda SR600
This image displays a close-up of the Barracuda SR600's front panel, showing the power button and LED indicators for Charging, On AC, Low Battery, On Battery, Overload, and Fault.
- Power Button: Press to turn the UPS on or off.
- LED Indicators:
- Charging: Indicates the battery is charging.
- On AC: Indicates the UPS is operating on utility power.
- Low Battery: Indicates the battery level is low.
- On Battery: Indicates the UPS is operating on battery power.
- Overload: Indicates the connected load exceeds the UPS capacity.
- Fault: Indicates a system error.
3.2 Rear Panel

Figure 3: Rear Panel of Barracuda SR600
This image shows the rear panel of the Barracuda SR600, detailing the eight power outlets (four for AVR/Backup and four for Surge Only), the circuit breaker, the USB port, and the AC input.
- AVR/Backup Outlets (4): Provide battery backup power and surge protection. Connect critical devices like computers and monitors here.
- Surge Only Outlets (4): Provide surge protection only. Connect non-critical devices like printers or scanners here.
- Circuit Breaker: Resettable overload protection.
- USB Port: For connecting to a computer for monitoring software (if applicable).
- AC Input: Connects the UPS to the utility power outlet.
4. Setup
4.1 Unpacking
Carefully remove the UPS from its packaging. Inspect the unit for any shipping damage. Retain the original packaging for future use or return.
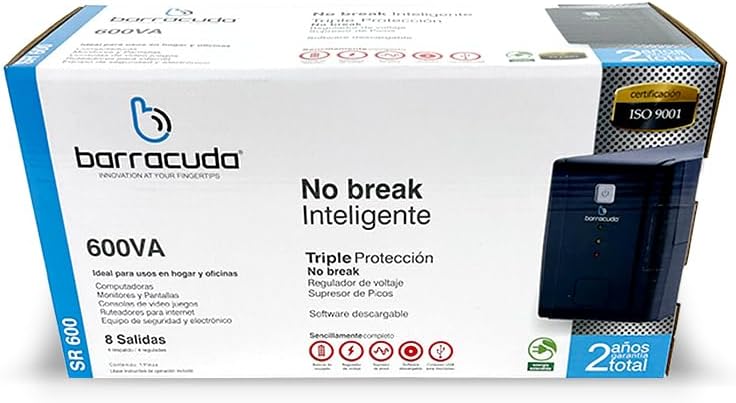
Figure 4: Barracuda SR600 Retail Packaging
This image displays the retail box for the Barracuda SR600, showing product information and branding.
4.2 Placement
Place the UPS on a flat, stable surface in a clean, dry, and well-ventilated area. Avoid placing it near heat-emitting appliances or in direct sunlight. Ensure there is adequate space around the unit for proper airflow.
4.3 Connecting Devices
- Plug the UPS power cord into a grounded 120VAC wall outlet.
- Connect your critical devices (e.g., computer, monitor) to the AVR/Backup Outlets on the rear panel.
- Connect non-critical devices (e.g., printer, scanner) to the Surge Only Outlets.
- Ensure all connected devices are turned off before plugging them into the UPS.
4.4 Initial Charging
For optimal performance, charge the UPS battery for at least 8 hours before initial use. The unit will charge automatically when connected to AC power, even if the UPS is turned off.
5. Operation
5.1 Powering On/Off
- To Turn On: Press and hold the power button on the front panel for approximately 3 seconds until you hear a beep and the 'On AC' LED illuminates.
- To Turn Off: Press and hold the power button for approximately 3 seconds until you hear a beep and all LEDs turn off.
5.2 AC Mode
When the UPS is connected to utility power and the 'On AC' LED is lit, it is operating in AC mode. In this mode, the UPS provides regulated power to connected devices and charges its internal battery.
5.3 Battery Mode
During a power outage or significant voltage fluctuation, the UPS automatically switches to battery mode. The 'On Battery' LED will illuminate, and the unit will emit an audible alarm (beeping) to indicate it is running on battery power. The alarm will sound more frequently as the battery level becomes critically low.
5.4 LED Indicators Explanation
Refer to Section 3.1 for a detailed description of each LED indicator and its meaning during operation.
6. Maintenance
6.1 Battery Care
- To maximize battery life, ensure the UPS is connected to AC power at all times to keep the battery fully charged.
- Avoid frequent deep discharges of the battery.
- If the UPS is to be stored for an extended period, fully charge the battery and then disconnect it from AC power. Recharge the battery every 3 months to prevent permanent damage.
6.2 Cleaning
Disconnect the UPS from AC power and all connected devices before cleaning. Use a soft, dry cloth to wipe the exterior of the unit. Do not use liquid or aerosol cleaners.
6.3 Storage
Store the UPS in a cool, dry place, away from direct sunlight and extreme temperatures. Ensure the battery is fully charged before storage and recharged periodically as mentioned above.
7. Troubleshooting
If you experience issues with your Barracuda SR600, refer to the table below for common problems and their solutions.
| Problem | Possible Cause | Solution |
|---|---|---|
| UPS does not turn on. | Battery is completely discharged. | Connect the UPS to AC power and allow it to charge for at least 8 hours. |
| UPS is on but provides no power to outlets. | Circuit breaker tripped. | Reduce the load on the UPS and press the circuit breaker button on the rear panel to reset. |
| UPS constantly beeps in AC mode. | Overload condition. | Disconnect non-essential equipment from the UPS. Ensure total load does not exceed 240W. |
| Short backup time. | Battery not fully charged or battery end-of-life. | Allow the battery to charge for 8 hours. If the problem persists, the battery may need replacement (contact support). |
| Fault LED is lit. | Internal fault. | Turn off the UPS, disconnect all devices, and unplug from AC. Wait 5 minutes, then reconnect and restart. If the fault persists, contact customer support. |
8. Specifications
Technical specifications for the Barracuda No Break SR600.
| Feature | Specification |
|---|---|
| Capacity | 600VA / 240W |
| Input Voltage | 120VAC |
| Input Voltage Range | 120VAC -30% +25% |
| Output Voltage | 120VAC |
| Voltage Regulation (typical) | +- 10% |
| Frequency | 50Hz or 60Hz |
| Frequency Regulation | +- 1% |
| Output Contacts | 4 Energy Backup / 4 Surge Protection |
| Battery Type | 12V/4.5Ah |
| Recharge Time | 5 hours average |
| Dimensions (L x W x H) | 60 x 30 x 25 cm (approximate package dimensions) |
| Weight | 6 kg (approximate package weight) |
| Material | Metal |
9. Warranty and Support
The Barracuda No Break SR600 comes with a 2-year total warranty from the date of purchase, covering manufacturing defects and malfunctions under normal use. Please retain your proof of purchase for warranty claims.
For technical support, warranty service, or inquiries, please contact Barracuda customer service. Refer to the product packaging or the Barracuda official website for the most current contact information.
