
Heimerdinger LB20901Body
Heimerdinger 18 Gauge Cordless Nail Gun User Manual
Model: LB20901Body | Brand: Heimerdinger
Introduction
This user manual provides essential information for the safe and effective operation, maintenance, and troubleshooting of your Heimerdinger 18 Gauge Cordless Nail Gun. Please read this manual thoroughly before initial use to ensure proper handling and to prevent injury or damage to the tool.
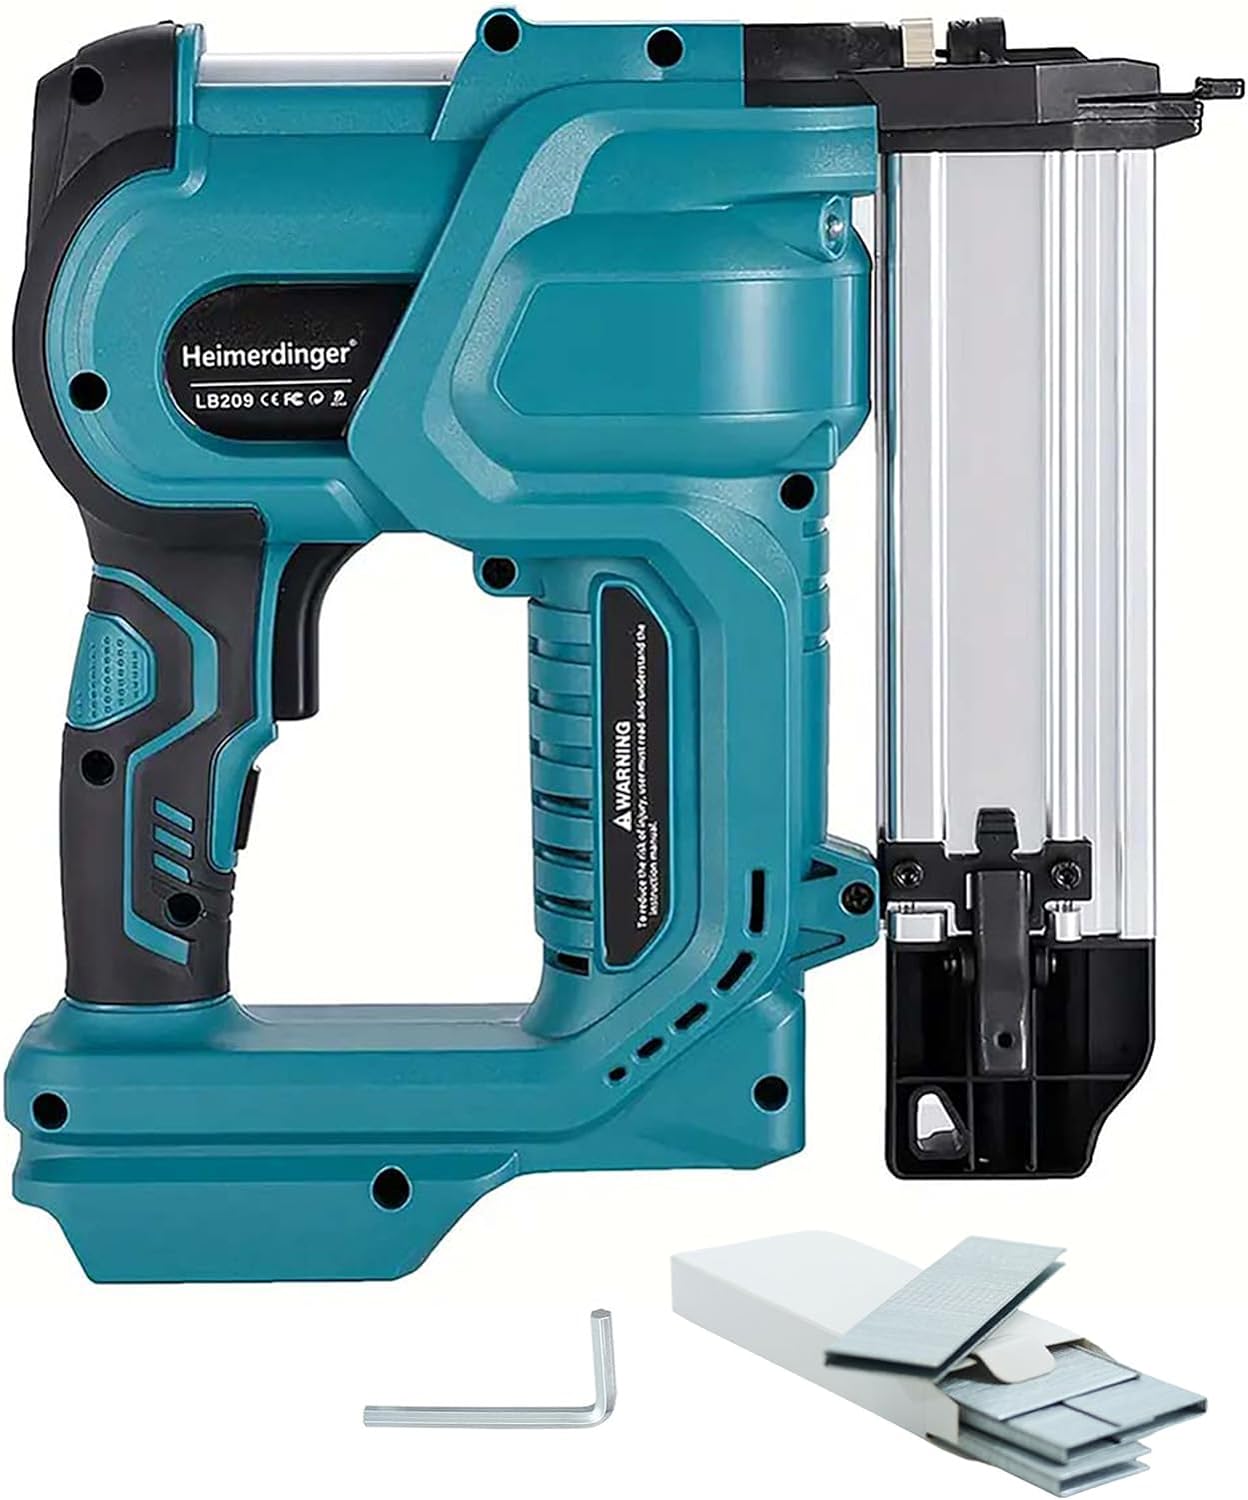
Figure 1: The Heimerdinger 18 Gauge Cordless Nail Gun.
Safety Information
WARNING: Always wear eye protection and hearing protection when operating the tool. Disconnect the battery before performing any adjustments, maintenance, or when clearing jams.
- Ensure the workpiece is stable and secure before firing.
- Keep hands and body parts clear of the firing area.
- Do not point the tool at yourself or others.
- Verify the contact safety mechanism is fully depressed against the workpiece before pulling the trigger.
- Use only recommended nails and staples for this tool.
- Store the tool in a dry, secure place away from children.
The tool incorporates two safety mechanisms: an On/Off switch and a contact safety. The tool will only fire nails when the contact safety device is fully depressed against the surface of the object. If the contact safety is not engaged, the tool will not fire even if the trigger is pulled.
What's in the Box
Upon unboxing, verify that all items listed below are present:
- 1 x Cordless Nailer Body
- 1 x 500pcs F50 nail
- 1 x 500pcs 9032 nail
Note: Battery and charger are sold separately and are not included with this tool-only model.

Figure 2: The cordless nail gun body, showing that the battery and charger are not included.
Setup
1. Battery Installation
This nail gun is compatible with Makita 18V batteries, such as BL1860B, BL1850B, BL1840B, BL1830B, and BL1820B. Ensure the battery is fully charged before use.
- Align the battery with the battery slot on the tool's handle.
- Slide the battery into the slot until it clicks securely into place.
- To remove, press the release button on the battery and slide it out.
2. Loading Nails and Staples
The Heimerdinger 2-in-1 nail and staple gun drives 18 gauge brad nails (3/4''-2'') and crown staples (3/4''-1-9/16'').
- Ensure the tool is disconnected from the battery for safety.
- Pull back the magazine follower until it locks into place.
- Insert the strip of nails or staples into the magazine with the points facing down.
- Release the magazine follower, allowing it to push the fasteners forward.

Figure 3: Illustration of the 2-in-1 functionality, showing compatible brad nail and crown staple sizes.

Figure 4: Detailed view of nail and staple specifications and the loading process.
3. Adjusting Nailing Depth
The nailing depth can be adjusted to suit different materials and desired finishes.
- Locate the regulation knob near the nose of the tool.
- Rotate the knob to increase or decrease the nailing depth. Test on a scrap piece of material to achieve the desired depth.

Figure 5: The depth adjustment knob, allowing control over nail penetration based on material hardness.
Operating Instructions
1. Powering On/Off
The tool features an On/Off switch for basic power control.
- To power on, slide the On/Off switch to the 'On' position.
- To power off, slide the On/Off switch to the 'Off' position.
2. Firing Modes
The tool offers dual firing modes: Single Shot and Contact Firing (Burst).
- Single Shot Mode: For precise placement, depress the contact safety against the workpiece, then pull the trigger to fire one nail.
- Contact Firing (Burst) Mode: For rapid fastening, hold the trigger and depress the contact safety against the workpiece to fire nails continuously.
Switch between modes using the dual mode toggle switch located on the tool.

Figure 6: Visual representation of single shot and burst firing functions.
Video 1: Demonstration of the 2-in-1 Cordless Brad Nailer and Stapler in action, showcasing its versatility and ease of use for both nails and staples.
Video 2: Overview of the electric nail gun's features, including its ability to penetrate iron and aluminum sheets, and the integrated LED lighting for dark environments. Note: Battery not included.
3. Integrated Features
- Built-in Small Air Pump: Allows the tool to easily penetrate 1mm thick iron sheets and 2mm thick aluminum plates.
- LED Highlight Lighting: Two lights on both sides of the tool illuminate the work area, enabling operation in dark environments.

Figure 7: The nail gun's built-in air pump for metal penetration and dual LED lights for improved visibility.
Maintenance
- Regularly inspect the tool for any signs of damage or wear.
- Keep the tool clean and free of dust and debris. Use a dry cloth to wipe down surfaces.
- Ensure the magazine is clear of any obstructions.
- Store the tool in a dry, cool place when not in use.
Troubleshooting
| Problem | Possible Cause | Solution |
|---|---|---|
| Tool does not fire | Battery not installed or low charge; Safety contact not fully depressed; On/Off switch in 'Off' position; Fastener jam. | Install or charge battery; Ensure contact safety is fully depressed against workpiece; Turn On/Off switch to 'On'; Clear any fastener jams. |
| Nails/Staples not fully driven | Depth adjustment too shallow; Battery low; Incorrect fastener size for material. | Adjust depth knob deeper; Recharge battery; Use appropriate fastener size. |
| Tool jams frequently | Incorrect fastener size/type; Damaged fasteners; Magazine dirty or damaged. | Use correct fasteners; Replace damaged fasteners; Clean magazine. |
Specifications
| Feature | Detail |
|---|---|
| Brand | Heimerdinger |
| Model Number | LB20901Body |
| Item Weight | 6.17 pounds (without battery) |
| Product Dimensions | 11.9 x 9.8 x 0.1 inches |
| Material Type | Plastic Carbon Steel |
| Nail/Staple Gauge | 18 Gauge |
| Brad Nail Length | 3/4'' - 2'' |
| Crown Staple Length | 3/4'' - 1-9/16'' |
| Nailing Capacity | 1200 nails (with 4.0Ah battery) |
| Battery Compatibility | Makita 18V (e.g., BL1860B, BL1850B, BL1840B, BL1830B, BL1820B) |
Warranty and Support
For warranty information, technical support, or service inquiries, please contact Heimerdinger customer service directly or visit their official website. Keep your purchase receipt as proof of purchase.
You can visit the Heimerdinger Store on Amazon for more information.
Ask a question about this manual
Ask about setup, troubleshooting, compatibility, parts, safety, or missing instructions. Manuals+ will review the question and use this page’s manual context to help answer it.