1. Introduction
This manual provides essential instructions for the safe and efficient operation of your Tera Level 2 J1772 48A Electric Vehicle (EV) Charger. Please read this manual thoroughly before installation and use, and retain it for future reference.
The Tera EV Charger is designed to provide reliable and fast charging for both J1772 compatible electric vehicles and Tesla vehicles (with the included adapter). It features adjustable current settings, scheduling options, and robust safety protections.
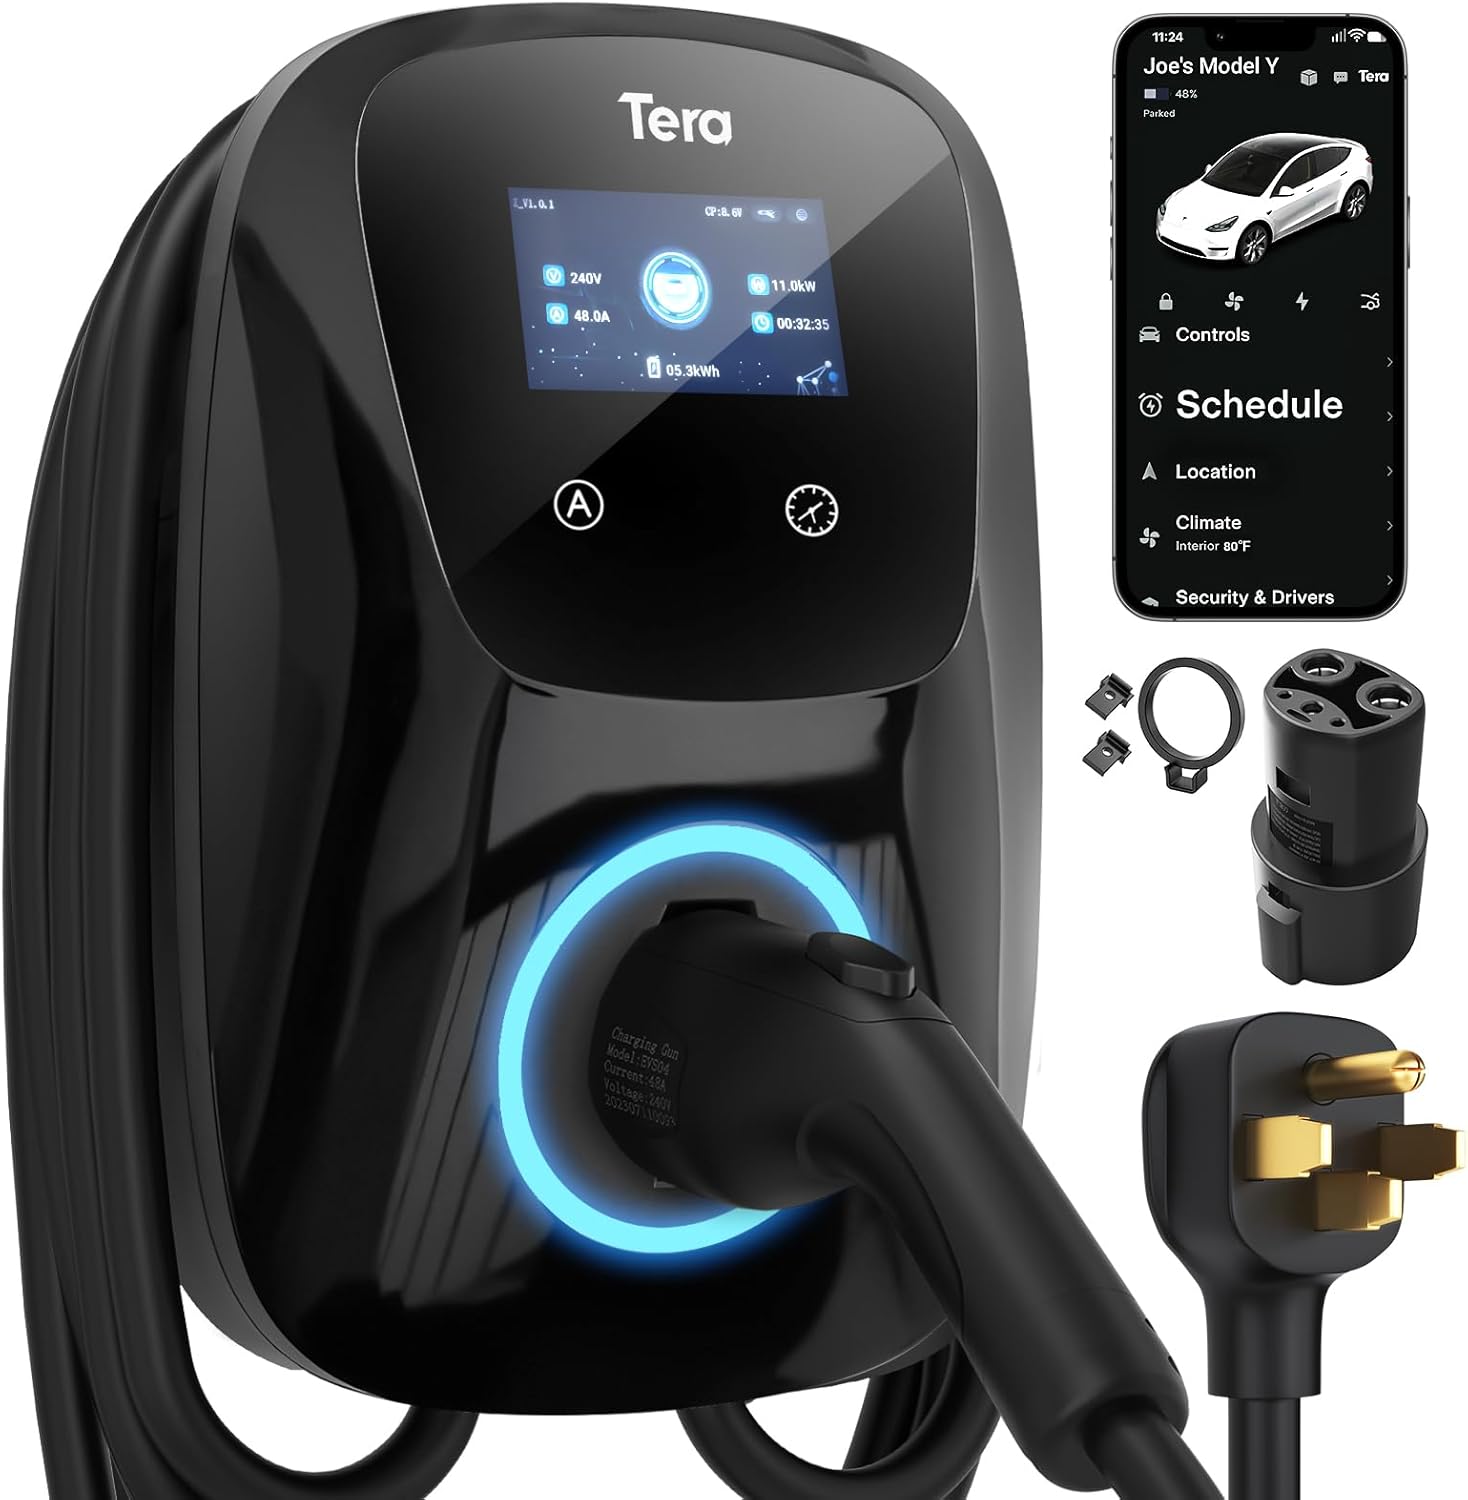
Image 1.1: Tera Level 2 EV Charger with included accessories.
2. Safety Information
Always adhere to the following safety guidelines to prevent injury or damage:
- Professional Installation: Installation should be performed by a qualified electrician in accordance with all local and national electrical codes.
- Grounding: Ensure the charger is properly grounded to prevent electrical shock.
- Water and Moisture: Do not operate the charger if it is visibly damaged or exposed to excessive moisture. While the unit is IP65 rated for outdoor use, avoid submerging it.
- Cable Integrity: Regularly inspect the charging cable for any signs of wear, cuts, or damage. Do not use a damaged cable.
- Children and Pets: Keep children and pets away from the charging area during operation.
- Emergency Stop: Familiarize yourself with the location of your electrical panel's circuit breaker for the charger in case an emergency shutdown is required.
- Ventilation: Ensure adequate ventilation around the charger during operation.
The Tera EV Charger is ETL Certified, indicating compliance with North American safety standards. This certification is equivalent to UL for home insurance requirements, signifying the manufacturer's commitment to high safety standards.

Image 2.1: ETL Certification and integrated safety protections.
3. Package Contents
Verify that all items are present in the package before proceeding with installation:
- Tera Electric Vehicle Charger Unit
- User Manual (this document)
- Mounting Plate
- Screws Set
- Tools (for installation)
- J1772 to Tesla Adapter with Lock
- Cable Holder for Tesla

Image 3.1: Contents of the Tera EV Charger package.
4. Setup and Installation
The Tera EV Charger is designed for wall-mounted installation. Follow these general steps:
- Choose Location: Select a suitable location near your parking area, ensuring it is within reach of your vehicle's charging port and a dedicated 240V outlet (NEMA 14-50). The 25-foot cable provides flexibility.
- Mounting Plate: Unscrew the mounting plate from the charger unit. Position the mounting plate on the wall at the desired height and mark the drilling points.
- Secure Mounting Plate: Drill pilot holes and securely fasten the mounting plate to the wall using the provided screws and anchors.
- Attach Charger Unit: Carefully align the charger unit with the mounted plate and slide it into place. Secure it with the anti-theft screw.
- Connect Power: Plug the charger's NEMA 14-50 plug into the dedicated 240V outlet.
- Cable Management: Use the provided cable holder to neatly store the charging cable when not in use.
For detailed electrical wiring and circuit breaker requirements, consult a certified electrician. The unit is IP65 rated, making it suitable for both indoor and outdoor installation, capable of withstanding temperatures from -22°F to 122°F.

Image 4.1: Installation steps for the Tera EV Charger.

Image 4.2: The charger's IP65 rating ensures durable performance in various weather conditions.
5. Operating Instructions
The Tera EV Charger offers both manual and app-based control for charging sessions.
5.1. Initial Setup and Charging
Before plugging the charger into your vehicle, it is recommended to configure the desired current and schedule settings on the unit or via the app. Plugging it in first will activate a plug-and-play mode, which may not utilize scheduled settings.

Image 5.1: Configure settings before connecting to the vehicle.
5.2. Manual Current Adjustment and Scheduling
The charger unit features a touch screen interface for direct control:
- Current Adjustment: Use the 'A' button on the unit to cycle through available current settings (e.g., 24A, 32A, 40A, 48A). Select the appropriate amperage for your vehicle and electrical circuit.
- Schedule Setting: Use the clock icon button to set a charging schedule, allowing you to define charging start times for up to 12 hours in advance.

Image 5.2: Touch screen controls for current and schedule.
5.3. App-Based Control and Scheduling
For enhanced convenience, the Tera EV Charger can be controlled via a dedicated mobile application. This allows for remote management of charging sessions:
- Start/Stop Charging: Initiate or terminate charging remotely.
- Adjust Current: Change the charging amperage from your mobile device.
- Schedule Charging: Set detailed charging schedules to optimize for off-peak electricity rates or specific departure times.
- Monitor Charging: View real-time charging status and energy consumption.

Image 5.3: App interface for remote charging control.

Image 5.4: Visual representation of scheduled charging for cost efficiency.
5.4. Connecting to Your Vehicle
- Ensure the charger is powered on and any desired settings (current, schedule) are configured.
- For Tesla vehicles, attach the J1772 to Tesla adapter to the charger's J1772 connector.
- Insert the charging connector (or adapter) firmly into your vehicle's charging port.
- The charger will begin the charging process according to your settings or immediately if in plug-and-play mode.
Note: Hybrid vehicles may automatically reduce charging current based on their maximum allowable current, regardless of the charger's setting.
6. Features
- Universal Compatibility: Fully upgraded for seamless compatibility with all Tesla models (using the included adapter) and J1772 standard electric vehicles.
- Fast Charging: Delivers up to 48A output, providing rapid Level 2 charging at approximately 46 miles of range per hour.
- Adjustable Current: Manually select charging current from 24A, 32A, 40A, or 48A to suit your vehicle's needs and home electrical capacity.
- Extended Cable Length: A 25-foot premium charging cable offers ample reach for convenient charging in various locations.
- Durable and Weatherproof: IP65 rated for water and dust resistance, ensuring reliable operation in diverse environmental conditions, from extreme cold (-22°F) to high heat (122°F).
- Comprehensive Safety: ETL certified with multiple protection features including overvoltage, undervoltage, overload, overtemperature, ground fault, earth leakage, and short circuit protection.

Image 6.1: High-speed Level 2 charging capabilities.

Image 6.2: The 25-foot cable provides extensive reach for charging.
7. Specifications
| Specification | Value |
|---|---|
| Brand | Tera |
| Model Number | ZB04-U011K series |
| Amperage | 48 Amps (Adjustable) |
| Output Voltage | 240 Volts (AC) |
| Wattage | 11.5 kWh |
| Cable Length | 25 feet |
| Connector Type | J1772 (with Tesla adapter included) |
| Power Plug | NEMA 14-50 |
| IP Rating | IP65 |
| Operating Temperature | -22°F to 122°F (-30°C to 50°C) |
| Certifications | ETL, CE, TÜV, FCC |
| Item Weight | 20 pounds (approx. 9.1 kg) |
| Product Dimensions | 22 x 16 x 12 inches (approx. 56 x 41 x 30 cm) |
8. Troubleshooting
If you encounter issues with your Tera EV Charger, consider the following common troubleshooting steps:
- No Power: Check the circuit breaker for the outlet. Ensure the NEMA 14-50 plug is fully inserted.
- Charging Not Initiating: Verify that the charging connector is securely plugged into the vehicle's port. Check the charger's display for error messages. Ensure the vehicle is ready to accept a charge.
- Slow Charging: Confirm the current setting on the charger or app. Ensure your vehicle is not limiting the charging rate.
- Error Indicators: The charger features LED indicators to communicate status and errors. Refer to the table below for common indicator meanings.
| Indicator Status | Meaning |
|---|---|
| Blue (Always on) | Standby |
| Green (Always on) | Insert the Charger |
| Green (Flashes every 1S) | Charging |
| Red (Always on) | CP Abnormal |
| Red (Flashes every 1S) | Over/Under Voltage |
| Red (Flashes every 2S) | Ground Fault |
| Red (Flashes 3S ON, 3S OFF) | Over-current Protection |
| Purple (Flashes every 1S) | Leakage Protection |
| Purple (Flashes every 2S) | Over-temperature Protection |
| Purple (Flashes every 4S) | Adhesion Protection |

Image 8.1: LED indicator light meanings for troubleshooting.
If problems persist, contact customer support.
9. Maintenance
Regular maintenance helps ensure the longevity and optimal performance of your EV charger:
- Cleaning: Periodically wipe the charger unit and cable with a soft, damp cloth. Avoid using harsh chemicals or abrasive cleaners.
- Cable Inspection: Routinely check the charging cable and connector for any signs of damage, fraying, or discoloration. Replace if damaged.
- Storage: When not in use, store the charging cable neatly using the provided cable holder to prevent kinks or damage.
- Environmental Protection: While the unit is weatherproof, ensure it is not continuously exposed to extreme conditions beyond its operating limits.
10. Warranty and Support
The Tera EV Charger comes with a 2-year warranty, reflecting the manufacturer's commitment to quality and reliability. For warranty claims or technical assistance, please contact Tera customer support.
Contact Information:
- Email: cs@tera-innovation.com
- Website: https://www.tera-innovation.com
- Phone: +1 (626)438-1404

Image 10.1: Certifications and 2-year warranty information.


