1. Introduction
This manual provides detailed instructions for the safe and effective use of your Fahrentec FMR335L Thermal Imaging Scope with Rangefinder. Please read this manual thoroughly before operating the device to ensure optimal performance and to prevent damage.

Image: Fahrentec FMR335L Thermal Night Vision Scope mounted on a rifle, showcasing its application.
2. Safety Information
WARNING: Improper use can lead to serious injury or damage to the device.
- Do not look directly at intense light sources (e.g., the sun, lasers) through the scope, as this can cause permanent eye damage and damage to the sensor.
- Handle the device with care. Avoid dropping or subjecting it to severe impacts.
- Keep the device away from extreme temperatures, open flames, and strong magnetic fields.
- Ensure batteries are inserted correctly according to polarity markings. Use only recommended battery types.
- Do not attempt to disassemble or modify the device. Refer all servicing to authorized personnel.
- Keep out of reach of children.
3. Package Contents
Verify that all items listed below are included in your package:

Image: Component illustration and accessories included with the FMR335L.
- 1x Fahrentec FMR335L Thermal Imaging Scope
- 1x Battery Charger Station
- 1x USB-Type C Cable
- 1x Carrying Bag
- 1x Eye Mask
- 1x User Guide (this manual)
- 1x Lens Cleaning Cloth
- 1x Picatinny Rail Mount
- Mount Fix Nuts and Allen Key
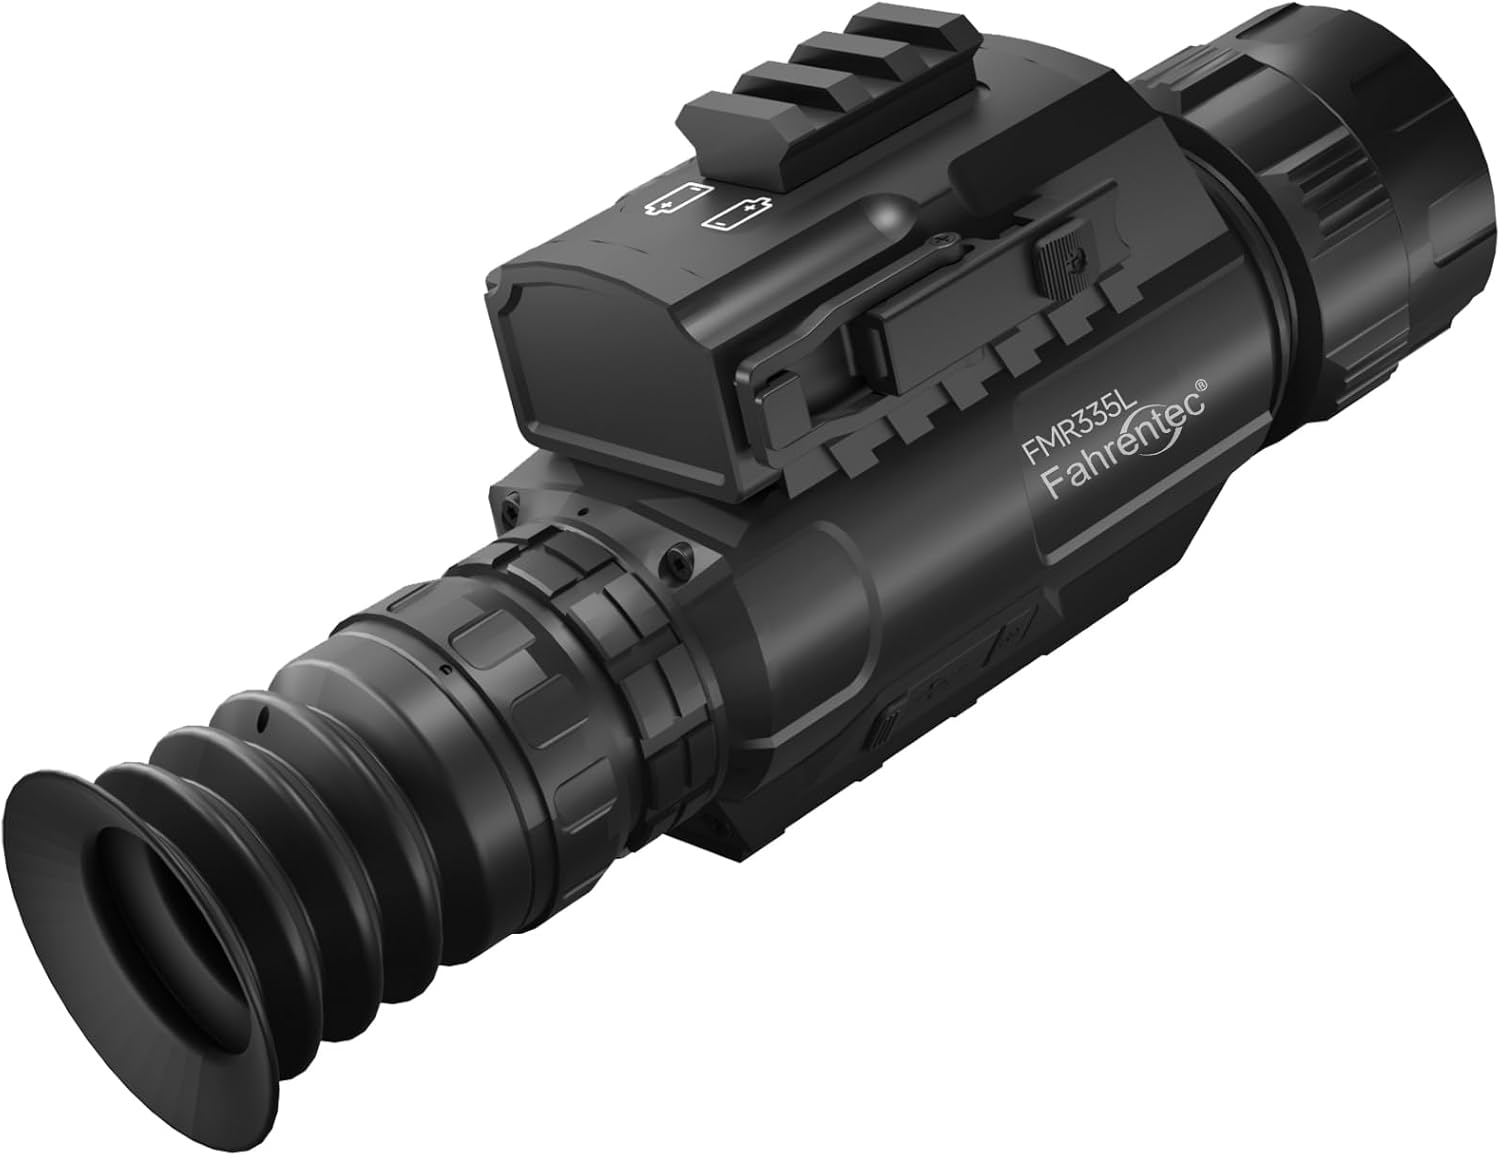
4. Product Overview
The Fahrentec FMR335L is a high-performance thermal imaging riflescope designed for hunting and observation. It features a 640x512 thermal sensor, 35mm objective lens, integrated laser rangefinder, and advanced ballistic calculation capabilities.


Key Features:
- Blinkless Silent Operation: Eliminates calibration noise for undisturbed observation.
- 5-Second Tool-Free Mounting: Quick-release mount for rapid attachment and detachment.
- Ballistic-Calibrated Reticles: Precision 7.62mm true milliradian reticle system with OTA firmware updates.
- Unified IP67 Control System: Single aerospace-grade joystick for simplified operation and dust/water protection.
- OLED Display: 0.39" 1024x768 OLED with cryogenic glass bonding for clear images in extreme temperatures.
- Integrated Laser Rangefinder: Detects targets up to 1300 yards.
- Ballistics Calculator: Provides precise aiming solutions up to 1600 yards.
- 8 Image Modes: Multiple color palettes for enhanced observation.
- WiFi & Recording: Built-in WiFi and 32GB storage for video and photo capture.
5. Setup
5.1 Battery Installation
- Locate the battery compartment on the top of the scope.
- Open the battery compartment cover.
- Insert two flat-top 18650 rechargeable batteries according to the polarity markings (+/-). Ensure the batteries are fully charged.
- Close the battery compartment cover securely.

Image: Illustration showing the removable and rechargeable battery system.
5.2 Mounting the Scope
The FMR335L comes with a quick-release Picatinny mount for easy attachment to compatible rifles.
- Attach the Picatinny rail mount to the bottom of the thermal scope using the provided screws and Allen key.
- Align the scope with the Picatinny rail on your rifle.
- Engage the quick-release lever on the mount.
- Slide the scope onto the rail until it is in the desired position.
- Secure the quick-release lever to lock the scope in place. Ensure it is firmly attached.

Image: Quick release scope mount installation steps.
6. Operating Instructions
6.1 Power On/Off
- To power on: Press and hold the power button (typically located near the joystick) for a few seconds until the display activates.
- To power off: Press and hold the power button again until the device shuts down.
6.2 Joystick Control
The FMR335L utilizes a single aerospace-grade joystick for navigation and control. This joystick replaces traditional buttons, simplifying operation, especially in challenging conditions or when wearing gloves.
- Press: Confirms selections or activates functions.
- Push Up/Down/Left/Right: Navigates through menus or adjusts settings.
6.3 Image Modes
The scope offers 8 distinct image modes (color palettes) to optimize observation based on environmental conditions and target characteristics.

Image: Visual representation of the 8 available image modes.
- White Hot: Hot objects appear white.
- Black Hot: Hot objects appear black.
- Iron Hot: A common palette showing heat in shades of red and yellow.
- Desert Yellow: A specific palette for desert environments.
- Green Hot: Hot objects appear green.
- Red Hot: Hot objects appear red.
- Sky: A palette optimized for sky observation.
- Edge: Highlights temperature differences at object edges.
Navigate through the menu using the joystick to select your preferred image mode.
6.4 Laser Range Finder (LRF)
The integrated LRF can accurately measure distances to targets up to 1300 yards.

Image: Laser Range Finder detecting a target at 1300 yards.
- To activate LRF: Briefly press the designated LRF button or select it from the menu.
- Aim the reticle at the target and press the LRF button again to get a distance reading.
6.5 Ballistics Calculator
The ballistics calculator uses LRF data and pre-programmed bullet information to provide an adjusted aiming point for precise shots up to 1600 yards.

Image: Ballistics Calculator interface showing input parameters and calculated impact point.
- Access the Ballistics Calculator from the main menu.
- Input your bullet weight, initial velocity, ballistic coefficient, zero range, sight height, temperature, and altitude.
- After ranging a target with the LRF, the calculator will display a new aiming point on the reticle.
6.6 Reticle Styles and Color Modes
Choose from 6 reticle styles and 3 color modes (white, black, yellow) to suit your preference and environmental conditions.

Image: Available reticle styles and color options.
- Navigate to the Reticle Settings in the menu.
- Select your desired reticle style and color. The reticle can contrast automatically (e.g., black on white, white on black) for improved visibility.
6.7 Video & Photo Recording and WiFi Connection
The FMR335L allows you to capture videos and photos directly to its internal 32GB storage. It also features WiFi connectivity for streaming and control via a mobile application.

Image: WiFi connection, photo/video recording, and hunting capabilities.
- Recording: Use the joystick or dedicated button to start/stop video recording or capture photos.
- WiFi: Activate WiFi from the menu. Download the recommended app (e.g., IR-CAM for Android, VLC/easyplayer for iOS) to your smartphone. Connect to the scope's WiFi network to stream live footage or manage recordings.
- Data Transfer: Connect the scope to a computer via the USB-C cable to transfer recorded files. The device will appear as a removable drive.
6.8 Zeroing the Scope
Accurate zeroing is crucial for precision. The FMR335L allows for X and Y axis adjustments.
- Mount the scope securely on your rifle.
- Set up a target at your desired zeroing distance.
- Enter the zeroing menu. Note that adjustments are typically made at the 2.5x base magnification.
- Fire a shot and observe the point of impact relative to your aiming point.
- Adjust the X (windage) and Y (elevation) axes using the joystick until the point of impact matches the aiming point.
- Save your zeroing settings.
7. Maintenance
7.1 Cleaning
- Lenses: Use the provided lens cleaning cloth or a soft, lint-free cloth specifically designed for optics. Gently wipe the lens surfaces. Do not use abrasive materials or harsh chemicals.
- Body: Wipe the scope's body with a soft, damp cloth. For stubborn dirt, a mild soap solution can be used, followed by wiping with a clean, damp cloth. Ensure no moisture enters ports or openings.
7.2 Battery Care
- Always use high-quality, flat-top 18650 rechargeable batteries.
- Charge batteries fully before use with the provided charger.
- Remove batteries if the device will not be used for an extended period to prevent leakage.
7.3 Storage
- Store the scope in its protective carrying bag in a cool, dry place, away from direct sunlight and extreme temperatures.
- Ensure the lens caps are in place to protect the optics.

Image: The FMR335L is IP67 waterproof, suitable for various weather conditions.
8. Troubleshooting
| Problem | Possible Cause | Solution |
|---|---|---|
| Device does not power on | Dead or incorrectly inserted batteries | Ensure batteries are fully charged and inserted with correct polarity. Use flat-top 18650 batteries. |
| Poor image quality | Dirty lens; incorrect image mode; environmental factors | Clean the lens with the provided cloth. Try different image modes. Allow the device to acclimate to ambient temperature. |
| Laser Range Finder not working | Obstruction; target too far/close; low battery | Ensure clear line of sight. Verify target is within range (1300 yards). Check battery level. |
| WiFi connection issues | Incorrect app; signal interference; WiFi not activated | Ensure you are using the correct app (IR-CAM/VLC). Activate WiFi on the scope. Move closer to the device. |
| Scope not holding zero | Loose mount; improper zeroing procedure | Ensure the quick-release mount is securely tightened. Re-zero the scope carefully following instructions. |
9. Specifications
| Feature | Detail |
|---|---|
| Model Name | FMR335L |
| Thermal Sensor Resolution | 640x512 |
| Objective Lens Diameter | 35 Millimeters |
| Display Type | 0.39" 1024x768 OLED |
| Refresh Rate | 50HZ |
| Laser Range Finder Range | Up to 1300 yards |
| Ballistics Calculator Range | Up to 1600 yards |
| Storage | 32GB (internal) |
| Connectivity | WiFi, USB-C |
| Power Source | 2x Flat-top 18650 rechargeable batteries |
| Material | Magnesium Alloy |
| Waterproof Rating | IP67 |
| Product Dimensions | 9.45"L x 2.4"W x 3.28"H |
| Item Weight | 22.26 Ounces |
| Operating Temperature | -40°C to 50°C |
10. Warranty & Support
10.1 Warranty Information
The Fahrentec FMR335L Thermal Imaging Scope comes with a 1-year limited warranty from the date of purchase. This warranty covers manufacturing defects and workmanship under normal use. It does not cover damage caused by misuse, accidents, unauthorized modifications, or exposure to extreme conditions beyond specified limits.
For warranty claims, please retain your proof of purchase and contact Fahrentec customer support.
10.2 Customer Support
For technical assistance, troubleshooting, or warranty inquiries, please contact Fahrentec customer support through the retailer where the product was purchased or visit the official Fahrentec website.
Additionally, extended protection plans may be available for purchase through Amazon, offering additional coverage beyond the manufacturer's warranty.