1. Introduction
This manual provides detailed instructions for the proper setup, operation, and maintenance of your Jiayete C-01 UHF Wireless XLR Transmitter & Receiver system. Please read this manual thoroughly before using the product to ensure optimal performance and safety.
2. Safety Information
WARNING:
- This device operates on the UHF band and may interfere with other wireless devices.
- Do not use near pacemakers or other medical devices.
- Keep batteries out of reach of children.
- Do not expose the device to high temperatures or humidity.
- Do not dispose of batteries in fire.
3. Package Contents
Verify that all items listed below are included in your package:
- Receiver (1 unit)
- Transmitter (1 unit)
- XLR to 6.35mm Plug Adapter (1 unit)
- 6.35mm to XLR Plug Adapter (1 unit)
- USB Charging Cable (1 unit)
- User Manual (1 unit)

Image: Contents of the Jiayete C-01 package, including the transmitter, receiver, various adapters, and charging cable.
4. Product Overview
The Jiayete C-01 system consists of a transmitter and a receiver, designed to convert wired XLR microphones or instruments into wireless devices using UHF technology.
4.1. Main Components
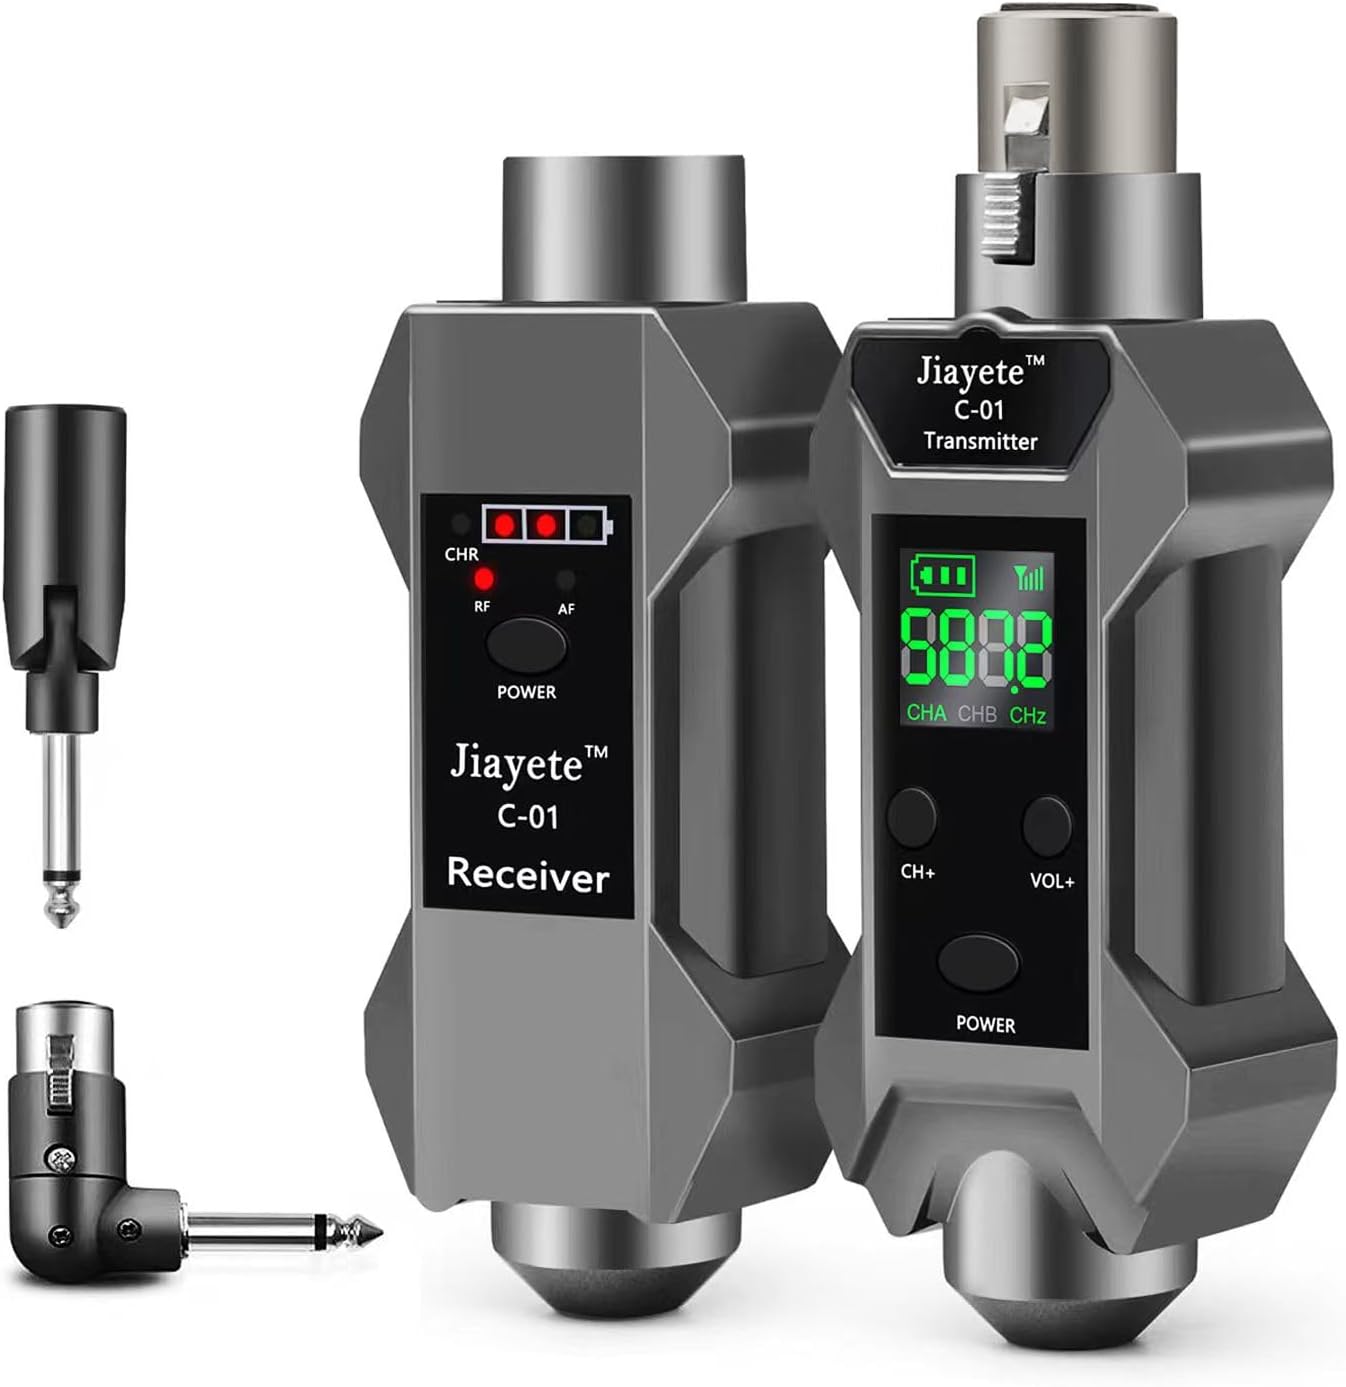
Image: The Jiayete C-01 Wireless XLR Transmitter and Receiver units.
Transmitter
Connects to your microphone or instrument. Features a display for battery level, frequency, and channel. Includes buttons for channel adjustment and power.
Receiver
Connects to your audio mixer, PA system, or amplifier. Features indicators for charging, battery, radio frequency (RF), and audio frequency (AF).
4.2. Adapters
The system includes various adapters for versatile connectivity:
- XLR to 6.35mm Plug Adapter: For connecting the receiver to devices with 6.35mm (1/4 inch) inputs, such as guitar amplifiers or certain mixer channels.
- 6.35mm to XLR Plug Adapter: For connecting the transmitter to instruments with 6.35mm (1/4 inch) outputs, like guitars or basses.

Image: The 180-degree rotatable 6.35mm plug adapter, offering flexible connection angles for instruments.
4.3. Panel Introduction
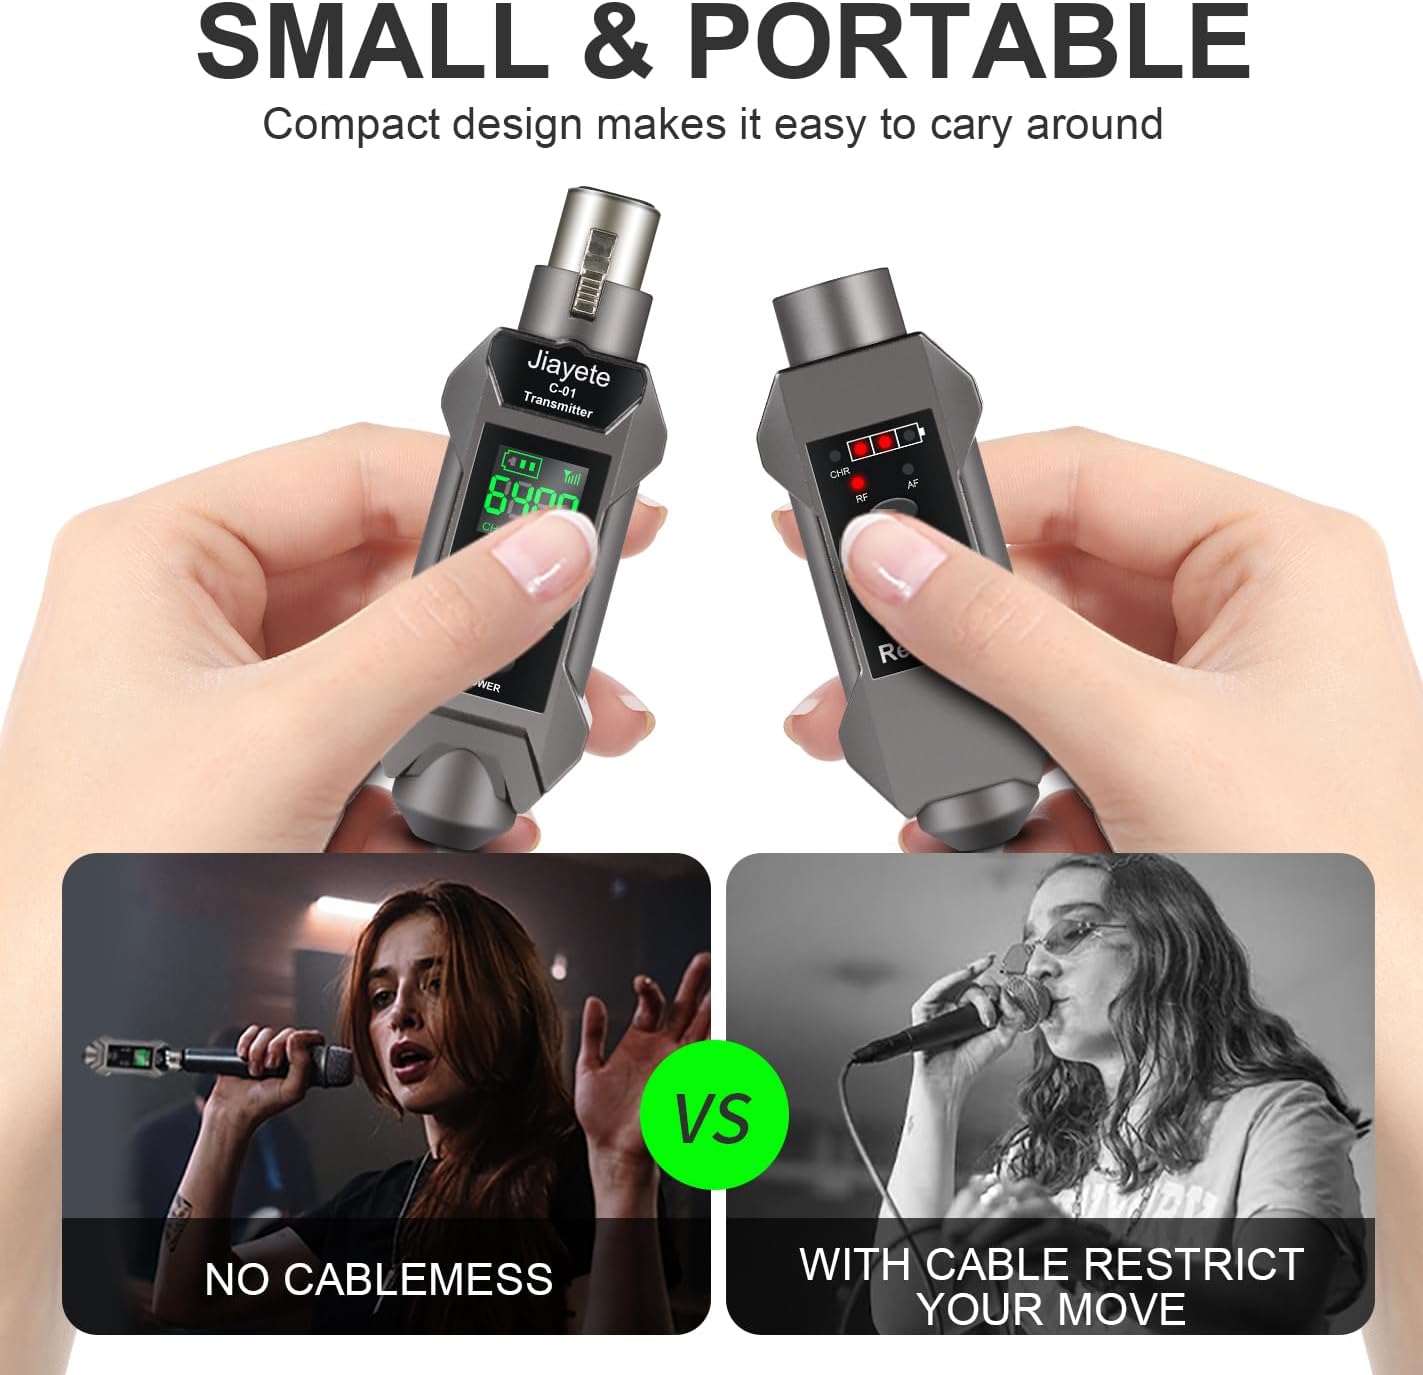
Image: A diagram illustrating the various indicators and controls on both the transmitter and receiver units.
5. Setup
5.1. Charging the Devices
Before first use, fully charge both the transmitter and receiver using the provided USB charging cable. The charging cable features a USB-A connector on one end and two USB-C connectors on the other, allowing simultaneous charging of both units.
- Connect the USB-A end of the charging cable to a USB power adapter (not included).
- Connect the two USB-C ends to the charging ports on the transmitter and receiver.
- The charging indicator will illuminate during charging and turn off when fully charged.
5.2. Connecting to a Microphone (XLR)
- Plug the transmitter directly into the XLR output of your dynamic microphone.
- Plug the receiver into an available XLR input on your audio mixer or PA system.
- Ensure both devices are powered on. They will automatically pair.
5.3. Connecting to an Instrument (Guitar/Bass)
- Attach the 6.35mm to XLR plug adapter to the transmitter.
- Plug the adapter-equipped transmitter into the 6.35mm output jack of your instrument (e.g., guitar, bass). The 180-degree rotatable design allows for flexible positioning.
- Attach the XLR to 6.35mm plug adapter to the receiver.
- Plug the adapter-equipped receiver into the 6.35mm input of your amplifier or audio interface.
- Ensure both devices are powered on. They will automatically pair.

Image: The Jiayete C-01 transmitter connected to an electric guitar via the 6.35mm adapter, demonstrating its use as a wireless guitar system.
5.4. Connecting to a Condenser Microphone
The C-01 transmitter supports 48V phantom power for condenser microphones. To activate this mode:
- Plug the transmitter into the XLR output of your condenser microphone.
- Press and hold the power button on the transmitter for three seconds to cycle through the voltage modes (0V, 5V, 48V). Select 48V for condenser microphones.
- Plug the receiver into an available XLR input on your audio mixer or PA system.
- Ensure both devices are powered on. They will automatically pair.
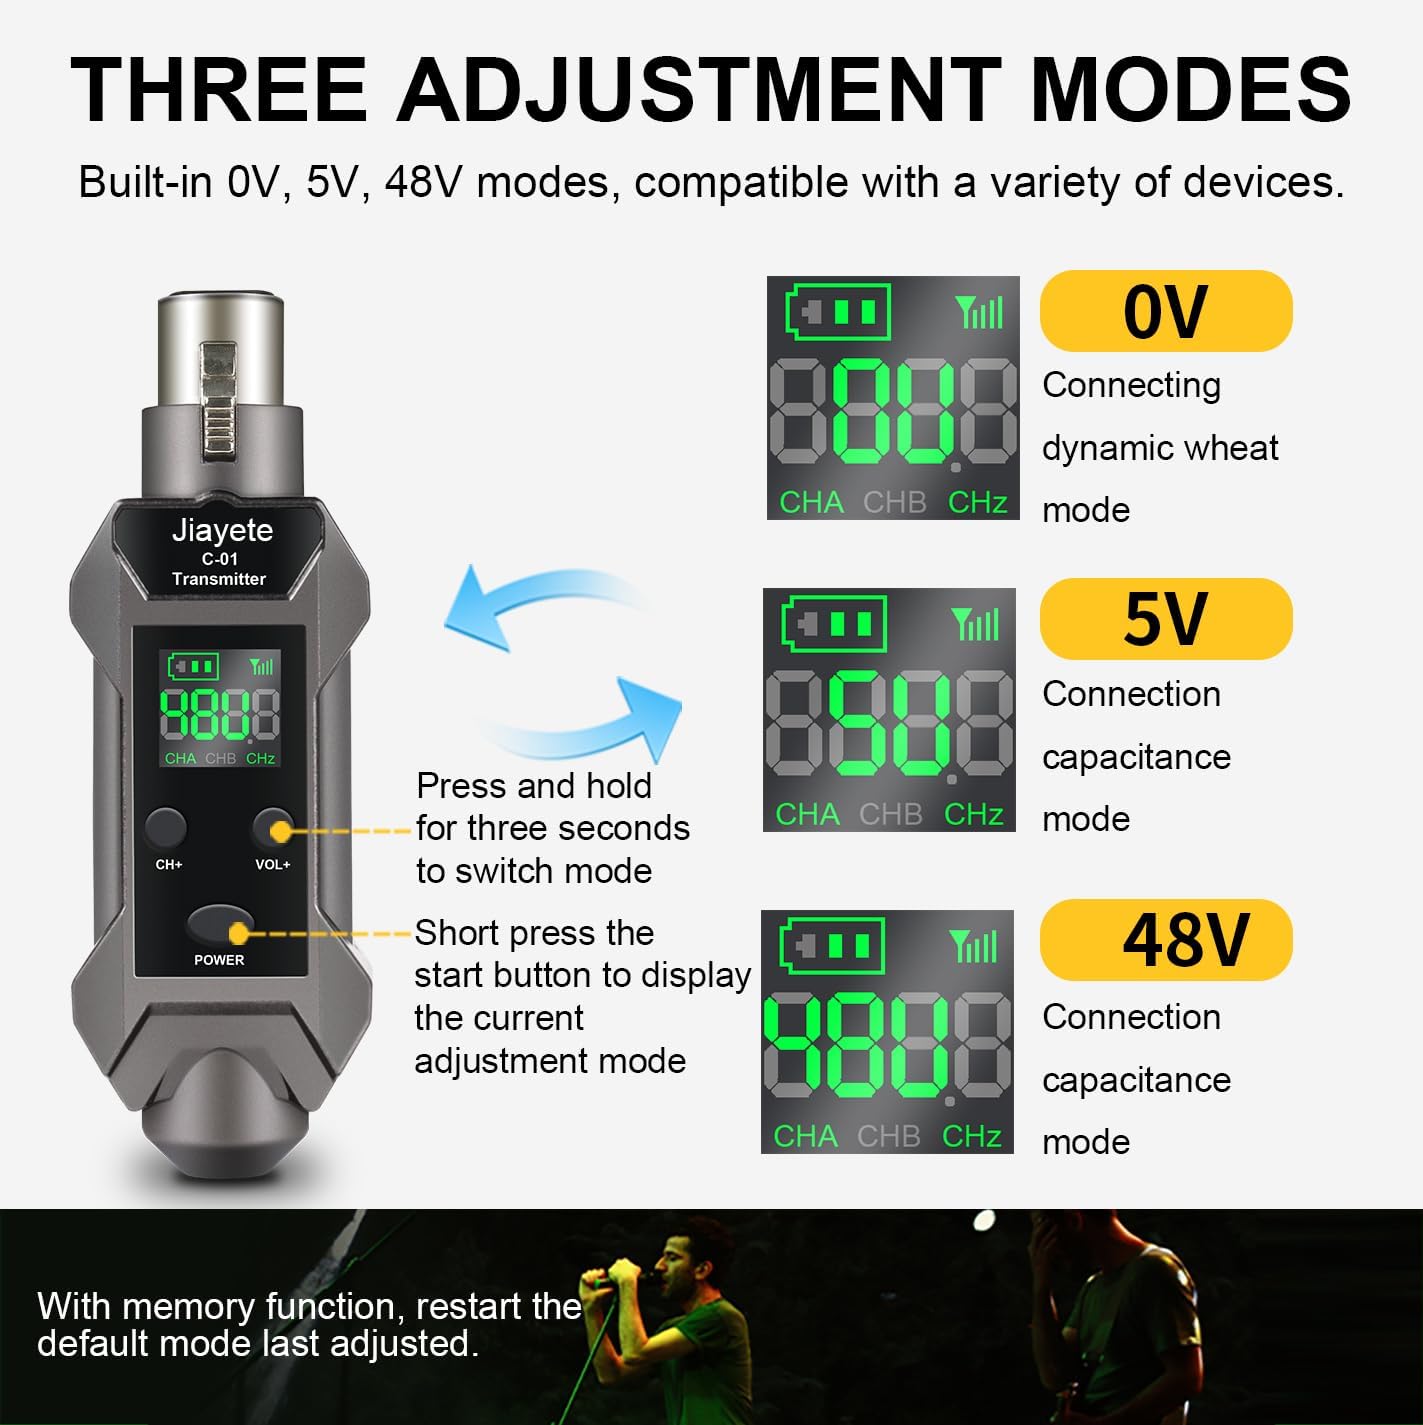
Image: The transmitter's display indicating the three available voltage modes (0V, 5V, 48V) for different microphone types.
5.5. Video Demonstration: Setup and Use
Video: An official demonstration by Jiayete showing the setup process for the wireless XLR system with a microphone and guitar, including mode adjustments.
6. Operating Instructions
6.1. Power On/Off
- To Power On: Briefly press the POWER button on both the transmitter and receiver.
- To Power Off: Press and hold the POWER button on each device for approximately 3 seconds.
6.2. Automatic Frequency Matching
The C-01 system features automatic frequency matching. When both the transmitter and receiver are powered on, they will automatically scan and connect to an available frequency channel. The system supports 16 channels, allowing multiple sets to be used simultaneously without interference.

Image: Illustration of multiple C-01 units automatically matching frequencies for simultaneous use with an audio mixer.
6.3. Adjusting Modes (Transmitter)
The transmitter offers three voltage modes for compatibility with various microphones:
- 0V: For dynamic microphones.
- 5V: For capacitance recording microphones.
- 48V: For phantom power condenser microphones.
To adjust the mode:
- Briefly press the POWER button to display the current adjustment mode.
- Press and hold the POWER button for three seconds to cycle through 0V, 5V, and 48V modes. Release the button when the desired mode is displayed.
The device has a memory function and will restart in the last adjusted mode.
6.4. Battery Life
The built-in lithium battery provides approximately 6-8 hours of continuous use on a full charge.
7. Maintenance
- Clean the device with a soft, dry cloth. Do not use liquid cleaners or solvents.
- Store the device in a cool, dry place away from direct sunlight and extreme temperatures.
- Avoid dropping or subjecting the device to strong impacts.
- Regularly check the charging ports for dust or debris and clean if necessary.
8. Troubleshooting
| Problem | Possible Cause | Solution |
|---|---|---|
| No sound or intermittent sound | Low battery on transmitter or receiver Devices not paired Interference from other wireless devices Incorrect mode selected (for condenser mics) | Charge both units fully Ensure both units are powered on and within range for automatic pairing Change channels if interference is suspected Verify 0V, 5V, or 48V mode is correctly set for your microphone type |
| Poor sound quality or static | Out of range Strong interference Obstructions between units | Reduce distance between transmitter and receiver Change channels Ensure clear line of sight between units |
| Device does not power on | Battery completely drained Faulty charging cable or adapter | Charge the device for at least 30 minutes Try a different USB charging cable or power adapter |
9. Specifications
| Feature | Detail |
|---|---|
| Model Number | C-01 |
| Transmission Type | UHF |
| Channels | 16 |
| Operating Range | Up to 164 feet (50 meters) in open air |
| Battery Life | Approximately 6-8 hours |
| Charging Port | USB-C |
| Microphone Compatibility | Dynamic, Condenser (0V, 5V, 48V modes) |
| Instrument Compatibility | Guitar, Bass, Audio Mixer, PA System (via adapters) |
| Material | Metal |
| Item Weight | 9.9 ounces |
| Package Dimensions | 5.59 x 5.55 x 1.93 inches |
10. Warranty & Support
For any problems encountered during use, please contact us. We are committed to replying to your questions as soon as possible.
Please refer to your purchase documentation for specific warranty details and contact information.


