1. Introduction
This manual provides essential information for the safe and efficient operation, maintenance, and troubleshooting of your CREWORKS Mini Excavator EXC1601AOSXAMZ1. Please read this manual thoroughly before operating the machine to ensure proper usage and to prevent injury or damage.
2. Important Safety Information
Operating heavy machinery requires strict adherence to safety protocols. Failure to follow these instructions can result in serious injury or death.
- Read the Entire Manual: Understand all operating procedures and safety warnings before starting the excavator.
- Personal Protective Equipment (PPE): Always wear appropriate PPE, including hard hat, safety glasses, hearing protection, safety boots, and gloves.
- Operator Training: Ensure all operators are properly trained and familiar with the machine's controls and capabilities.
- Work Area Safety:
- Clear the work area of bystanders, especially children and pets.
- Identify and mark all underground utilities (electrical, gas, water, sewer) before digging.
- Ensure adequate lighting and ventilation if operating indoors.
- Maintain a safe distance from power lines and other overhead obstructions.
- Machine Inspection: Before each use, perform a thorough inspection of the excavator. Check for loose parts, fluid leaks, damaged hoses, and proper tire/track condition.
- Engine Safety:
- Never refuel while the engine is running or hot.
- Use only approved fuel (Gasoline) and store it in appropriate containers.
- Ensure proper ventilation when operating the engine.
- Stability:
- Operate on stable, level ground whenever possible.
- Be aware of the machine's center of gravity and avoid operating on excessively steep slopes.
- Extend the dozer blade for added stability during digging operations.
- Attachment Safety: Ensure all attachments are securely connected and rated for use with this excavator.
- Emergency Procedures: Know how to shut down the machine quickly in an emergency.
3. Product Overview
The CREWORKS Mini Excavator EXC1601AOSXAMZ1 is a compact and powerful machine designed for various excavation tasks in confined spaces. It features a 23 HP B&S engine and a digging force of 3262 lbf.

Figure 3.1: Overall view of the CREWORKS Mini Excavator, showcasing its compact design and main components.
3.1 Key Features
- Compact Design: Ideal for narrow lanes, alleys, backyards, and gardens.
- Powerful Engine: Equipped with a 23 HP B&S engine for efficient performance.
- High Digging Force: Delivers 3262 lbf (14.5 KN) of digging force.
- Versatile Attachments: Compatible with various high-flow attachments (e.g., augers, rippers, mulcher heads - not included).
- Easy Maintenance: External hydraulic hoses and accessible compartments simplify routine checks.
- Durable Construction: Made from sturdy alloy steel with rubber tracks for all-terrain use.
- Adjustable Seat: Provides operator comfort during extended use.
3.2 Dimensions and Specifications

Figure 3.2: Visual representation of the mini excavator's key dimensions and performance specifications.
| Specification | Value |
|---|---|
| Brand | CREWORKS |
| Model Number | EXC1601AOSXAMZ1 |
| Item Weight | 1940 Pounds (880 kg) |
| Engine Type | 4 Stroke, 23 HP B&S Engine |
| Operation Mode | Hydraulic |
| Fuel Type | Gasoline |
| Fuel Capacity | 2.1 Gallons |
| Maximum Digging Force | 3262 lbf (14.5 KN) |
| Maximum Digging Depth | 6 ft. |
| Bucket Width | 15.7 inches (400 mm) |
| Max. Load Capacity | 264.5 lb. (120 kg) |
| Material | Alloy Steel |
| Color | Orange |
4. Setup and Pre-Operation Checks
Before operating your mini excavator, perform the following setup and pre-operation checks to ensure safe and efficient performance.
4.1 Initial Assembly (if required)
Refer to the separate assembly guide for detailed instructions on attaching the boom, bucket, and other components. Ensure all bolts and fasteners are tightened to the manufacturer's specifications.
4.2 Fluid Level Checks
- Engine Oil: Check the engine oil level using the dipstick. Add recommended oil if necessary.
- Hydraulic Fluid: Verify the hydraulic fluid level. Ensure it is within the safe operating range.
- Fuel: Fill the fuel tank with fresh gasoline. The fuel capacity is 2.1 gallons.
4.3 Visual Inspection
- Inspect all hydraulic hoses for leaks, cracks, or damage.
- Check the rubber tracks for wear, damage, or proper tension.
- Ensure all safety decals are present and legible.
- Verify that the protective rain canopy is securely attached.
- Confirm that the adjustable seat is properly secured and comfortable for operation.
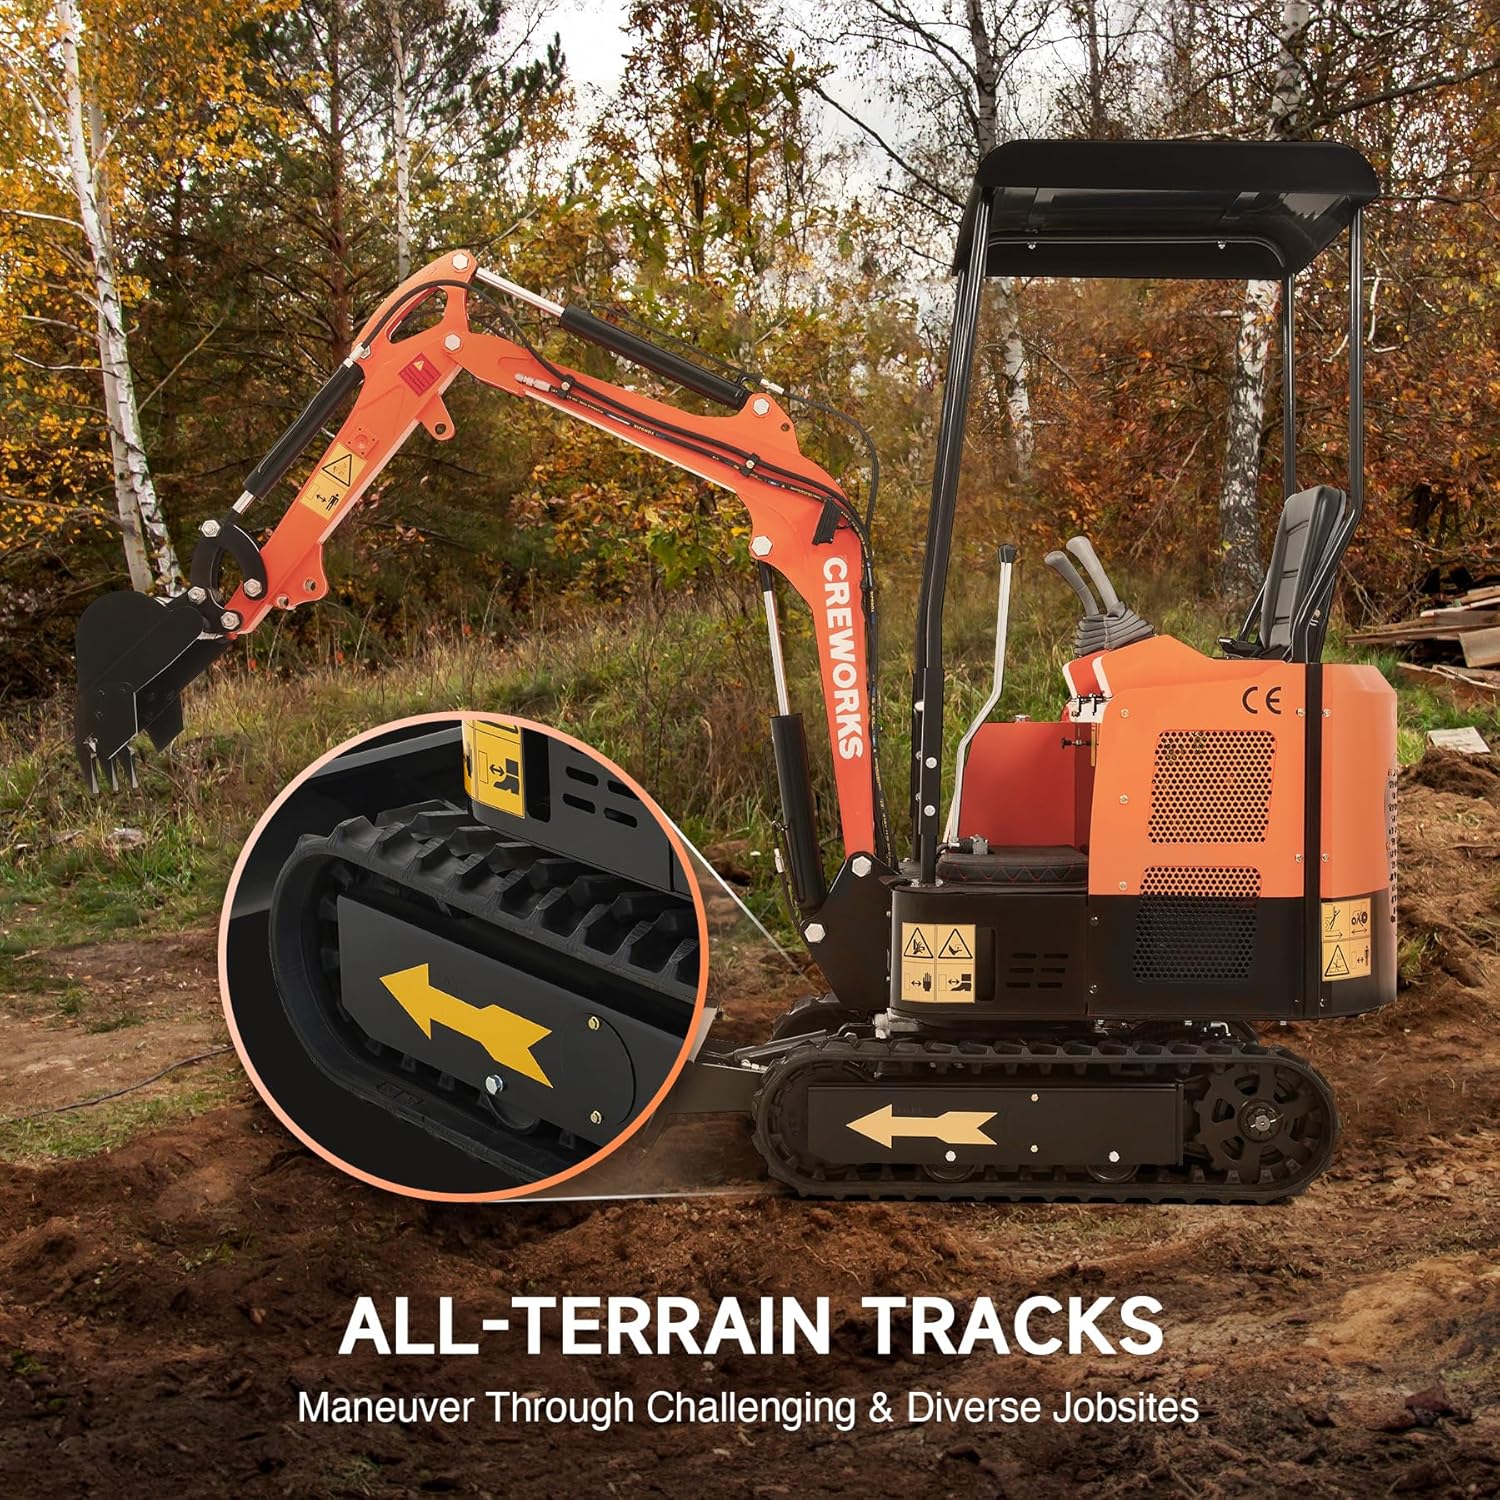
Figure 4.1: Close-up view of the all-terrain rubber tracks, designed for maneuverability across diverse job sites.
5. Operating Instructions
Familiarize yourself with the controls and practice in an open area before beginning any work.
5.1 Starting the Engine
- Ensure the machine is on level ground and the parking brake is engaged.
- Adjust the seat for comfortable access to all controls.
- Turn the ignition key to the "ON" position.
- Engage the choke if the engine is cold.
- Turn the ignition key to the "START" position and release once the engine starts.
- Allow the engine to warm up for a few minutes before operating.
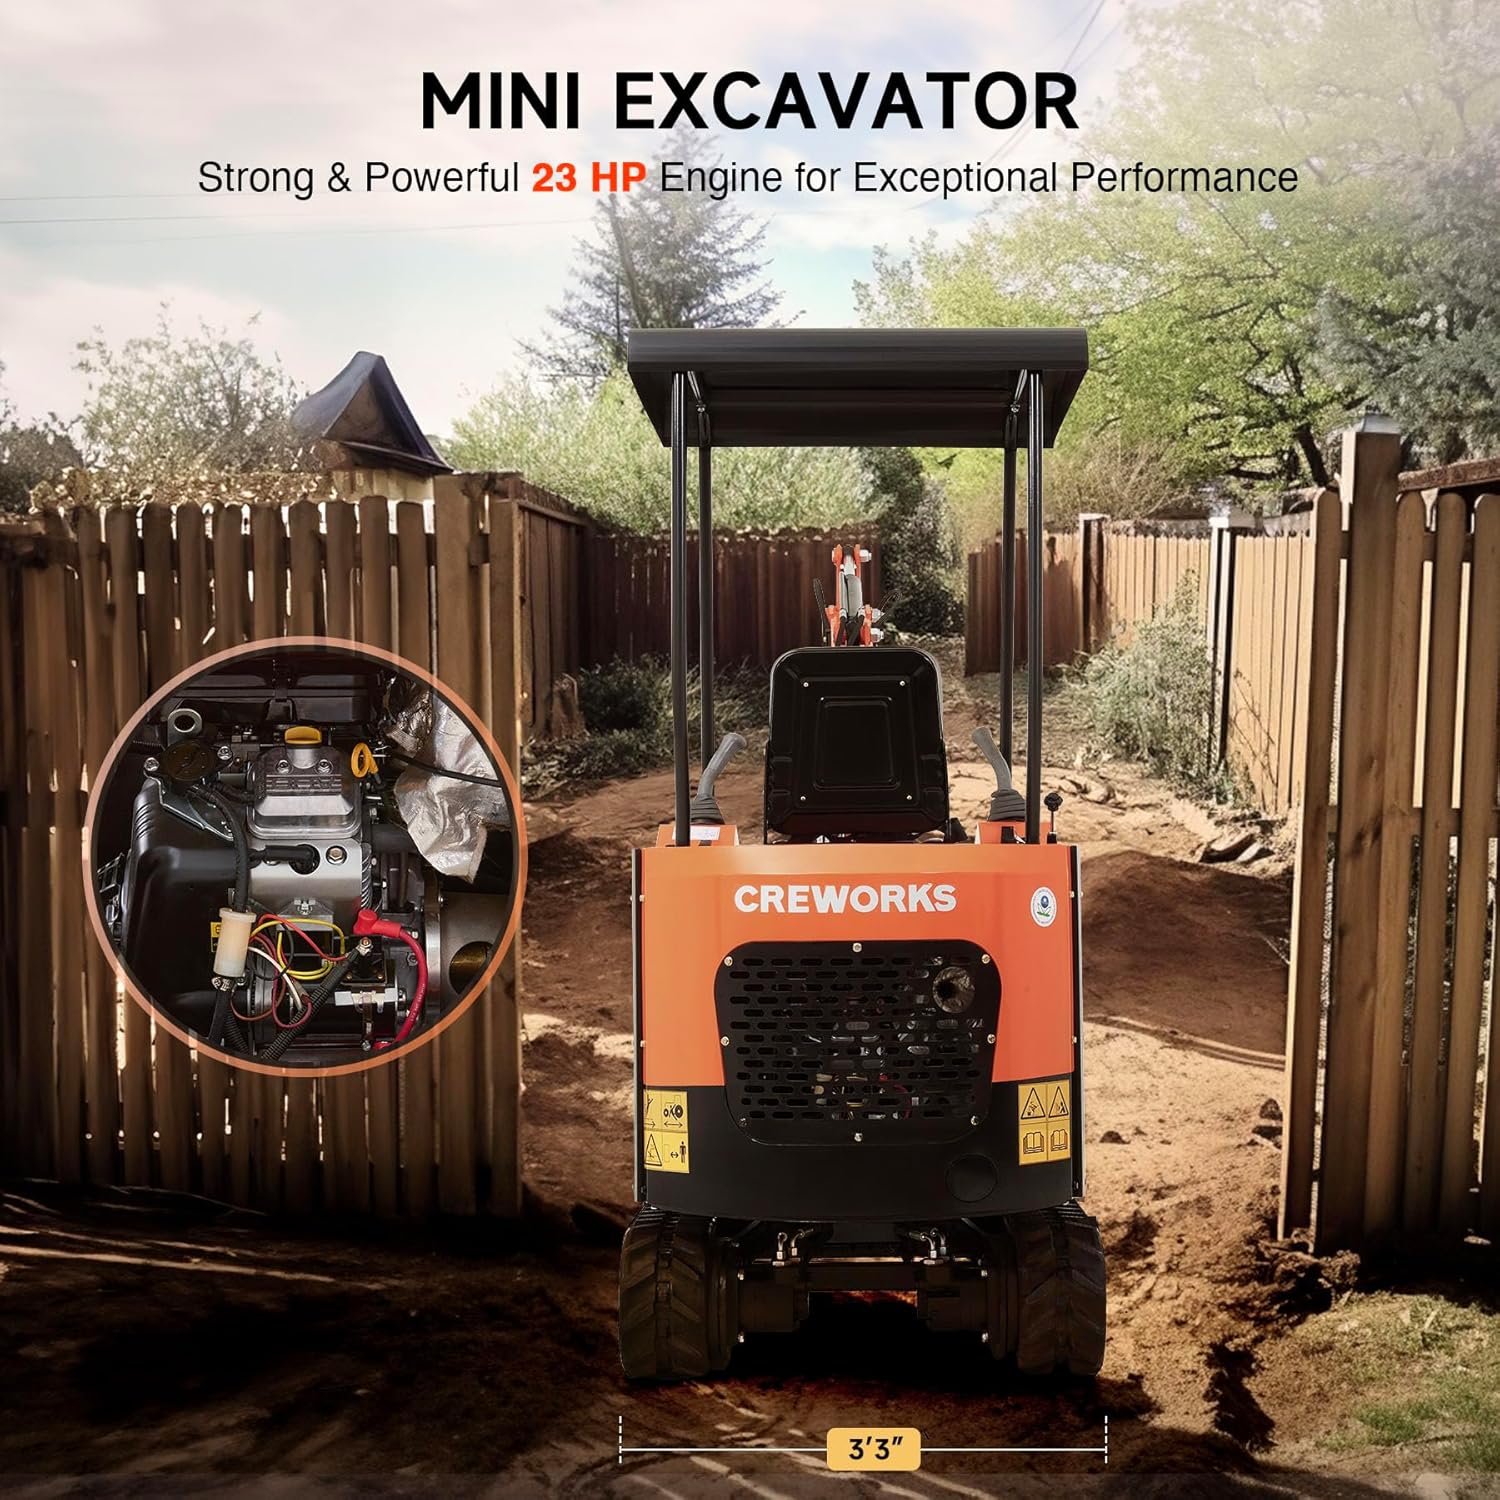
Figure 5.1: View of the 23 HP engine, highlighting its accessible design for maintenance and powerful performance.
5.2 Control Operation
The excavator is operated using joysticks and foot pedals. Refer to the control panel diagram (if available in a separate guide) for specific functions.
- Boom Control: Typically controls the raising and lowering of the main boom arm.
- Arm Control: Operates the arm (dipper stick) that extends and retracts.
- Bucket Control: Controls the curling and dumping action of the bucket.
- Swing Control: Rotates the upper structure of the excavator.
- Track Control: Foot pedals or levers control forward and reverse movement of the tracks.
- Dozer Blade Control: Controls the raising and lowering of the front dozer blade.

Figure 5.2: The adjustable operator's seat, designed for ergonomic comfort and optimal control access.
5.3 Digging Operations
- Position the excavator on stable ground.
- Lower the dozer blade for increased stability.
- Extend the boom and arm to the desired digging depth (maximum 6 ft.).
- Curl the bucket to scoop material.
- Lift the boom and swing the upper structure to dump the material.
- Avoid overloading the bucket to maintain stability and prevent damage.

Figure 5.3: The upgraded boom design, allowing for deeper digging capabilities and enhanced reach.
5.4 Using Attachments
The excavator is designed to accommodate various high-flow attachments. Consult the attachment's specific manual for installation and operation instructions. Always ensure the attachment is securely fastened and compatible with the excavator's hydraulic system.
6. Maintenance
Regular maintenance is crucial for the longevity and safe operation of your CREWORKS Mini Excavator.
6.1 Daily Checks
- Check engine oil, hydraulic fluid, and fuel levels.
- Inspect all hoses and connections for leaks or damage.
- Clean debris from the engine compartment and radiator fins.
- Check track tension and condition.
- Lubricate all grease points.
6.2 Scheduled Maintenance
Refer to the engine manufacturer's manual for specific service intervals. General guidelines include:
- Every 50 Hours: Change engine oil and filter.
- Every 100 Hours: Check and clean air filter, inspect spark plug.
- Every 200 Hours: Replace fuel filter, inspect hydraulic fluid and filter.
- Annually: Inspect all belts, hoses, and electrical connections.
Note: The external hydraulic hoses are designed for easy access, simplifying maintenance procedures.
7. Troubleshooting
This section provides solutions to common operational issues. For problems not listed here, contact customer support.
| Problem | Possible Cause | Solution |
|---|---|---|
| Engine Fails to Start | No fuel, dead battery, faulty spark plug, clogged fuel filter. | Check fuel level, charge/replace battery, inspect/replace spark plug, replace fuel filter. |
| Loss of Hydraulic Power | Low hydraulic fluid, clogged hydraulic filter, damaged hydraulic pump. | Check hydraulic fluid level, replace hydraulic filter, contact service for pump inspection. |
| Excavator Not Moving | Parking brake engaged, track motor issue, hydraulic issue. | Disengage parking brake, check hydraulic fluid, contact service. |
| Overheating Engine | Low coolant, clogged radiator, excessive load. | Check coolant level, clean radiator fins, reduce load. |
8. Warranty Information
For detailed warranty terms and conditions, please refer to the warranty card included with your product or visit the official CREWORKS website. Keep your purchase receipt as proof of purchase for any warranty claims.
9. Customer Support
If you require assistance, have questions, or need to order replacement parts, please contact CREWORKS customer support. Contact information can typically be found on the product packaging, the official CREWORKS website, or your purchase documentation.
For online resources, visit the CREWORKS Store on Amazon.


