1. Introduction
The glo HYPER PRO is an advanced tobacco heating device designed to provide an enhanced experience. It features an EasyView LED display for monitoring device status, a TasteSelect selector for choosing between Standard and Boost modes, and HeatBoost technology for consistent intensity. The device also includes fast charging capabilities and extended battery life.
Important Safety Notice: This product is not risk-free and contains nicotine, which is addictive.
2. Safety Warnings
- This product, when used with its intended tobacco sticks, is not risk-free and delivers nicotine, a highly addictive substance.
- The device itself does not contain tobacco sticks, liquids, pre-filled cartridges, or refills. These must be purchased separately.
- The glo HYPER PRO operates without combustion, producing zero ash and less odor compared to traditional cigarettes.
- Always read the label, warnings, and instructions provided on the product packaging before use. Information on the packaging may differ from online descriptions.
- Keep out of reach of children and pets.
- Do not expose the device to extreme temperatures, direct sunlight, or water.
- Use only the charging cable provided or a certified USB-C cable with a compatible power adapter.
3. Package Contents
Please check that your glo HYPER PRO package contains the following items:
- glo HYPER PRO Device
- USB-C Charging Cable
- Cleaning Brush
- User Manual (this document)
4. Device Overview
Familiarize yourself with the components of your glo HYPER PRO device.
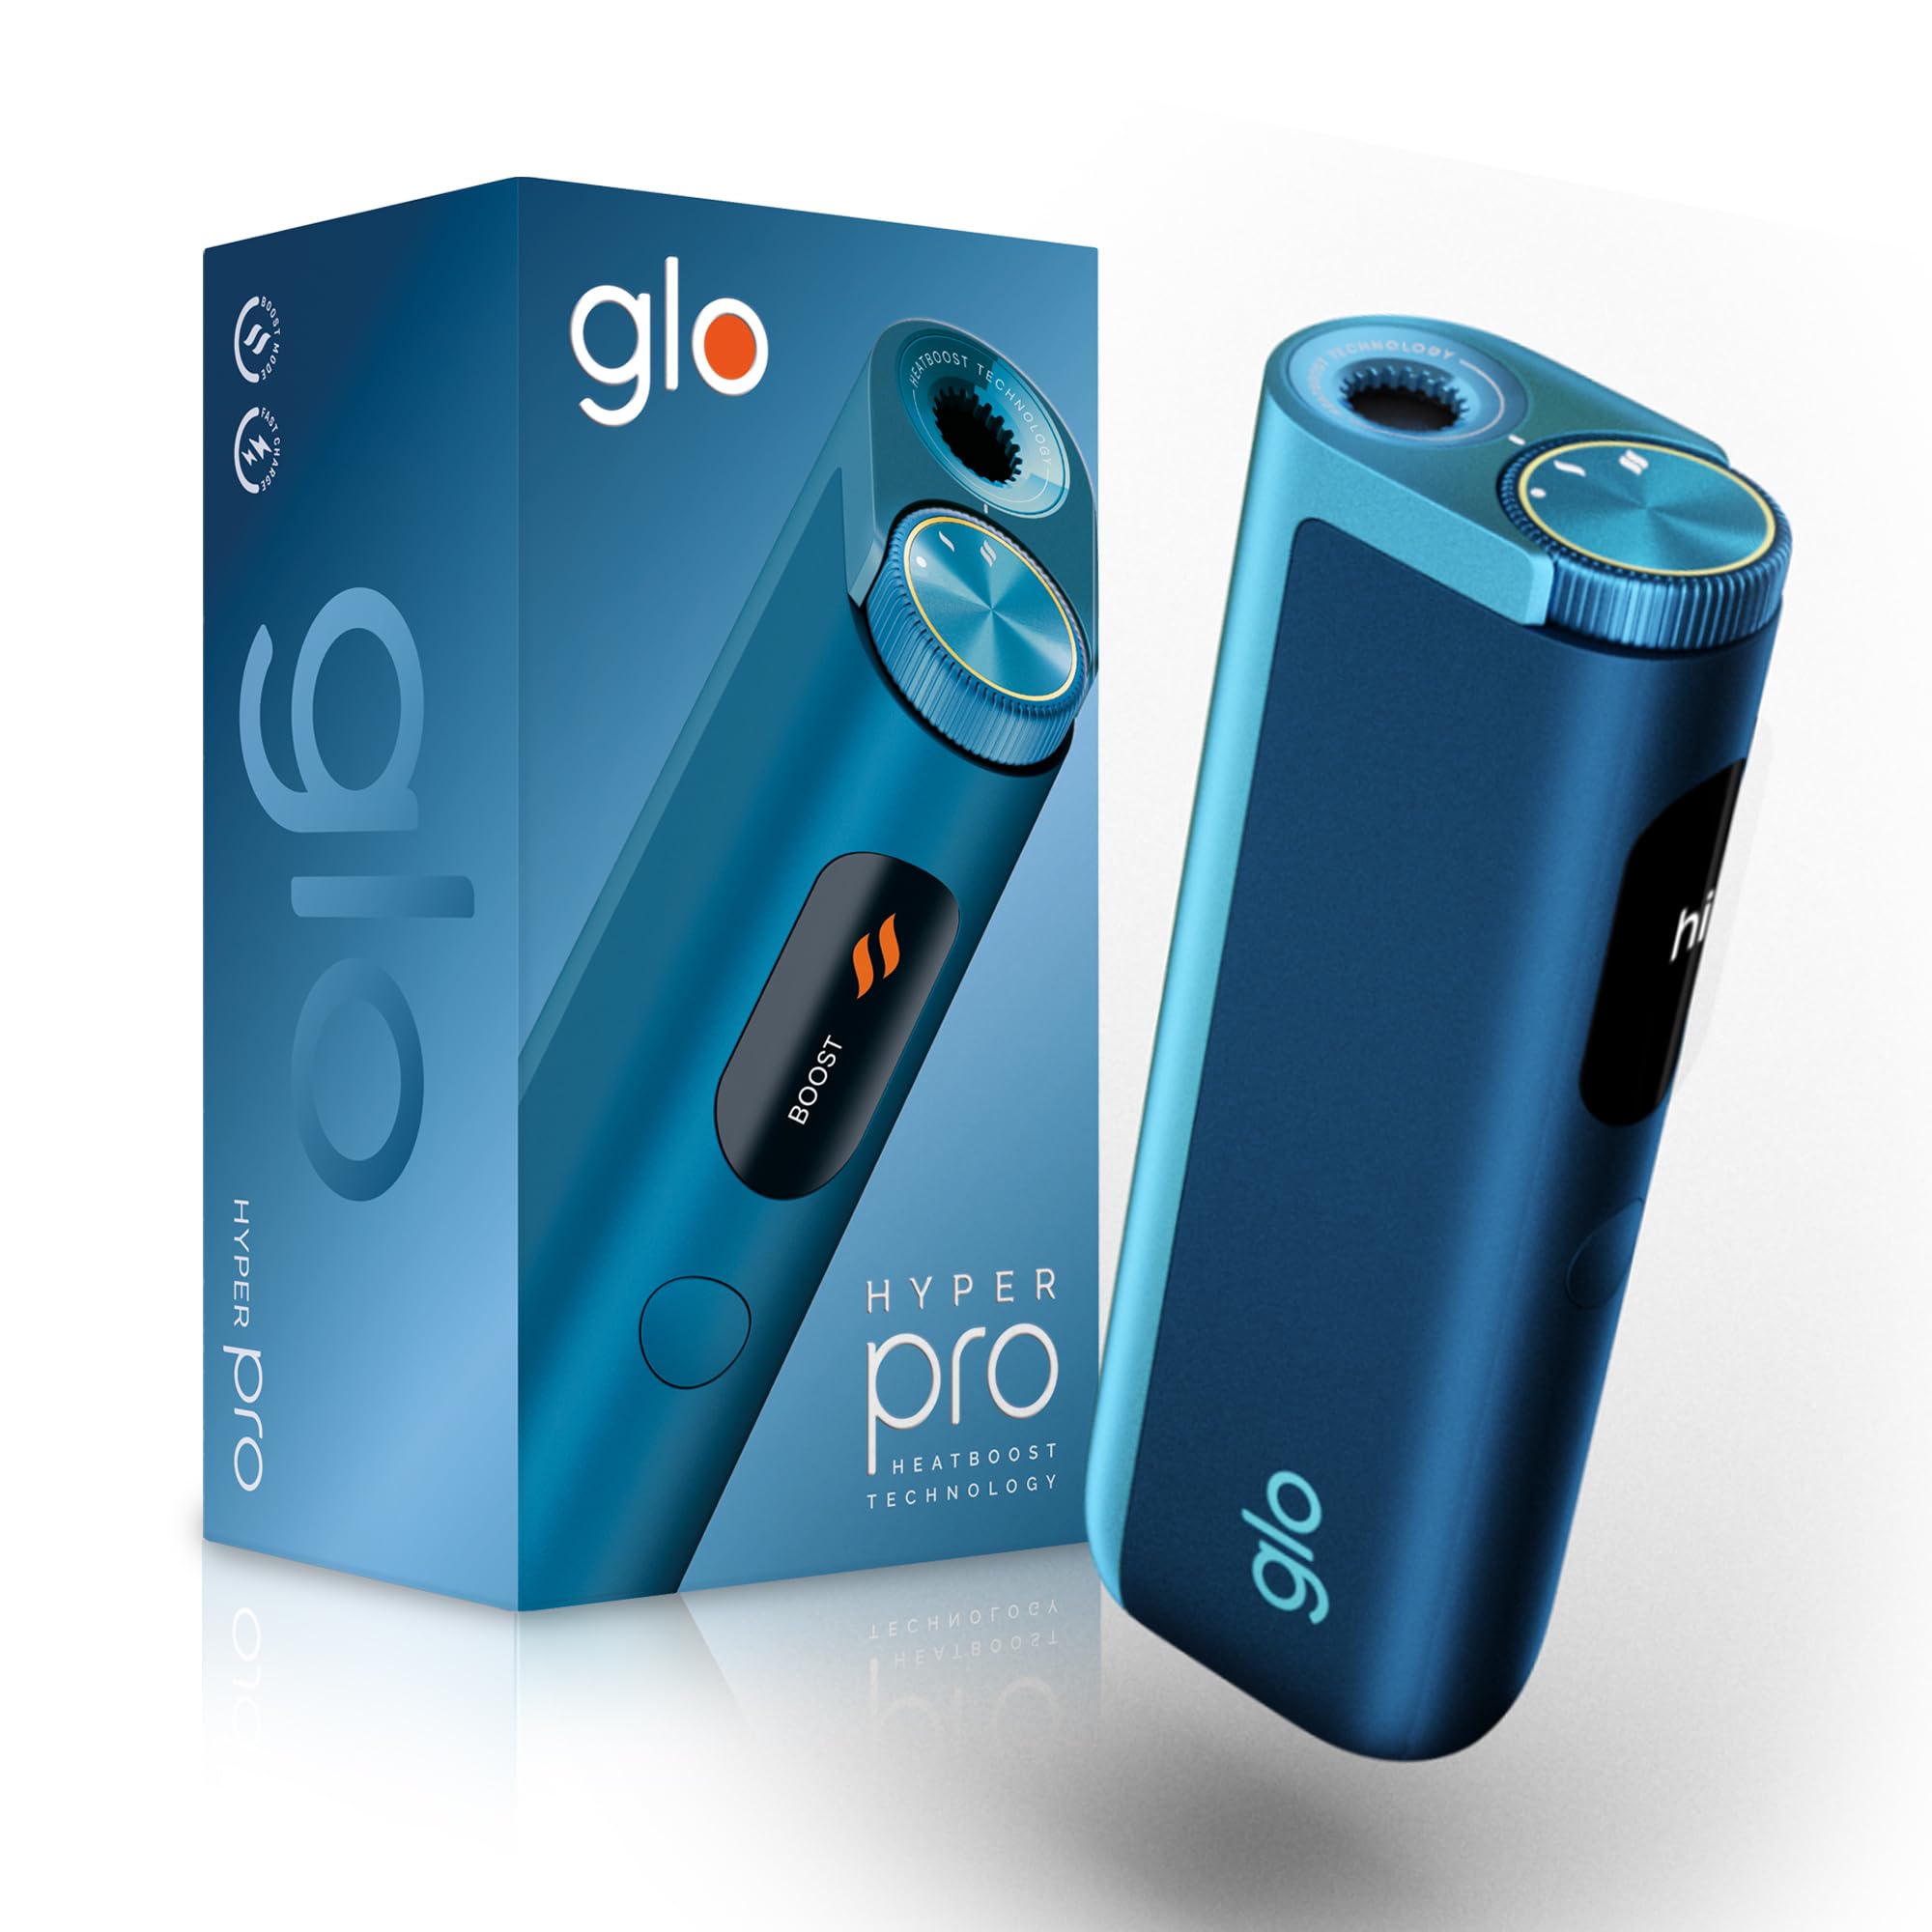
This image displays the glo HYPER PRO device in blue, highlighting its compact dimensions (96.4mm height, 36.5mm width) and weight (92 grams). Key features such as Boost Mode, EasyView Display, and Fast Charge are indicated.
- Heating Chamber: Where the tobacco stick is inserted.
- TasteSelect Selector: Button to switch between Standard and Boost modes.
- EasyView LED Display: Shows selected mode, session progress, and battery status.
- USB-C Port: For charging the device.
5. Initial Setup
5.1 Charging the Device
Before first use, fully charge your glo HYPER PRO device. The device features fast charging and extended battery life.
- Connect the USB-C charging cable to the device's USB-C port.
- Plug the other end of the cable into a compatible USB power adapter.
- The EasyView LED display will indicate the charging progress.
- Once fully charged, disconnect the device from the charger.
5.2 First Use
To turn on the device for the first time:
- Press the TasteSelect button 5 times rapidly.
- The device will vibrate and the EasyView LED display will illuminate, indicating it is ready for use.
6. Operating the Device
6.1 Inserting a Tobacco Stick
Ensure the device is clean before inserting a tobacco stick.
- Gently insert a compatible tobacco stick into the heating chamber at the top of the device.
- Do not force the stick.
6.2 Selecting a Mode (Standard or Boost)
The TasteSelect selector allows you to choose your preferred intensity.

This image illustrates two glo HYPER PRO devices, demonstrating the selection between Standard and Boost intensity modes.
- Standard Mode: For a balanced experience. Press and hold the TasteSelect button until the device vibrates once.
- Boost Mode: For superior intensity, featuring HeatBoost technology. Press and hold the TasteSelect button until the device vibrates twice.
The EasyView LED display will show the selected mode and the heating progress.
6.3 Starting a Session
- After inserting the tobacco stick and selecting your mode, the device will begin heating.
- The EasyView LED display will show a countdown or progress indicator.
- The device will vibrate when it is ready for use.
- Once the session is complete, the device will vibrate again and the display will turn off.
6.4 Ending a Session
After the session:
- Remove the used tobacco stick from the heating chamber.
- Dispose of the used stick responsibly.
- Allow the device to cool down before cleaning or storing.
7. Maintenance and Cleaning
Regular cleaning ensures optimal performance and longevity of your glo HYPER PRO device.
7.1 Cleaning the Heating Chamber
- Ensure the device is turned off and completely cool before cleaning.
- Use the provided cleaning brush to gently remove any tobacco residue from the heating chamber.
- Avoid using water or liquid cleaners directly on the heating element.
- For stubborn residue, a dry cotton swab can be used carefully.
7.2 External Cleaning
Wipe the exterior of the device with a soft, dry cloth as needed.
8. Troubleshooting
If you encounter issues with your glo HYPER PRO, refer to the following common problems and solutions:
| Problem | Possible Cause | Solution |
|---|---|---|
| Device does not turn on | Low or no battery charge | Charge the device fully using the provided USB-C cable. |
| Device not heating | Tobacco stick not inserted correctly; Device malfunction | Ensure the tobacco stick is fully and correctly inserted. Try restarting the device. If the issue persists, contact customer support. |
| Charging is slow or not working | Faulty cable or adapter; Dirty charging port | Check the USB-C cable and power adapter for damage. Try a different compatible cable/adapter. Clean the charging port gently with a dry, soft brush. |
| LED display not working | Device malfunction | Try restarting the device. If the issue persists, contact customer support. |
9. Specifications
| Feature | Detail |
|---|---|
| Brand | glo |
| Model Number | 10189920 |
| Dimensions (LxWxH) | 9.6 x 3.6 x 2.1 cm |
| Weight | 150 grams |
| Battery Capacity | 2580 mAh (Lithium Ion) |
| Charging Port | USB-C |
| Special Feature | Compact design |
| Manufacturer | Nicoventures Trading Limited |
10. Warranty and Support
10.1 Warranty Information
For detailed warranty information, please refer to the warranty card included in your product packaging or visit the official glo website. Warranty terms and conditions may vary by region.
10.2 Customer Support
If you have any questions, require assistance, or need to report an issue with your glo HYPER PRO device, please contact glo customer support through their official website or the contact details provided in your product documentation.


