
1. Introduction
This manual provides detailed instructions for the installation, operation, and maintenance of your aoonav 13.6 Inch Android 12 Car Stereo Radio. Please read this manual thoroughly before installation and use to ensure proper functionality and safety. This unit is designed for specific Infiniti models: G25, G37, G35, Q40, and Q60 manufactured between 2007 and 2015.
2. Key Features
- Vehicle Compatibility: Designed for Infiniti G25, G37, G35, Q40, Q60 (2007-2015). Supports original factory rear camera, 360 camera, and OEM Bose sound system. Plug-and-play installation.
- Android 12 System: Features a 13.6-inch HD Touch Android Screen with 6GB RAM + 128GB ROM and a UIS7862S Octa-core processor for sensitive touch response and fast operation.
- Integrated Carplay/Android Auto: Supports wireless/wired CarPlay and Android Auto via Bluetooth, allowing phone content projection to the large screen. Access calls, navigation, music, and apps via Siri/Google controls.
- GPS Navigation & 4G Connectivity: Built-in GPS module supports online and offline navigation apps. Includes a 4G SIM card reader for network access.
- Stable Wi-Fi & Bluetooth: Built-in Wi-Fi module supports 4G SIM card use and online maps via phone hotspot. Bluetooth 5.1 ensures stable connections for hands-free calls, phone book download, and music streaming.
- On-Screen Climate Control: Replaces factory display and climate controls with a multi-touch panel integrated into a factory-match bezel.
3. Setup and Installation
3.1 Unboxing and Component Overview
The package includes the main screen unit, power cord, and various accessories. Familiarize yourself with all components before beginning installation.
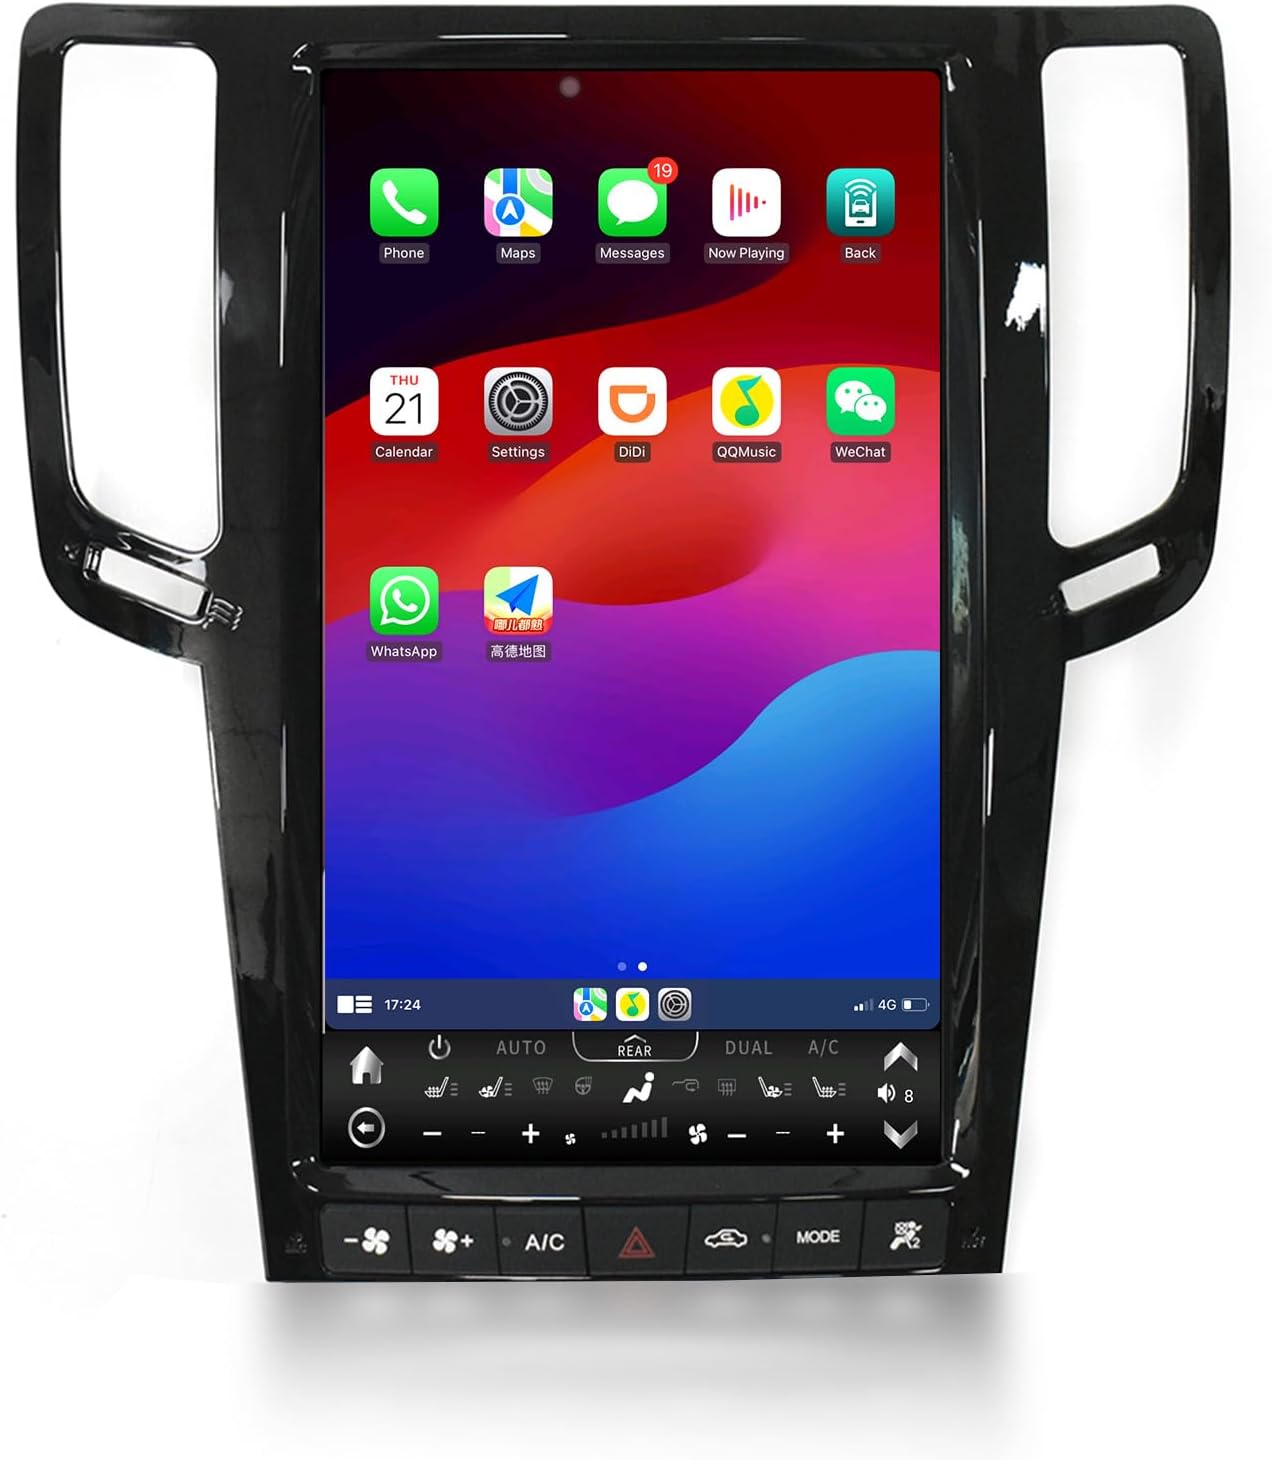
Image: The aoonav 13.6 Inch Android 12 Car Stereo unit, showcasing its large display and integrated control panel.
3.2 Rear Panel Connections
The rear of the radio unit features multiple connectors. While not all may be used, key connections include:
- Radio Antenna: Connects to the vehicle's radio antenna.
- 4G LTE Signal Antenna: Screws onto the designated port for 4G SIM card signal.
- GPS Antenna: Screws onto the designated port for GPS signal.
- SIM Card Slot: Located on the main power cord harness or directly on the unit.
- Main Power Cord: Connects to the vehicle's power harness.
- CANbus Connector: Essential for vehicle communication.
- Air Conditioning Connector: Connects to the vehicle's AC system.
When removing the factory radio, ensure to keep the original air conditioning control box connected to its original connectors. This box is crucial for the new unit's climate control functionality.
3.3 Hazard Button Functionality
After connecting the air conditioning box, verify that the hazard button on the new unit functions correctly. If it does not, recheck the connection of the AC panel connector. There are often identical connectors, so ensure the correct one is used.
3.4 Additional Cables and Connections
- External Microphone: A 3.5mm jack is provided for an external microphone if the built-in microphone is not sufficient.
- Subwoofer RCA: For subwoofer signal output.
- Amp Control Wire: A blue wire labeled 'Amp Control' is typically not needed for factory connections.
- AUX AV IN RCA Female: For connecting external video sources.
- AUX R IN & AUX L IN: For supporting factory red and white RCA inputs on some vehicles.
- USB Cables: Two USB cables are provided (one 6-pin, one 4-pin). The 4-pin is the primary USB port, recommended for Android Auto and Apple CarPlay.
- Factory Backup Camera: Connects to the female RCA labeled 'CCD AV IN'. If using an aftermarket camera, plug its RCA into this port.
- Airbag Connector: A 4-pin connector that should be connected to the vehicle's airbag system to prevent the airbag light from appearing. If the light persists, an OBD reader may be needed to clear codes.
3.5 Main Harness Connections
The main harness contains numerous plugs. These should correspond to your specific vehicle model and year, and whether your vehicle has navigation and/or a Bose sound system. Labels on the connectors will guide you:
- Power Connector: Connects to the main power input on the radio unit.
- Update Connector: An 8-pin connector (two green wires) must be plugged in to allow system updates.
- Bose Sound System (No Navigation): Use the connector labeled 'with Bose Sound System, no Navigation'. Connect the FL/FR and RL/RR RCAs to the corresponding ports on the main harness.
- With Navigation (No Bose): Use the connector labeled 'with Navigation'.
- Without Navigation (No Bose): Use the connector labeled 'without Navigation'.
- Factory Backup Camera (Without Navigation): Use the male RCA labeled 'CAM CVBS'.
- Factory Backup Camera (With Navigation): Use the male RCA labeled 'CAM CVBS 07-09' for 2007-2009 models or 'CAM CVBS 10-15' for 2010-2015 models.
Always ensure that the clip on the connectors is facing downwards when plugging into the radio unit.
Video: Detailed guide on connecting the aoonav Android car radio for Infiniti models (2007-2015).
4. Operating Instructions
4.1 Basic Controls
- Built-in Microphone: Located on the left side of the unit. An external microphone is provided if needed.
- Reset Button (RST): A small button accessible with a paperclip or pin. Press once when the screen goes dark to reboot the radio.
- Physical Buttons: Fan speed, AC on/off, circulation, mode, and hazard button.
4.2 Customizing Wallpaper
You can change the wallpaper of your radio's home screen:
- Press and hold the screen on the home page.
- Select 'Wallpapers'.
- Choose the default wallpaper or navigate to 'Apps' > 'File Manager' to select a custom image.
- To use a custom image, transfer it to the radio's internal storage or a connected USB flash drive.
- Once the image is open in File Manager, tap the 'Set Wallpaper' icon (usually a house icon) on the left.
Video: Instructions on how to change the wallpaper on Sc7862 Android 12 head units.
4.3 Setting the Time
To set the date and time on your device:
- Go to 'Settings' (gear icon).
- Scroll down and select 'Date and Time'.
- You can enable 'Use network-provided time' and 'Use network-provided time zone' for automatic synchronization.
- Alternatively, disable these toggles to manually set the date and time.
Video: Guide on how to set the time on Sc7862 Android 12 head units.
4.4 CarPlay and Android Auto Connection
To connect your smartphone via CarPlay or Android Auto:
- For wired connection, use the 4-pin USB cable provided. It is recommended to use this dedicated cable rather than a factory USB adapter, as OEM ports may interfere with CarPlay functionality.
- Plug the USB cable into your smartphone and the radio unit.
- Navigate to 'Apps' and open 'CarLink' (or 'ZLink' depending on the radio version).
- For wireless CarPlay, ensure your phone's Bluetooth is connected to the radio unit.
Video: Instructions on how to connect CarPlay and Android Auto on Sc7862 Android Screen.
4.5 Changing Boot Up Screen Image
You can customize the image displayed when the unit boots up:
- Ensure your desired image (JPG or JPEG format, proper aspect ratio) is on a USB flash drive (32GB or less).
- Create a folder named 'mycar' in the root directory of the USB drive.
- Copy your image into the 'mycar' folder.
- Insert the USB drive into the radio unit.
- Go to 'Settings' (gear icon) > 'Car Settings' (fourth icon from left) > Enter password '3368' > 'Boot Screen Logo'.
- Scroll left on the screen to find the 'Tip' section, which will show your custom image.
- Select your image and confirm. Reboot the unit to see the new boot-up screen.
Video: How to change the boot up screen image on the Android head unit.
5. Maintenance
To ensure the longevity and optimal performance of your aoonav car stereo, follow these maintenance guidelines:
- Screen Cleaning: Use a soft, lint-free cloth to gently wipe the screen. For stubborn smudges, slightly dampen the cloth with water or a screen-safe cleaner. Avoid harsh chemicals or abrasive materials.
- Software Updates: Periodically check for and install software updates to ensure the system has the latest features, bug fixes, and security enhancements.
- Avoid Extreme Temperatures: Do not expose the unit to extreme heat or cold for extended periods, as this can affect performance and lifespan.
- Secure Connections: Regularly check that all cables and connectors are securely attached to prevent intermittent issues.
6. Troubleshooting
- Screen Goes Black/Unresponsive: Press the RST (reset) button with a paperclip. If the issue persists, check all power connections.
- Hazard Button Not Working: This indicates an incorrect connection of the air conditioning panel box. Ensure the correct connector is used and securely attached.
- Airbag Light Appears: Ensure the 4-pin airbag connector is properly connected. If the light remains, an OBD reader or scanner may be needed to clear the codes.
- Installation Difficulties: Refer to the provided installation manual and videos. If issues persist, contact customer support.
- CarPlay/Android Auto Issues: Ensure you are using the correct 4-pin USB cable directly from the unit, not through a factory adapter, as OEM adapters can interfere.
7. Specifications
| Feature | Specification |
|---|---|
| Item Weight | 8.53 pounds |
| Package Dimensions | 16.6 x 15.6 x 7 inches |
| Display Size | 13.6 Inches |
| Voice Command | Touchscreen |
| Screen Resolution | 1080p |
| Mounting Type | Dashboard Mount |
| Audio Output Mode | Stereo |
| Connectivity Technology | Bluetooth, Ethernet, USB, Wi-Fi |
| Map Type | Worldwide |
| Special Features | Android Auto, Apple Carplay, Bluetooth, Radar Warning, Touchscreen |
8. Warranty and Support
This aoonav product comes with a one-year warranty and lifetime after-sales service. For any questions regarding installation or use, please contact aoonav technical support. You can reach us via Amazon or email: autostereo@163.com. We offer 30-day money-back and 12-month replacement services.

Image: Contact information for aoonav customer support, including email address.