1. Introduction
This manual provides instructions for the safe and effective use of your ChargeWorx Solar Power Bank. Please read this manual thoroughly before operating the device and retain it for future reference. This power bank is designed to provide portable power for various electronic devices, featuring solar charging capabilities, multiple output ports, wireless charging, a built-in compass, and dual LED flashlights.
2. Product Overview
2.1 Components
- Solar Panel: For supplemental charging via sunlight.
- USB-A Output Ports (x2): For charging compatible devices.
- USB-C Input/Output Port: For charging the power bank or compatible devices.
- Micro-USB Input Port: For charging the power bank.
- Wireless Charging Pad: For wirelessly charging compatible devices.
- LED Indicator Lights: Display battery level and charging status.
- Dual LED Flashlights: For illumination.
- Built-in Compass: For basic navigation.
- Power Button: To activate the device and flashlight.
2.2 Key Features
- Capacity: 15,000 mAh.
- Charge Cycles: Offers 600+ charge cycles.
- Multi-Port Charging: Supports simultaneous charging of multiple devices.
- Weatherproof Rating: IPX4, resistant to water splashes from any direction.
- Impact-Resistant Design: Enhanced durability for outdoor use.
- Compatibility: Works with various smartphones (Apple, Samsung, Motorola), tablets, headphones, smartwatches, and cameras.

Image: The ChargeWorx Solar Power Bank, showcasing its solar panel, charging ports, wireless charging area, and dual LED flashlights.

Image: A visual representation of the power bank's key features, including its 15,000 mAh capacity and various functionalities.
3. Setup
3.1 Initial Charging of the Power Bank
Before first use, fully charge the power bank using a wall adapter. Solar charging is primarily for emergency or supplemental power and is not recommended for initial full charging.
- Connect a USB-C cable to the power bank's USB-C input port or a Micro-USB cable to the Micro-USB input port.
- Connect the other end of the cable to a compatible USB wall adapter (not included).
- The LED indicator lights will illuminate to show the charging progress. All four lights will be solid when fully charged.
4. Operating Instructions
4.1 Charging Devices via USB Ports
- Connect your device's charging cable to one of the USB-A output ports or the USB-C input/output port on the power bank.
- Connect the other end of the cable to your device.
- Press the Power Button once to begin charging. The LED indicators will show the remaining power.
- Disconnect your device once charging is complete.

Image: The power bank simultaneously charging a mobile phone, tablet, wireless earbuds, and an action camera via its various ports.
4.2 Wireless Charging
The power bank supports wireless charging for compatible devices.
- Press the Power Button once to activate the power bank.
- Place your wireless charging compatible device (e.g., smartphone) directly onto the wireless charging pad area of the power bank.
- Ensure the device is centered on the pad for optimal charging. Charging will begin automatically.
- Remove your device once charging is complete.

Image: A smartphone being wirelessly charged on the power bank, demonstrating the wireless charging function.
4.3 Solar Charging Function
The integrated solar panel allows for supplemental charging of the power bank using sunlight. This feature is ideal for maintaining charge during outdoor activities or for emergency situations. It is not intended as the primary charging method due to varying solar intensity and efficiency.
- Place the power bank with the solar panel facing direct sunlight.
- Ensure no obstructions block the solar panel.
- The LED indicators will show charging activity.
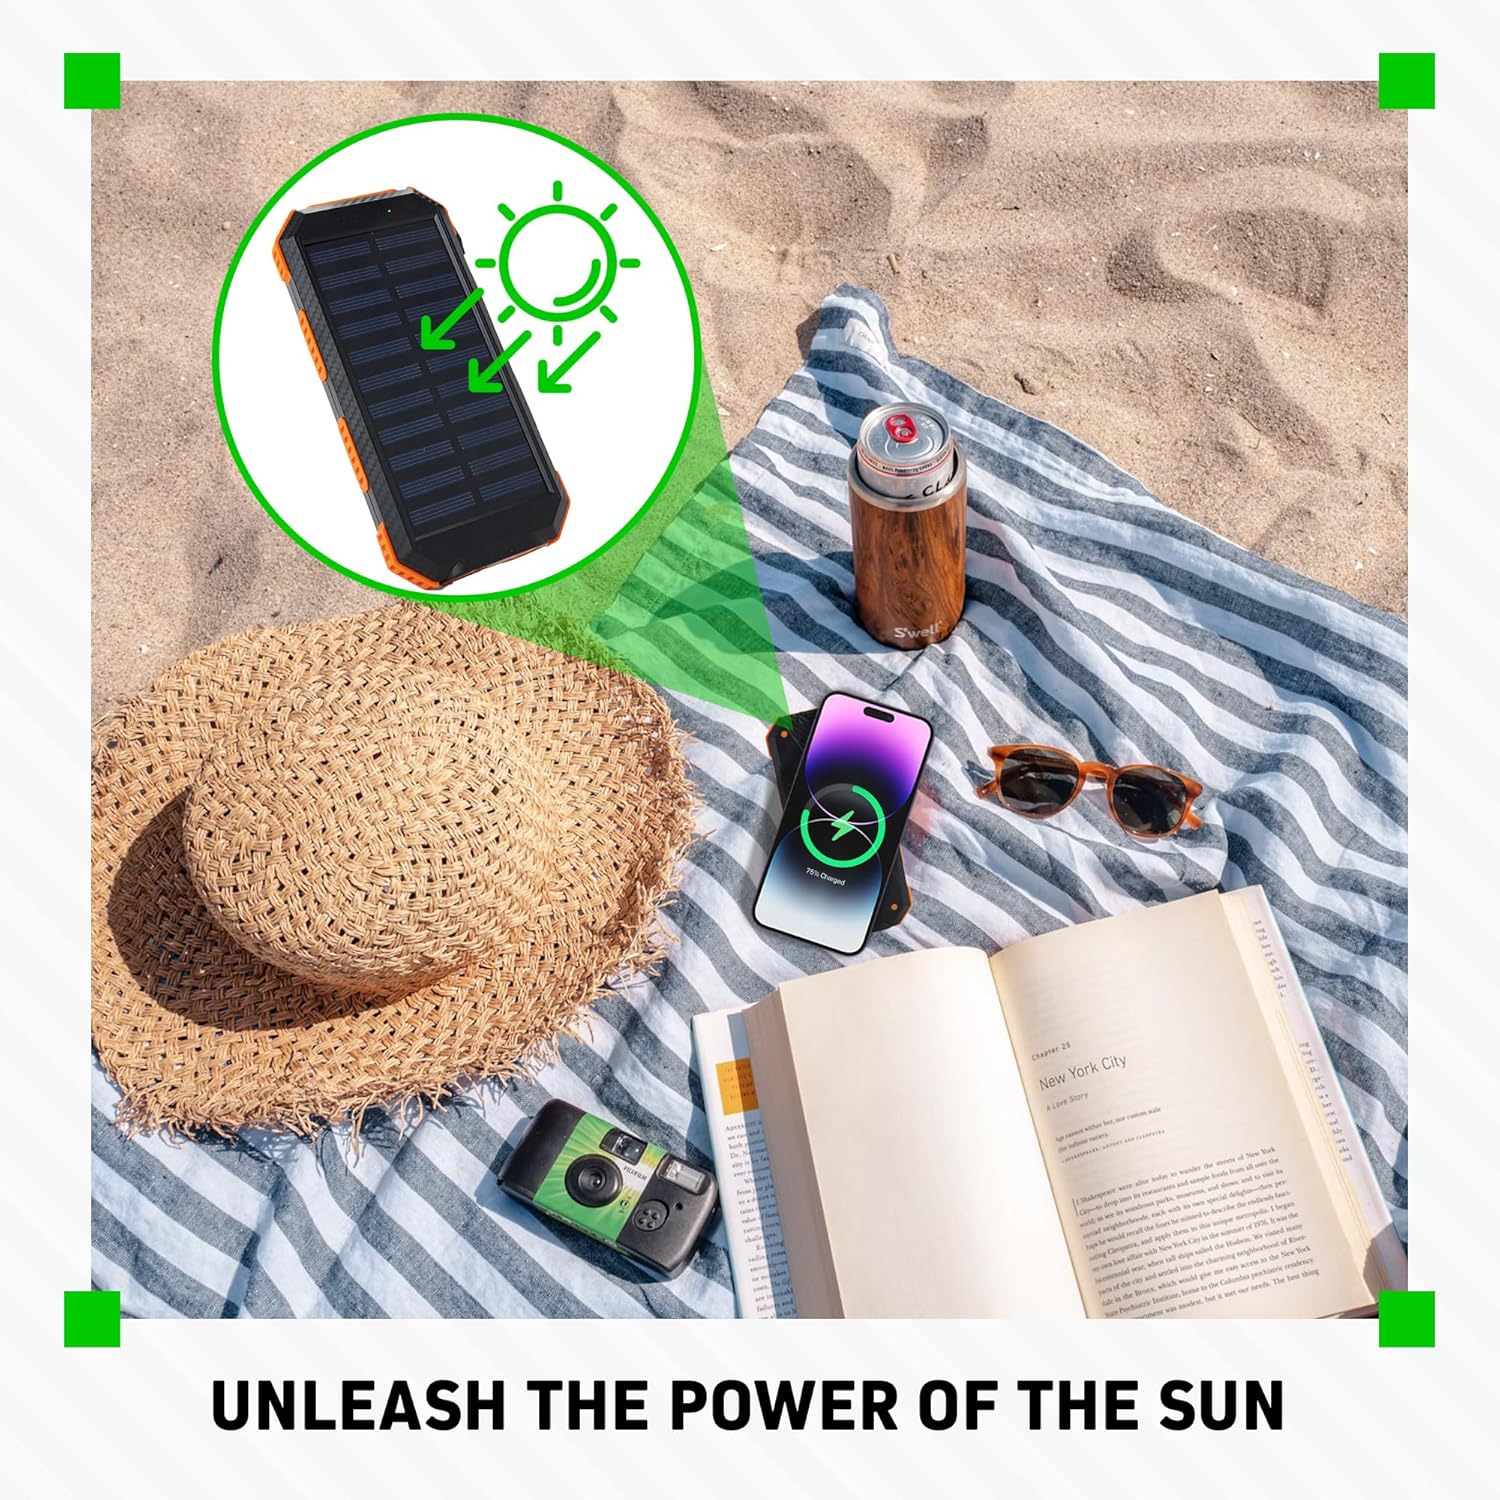
Image: The power bank's solar panel absorbing sunlight on a beach, illustrating its solar charging capability.
4.4 Using the LED Flashlight
- Press and hold the Power Button for approximately 3 seconds to turn on the dual LED flashlights.
- Press the Power Button again to cycle through different light modes (e.g., steady, SOS, strobe, if available).
- Press and hold the Power Button again for approximately 3 seconds to turn off the flashlights.
4.5 Using the Built-in Compass
The power bank includes a basic built-in compass for directional guidance. For accurate readings, ensure the power bank is held horizontally and away from strong magnetic fields or electronic devices that could interfere with its operation.

Image: The power bank's flashlight in use, demonstrating its illumination feature, with a small inset showing the solar panel on a backpack, indicating outdoor utility and the presence of a compass.
5. Maintenance
5.1 Cleaning
- Wipe the power bank with a soft, dry cloth.
- Do not use harsh chemicals, cleaning solvents, or strong detergents.
- Keep the solar panel clean for optimal performance.
5.2 Storage
- Store the power bank in a cool, dry place away from direct sunlight and extreme temperatures.
- If storing for extended periods, charge the power bank to approximately 50-75% every 3 months to maintain battery health.
5.3 Battery Care
- Avoid fully discharging the power bank frequently.
- Do not expose the power bank to temperatures above 60°C (140°F) or below -10°C (14°F).
6. Troubleshooting
6.1 Power Bank Not Charging
- Ensure the charging cable is securely connected to both the power bank and the wall adapter.
- Verify the wall adapter is functioning correctly and providing power.
- Try a different charging cable or wall adapter.
- For solar charging, ensure the panel is in direct, strong sunlight and not obstructed. Note that solar charging is slow and supplemental.
6.2 Devices Not Charging
- Ensure the power bank has sufficient charge (check LED indicators).
- Press the Power Button once to activate output.
- Verify your device's charging cable is properly connected to both the power bank and your device.
- Try a different USB port or cable.
- For wireless charging, ensure your device is compatible and correctly positioned on the charging pad. Remove any thick cases that might interfere.
6.3 Flashlight Not Working
- Ensure the power bank has sufficient charge.
- Press and hold the Power Button for approximately 3 seconds to activate the flashlight.
7. Specifications
| Feature | Specification |
|---|---|
| Model Number | CX6579 |
| Battery Capacity | 15,000 mAh |
| Input (Micro-USB) | 5V / 2A |
| Input/Output (USB-C) | 5V / 2A |
| Output (USB-A x2) | 5V / 2A (Total) |
| Wireless Output | 5W (Standard) |
| Solar Panel Output | 5V / 0.2A (Max, supplemental) |
| Dimensions | 7.95 x 1.3 x 4.21 inches |
| Weight | 10.1 ounces |
| Weatherproof Rating | IPX4 |
| Included Components | User Manual |
8. Safety Information
- Do not disassemble, open, or shred the battery pack.
- Do not expose the power bank to heat or fire. Avoid storage in direct sunlight.
- Do not short-circuit the battery pack.
- Do not expose the power bank to mechanical shock.
- In case of battery leakage, do not allow the liquid to come into contact with skin or eyes. If contact has been made, wash the affected area with copious amounts of water and seek medical advice.
- Keep the power bank out of reach of children.
- Supervise children when using the power bank.
- Ensure proper disposal of the power bank according to local regulations.
- Do not use the power bank if it has been damaged or modified.
9. Warranty and Support
Warranty information for this product was not provided in the available data. For specific warranty details, technical support, or customer service inquiries, please contact ChargeWorx directly through their official website or the retailer where the product was purchased.

