Introduction
The Alacrity Pet Microchip Scanner is a versatile and portable device designed for efficiently reading animal microchips. It supports multiple common microchip standards and offers flexible connectivity options for data management. This manual provides comprehensive instructions for setting up, operating, and maintaining your scanner.

Image: The Alacrity Pet Microchip Scanner, showcasing its compact design, circular scanning head, and included accessories like the USB cable and 2.4GHz wireless dongle.
Package Contents
Please verify that all items are present in the package:
- 1 x Alacrity Pet Microchip Scanner
- 1 x English User Manual
- 1 x USB Cable
- 1 x 2.4GHz Wireless Dongle

Image: The Alacrity Pet Microchip Scanner, its retail box, USB cable, and 2.4GHz wireless dongle, laid out to show all included components.
Key Features
- Universal Compatibility: Supports ISO11784 / ISO11785 / FDX-B and EMID microchip standards.
- Dual Data Output: Provides data in both hexadecimal and decimal formats, selectable by the user.
- 1.44” TFT Screen Display: Clear display of battery level, working mode, connection status, and microchip data. Supports display of pet's name, age, and owner information if pre-uploaded.
- Multiple Connection Modes: Offers USB wired, 2.4GHz wireless, and Bluetooth connectivity for versatile use.
- Two Working Modes:
- Upload Instantly Mode: Data is transmitted immediately upon scanning.
- Storage Mode: Can store up to 240 pieces of data internally, which can be uploaded later.
- Long-lasting Battery: Equipped with an 800mAh rechargeable battery, providing approximately 16 hours of continuous operation.
- Portable Design: Compact and lightweight for easy handling and transport.

Image: A close-up view of the scanner's 1.44-inch TFT display screen, showing menu options like "Scan," "View History," "Clear Records," and "Upload," with a small puppy in the background.
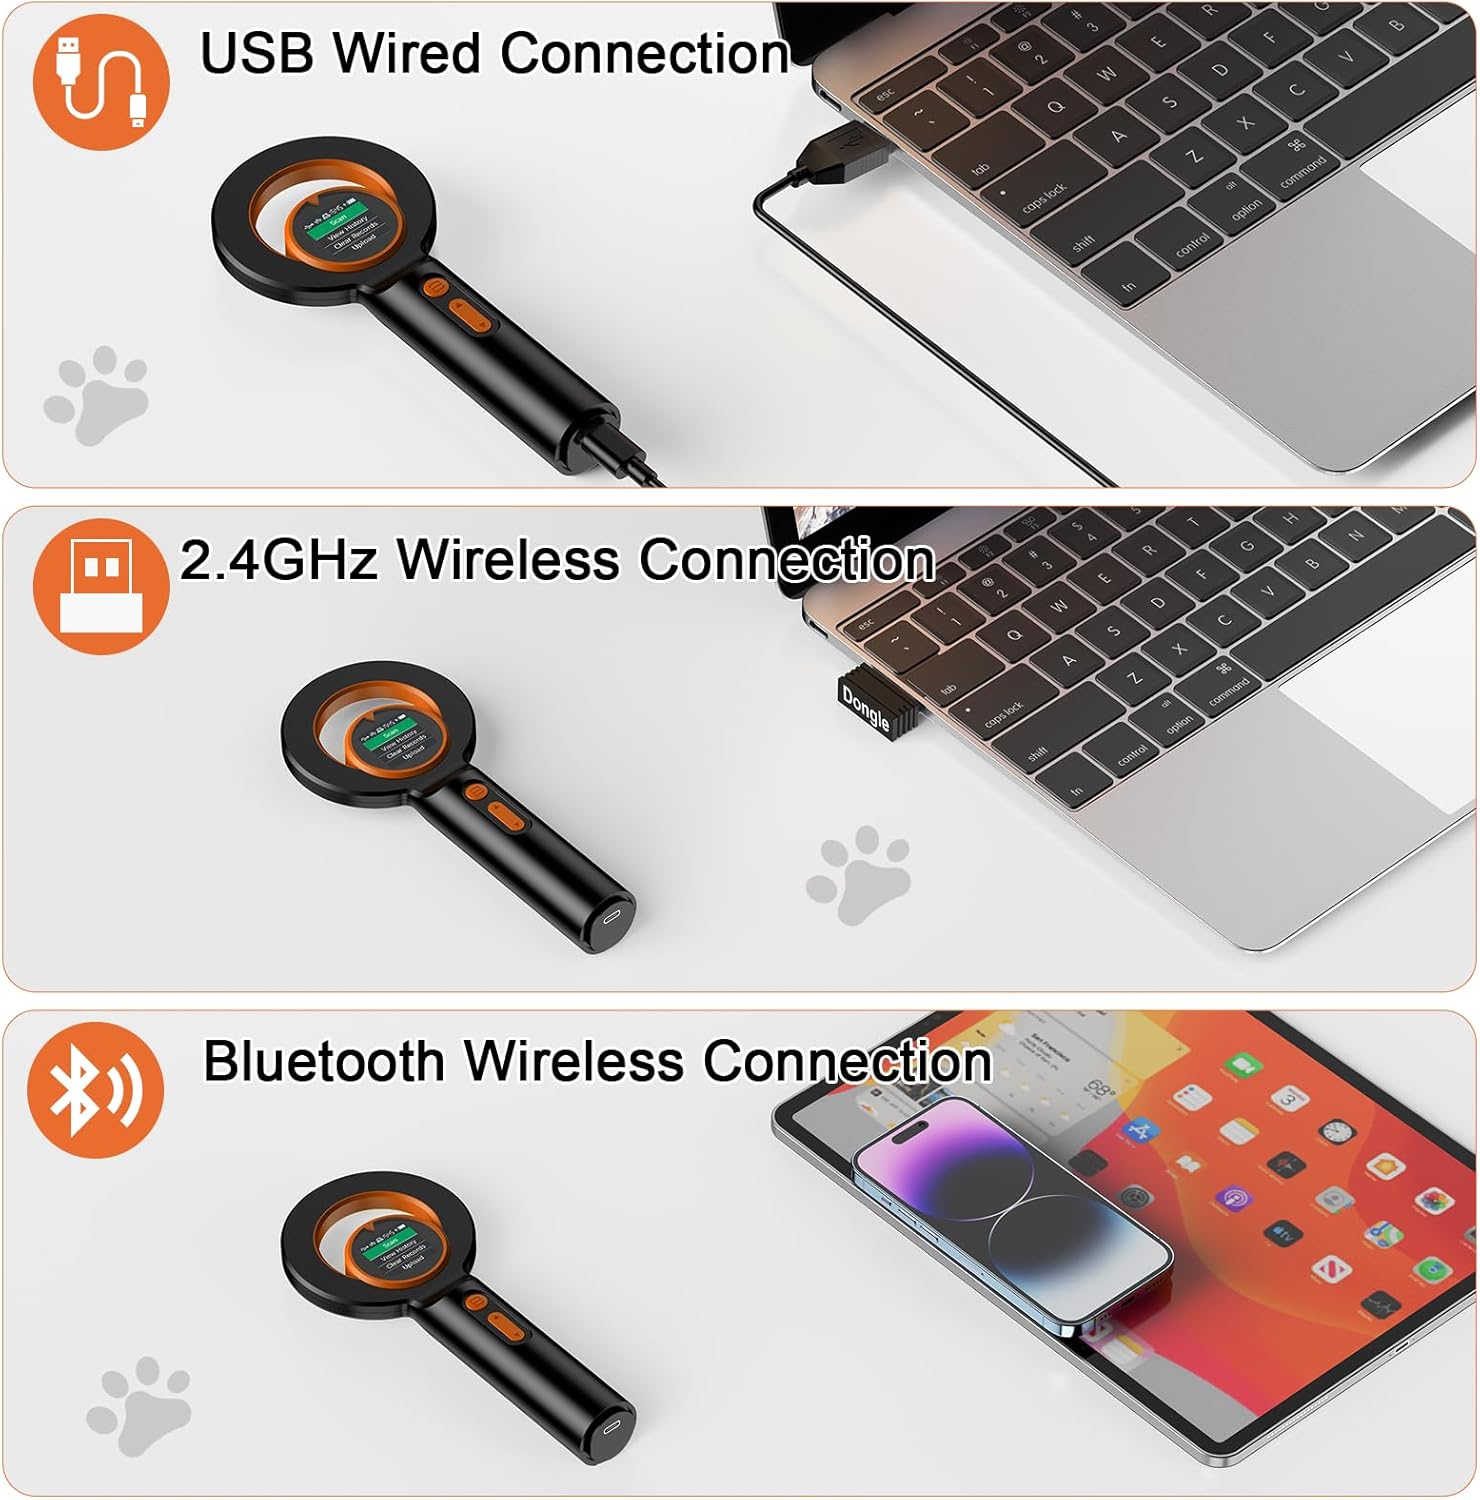
Image: Three panels illustrating the scanner's connectivity options: USB wired connection to a laptop, 2.4GHz wireless connection using a dongle, and Bluetooth wireless connection to a tablet.

Image: The scanner next to a cloud icon with "240" indicating data storage capacity, and various operating system logos (Linux, Windows, Mac OS, iOS, Android) suggesting compatibility for data upload.
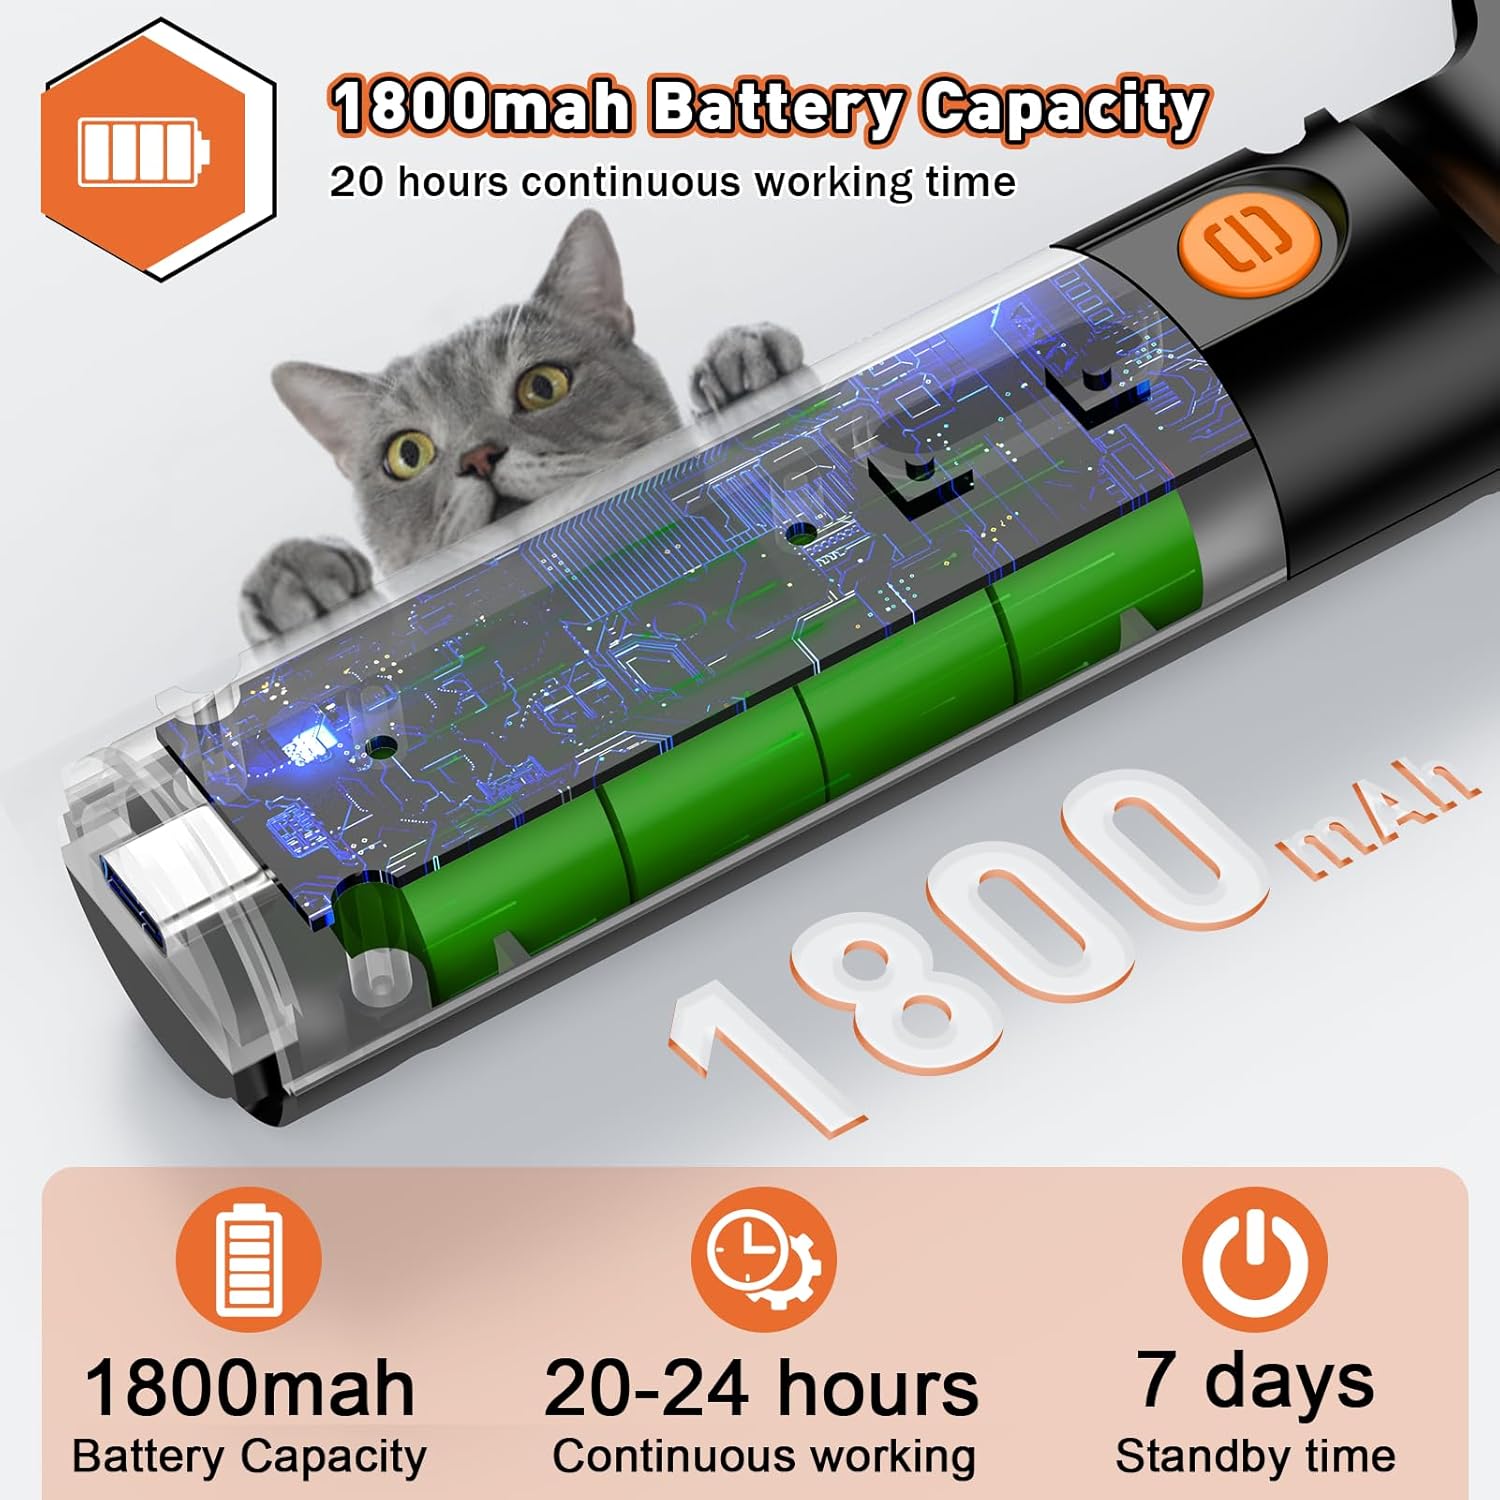
Image: An illustration showing the internal battery of the scanner, highlighting its 1800mAh capacity and indicating 20-24 hours of continuous working time and 7 days of standby time.
Setup
1. Charging the Device
Before first use, fully charge the scanner using the provided USB cable. Connect the USB cable to the scanner's charging port and plug the other end into a standard USB power adapter or computer USB port. The battery indicator on the TFT screen will show charging status.
2. Powering On/Off
Press and hold the power button (usually the top button) for a few seconds to turn the scanner on. To turn off, navigate to the "Shutdown" option in the menu and confirm, or press and hold the power button again.
3. Connecting to a Device (Optional)
The scanner supports three connection methods for data transfer:
- USB Wired Connection: Connect the scanner directly to your computer using the USB cable. The scanner will typically be recognized as a storage device or input device.
- 2.4GHz Wireless Connection: Insert the 2.4GHz wireless dongle into a USB port on your computer. The scanner should automatically connect. Select "2.4G Connect" from the scanner's menu if manual connection is needed.
- Bluetooth Connection: Enable Bluetooth on your computer or mobile device. On the scanner, select "BT Connect" from the menu. Pair the scanner with your device through your device's Bluetooth settings.
No specific driver or software installation is required for basic operation, but for advanced data management (like uploading pet information to the scanner), you may need to contact the seller for software components.

Image: A visual representation of the three connection modes: 2.4GHz Wireless, Bluetooth Wireless, and USB Wired, showing the scanner connecting to a laptop and a tablet.
Operating Instructions
1. Navigating the Menu
Use the navigation buttons on the scanner to scroll through menu options on the TFT screen. The top button typically acts as a selection/confirmation button, and the bottom button for navigation.
Main Menu Options:
- Scan: Initiates the microchip scanning process.
- View Records: Allows you to review previously scanned microchip data stored on the device.
- Clear Records: Erases all stored microchip data from the device. Use with caution.
- Upload: Transfers stored data to a connected computer or device.
- BT Connect: Initiates Bluetooth pairing mode.
- 2.4G Connect: Initiates 2.4GHz wireless connection mode.
- Settings: Accesses device settings (e.g., data output format - hexadecimal/decimal).
- Shutdown: Powers off the device.
2. Scanning a Microchip
- Ensure the scanner is powered on.
- Select "Scan" from the main menu.
- Hold the scanning head close to the area where the animal's microchip is implanted (typically between the shoulder blades).
- Move the scanner slowly over the area. The device will emit a sound or display the microchip ID on the screen once a chip is detected.
- The reading time is typically less than 100ms.

Image: A person using the Alacrity Pet Microchip Scanner to scan a cat, demonstrating the proper technique of holding the scanner close to the animal's body. Insets show examples of microchip types (glass tube and ear tag).
3. Data Management
The scanner can operate in two modes for data handling:
- Upload Instantly Mode: When connected via USB, 2.4GHz, or Bluetooth, scanned data can be sent directly to the connected device.
- Storage Mode: If not connected, the scanner will automatically save up to 240 scanned microchip IDs. These can be uploaded later by connecting the scanner to a computer and selecting the "Upload" option.
To input additional pet information (name, age, owner details) and have it display on the scanner's screen, you will need specific software. Please contact Alacrity customer support or the seller for details on obtaining and using this software.

Image: A diagram showing a software interface on a laptop for inputting pet microchip data, name, telephone, and address, and how this information can then be displayed on the scanner's screen after scanning.
Maintenance
- Cleaning: Use a soft, dry cloth to clean the scanner's exterior. For the screen, use a microfiber cloth. Avoid abrasive cleaners or solvents.
- Storage: Store the scanner in a cool, dry place away from direct sunlight and extreme temperatures.
- Battery Care: To prolong battery life, avoid fully discharging the battery frequently. Charge the device regularly, even if not in active use.
- Handling: Handle the device with care to prevent drops or impacts, which could damage internal components or the screen.
Troubleshooting
| Problem | Possible Cause / Solution |
|---|---|
| Scanner does not power on. | Battery may be depleted. Connect to power source and charge for at least 30 minutes before attempting to power on again. |
| Cannot read microchip. |
|
| Cannot connect via Bluetooth/2.4GHz. |
|
| Scanner screen freezes. | Press and hold the power button for an extended period (e.g., 10-15 seconds) to force a restart. If the issue persists, ensure the battery is adequately charged. |
Specifications
| Feature | Detail |
|---|---|
| Model Name | MJ-Q40 |
| Brand | Alacrity |
| Scanner Type | Microchip |
| Supported Microchips | ISO11784 / ISO11785 / FDX-B, EMID |
| Display | 1.44” TFT Screen |
| Connectivity Technology | Bluetooth, 2.4GHz Wireless, USB |
| Battery | 800mAh Lithium Polymer (rechargeable) |
| Continuous Working Time | Approx. 16 hours |
| Data Storage Capacity | 240 pieces of data |
| Item Weight | 6.4 ounces (0.18 Kilograms) |
| Package Dimensions | 8.39 x 4.53 x 1.57 inches |
| Light Source Type | LED |
| Optical Sensor Technology | CMOS |
| Country of Origin | China |
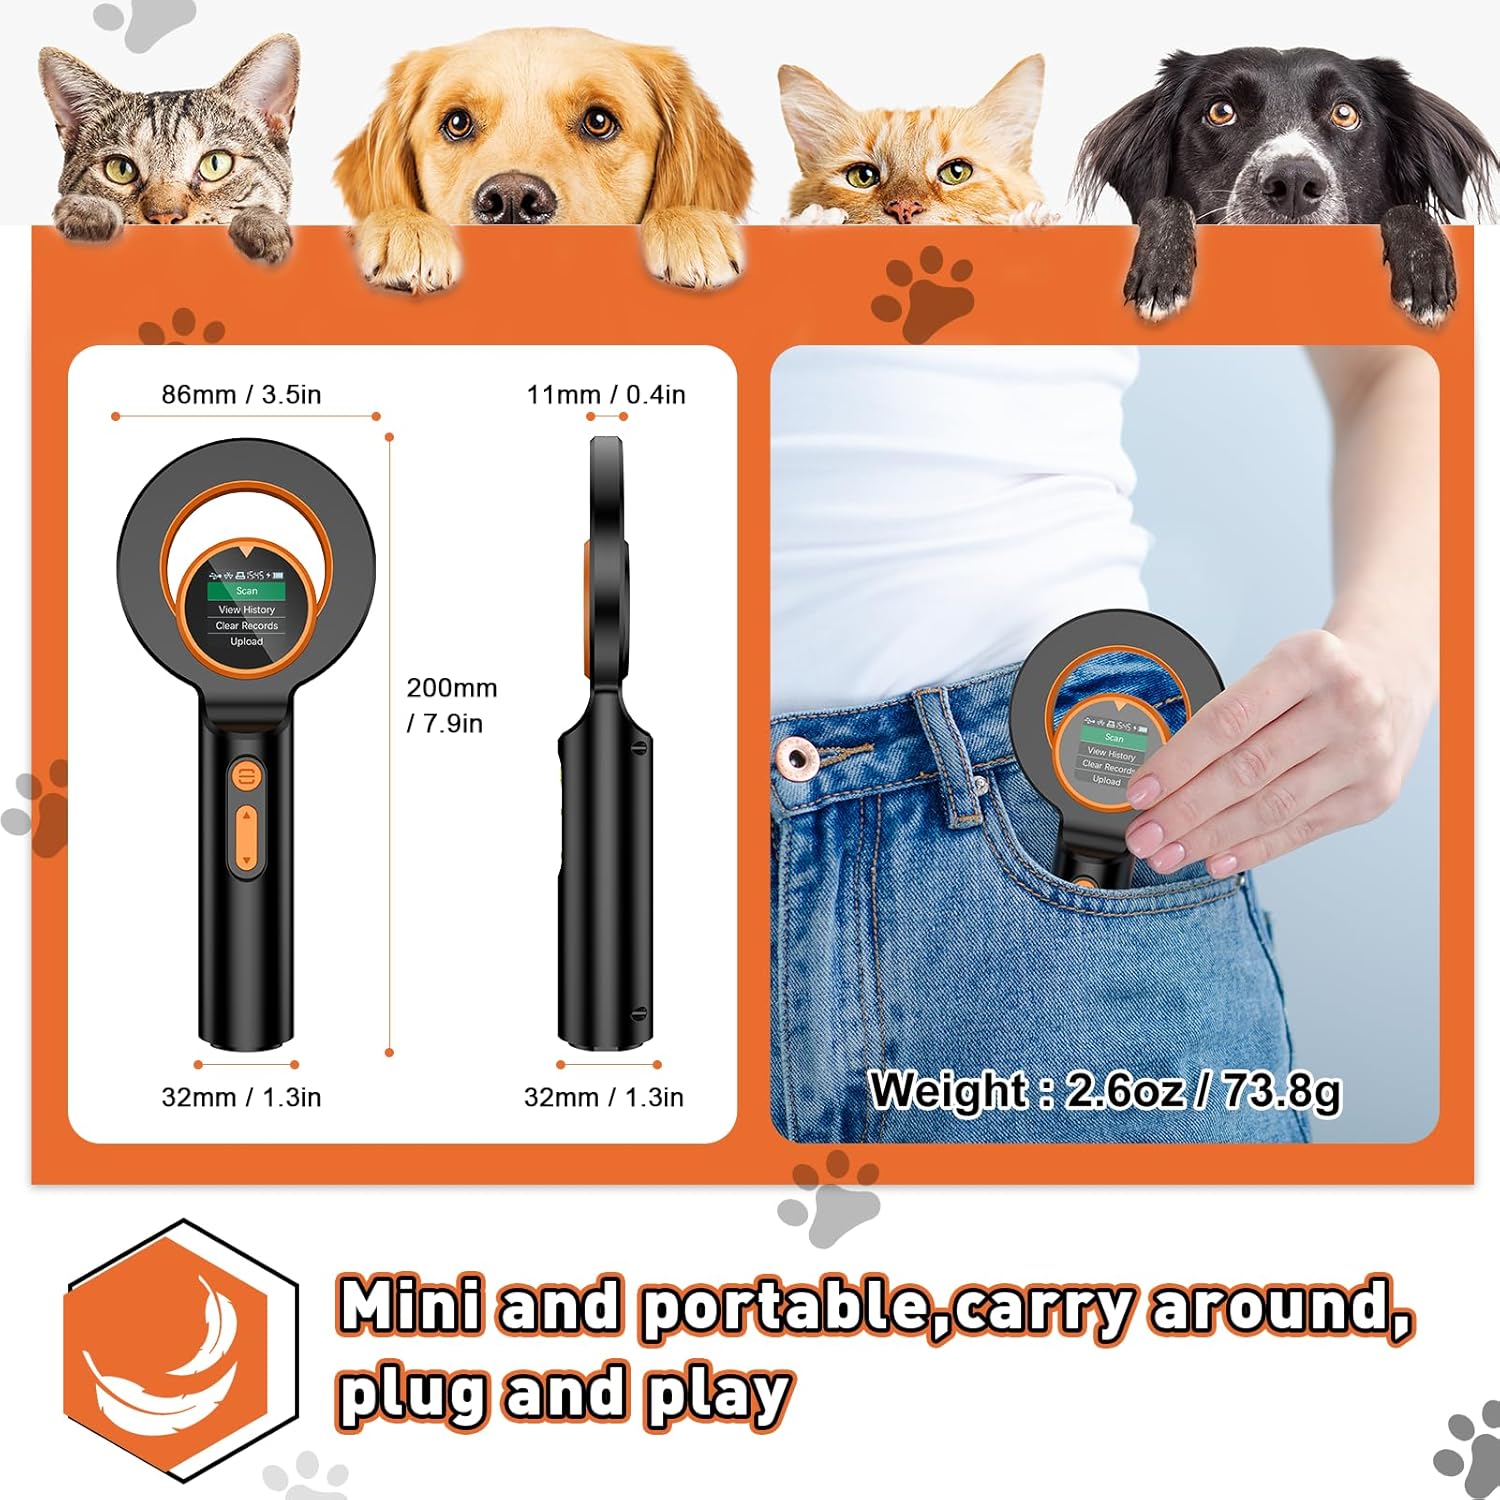
Image: A visual representation of the scanner's dimensions (86mm/3.5in width, 200mm/7.9in height, 32mm/1.3in handle width, 11mm/0.4in thickness) and its lightweight nature (2.6oz/73.8g), shown being carried in a pocket.
Warranty and Support
For warranty information, technical support, or inquiries regarding software components for advanced features, please contact the manufacturer, Alacrity, or your original seller. Refer to the product packaging or the seller's contact information for specific details.