
1. Introduction
Thank you for choosing the AINAVI 10 Inch Under Seat Car Subwoofer. This active stereo subwoofer is designed to enhance your vehicle's audio system with powerful bass and multi-color ambient lighting. Featuring a built-in amplifier with 800 Watts Max power, it offers a compact solution for superior sound. This manual provides essential information for proper installation, operation, and maintenance to ensure optimal performance and longevity of your device.
2. Safety Information
- Read all instructions carefully before installation and use.
- Installation should be performed by a qualified professional to prevent damage to the product or vehicle.
- Disconnect the vehicle's battery before starting any electrical work.
- Ensure all wiring is properly insulated and secured to prevent short circuits and electrical hazards.
- Do not expose the subwoofer to moisture or extreme temperatures.
- Avoid placing objects on top of the subwoofer that could obstruct ventilation.
- Operate the subwoofer within its specified power limits to prevent damage.
3. Product Overview
The AINAVI CX-80 subwoofer is engineered for powerful bass in a compact form factor, ideal for under-seat installation. It includes a robust aluminum casing and a 100MM magnetic coil for enhanced performance.
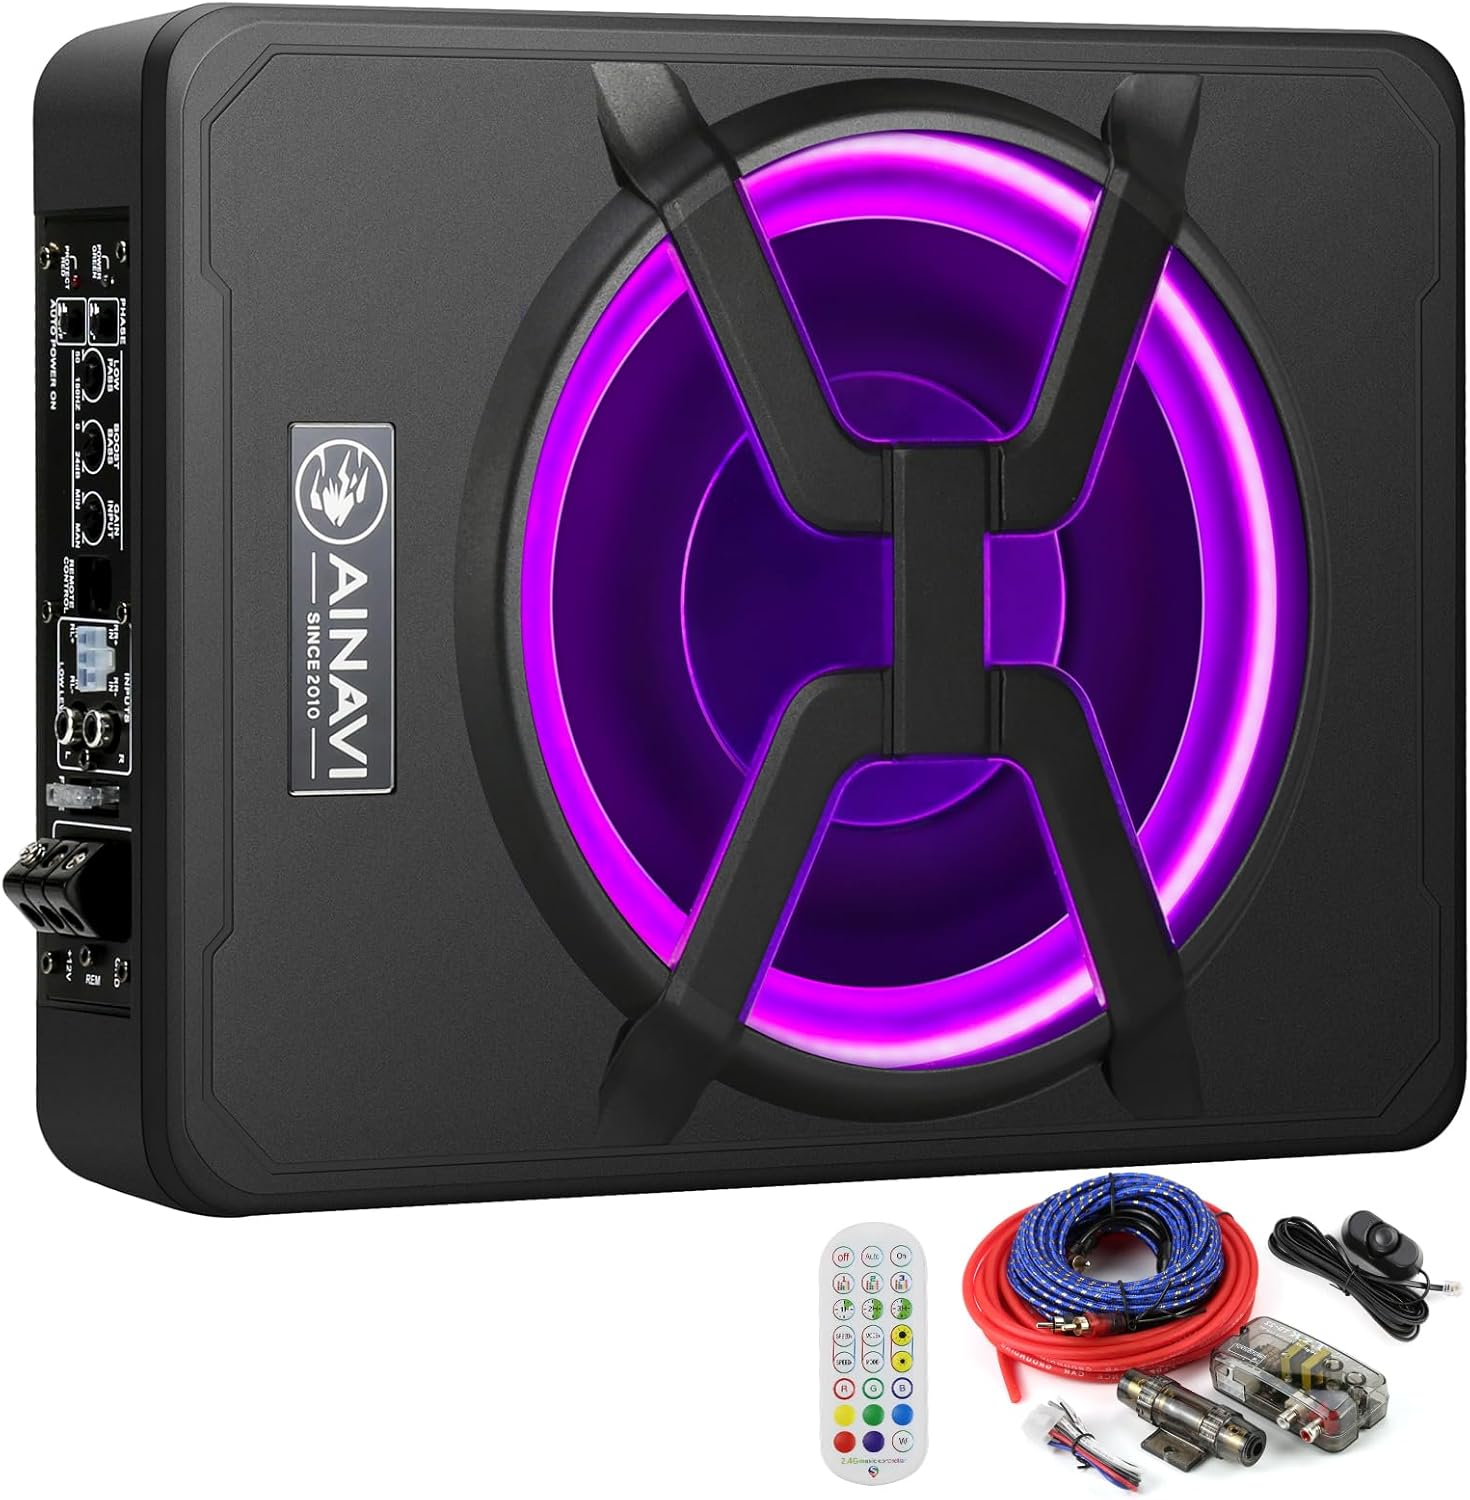
Figure 3.1: AINAVI 10 Inch Under Seat Car Subwoofer with included remote control and wiring kit.
3.1 Key Features
- Built-in Amplifier: Integrated 800 Watts Max amplifier for powerful sound without external components.
- Multi-Color Ambient Lighting: Customizable LED lighting around the subwoofer cone, controllable via remote or app.
- Compact Design: Slim profile (13 x 10 x 3 inches) allows for discreet installation under car seats.
- Durable Construction: Enclosed in an aluminum casing for high hardness and shock resistance, ensuring stable low-frequency output.
- High/Low Level Inputs: Versatile input options for compatibility with various car audio systems.

Figure 3.2: Detailed view highlighting the 100MM magnetic coil and robust enclosed aluminum casing, designed for powerful and stable bass.

Figure 3.3: The subwoofer's dynamic multi-color ambient lighting, controllable via the included remote or a smartphone application.
3.2 Product Dimensions and Compatibility
The compact size of the AINAVI CX-80 allows for flexible installation in various vehicle types, including cars, trucks, vans, SUVs, and RVs.

Figure 3.4: Product dimensions for easy installation planning.

Figure 3.5: The subwoofer is compatible with a wide range of vehicles.
3.3 Included Accessories
The package includes all necessary components for installation and control:
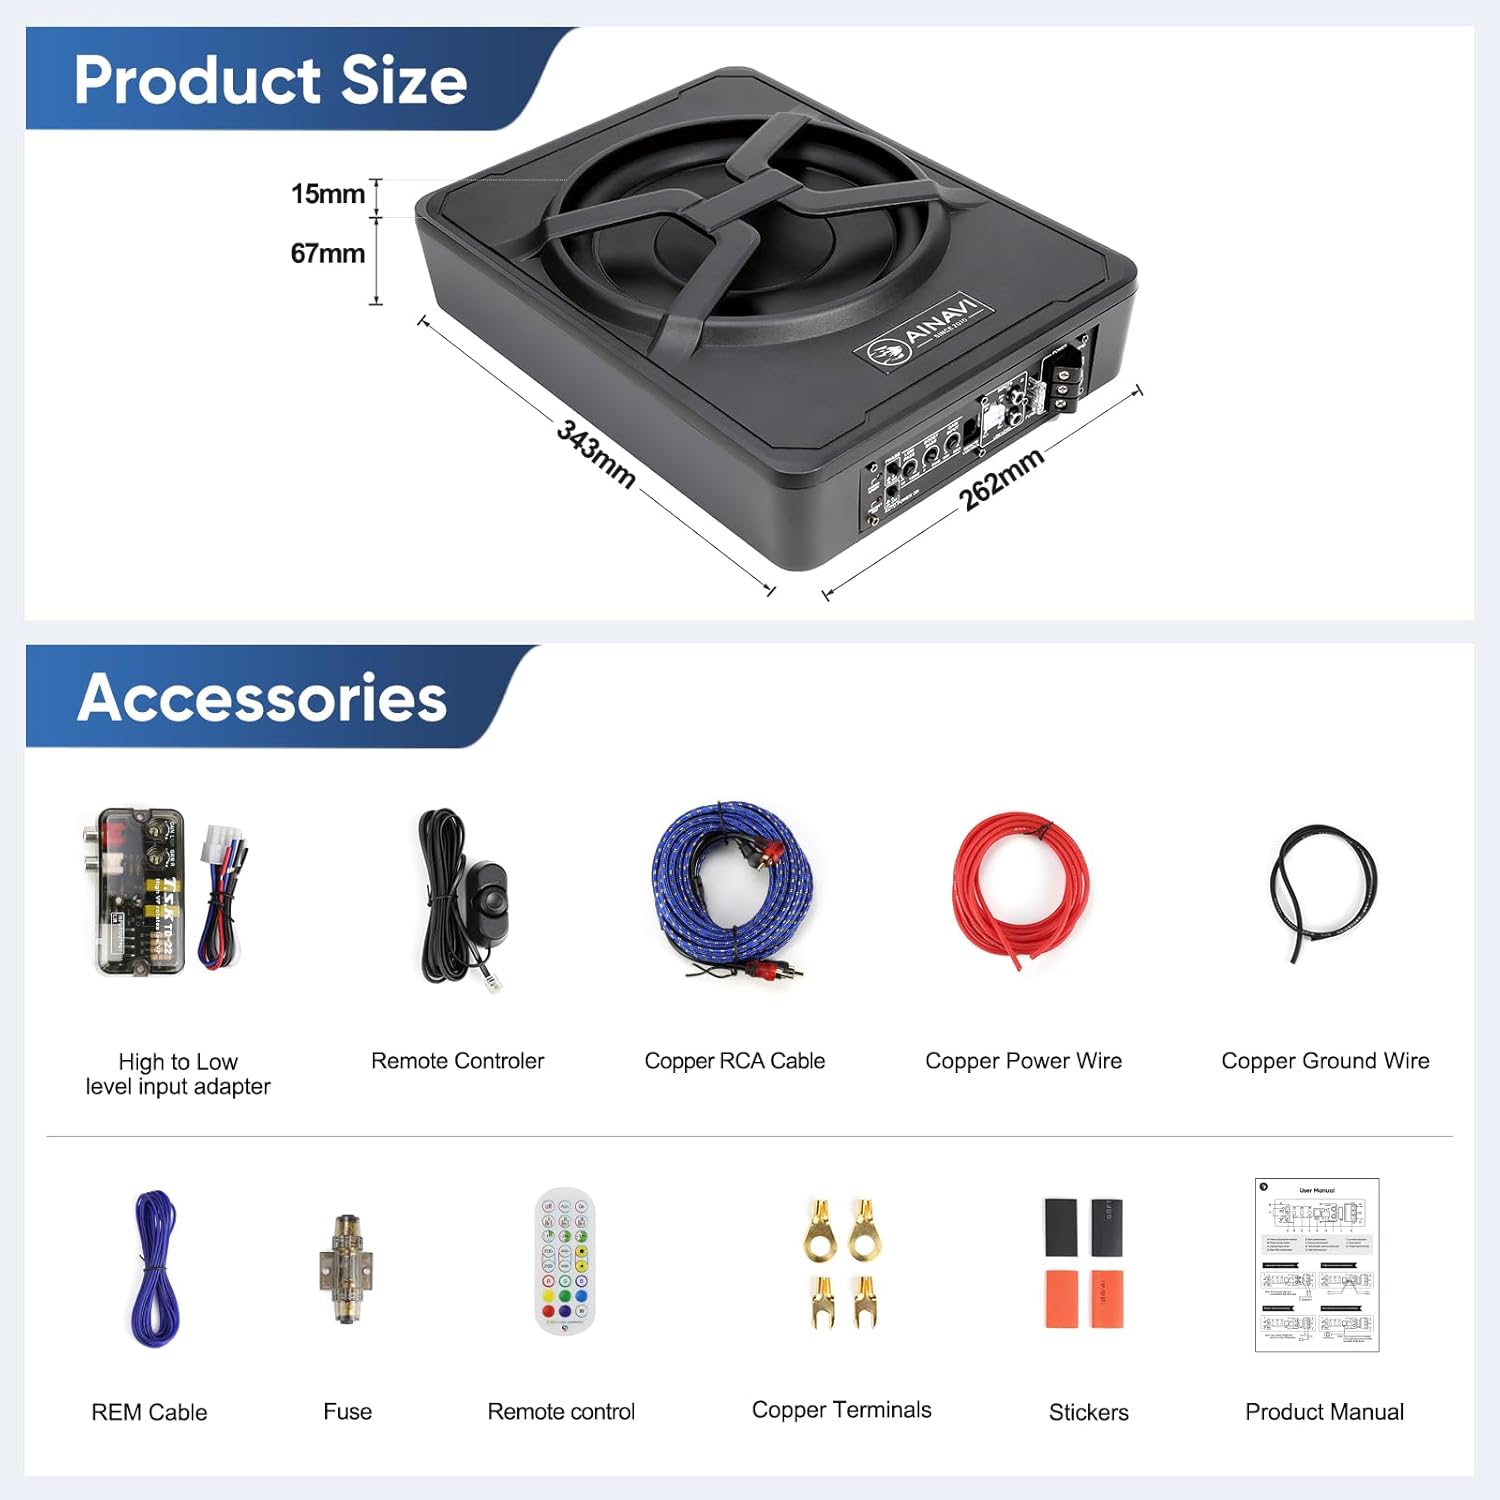
Figure 3.6: Complete list of accessories provided with your AINAVI subwoofer.
4. Setup and Installation
Proper installation is crucial for the performance and safety of your subwoofer. Follow these steps carefully. If you are unsure about any step, consult a professional car audio installer.
4.1 Wiring Connections
The subwoofer supports both high-level and low-level input connections. Do not input high/low level at the same time.

Figure 4.1: Detailed wiring diagrams for various input and power connections.

Figure 4.2: Overview of high and low level input options for connecting to your car's audio system.
4.1.1 Low Level Input Connection (RCA)
- Connect the RCA cables from your head unit's pre-out to the "LOW LEVEL INPUTS" on the subwoofer.
4.1.2 High Level Input Connection (Speaker Level)
- If your head unit does not have RCA outputs, use the included high-to-low level input adapter.
- Connect the vehicle's speaker wires to the corresponding inputs on the adapter, then connect the adapter to the "HIGH LEVEL INPUTS" on the subwoofer.
4.1.3 Power Input Connection
- Connect the copper power wire (+12V) to the positive terminal of your car battery, ensuring an inline fuse is installed close to the battery.
- Connect the copper ground wire (GND) to a clean, unpainted metal surface on the vehicle's chassis.
- Connect the REM (Remote) wire to the remote output of your head unit or an accessory wire that turns on with the ignition.
4.1.4 Remote Control Connection
- Plug the wired remote control into the "REMOTE CONTROL" port on the subwoofer. This allows for convenient bass level adjustment.
4.2 Physical Placement
The slim design of the AINAVI CX-80 makes it ideal for under-seat installation, maximizing space efficiency in your vehicle.

Figure 4.3: Example of under-seat installation.
Ensure adequate clearance for ventilation and access to controls. Use the provided mounting hardware to secure the subwoofer firmly to prevent movement during driving.
5. Operating Instructions
Once installed, you can begin operating your AINAVI subwoofer and customize its settings.
5.1 Initial Power On
After all connections are secure and the vehicle's battery is reconnected, turn on your car's ignition. The subwoofer should power on automatically if the REM wire is connected correctly.
5.2 Adjusting Audio Settings
The subwoofer's control panel (Figure 4.1) allows for fine-tuning of audio output:
- GAIN INPUT: Adjusts the input sensitivity to match the output of your head unit. Start low and gradually increase until desired volume is achieved without distortion.
- LOW PASS: Controls the low-pass filter frequency (50Hz-150Hz). This determines the maximum frequency the subwoofer will play, ensuring it only reproduces bass frequencies.
- BASS BOOST: Provides an adjustable bass boost (0-18dB) at 45Hz for enhanced low-end impact. Use sparingly to avoid distortion.
- PHASE: Adjusts the phase (0° or 180°) to ensure the subwoofer's output is in sync with your main speakers, preventing cancellation and improving bass clarity.
5.3 Ambient Lighting Control
The multi-color ambient lighting can be controlled via the included remote control or a dedicated smartphone application (if available, refer to product packaging for app details).
- Use the remote to select desired colors, brightness, and lighting modes (e.g., solid, pulsating, color cycle).
- The smartphone app may offer more advanced customization options.
Video 5.1: Demonstration of the 10-inch car subwoofer's ambient lighting features and control via smartphone app.
Video 5.2: Overview of the 12-inch powered car audio subwoofer, showcasing its design and lighting (similar features to the 10-inch model).
6. Maintenance
To ensure the longevity and optimal performance of your AINAVI subwoofer, follow these simple maintenance guidelines:
- Cleaning: Use a soft, dry cloth to wipe down the exterior of the subwoofer. Avoid using harsh chemicals or abrasive cleaners.
- Ventilation: Ensure the subwoofer's vents are clear of obstructions to prevent overheating.
- Connections: Periodically check all wiring connections to ensure they are secure and free from corrosion.
- Environment: Protect the subwoofer from direct sunlight, extreme heat, and moisture.
7. Troubleshooting
If you experience issues with your subwoofer, refer to the table below for common problems and solutions.
| Problem | Possible Cause | Solution |
|---|---|---|
| No Power | Loose power/ground wire, blown fuse, no remote signal. | Check all connections, replace fuse, verify remote wire connection to head unit. |
| No Sound | Incorrect input connection, gain too low, head unit settings. | Ensure correct high/low level input, increase gain, check head unit's subwoofer output settings. |
| Distorted Sound | Gain too high, bass boost too high, incorrect phase setting. | Reduce gain, lower bass boost, adjust phase (0°/180°) for best sound. |
| Overheating | Insufficient ventilation, prolonged high volume use. | Ensure clear airflow around the subwoofer, reduce volume, allow to cool. |
8. Specifications
| Feature | Detail |
|---|---|
| Brand | AINAVI |
| Model Number | CX-80 |
| Speaker Size | 10 Inches |
| Woofer Diameter | 10 Inches |
| Power Source | Corded Electric |
| Max Power Output | 800 Watts (Max) |
| Audio Output Mode | Surround |
| Material | Aluminum |
| Product Dimensions | 13 x 10 x 3 inches |
| Item Weight | 11.6 pounds |
| Control Method | App, Remote |
| Connectivity Technology | Wired (Subwoofer), Wi-Fi (App Control) |
| Vehicle Service Type | Van, RV, Car, Truck |
| Warranty Type | Limited |
9. Warranty and Support
AINAVI provides a limited warranty for this product. For specific warranty terms and conditions, please refer to the warranty card included in your product packaging or contact customer support.
Customer Support
For installation assistance, technical support, or any other inquiries, please contact AINAVI customer service:
- Phone: +1 (833) 858-5016
- Working Hours: 3:00 PM to 12:00 PM PST
- Email: info@ainavi.com
You can also reach out via your order center on Amazon by clicking on the seller name "HomeCar" and then "Ask a question." Providing pictures or videos of your technical or installation questions can help expedite support.

Figure 9.1: Guide to contacting customer support through Amazon.

Figure 9.2: AINAVI customer support contact information.