The TTXSCAM MT02 is an innovative motorcycle DVR system designed to enhance your riding experience with advanced features. It integrates wireless Apple Carplay and Android Auto, a Tire Pressure Monitoring System (TPMS), and high-definition dual cameras for comprehensive recording.
Key features include:
5-inch IPS Touch Screen for intuitive control.
HD 1080P Front and Rear Cameras with IMX322 Chipset for clear recording.
IP65 Waterproof rating for durability in various weather conditions.
Wireless Apple Carplay and Android Auto for seamless smartphone integration.
Integrated TPMS for real-time tire pressure and temperature monitoring.
GPS G-Sensor for accurate location and impact detection.
WiFi and Bluetooth connectivity for easy data transfer and peripheral pairing.
What's in the Box
Upon unboxing your TTXSCAM MT02, you should find the following components:
5-inch IPS Touch Screen Monitor
2K Front Camera and 1080P Rear Camera
Tire Sensors for TPMS (2 units)
Mounting Bracket Kits and Tools
Power Cable with built-in fuse
USB Power Supply Cable (for alternative power)
Camera Cables
Adhesive Pads and Zip Ties
User Manual
The main unit and accessories are securely packaged to ensure safe delivery.
Image: TTXSCAM MT02 main unit, dual cameras, TPMS sensors, and 64GB microSD card.
Video: An unboxing of the TTXSCAM MT02, showing the main monitor, cables, and accessories included in the package.
Setup
1. Monitor Installation
The monitor comes with a universal adjustable bracket holder for flexible mounting on various motorcycle models. The bracket kits and tools are included for easy attachment to the motorcycle handlebar.
Image: Components of the monitor mounting bracket.
Assemble the bracket components as shown in the user manual.
Connect the assembled bracket to the back of the monitor.
Mount the holder onto your motorcycle's handlebar and secure it firmly.
Image: Visual guide for monitor installation steps on a motorcycle handlebar.
2. Camera Installation
The system includes 1080P front and rear cameras. Ensure they are mounted securely in positions that provide a clear view of the road ahead and behind.
Image: Illustration of the front and rear cameras mounted on a motorcycle.
Video: A step-by-step guide on how to assemble and install the cameras and monitor.
3. Power and Cable Connections
Connect the power cable to your motorcycle's battery (positive and negative terminals). The system includes a built-in fuse for protection. Ensure all camera cables are securely connected to the main monitor. The cables are color-coded for easy identification.
Image: Close-up of the waterproof cable joints.
Alternatively, the unit can be powered via a USB power supply if your motorcycle has a compatible USB port, offering a simpler installation without direct battery wiring.
4. TPMS Sensor Installation
The TPMS sensors are designed for easy installation on your tire valves. Ensure the tire pressure sensors are tested before final installation and reassembly.
Image: Close-up of the TPMS sensors and their display on the monitor.
Unscrew the valve cap from your tire.
Begin by installing the anti-theft washer.
Turn the nut counterclockwise.
Secure the washer by turning the wrench clockwise.
Check for air leaks using soapy water.
Image: Visual steps for installing the TPMS tire sensors.
Operating
1. Initial Power On & Basic Settings
Once all connections are secure, turn on your motorcycle's ignition. The monitor should power on automatically. The system may begin recording immediately upon startup. You can access basic settings like resolution and recording preferences from the main menu.
2. Wireless Carplay & Android Auto
Connect your smartphone wirelessly to the monitor to access Apple Carplay or Android Auto features.
Image: The monitor displaying both Apple Carplay and Android Auto interfaces.
Video: Demonstrates how to connect your iPhone to the device for Carplay functionality via Bluetooth.
3. GPS Navigation
Utilize your smartphone's navigation applications directly on the motorcycle monitor via Carplay or Android Auto for seamless GPS guidance.
Image: A rider using GPS navigation displayed on the motorcycle monitor, mirroring a smartphone app.
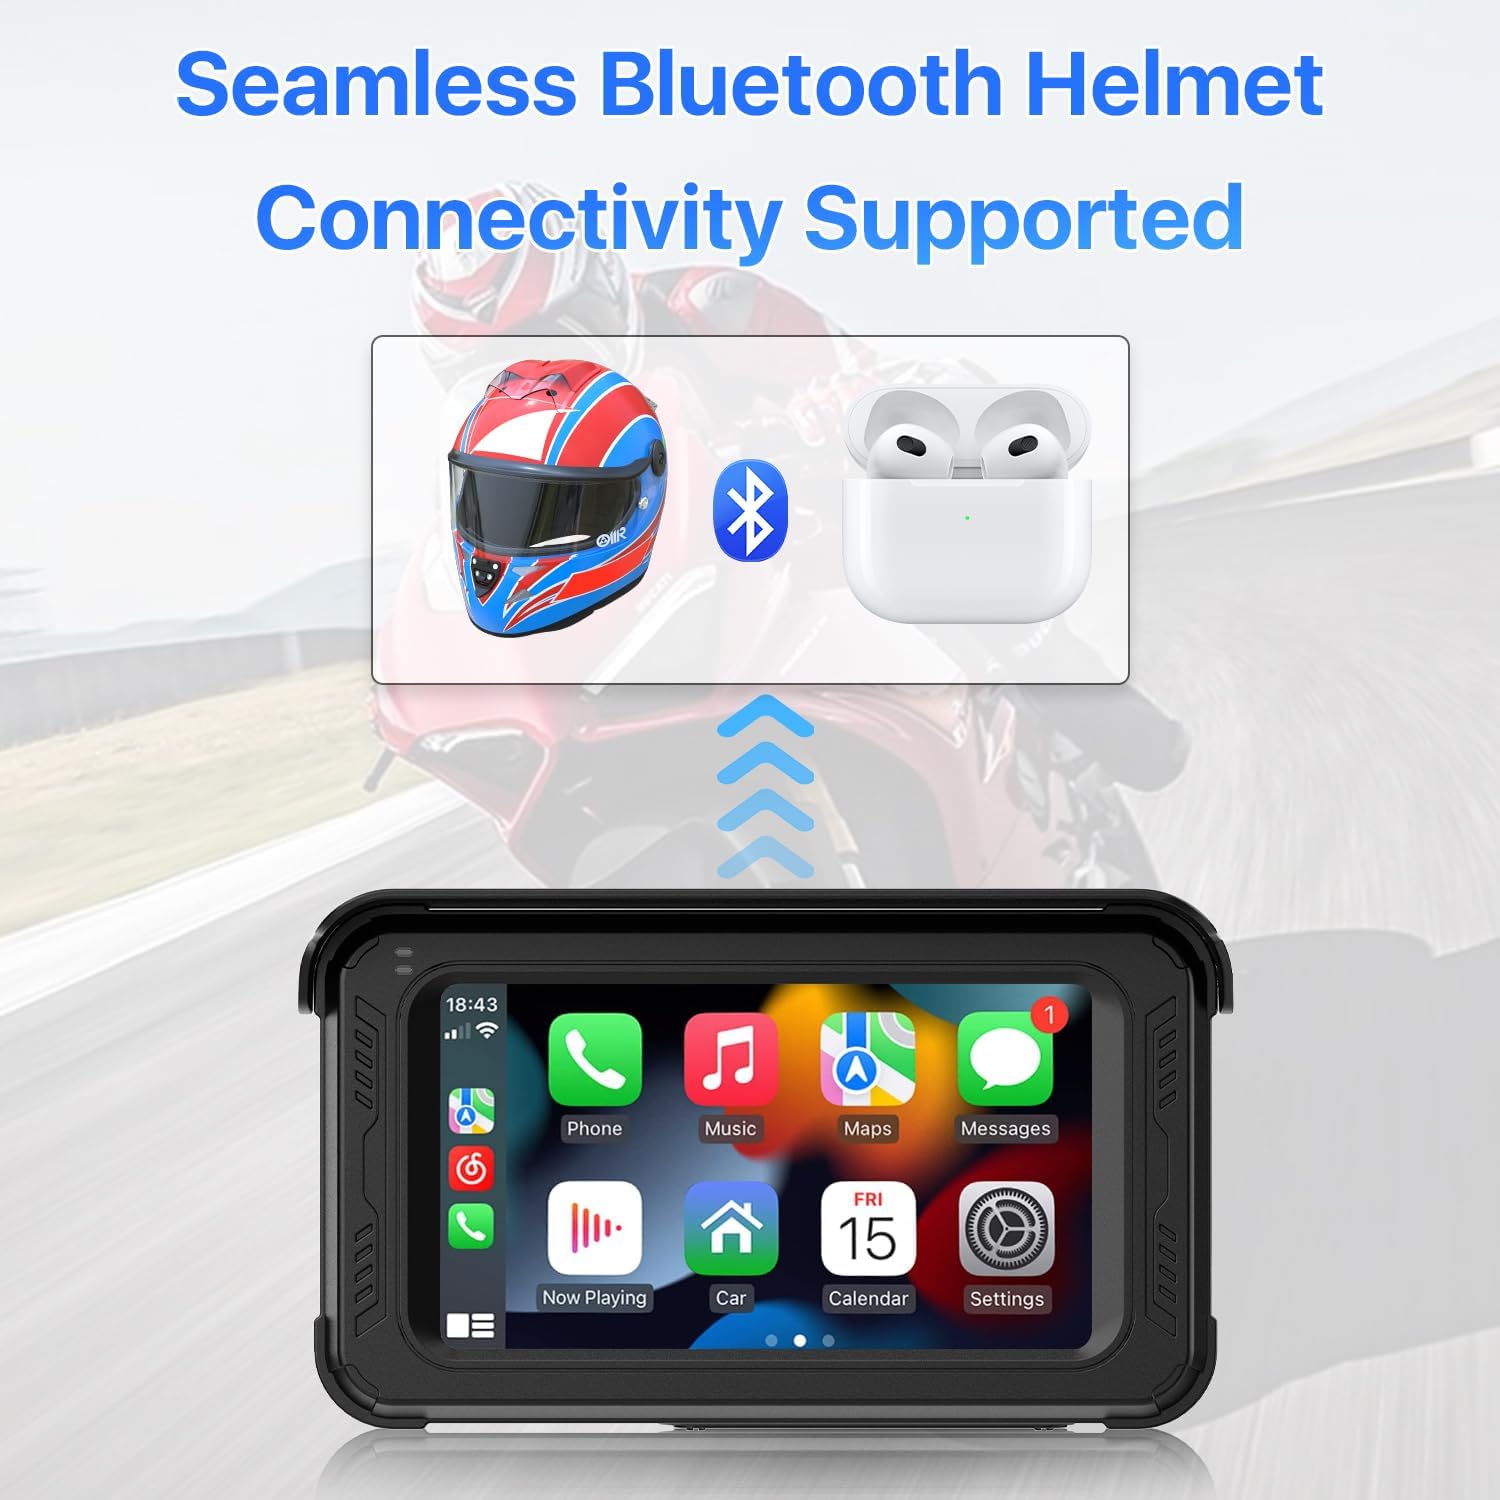
4. Bluetooth Helmet Integration
Connect your Bluetooth helmet for audio output, including navigation instructions and music.
Image: Diagram showing the monitor connecting to a Bluetooth helmet and earbuds.
Ensure your helmet or earphones are powered on and in discovery mode.
On your phone's Bluetooth settings, locate and pair with 'MT69C-xxxxxxx'.
Establish a secure connection for wireless Carplay/Android Auto via Wi-Fi.
Ensure the device microphone is OFF (Settings >> System >> Device MIC >> OFF).
Access 'Bluetooth Emit' on the device to search and connect with your Bluetooth helmet.
5. DVR Functionality
The device continuously records footage from both front and rear cameras. It supports loop recording and features a G-sensor for automatic incident detection and saving.
The monitor displays real-time tire pressure and temperature from the installed sensors, providing critical safety information during your ride.
7. Voice Control
Leverage Siri or Google Voice commands through Carplay/Android Auto for hands-free control of navigation, calls, and music, enhancing safety and convenience.
Image: Icons illustrating safer riding, music on the go, effortless navigation, and safe calls via voice control.
Maintenance
Cleaning
Regularly wipe the screen and camera lenses with a soft, damp cloth to remove dust and debris. Avoid using harsh chemicals that may damage the waterproof seals or screen coating.
Storage
When not in use for extended periods, store the device in a cool, dry place away from direct sunlight and extreme temperatures. Ensure all ports are sealed to maintain waterproof integrity.
Software Updates
Periodically check the manufacturer's website for any available firmware or software updates to ensure optimal performance and access to new features.
Troubleshooting
Common Issues & Solutions
Device not powering on: Check all power connections to the battery or USB source. Ensure the fuse in the power cable is intact.
Cameras not displaying footage: Verify that camera cables are securely connected to the monitor. Check camera settings for proper configuration.
TPMS sensors not pairing/displaying data: Ensure sensors are correctly installed on the valve stems. Follow the binding procedure in the user manual carefully. Some users have found success by screwing on the locking nut first, then turning on the system, selecting the TPMS icon, pressing 'start', and then screwing on the sensor when the corresponding wheel number blinks.
Wireless Carplay/Android Auto connectivity issues: Ensure Bluetooth is enabled on your phone and the device. Confirm Wi-Fi connection between the phone and the device. Disable the device's internal microphone if experiencing interference during pairing.
Time stamp issues on recordings: If the time stamp resets to GMT, check the device's time zone settings and ensure it's correctly synchronized.
Specifications
Feature
Detail
Brand
TTXSCAM
Model Name
TTXSCAM-MT02
Orientation
Front and Rear
Vehicle Service Type
Motorcycle
Connectivity Technology
Wireless, Bluetooth, Wi-Fi, USB
Special Features
Support Tire Pressure Monitoring System, Waterproof, Support wireless Carplay & Android Auto, 5-inch IPS FHD Touchscreen, Support DVR Dashcam
Video Capture Resolution
1080p
Included Components
5-inch IPS Touch Screen, 2K Front Camera and 1080P Rear Camera, Tire Sensors for TPMS, Support Wireless Apple Carplay & Android Auto, Many Other Necessary Parts
Mounting Type
Dashboard Mount
Color
Black
Warranty and Support
The TTXSCAM MT02 comes with a standard manufacturer's warranty. For detailed warranty information, product support, or technical assistance, please refer to the contact information provided in your product packaging or visit the official TTXSCAM website.
Keep your purchase receipt as proof of purchase for any warranty claims.
Related Documents - MT02
TTXSCAM Motorcycle DVR User Manual with Apple Carplay, Android Auto & TPMS Comprehensive user manual for the TTXSCAM Motorcycle DVR, featuring Apple CarPlay, Android Auto, and TPMS. Learn about installation, main screen functions, connectivity, tire pressure monitoring, dash cam settings, playback, Wi-Fi connection, and app usage for this advanced motorcycle recording system.
Automate Pulse 2 HomeKit Integration Quick Start Guide Learn how to integrate your Automate Pulse 2 Hub with Apple HomeKit and Siri for voice control of your motorized shades. This guide covers setup, commands, troubleshooting, and FAQs.
MT02 WiFi Repeater User Manual and Setup Guide Comprehensive guide for setting up and using the MT02 WiFi Repeater, including WPS and manual configuration, LED explanations, and FCC compliance information.
Automate Pulse 2 HomeKit Integration Quick Start Guide A quick start guide for integrating Automate Pulse 2 hubs with Apple HomeKit, enabling voice control via Siri for motorized shades. Includes setup, operation, and troubleshooting steps.