
1. Introduction
Thank you for choosing the MidTen 3-9x32 Scope Combo. This comprehensive optical system is designed for versatility and precision, combining a variable magnification rifle scope with a holographic red/green dot sight and a green laser sight. This manual provides detailed instructions for proper setup, operation, and maintenance to ensure optimal performance and longevity of your device.
The combo includes a 3-9x32 rangefinder scope, a red/green dot sight with four reticle patterns, and a Class IIIA green laser sight, all designed to be mounted on 20mm Picatinny rails.
2. Safety Information
- Laser Safety: This product contains a Class IIIA laser. Avoid direct eye exposure to the laser beam. Do not aim the laser at aircraft or vehicles.
- Eye Protection: Always wear appropriate eye protection when handling or operating firearms and optical devices.
- Mounting: Ensure all mounting hardware is securely tightened to prevent movement during use, which could lead to injury or damage to the device.
- Storage: Store the scope combo in a safe, dry place, away from direct sunlight and extreme temperatures. Keep out of reach of children.
- Maintenance: Do not attempt to disassemble or modify the device. Refer to qualified technicians for any repairs beyond routine cleaning.
3. Package Contents
The MidTen 3-9x32 Scope Combo typically includes the following components:
- 3-9x32 Rifle Scope with Integrated Picatinny Rail
- Holographic Red/Green Dot Sight
- Green Laser Sight (Class IIIA, <2mW)
- Picatinny Riser Mount
- Lens Caps
- Cleaning Cloth
- Hex Wrenches for Installation
- Batteries (for illumination and laser)
4. Product Overview and Features
This 4-in-1 combo offers multiple sighting options for various scenarios.

Figure 1: MidTen 3-9x32 Scope Combo with key components labeled.
- 3-9x32 Rangefinder Scope: Offers variable 3x to 9x magnification with a 32mm objective lens. Features a rangefinder reticle and dual red/green illumination with 5 brightness levels.
- Holographic Red/Green Dot Sight: Provides quick target acquisition with 4 selectable reticle patterns and dual red/green illumination. Designed for unlimited eye relief and a wide field of view.
- Green Laser Sight: A Class IIIA laser (<2mW) for rapid aiming, effective up to 1600 ft (500m) in low light. Features an independent switch for activation.
- Picatinny Riser Mount: Facilitates easy and secure attachment to all standard 20mm Picatinny rails.
- Durable Construction: Shockproof, fogproof, and waterproof, with multi-coated optics and nitrogen-filled for reliability in various conditions.

Figure 2: Overview of the 4-in-1 Rifle Scope Combo components.
5. Setup and Installation
5.1 Mounting the Scope Combo
- Ensure your firearm is unloaded and safe before proceeding.
- Attach the Picatinny riser mount to your firearm's 20mm Picatinny rail. Secure it firmly using the provided hex wrenches.
- Slide the main scope assembly onto the riser mount. Position it to achieve comfortable eye relief.
- Tighten the mounting screws on the scope assembly to secure it to the riser mount. Do not overtighten.
- Attach the holographic red/green dot sight to the top rail of the main scope.
- Attach the green laser sight to the side rail of the main scope.

Figure 3: Scope dimensions and Picatinny rail mounting details.
5.2 Battery Installation
The scope's illuminated reticle, red dot sight, and laser sight each require batteries for operation. Refer to the specific component for battery type and orientation.
- Rifle Scope Illumination: Unscrew the illumination knob cap on the main scope. Insert the battery (typically CR2032) with the positive (+) side facing up. Replace the cap.
- Red Dot Sight: Locate the battery compartment, usually on the side or top. Insert the battery (typically CR2032) with the correct polarity.
- Green Laser Sight: Unscrew the rear cap of the laser sight. Insert the battery (typically CR123A or similar) with the positive (+) side facing the front. Replace the cap.
6. Operation
6.1 Magnification Adjustment (Rifle Scope)
Rotate the magnification ring, located near the eyepiece, to adjust the magnification from 3x to 9x. Turn clockwise for higher magnification and counter-clockwise for lower magnification.
6.2 Diopter Adjustment (Rifle Scope)
To achieve a clear reticle image, look through the scope at a plain background (e.g., a clear sky) and rotate the diopter adjustment ring on the eyepiece until the reticle appears sharp and in focus.
6.3 Illuminated Reticle (Rifle Scope)
The main scope features a dual red/green illuminated reticle. Rotate the illumination knob (typically on the left side of the scope) to turn on the illumination and select between red or green colors. Continue rotating to adjust the brightness level (5 levels for each color).

Figure 4: Red and Green illumination options for the rifle scope reticle.
6.4 Holographic Red/Green Dot Sight
The red dot sight offers quick target acquisition. Use the controls on the sight to:
- Power On/Off: Activate or deactivate the sight.
- Reticle Pattern Selection: Cycle through the 4 available reticle patterns.
- Brightness Adjustment: Adjust the intensity of the red or green dot.
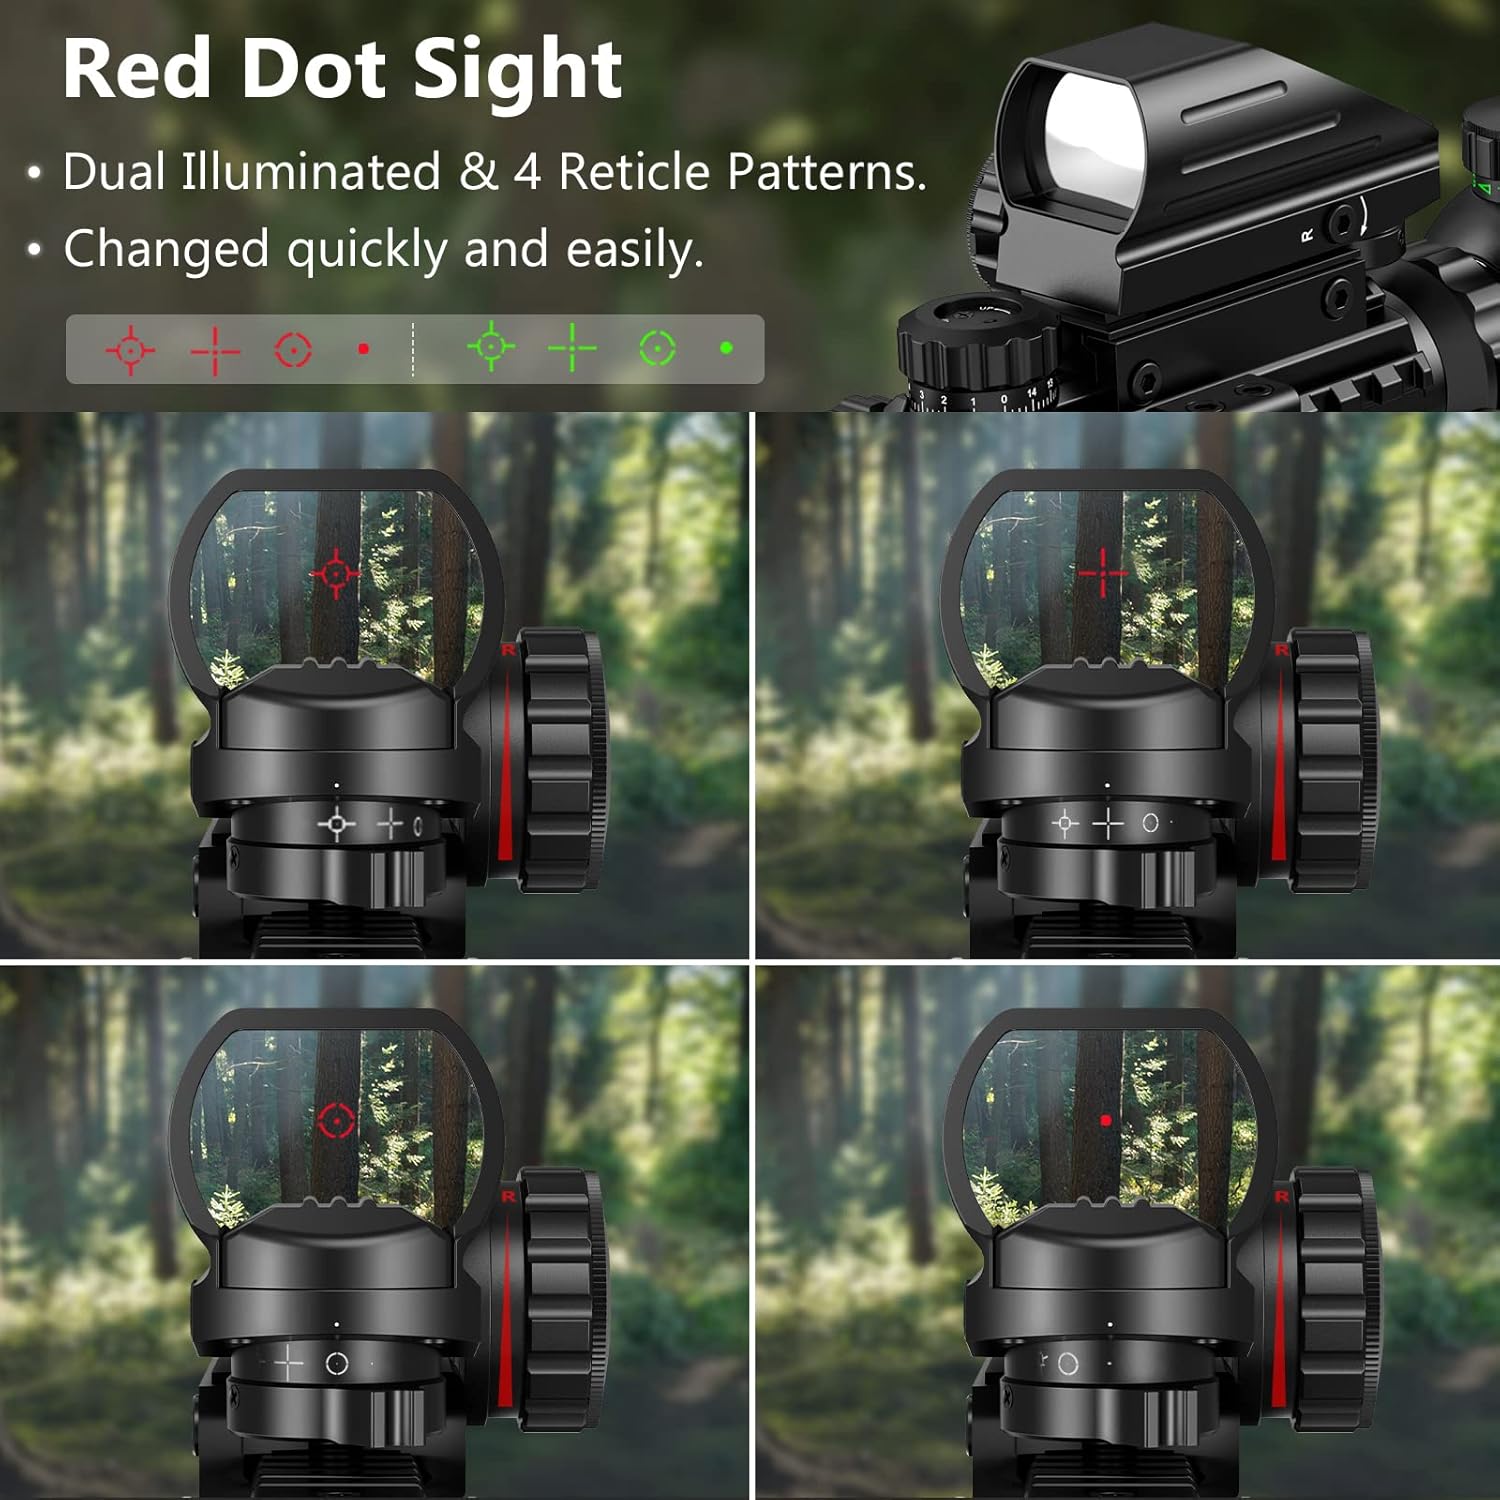
Figure 5: The holographic red dot sight displaying various reticle patterns.
6.5 Green Laser Sight
Activate the green laser sight using its independent switch. The laser provides a visible aiming point for rapid target acquisition, especially at closer ranges or in low light conditions.
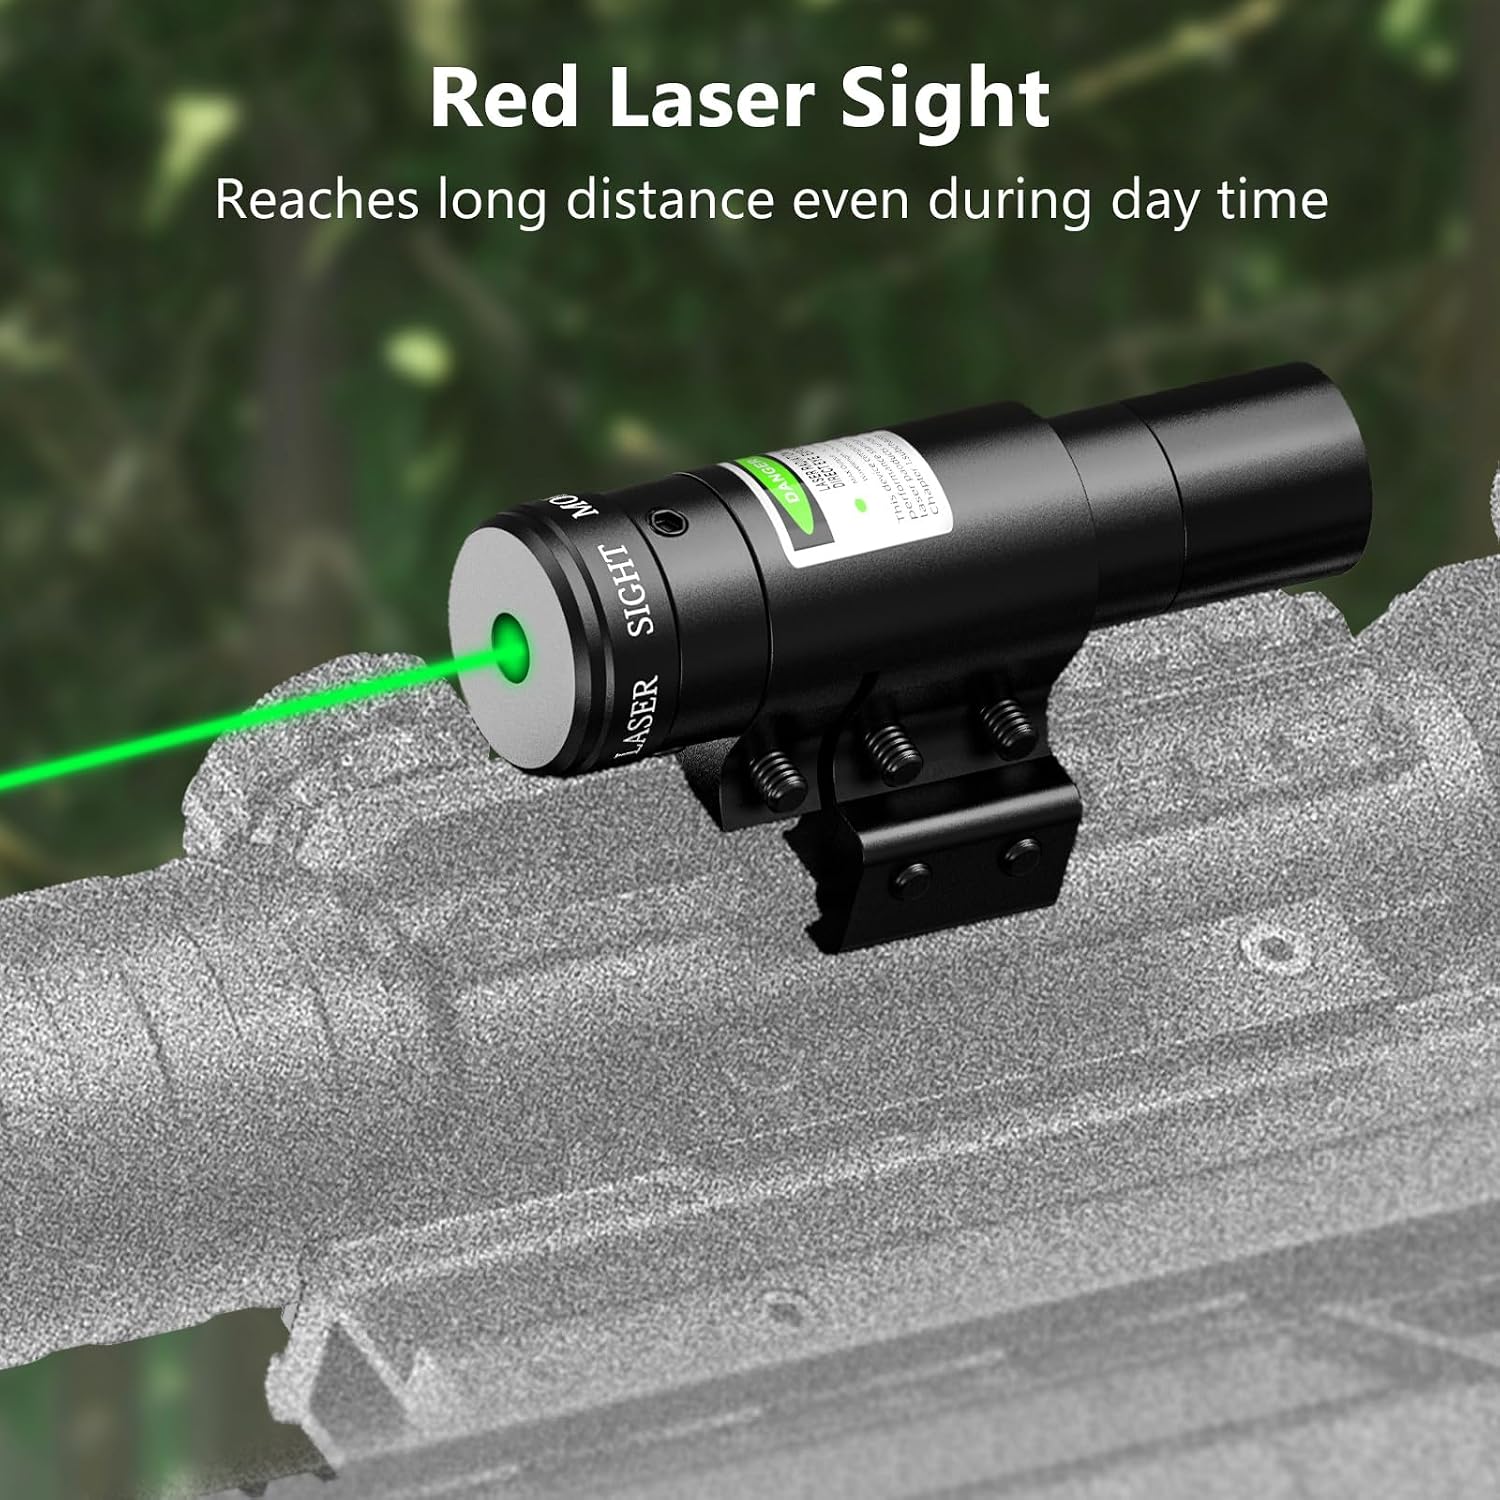
Figure 6: The green laser sight in operation.
6.6 Windage and Elevation Adjustments (Zeroing)
To zero your scope combo, you will need to adjust the windage (horizontal) and elevation (vertical) settings. This process should be performed at a shooting range with proper safety precautions.
- Rifle Scope: Remove the protective caps from the windage (side) and elevation (top) adjustment turrets. Use a coin or flathead screwdriver to make adjustments. Turn the turrets in the direction indicated to move the point of impact. Each click typically represents a specific change in impact at a given distance.
- Red Dot Sight: Use the adjustment screws on the red dot sight for windage and elevation. Follow the markings for direction of impact change.
- Green Laser Sight: The laser sight also has small adjustment screws for fine-tuning its point of aim to align with your primary optic or point of impact.
Important: Always make small, controlled adjustments and re-test after each adjustment until your point of aim matches your point of impact.
7. Maintenance
- Cleaning Lenses: Use the provided cleaning cloth or a soft, lint-free cloth specifically designed for optical lenses. Gently wipe away dust and smudges. For stubborn marks, use a small amount of lens cleaning solution. Avoid abrasive materials.
- Cleaning Body: Wipe the exterior of the scope combo with a soft, damp cloth to remove dirt and debris.
- Storage: When not in use, store the scope combo with lens caps on in its original packaging or a protective case in a cool, dry environment. Remove batteries if storing for extended periods to prevent leakage.
- Inspection: Periodically check all mounting screws and components for tightness.
8. Troubleshooting
| Problem | Possible Cause | Solution |
|---|---|---|
| Reticle is blurry | Improper diopter adjustment | Adjust the diopter ring on the eyepiece until the reticle is sharp. |
| Scope does not hold zero | Loose mounting screws; Recoil shock | Ensure all mounting screws are securely tightened. Re-zero the scope. If problem persists, check mount integrity. |
| Illumination (scope/red dot) not working | Dead or incorrectly installed battery | Check battery polarity. Replace battery if necessary. |
| Laser sight not working | Dead or incorrectly installed battery; Switch off | Ensure laser switch is on. Check battery polarity. Replace battery if necessary. |
| Fogging inside lenses | Rapid temperature change; Seal compromise | Allow the scope to acclimate to ambient temperature. If fogging persists, contact customer support. |
9. Specifications
| Feature | Detail |
|---|---|
| Brand | MidTen |
| Model Name | 3-9x32 |
| Magnification (Minimum) | 3x |
| Magnification (Maximum) | 9x |
| Objective Lens Diameter | 32 mm |
| Reticle Type | Rangefinder |
| Illumination | Red/Green, 5 brightness levels |
| Red Dot Sight Reticles | 4 patterns, Red/Green illumination |
| Laser Sight | Green, Class IIIA (<2mW) |
| Mounting Type | Picatinny Mount (20mm) |
| Material | Aluminum |
| Item Weight | 2.2 Pounds |
| Environmental Features | Shockproof, Fogproof, Waterproof |
10. Product Videos
For visual guidance on setup and operation, please refer to the following official product videos:
MidTen 3-9x32 Scope with Illumination and Laser
This video demonstrates the illumination features of the 3-9x32 scope and the operation of the integrated laser.
MidTen 3-9x32 Combo Scope Overview
A detailed overview of the MidTen 3-9x32 combo scope, covering its various components and functionalities.
3-9x32 4-in-1 Scope Combo with Dual Illuminated Scope Optics
This video highlights the dual illuminated scope optics and the overall 4-in-1 combo features.
11. Warranty and Support
MidTen products are manufactured to high-quality standards. For warranty information or technical support, please refer to the contact details provided with your purchase or visit the official MidTen website. Keep your proof of purchase for warranty claims.
