1. Safety Instructions
Please read all instructions carefully before using the ZAFRO Nugget Ice Maker. Retain this manual for future reference.
- Ensure the ice maker is placed on a stable, level surface away from direct sunlight and heat sources.
- Allow the unit to stand upright for at least 2 hours (or 1 hour as per manual) before plugging it in to allow refrigerant to settle.
- Use only potable water. Do not use distilled water or other liquids.
- Do not immerse the appliance, power cord, or plug in water or other liquids.
- Unplug the ice maker before cleaning or when not in use.
- Keep children away from the appliance.
- Do not operate the appliance with a damaged cord or plug.
- Do not attempt to repair or modify the appliance yourself. Contact qualified service personnel.
- Ensure proper ventilation around the unit. Maintain at least 5 inches of clearance on all sides.
2. Product Overview
The ZAFRO Nugget Ice Maker is designed to produce chewable nugget ice efficiently. Familiarize yourself with its components.

Figure 2.1: ZAFRO Nugget Ice Maker with its main components visible, including the transparent top lid, ice basket, and ice scoop. The LED control panel is also highlighted.
Key Features:
- Efficient Ice Making: Equipped with a powerful compressor for rapid ice production.
- Self-Cleaning Function: Automated cleaning system for convenience.
- 24-Hour Timer: Allows presetting operation time.
- Chewable Nugget Ice: Produces soft, crunchy ice cubes.
- LED Control Panel: Intuitive interface for easy operation.
- Transparent Top Lid: Allows monitoring of ice production.
- Included Accessories: Comes with an ice basket and ice scoop.
3. Setup
3.1 Unpacking
- Carefully remove the ice maker from its packaging.
- Remove all packing materials, including tape and protective films.
- Inspect the unit for any damage. If damaged, do not operate and contact customer support.
3.2 Placement
- Place the ice maker on a firm, level surface.
- Ensure adequate ventilation by leaving at least 5 inches (12.7 cm) of space around the unit.
- Avoid placing the unit near heat sources (e.g., ovens, radiators) or in direct sunlight.
- Do not place the ice maker in an enclosed cabinet.
3.3 Initial Cleaning
Before first use, it is recommended to clean the ice maker.
- Wipe the interior with a soft cloth dampened with warm water and a mild detergent.
- Rinse thoroughly and drain any remaining water.
- Perform a self-cleaning cycle as described in the Maintenance section.
3.4 Power Connection
- After placement and initial cleaning, allow the unit to stand upright for at least 2 hours before plugging it into a grounded electrical outlet. This allows the refrigerant to stabilize.
- Ensure the power supply matches the voltage specified on the appliance's rating label (115 Volts).
4. Operating Instructions
4.1 Filling the Water Reservoir
- Open the top lid of the ice maker.
- Fill the water reservoir with potable water up to the MAX fill line. Do not overfill.
- Close the top lid securely.
4.2 Starting Ice Production

Figure 4.1: Illustration of the ice maker's efficient ice production, highlighting the powerful compressor and rapid ice output.
- Plug in the ice maker. The power indicator light will illuminate.
- Press the ICE/CLEAN button to start the ice making cycle. The ice making indicator light will turn on.
- The first batch of ice may take slightly longer to produce. Subsequent batches will be faster.
- The ice maker will automatically stop producing ice when the ice basket is full or when the water level is low.
4.3 Using the 24-Hour Timer
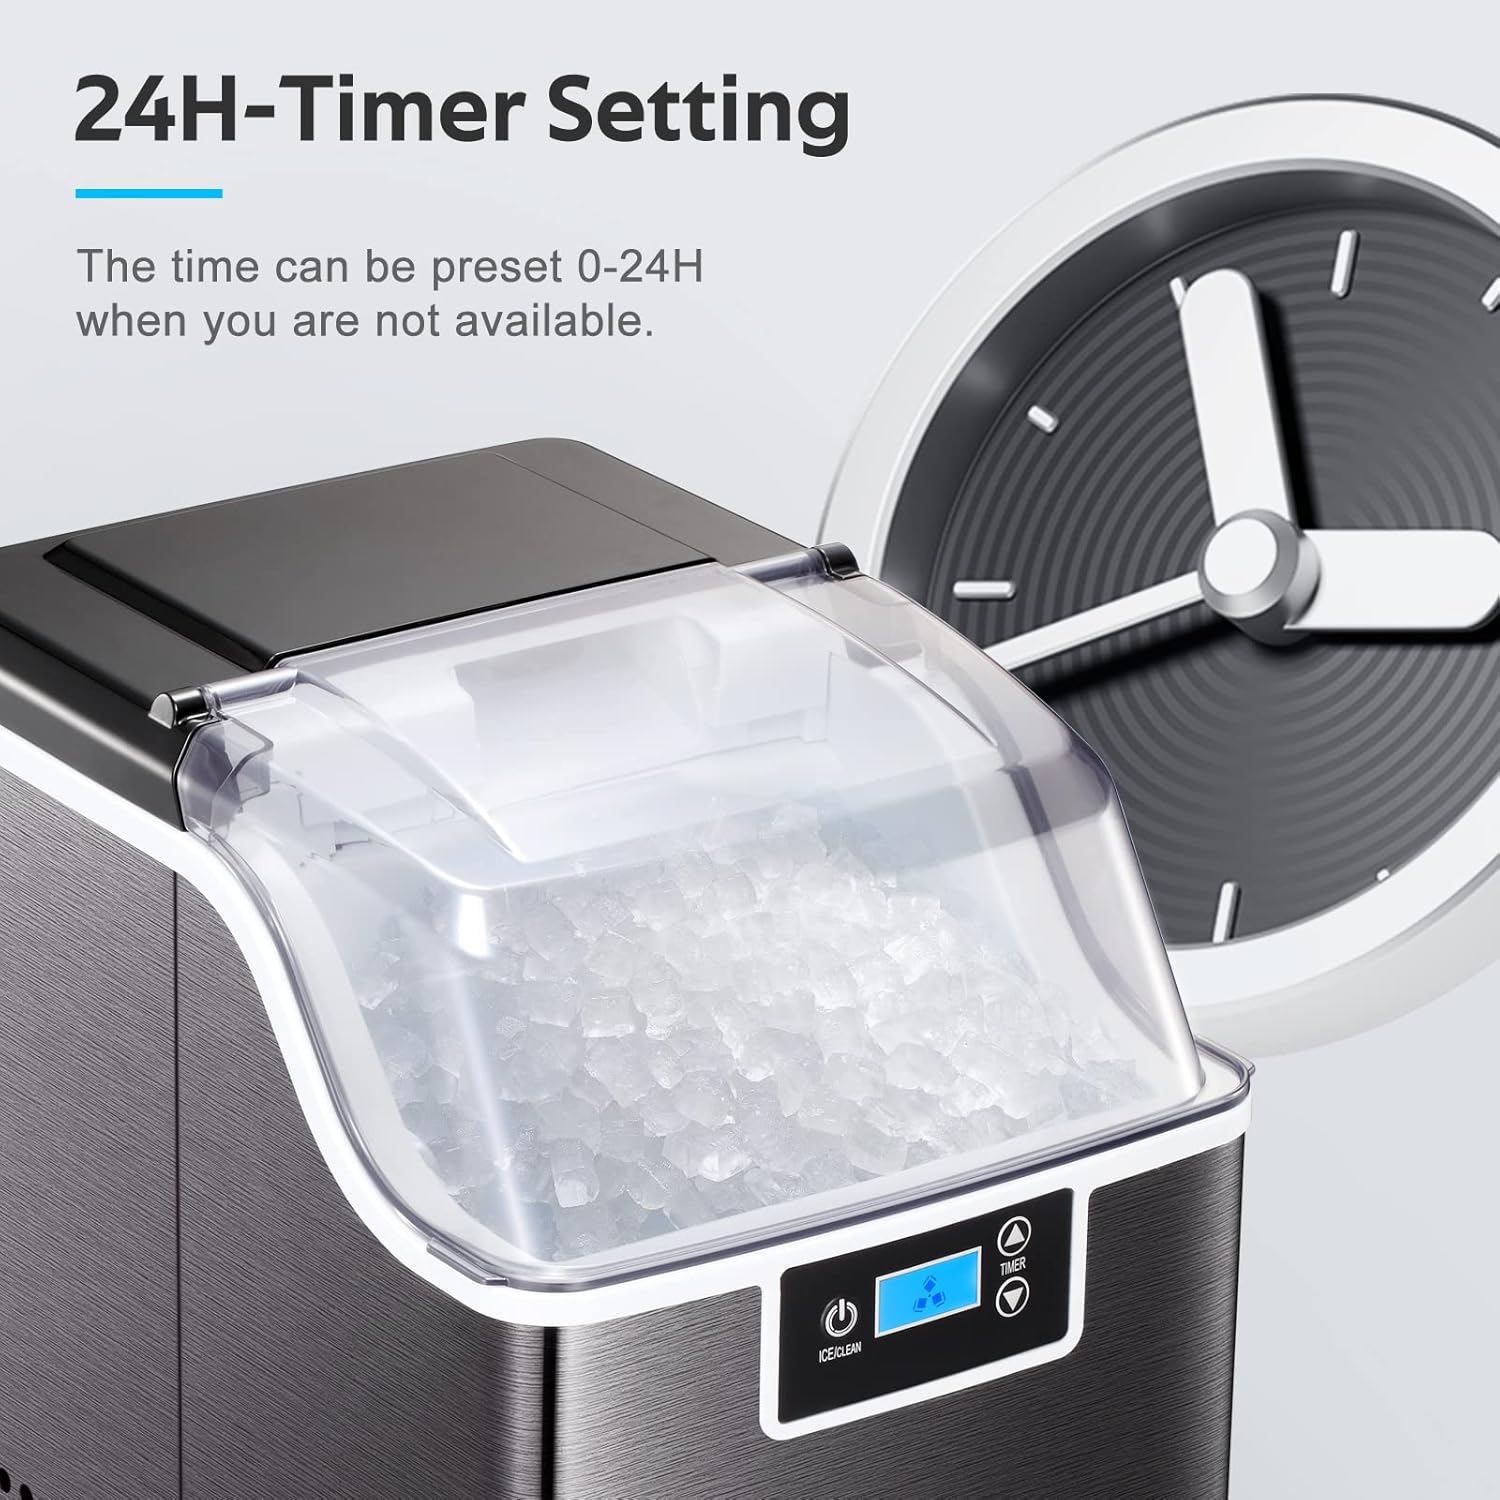
Figure 4.2: The ice maker's control panel displaying the 24-hour timer setting feature, allowing users to preset operation times.
The timer function allows you to set a delayed start or stop time for the ice maker.
- Press the TIMER button.
- Use the + and - buttons to adjust the desired delay time (0-24 hours).
- Confirm the setting by pressing the TIMER button again or wait a few seconds for it to set automatically.
4.4 Removing Ice
- When the ice basket is full, the "Ice Full" indicator will light up.
- Open the top lid and use the provided ice scoop to remove ice from the basket.
- Transfer the ice to a freezer for storage, as the ice maker is not a freezer and will not keep ice frozen for extended periods.

Figure 4.3: Visual comparison highlighting the chewable nugget ice produced by the machine versus standard ice cubes, emphasizing its texture and suitability for drinks.
5. Maintenance
5.1 Self-Cleaning Function

Figure 5.1: The ice maker's internal view during the self-cleaning cycle, showing water circulation for thorough cleaning.
The ice maker features an automatic self-cleaning system.
- Ensure the water reservoir is filled with clean water.
- Press and hold the ICE/CLEAN button for 5 seconds to activate the self-cleaning cycle. The "CLEAN" indicator will light up.
- The cleaning cycle will run for a set period. Once complete, drain the water from the unit.
5.2 Regular Cleaning
Regular cleaning helps maintain ice quality and extends the life of your appliance.
- Daily: Empty the ice basket and wipe it clean.
- Weekly: Drain any remaining water from the reservoir. Clean the interior with a soft cloth and a solution of water and mild detergent. Rinse thoroughly.
- Monthly: Perform a self-cleaning cycle.
5.3 Descaling (If Necessary)
Mineral deposits from water can build up over time. If you notice reduced ice production or unusual odors, descaling may be necessary.
- Unplug the ice maker and drain all water.
- Prepare a descaling solution (e.g., a mixture of water and white vinegar or a commercial descaling agent suitable for ice makers). Follow the descaling agent's instructions for dilution.
- Pour the solution into the water reservoir.
- Run a self-cleaning cycle.
- After the cycle, drain the solution completely.
- Rinse the reservoir thoroughly with clean water and run several self-cleaning cycles with fresh water to remove any residual descaling solution.
6. Troubleshooting
Refer to this section for common issues and their solutions.
| Problem | Possible Cause | Solution |
|---|---|---|
| Ice maker not producing ice. |
|
|
| "Water Shortage" indicator on. | Water reservoir is empty or water level is too low. | Add potable water to the reservoir up to the MAX fill line. |
| "Ice Full" indicator on. | Ice basket is full. | Remove ice from the basket. |
| Ice has an unusual taste or odor. |
|
|
| Unit is noisy. | Normal operation sounds (compressor, water pump). | Some operational noise is normal. Ensure the unit is on a stable, level surface. If noise is excessive or unusual, contact support. |
7. Specifications
| Feature | Detail |
|---|---|
| Brand | ZAFRO |
| Model Name | Z580212 |
| Product Dimensions (D x W x H) | 13.3"D x 9.45"W x 15.3"H |
| Ice Production Capacity | 45 Pounds per 24 Hours |
| Wattage | 300 watts |
| Voltage | 115 Volts |
| Refrigerant | R600a |
| Material | Stainless Steel |
| Item Weight | 31 pounds |
| Included Accessories | Ice scoop, Ice basket |
8. Warranty and Support
For warranty information or technical support, please refer to the warranty card included with your product or contact ZAFRO customer service.
When contacting support, please have your model number (Z580212) and purchase date available.
Note: Specific warranty terms and contact details may vary. Please consult your product documentation for the most accurate information.


